
Nighthawk Black Pearl (NBP) paint correction on a budget.
by Greg NicholsMany moons ago I was contacted by the owner of this car, and while on the phone I got a pretty good sense that this car had a bunch of issues going on. I asked the owner to send some photos, and carefully looking them over I could see some issues. We spoke at lenght about his goals for the car, and how to best meet them. In these goals were a budget he needed to stay within, which was possible but until I saw the car I couldn’t say for sure.
Now if you are familiar with detailing, there are certain OEM paints that are a PITA to work with; BMW jet black, Bentley black, Porsche black and Honda/Acuras Nighthawk black pearl. When heavy correction is needed on these paints they like to fight you, and they don’t like to finish down all that well. You always have to do a 3rd or 4th polishing step to make them perfect, whereas others you can reduce that by 1 or 2 steps. So having a budget which sets the time frame you have to work with on these paints presents an added dimension to the whole job, and you have to think though what is it going to take to meet that goal. The budget didn’t allow for many steps, hence the challenge.
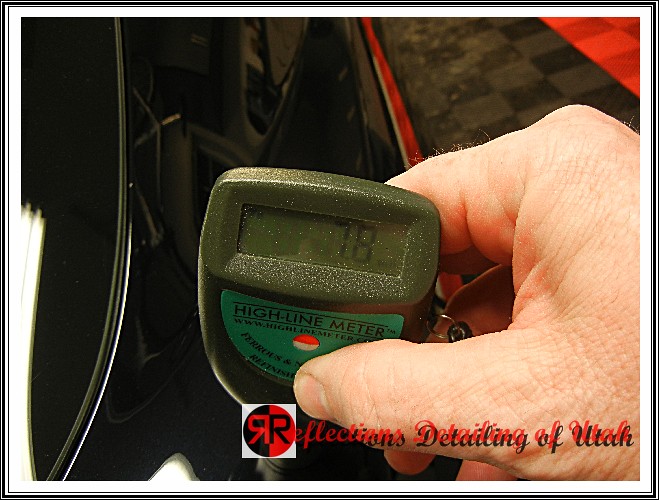
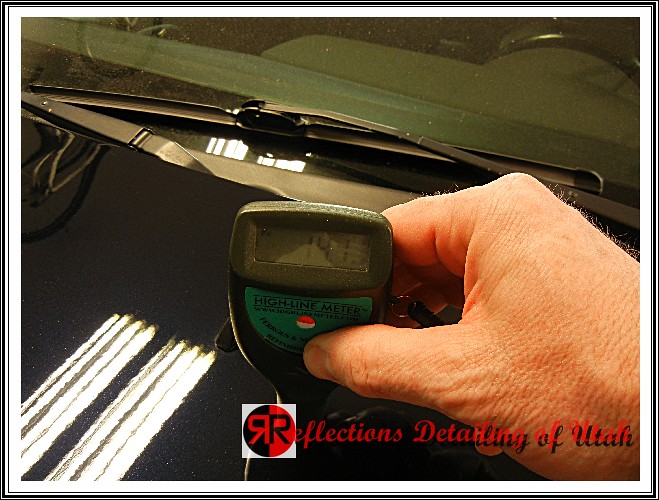
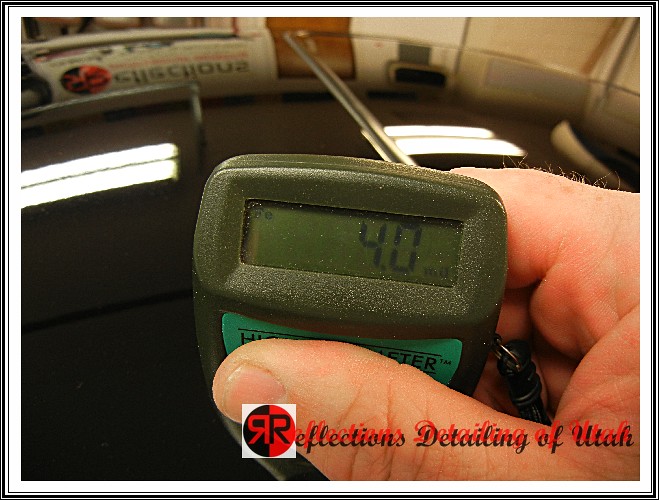
When the car arrived it was in rough shape, the photos didn’t fully show the true issues in the paint. The owner was keen enough to see them, and aware that he might have to settle for less of his goal……and I had my head spinning as to how to best attack this. He left it with me for a few days which really helped, because I needed to do a few test areas to deal with this challenge of correcting a super finicky paint in as few of hours as possible. I took some paint thickness readings to see, and to my concern the readings showed repaint work, super thin areas, and areas with huge thickness ranges on the same panel.
I felt confident I could give him a great outcome even with his tight budget. I’m pretty sure I did a bit extra just to be on the safe side of the outcome.
Products Used:
Megs 105
Megs 205
Megs 300
Menzerna 203
Menzerna final polish II
Menzerna 106fa
Megs Unigrit sanding paper 2000 and 1500
Blue foam
Black foam
Megs MF cutting pad
Megs MF finishing pad
Blackfire wet diamond
Danase Wet Glaze (Chemical Guys EZ Creme Glaze)
Window cleaner to remove polishing carriers vs. IPA. IPA was causing the paint to swell creating issues.
Many will ask why so many products. Well each panel was so different as to the amount of marring, yet I wanted a consistent finish and I was on a budget so If I could get the results I wanted by using black foam and menzerna 203 then another panel needed megs 300 and finishing pad, I did it. I know it sounds confusing but it worked and saved time. Also repainted areas react differently than OEM paint. I had to wet sand a few areas since wet sanding can be a more consistent removal method…not a lot of spots but a few.
I have learned to read how the paint in reacting to what I’m doing, so I can quickly modify my approach by simply changing out pads, or liquids……….. This is why professionals are worth the effort to seek out. The local car wash only teaches their staff one system and all cars get that system, yet the outcomes are hugely different for each car.
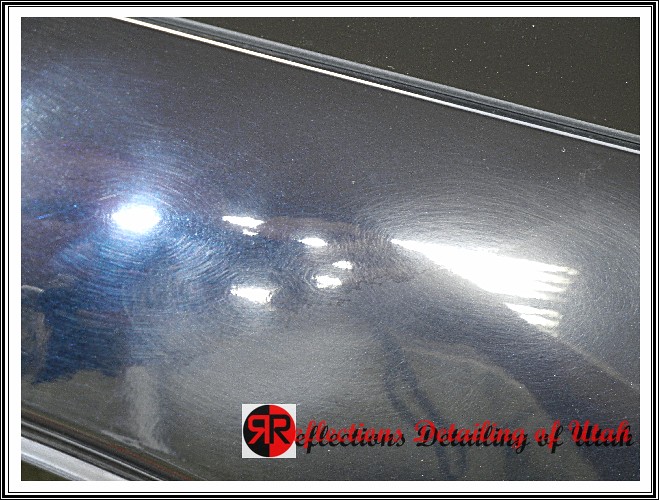
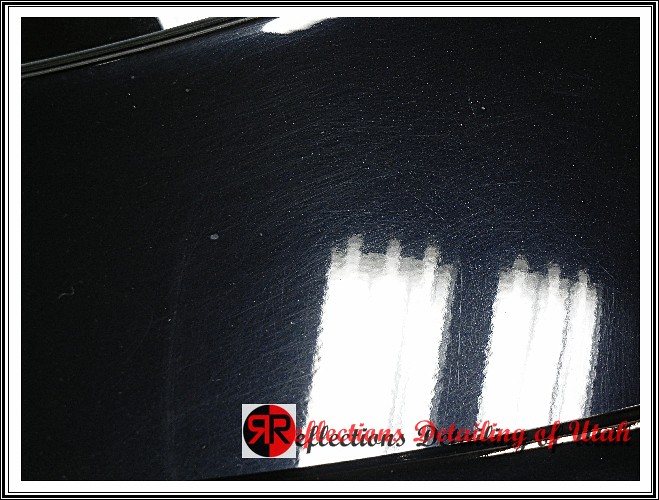
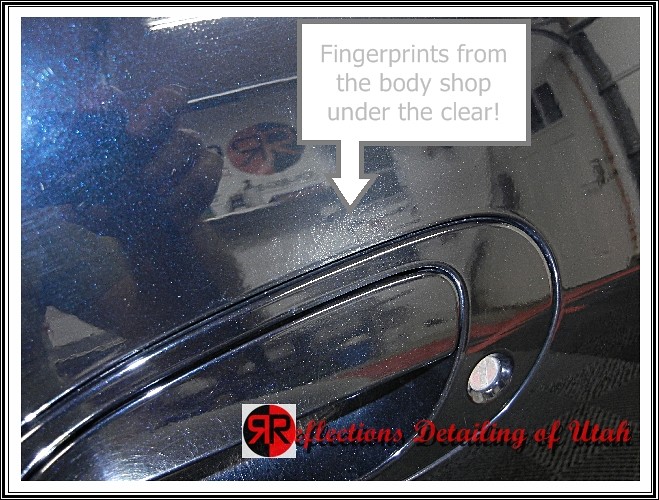
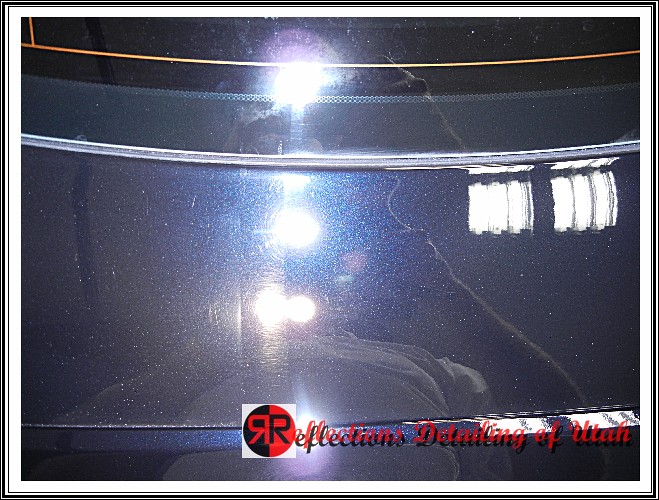
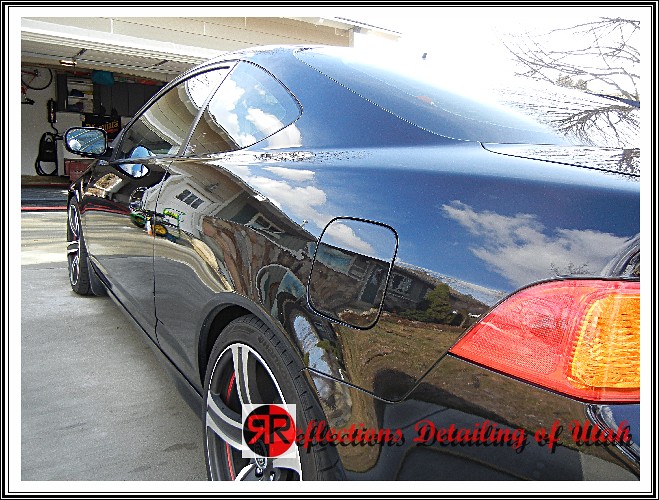
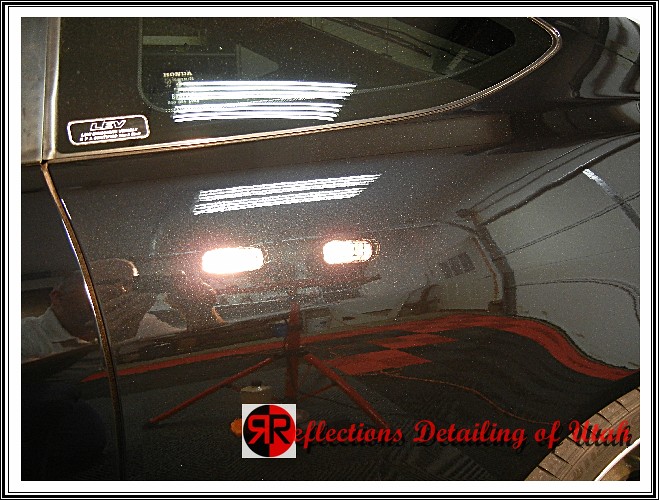
Here is a collection of what I found………..
When someone did a repaint, you are suppose to take your repaint to a hard edge not leave it in the middle of the pillar! You can see the line.


Here are some thickness samples from the car, all over the map. I had to check each panel in several spots to double check as each panel could have more than one thickness!!!
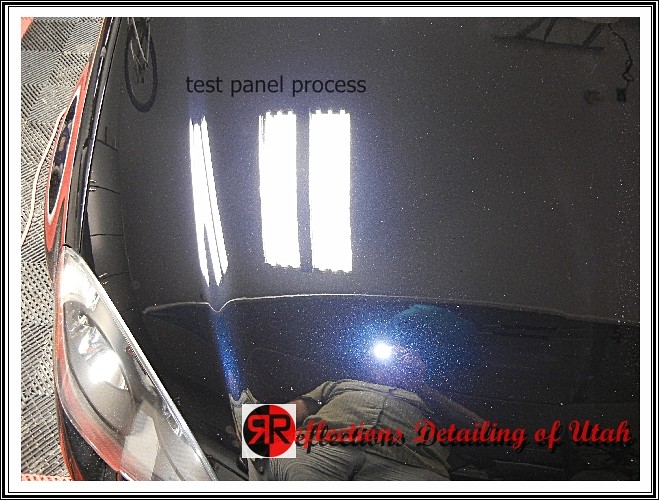
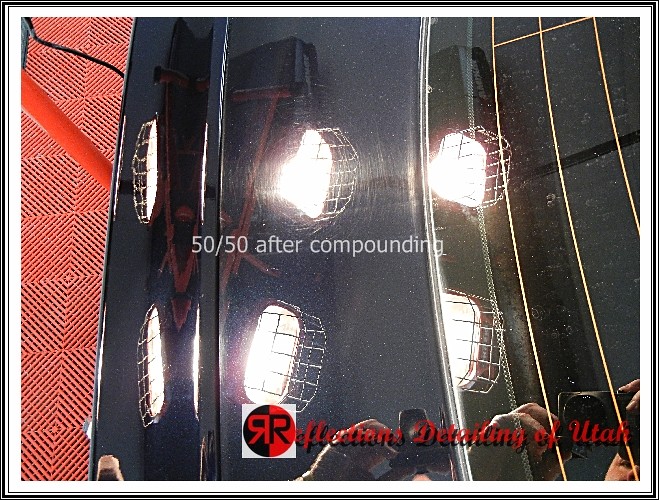
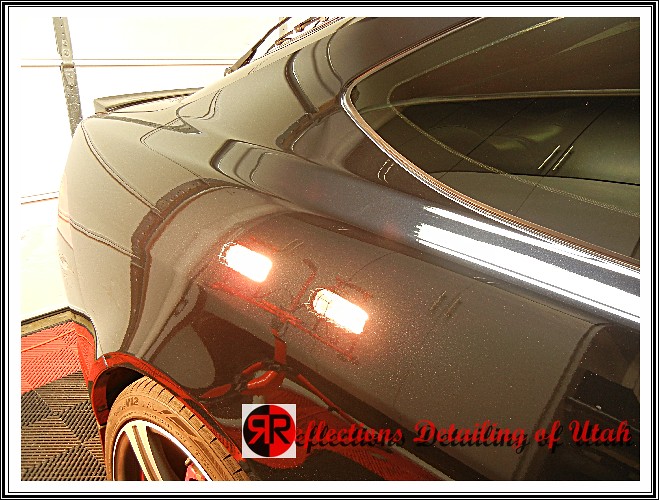
ARE we getting to a point we can correct? I need a photo or two that are cheery after the sea of swirls! This will calm your nerves I hope.
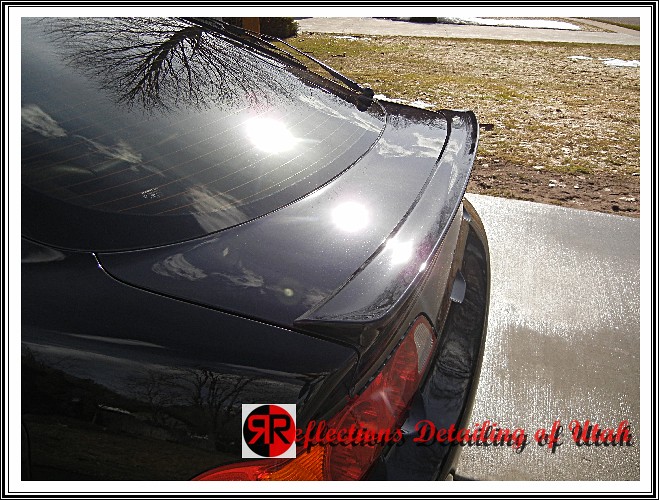
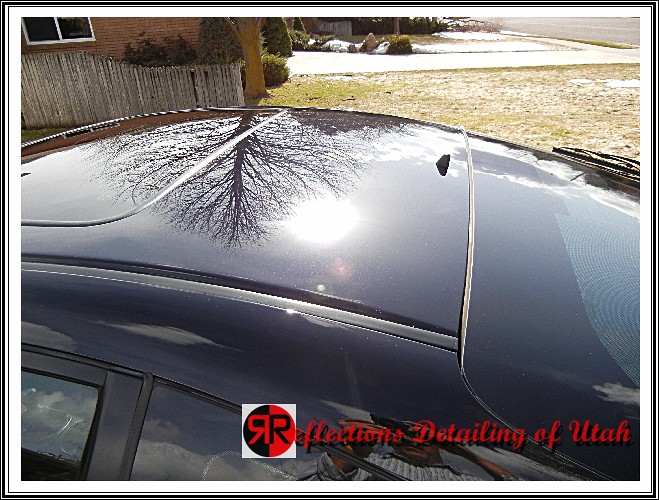

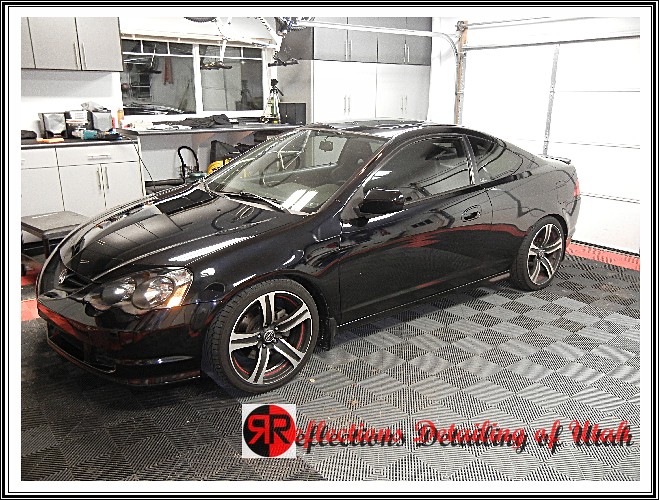

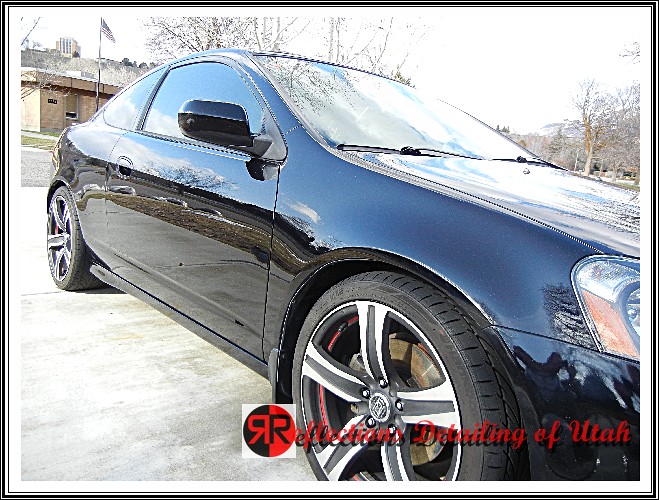
So did the owner meet his goals? I sure hope so.
Buy Products From This Article
Purchase the products used in this article individually or in one convenient package here!
Related Posts
- Full Detail and Paint Correction: Ferrari 458 Italia by Todd Cooperider of Esoteric Auto Detail
- Reflections Detailing of Utah 2011 Lambo Performante 1:3
- Ferrari F40: 60 Hour Restorative Detail by Todd Cooperider and Craig Reed
- 1967 Sunfire Yellow Corvette Stingray Detail
- Orlando Paint Correction Detail | 09 Aston Martin Vantage


I feel you man, I know you took time and busted your butt off, I had a Acura TL worst shape then that and it forever to get it looking good, but never looked as good as this.. Great job he should be happy I know I would have if my TL looked like that
Thanks for the comments. I did more butt busting than anythink…..lol
Cheers,
GREG
Greg, Thanks for the detailed right up. I’ve gotten to the point when I see pictures like that it makes me as sick as if I saw a shark attack. You did a great job. I’m still trying to figure out how you determined which areas needed what treatment. Did you actually do a test spot everywhere you got different readings? Given a bigger budget would you have gotten much better results? Not that I think the results you got weren’t fantastic.
Thanks tim,
I established a treatment that was my baseline approach, I had to adjust that for various panels. I had to do test spot on every panel that had low readings to see how much correction I could give, with out giving up too much clear coat….that slowed me down, but had to be done. You just cannot rip into paint with out taking readings on the paint.
Given more time we could have chased and corrected some deeper marring, some more RIDS and burnished the paint to a higher gloss. If any of the ask a pro detailers have the time, the results are amazing, maybe not so much in photo but in person you see it clearly.
Cheers,
GREG
Great writeup Greg. I was curious as to how you handled the transition line on the pillar where they had painted at one point? Is that one of the areas you used fine sandpaper on or did you just go with a more aggressive polish in that spot? Thanks!
The transition was wet sanded and then polished out, you have to get pretty darn close and in the right light to see the transition now. Even after several months you have to look for it. Funny thing my bothers TL NBP they did the same bloody thing!
The thing about sanding is you can control your correction more tightly in a small area. I started with 1500 then 2000 then polished with 203 if I recall correctly.
Cheers,
GREG
“So did the owner meet his goals? I sure hope so.”
Yes, Greg, you met and exceeded the owner’s expectations! You did an outstanding job and I very much appreciate the extra effort you put into this work. You were and are the right detailing specialist for the job. I feel that no one within at least 800 miles could have done what you did.
I have casually read and referenced Detailed Image for over a year and, when filling up at a gas station one night, the swirls caused by the original owner’s well intended washes were just too much. I visited Detailed Image and was elated to find a pro detailer in my home state.
Thank you again, not only for your expertise and experience, but willingness to accept the challenge that was my Nighthawk Black Pearl.
Nate,
Thanks for such a great testimonal! After seeing the car several months later and how glossy it looks I’m thrilled, you have done a great job keeping down the marring on this paint. You just need to convince your friends that cars are not meant to be leaned on!
The detailing gods must have liked the outcome too, after your car I had 2 more Nighthawk black pearls to do within 3 weeks of yours!
Cheers,
GREG
PS. Eric Schustler (another ask a pro writer) is like 825 miles from me ……… LOL
I really hate the fact that I didn’t know what I was getting into before I bought my NHBP Civic SI. I’ve spent at least 4 or 5 days on polishing alone and mine still isn’t quite to the point of perfection. Mine was definitely not as bad as this to start, but was in the same ballpark. The work you did on this car is outstanding, and inspires me to continue refining my own NHBP mess haha:)
Definitely an eye-opener as to how hard it really is to correct this paint though!!
you have the serial number for the paint on this car
pierro,
Do you mean a paint code? I don’t contact Todd Copperider, he owned one.
Cheers,
GREG
b92p
The paint code is B-92P.
I have NHBP Civic SI and it is a pain and it seems to be super soft. I love the color, but I’m scared to correct it again since if you look at it the paint scratches.
thanks for the paint code max
using something like megs 205 will work as long as the scratches or swirls are not deep. correction and polishing are different polishing will remove far less material