This particular Corvette is actually the second Corvette I’ve done for the owner now. It is a 1966 Corvette Sting Ray with the 425HP 427 motor. The car only has about 58,000 original miles on the clock and it received a body of restoration approximately three years prior where pretty much every nut and bolt was replaced. Needless to say, I was very eager to work on one of the worlds most sought after classic muscle cars. 😉
Upon inspection of the car the owner and I had decided upon a 2 step correction as there was only moderate swirling and a few random deep scratches. However, the more I looked at the car under the fluorescent lights of my garage the more I noticed how much the paint had shrunk down since it was first wet sanded and buffed. The overall texture of the paint had a rough distorted look to it and it lacked the smoothness, depth and gloss that you would expect in a well restored car.
Here is the car from about 10 feet away…looks great right?


Let’s zoom in a little closer…

Even closer…still think it looks good?


Now that were zoomed in close you can get a good idea of what I’m referring too, especially if you focus on the edge of the fluorescent light bulb in the reflection.
Here you can see the condition of the paint which really only had some moderate swirling that a 1 or 2 step correction would have easily removed.

Another

Here we can see some random deep scratches on the left rear panel which was likely caused by the rubber hose dragging over the paint while filling gas.

As you can imagine, the finish on this car really started to bother me since I knew I could make it look much better, but a simple 2 step correction was not the answer. After going round in round in my head about it I decided to call up the owner and discuss some possible options. I told him I really wanted to wet sand the paint, but that I was a little hesitant having no knowledge of how much paint was actually applied to the car during the restoration. On a typical car one would use a PTG (Paint Thickness Gauge) to measure the overall thickness of the paint. When I say typical I’m referring to a car where the body is made of metal, and not fiber glass like a Corvette. Unfortunately my PTG only works on ferrous and non-ferrous metals and I really didn’t feel like forking out $2000 for a high end ultrasonic PTG that is capable of reading various materials such as fiberglass. The owner however assured me that the painter had applied several coats of clear and that he was confident that there was more than enough material to work with. Though this made me feel a little more confident, I decided not to push my luck by risking a strike through from sanding too much.
Since this car has never seen rain from the day of the restoration, and it is always garaged, a simple wash with ONR was all that was needed followed by a light claying.
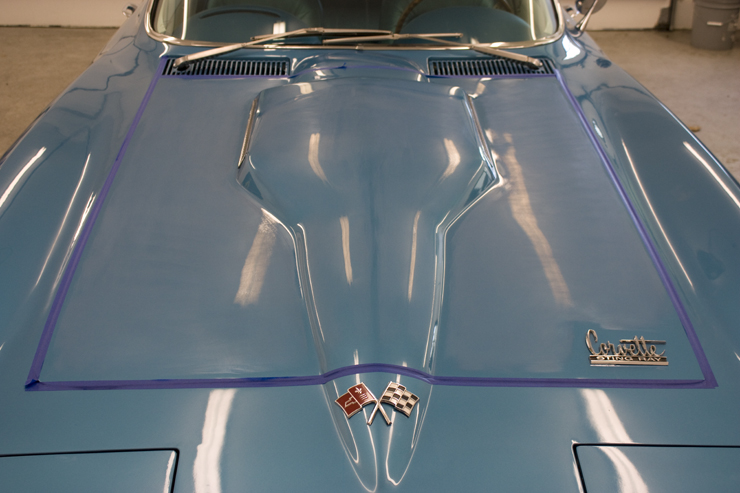
For the wet sanding of this car I chose to do the work by hand using a Meguiar’s foam sanding block wrapped with Meguiar’s 2000 grit paper, and then following that up with Meguiar’s 3000 grit paper. While I could have just stopped at the 2000 grit, it’s much easier to remove the sanding scratches when you follow with a 3000 grit or higher paper. As you can see below, I chose to tape off the edges to avoid the risk of a strike through. I also started off by only sanded the hood and then polishing a small spot to get an idea of how easy it would be to remove the sanding scratches. The last thing you ever want to do is wet sand an entire car only to find out that the removal of the scratches requires far more time and effort than you originally estimated…just a little tip I learned from a friend of mine. 😉
Taping up the edges
Testing a small spot on the paint to see how easy it would be to remove the wet sanding marks. The paint was actually pretty soft and it was very easy to remove the sanding marks.

After all the sanding was done I moved onto polishing and removal of the wet sanding marks. This was done using the following steps
- Meguiar’s M105 on a rotary polisher equipped with a Meguiar’s Solo Heavy Cutting pad
- Meguiar’s M105 on a rotary polisher equipped with a LC orange pad
- Meguiar’s M205 on a rotary polisher equipped with a Meguiar’s W9207 Finishing pad
Here is a quick 50/50 shot of the fender half sanded and half all polished out.

After all the polishing was done I gave the car a thorough wash to remove all polishing dust. I touched up all the chrome using Klasse All In One. Glass was cleaned, and the tires were dressed using Meguiar’s Hyper Dressing mixed at a 3:1 ratio.
Now that the car is all done, how about some pictures where I zoomed in to show the texture difference before and after it was all wet sanded and buffed. 🙂
Hood before
Hood after

Roof before

Roof after

Left rear before
Left rear after

No more swirls

Now for some final after shots! 🙂


Of course I could never post a car of this caliber with out showing an engine shot…even though I didn’t need to clean it.

One of the undercarriage showing just how clean and nice this car really was.

Thank you very much for taking the time to view my work. If you have any additional comments or questions, please submit them in the comment box below.