
Every car has history and a few stories, but rarely do they have this much when they’re “brand new”.
My client purchased this leftover ’08 model from a dealer on the other side of the country, and didn’t get the opportunity to look it over prior to the purchase. It was sold as “new” since it had never been titled, and had only 106 miles on it. When the truck arrived here in Ohio however, it looked more like it had 10,000 miles on it and never once cleaned! I inspected the vehicle right after he received it, and was amazed at the condition. We immediately scheduled a full detail for my first available opening.
I have a theory on how this all happened, but I’ll save that for a little bit later in the write up.
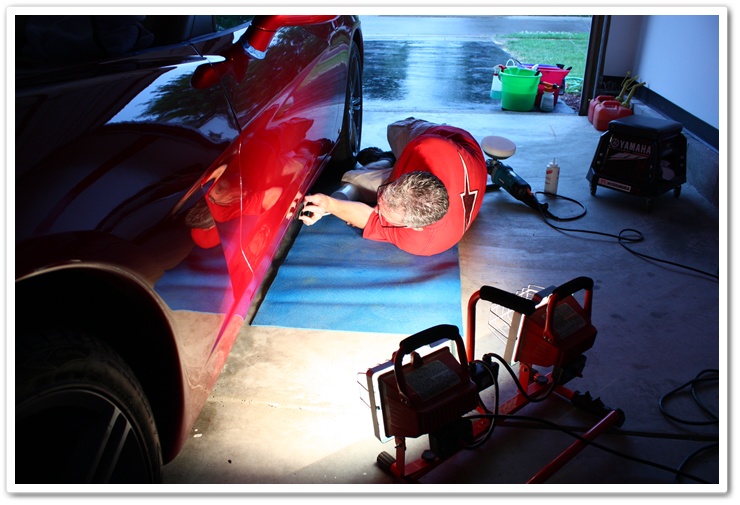
When he received it, he also found out that the trucking company had damaged one of the lower rocker panels…big gouge! So it was first off to the body shop for some damage repair before I could work on it. It turned out that it was a good idea to send it to the body shop first…more on that in a bit.
First let’s take a look at the overall condition of this brand new Corvette.
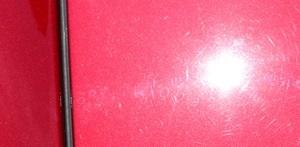
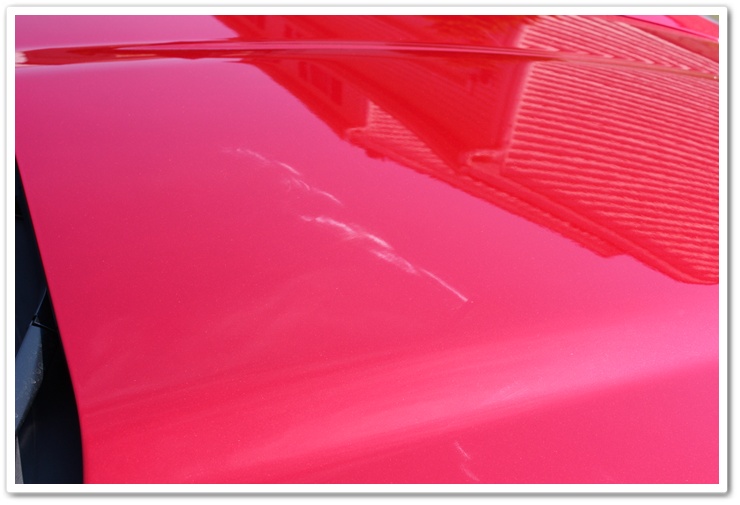
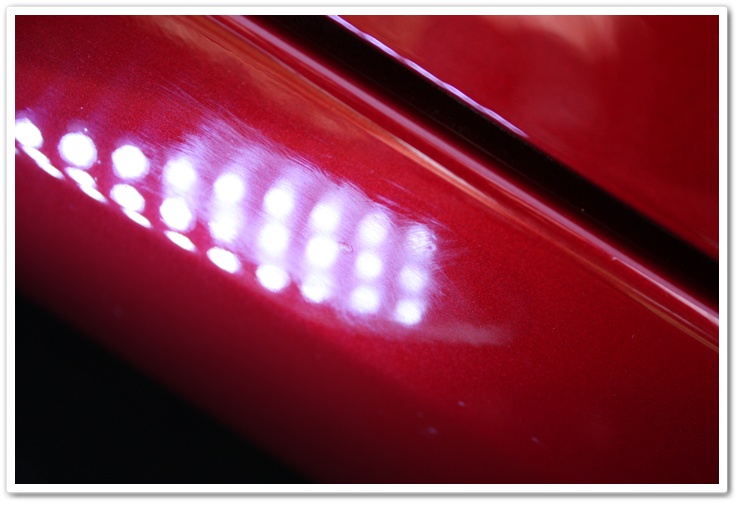
Paint condition: Light to moderate swirls all over the car. Obviously during its time sitting around the dealership it had been improperly cared for.
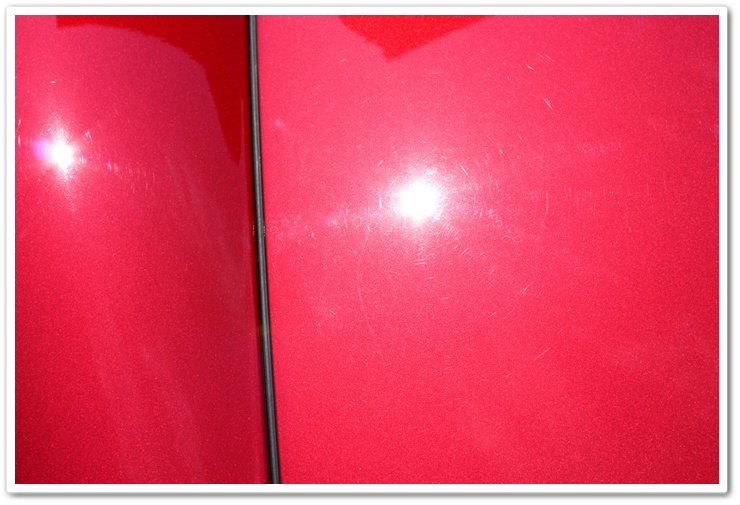

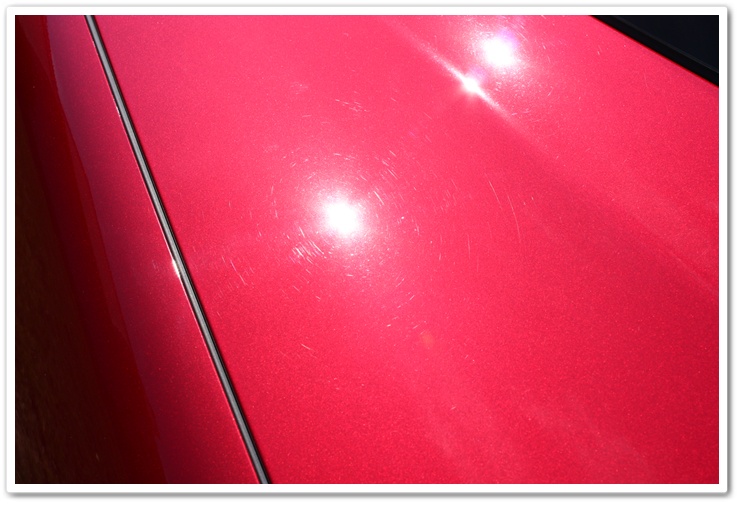
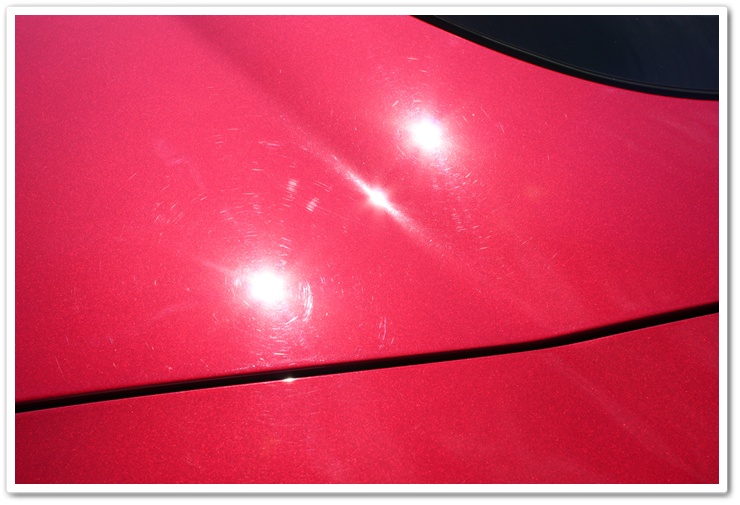
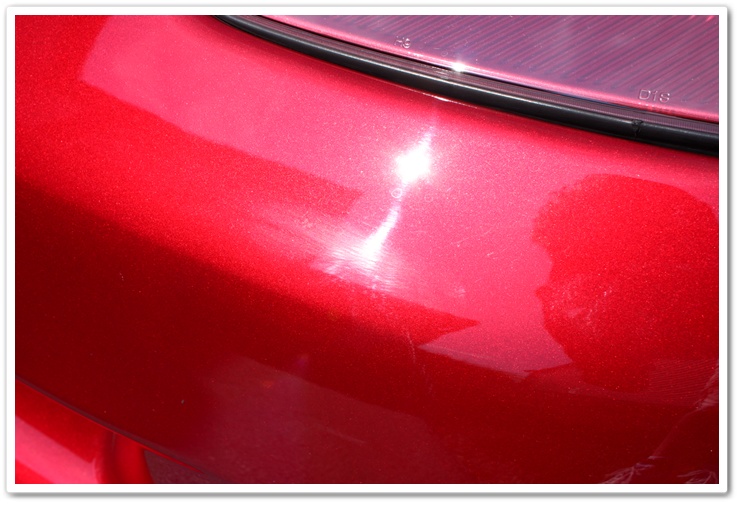
As soon as I saw this, I knew that the car had been wiped down (dry) from all of the body shop dust. This is proof of why debris should never be wiped off dry. The way this was leaving hologram-like defects, you could actually follow the wiping pattern. Can you imagine the situation if I would have worked on it first, and then they did this?
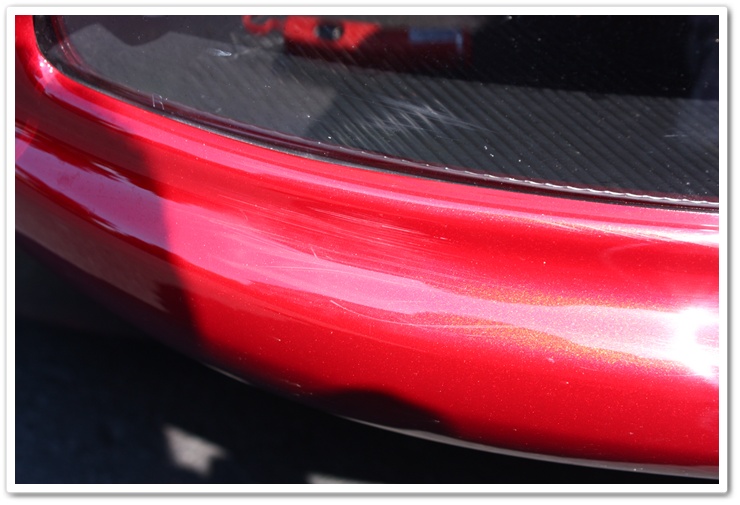
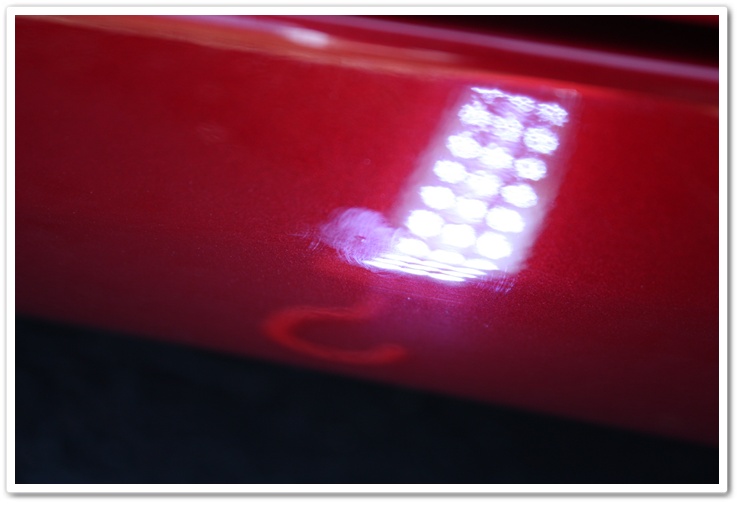
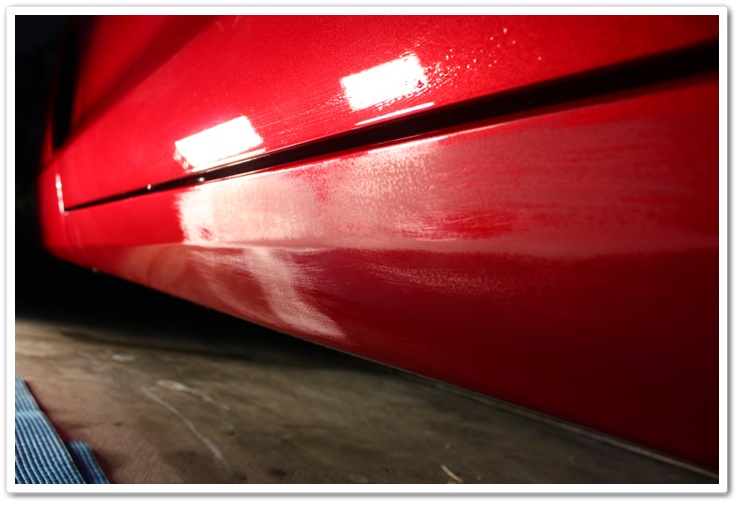
Since I knew where the damage repair had been done, I wanted to inspect it to see if there were any blend marks that needed to be fixed. I was a bit surprised to find this! It looked like there was a run in the paint, and somebody had attacked it with a very abrasive piece of sandpaper, and then walked away and called it finished.
There was another one of the exact same problem about two feet away…these were on the lower side of the rocker panels. Quality work didn’t happen on this job, and this poor Vette just can’t get a break!
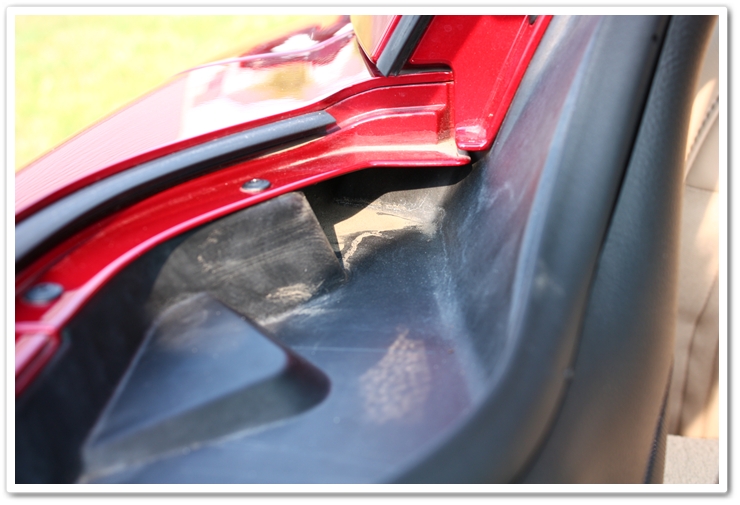
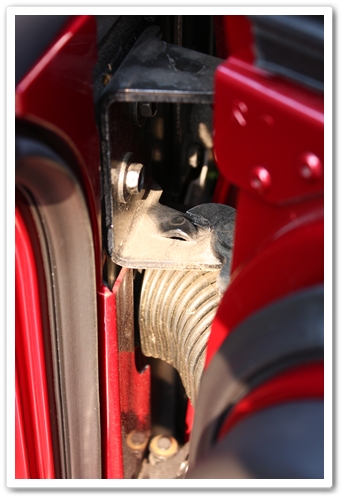
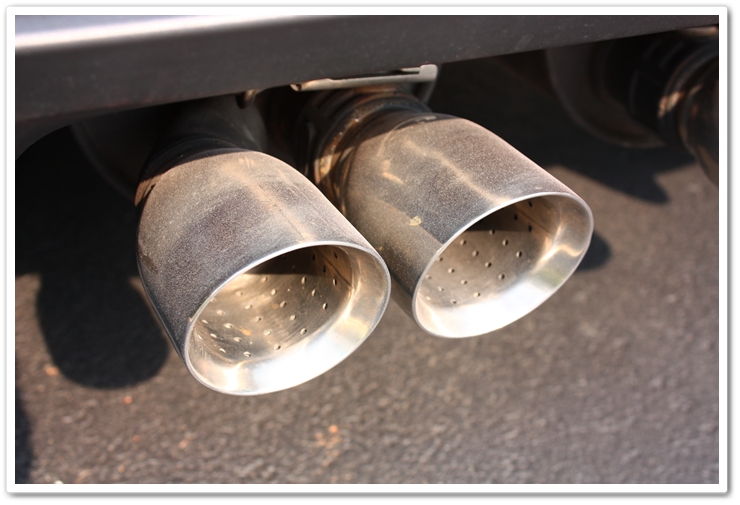
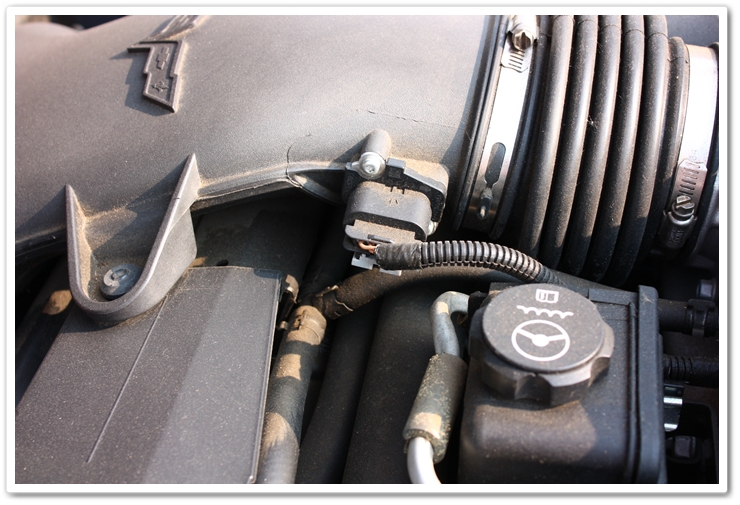
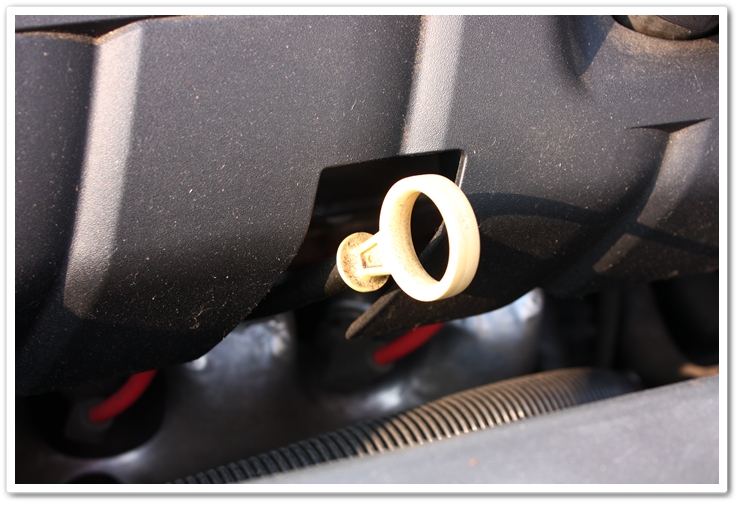
When I looked over the rest of the car, I found what appeared to be a heavy build up of sand in every crack and crevice.
In the rear deck lid:
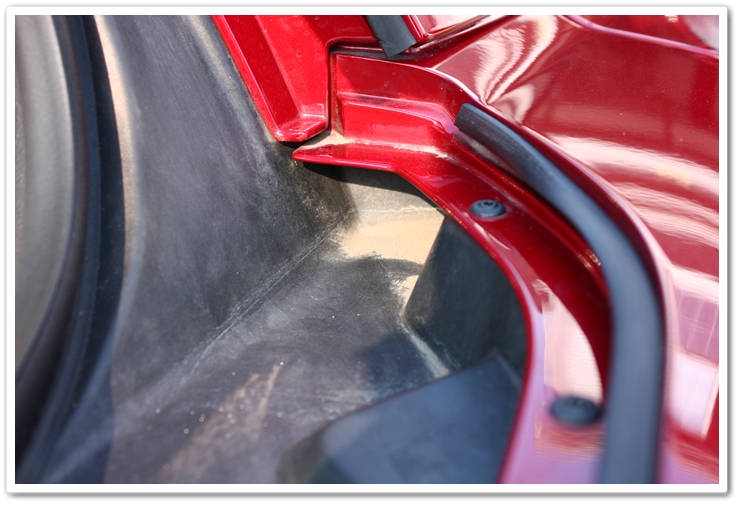
In the door jambs:

The exhaust:
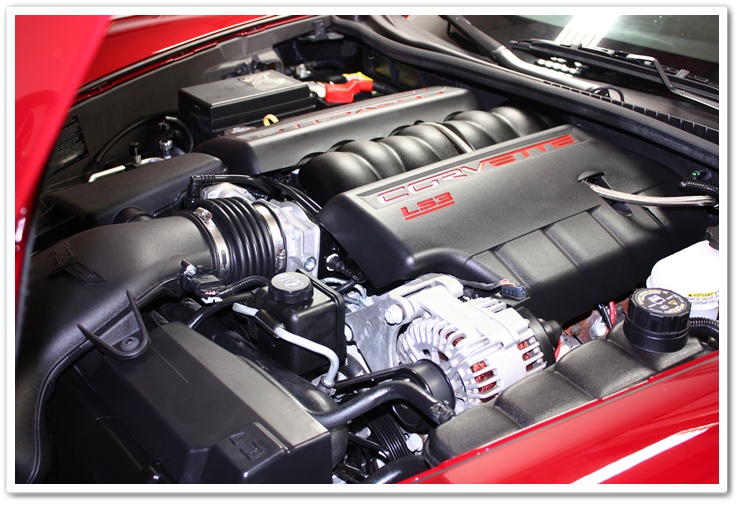
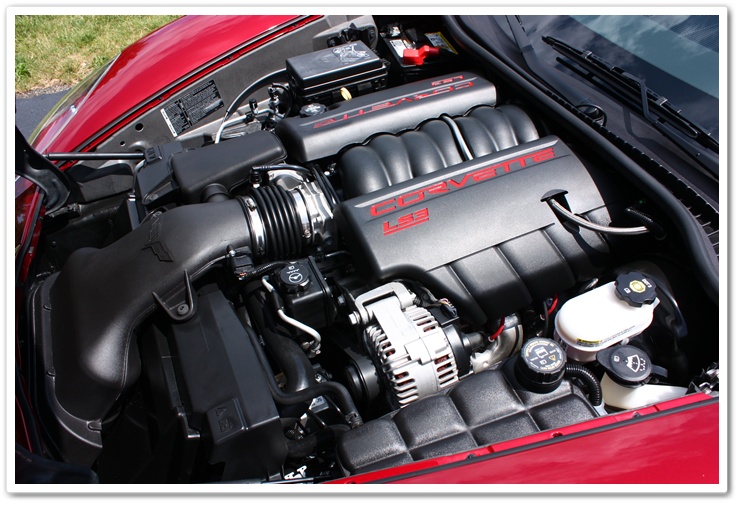
And everywhere in the engine compartment!
It’s getting pretty disgusting, right? I’m sure by now you can really feel for the owner of this car that was sold as “new”.
The plot thickens as we move to the interior, and I’m starting to put pieces of the puzzle together to come up with what I believe to be a solid theory.
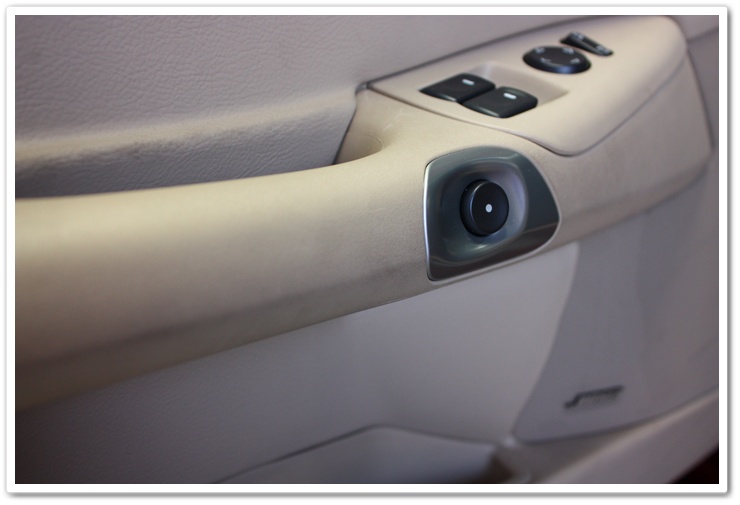
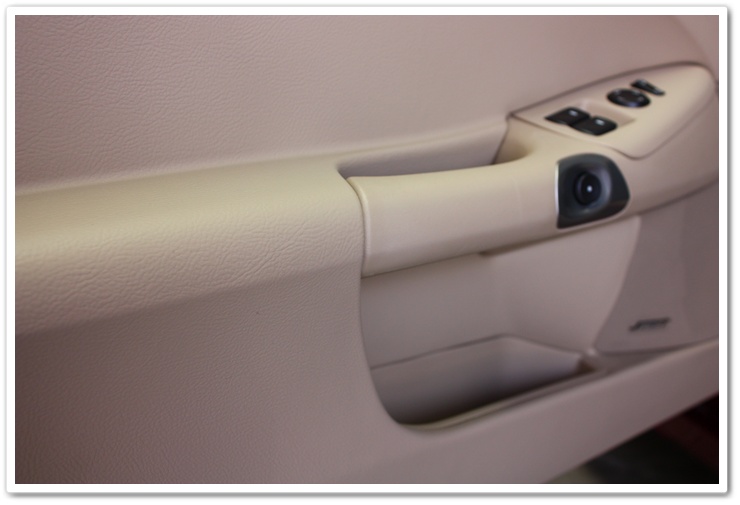
Here was a thorough build-up of crud all over the door panels and handles:
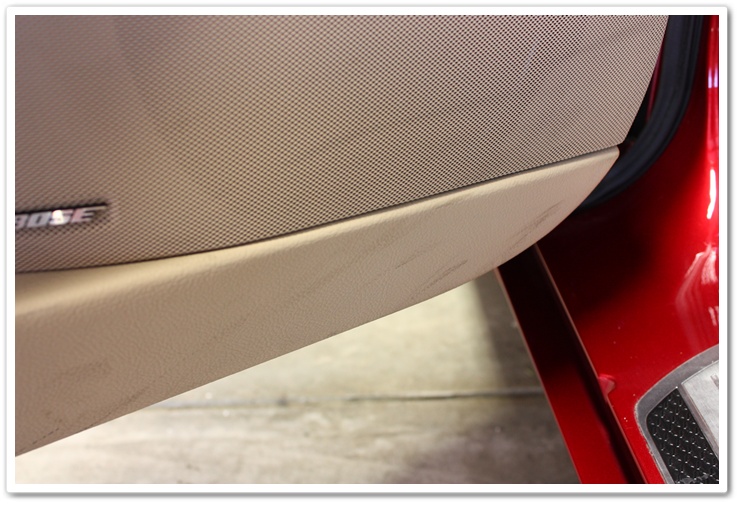
Don’t forget about down here.
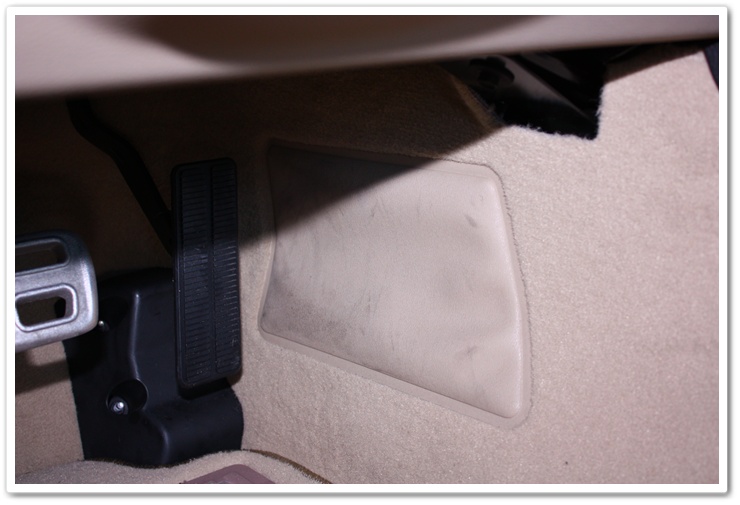
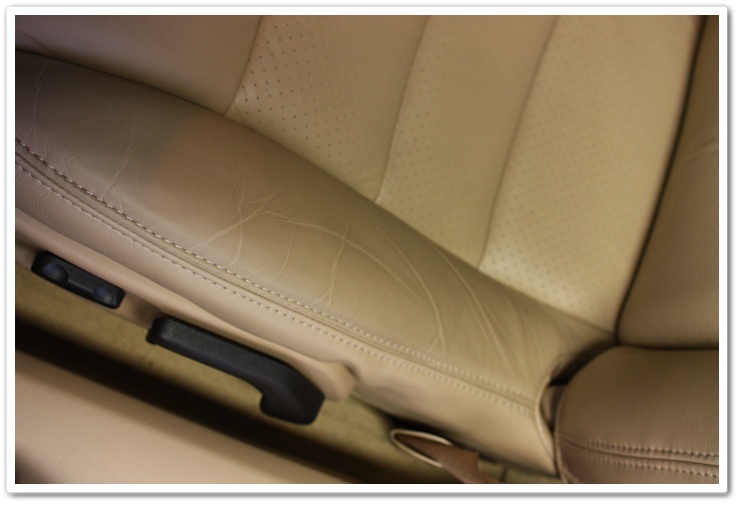
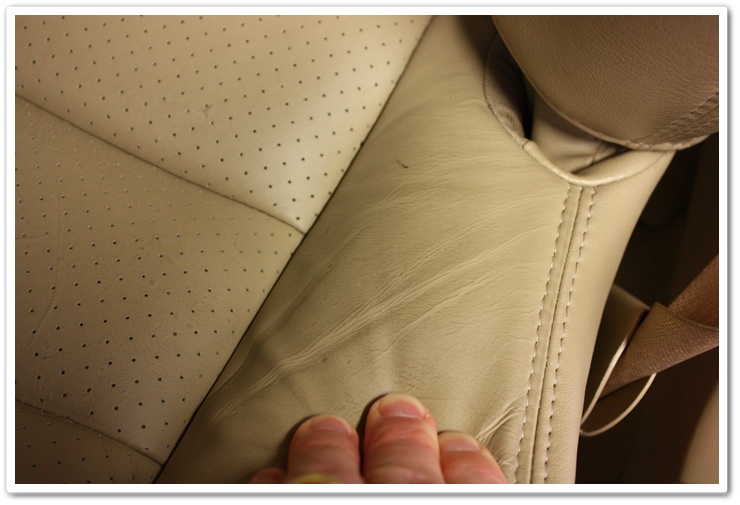
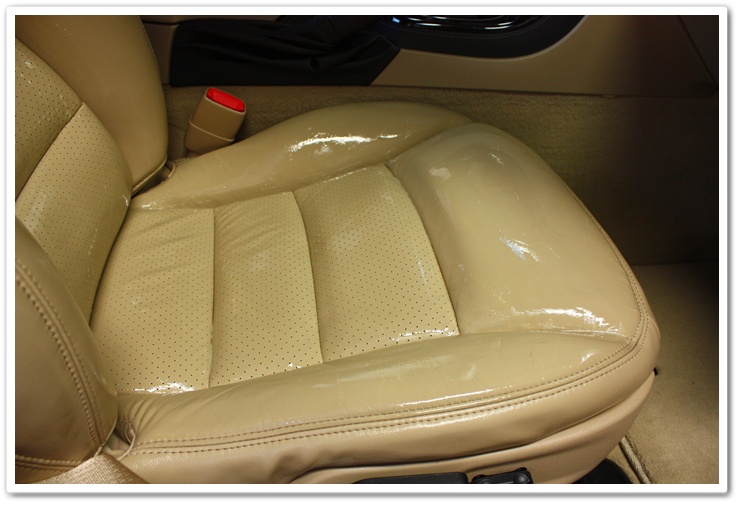
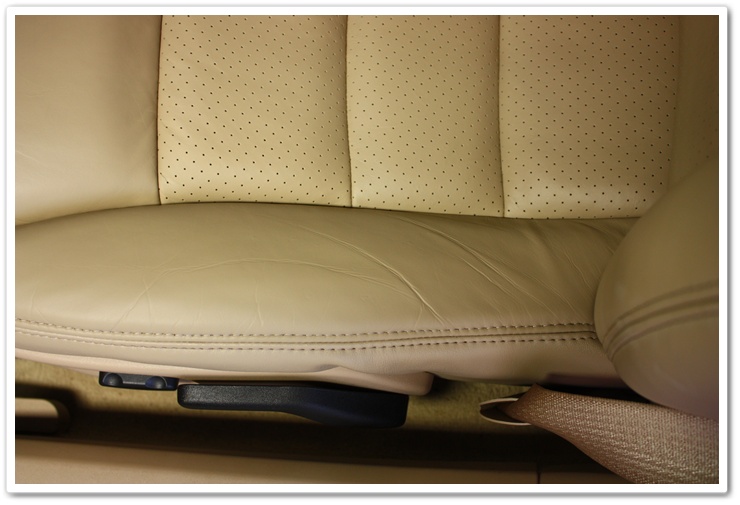
The leather looked exceptionally filthy
What I like to refer to as bonus crud was found when you pulled the leather sections apart!
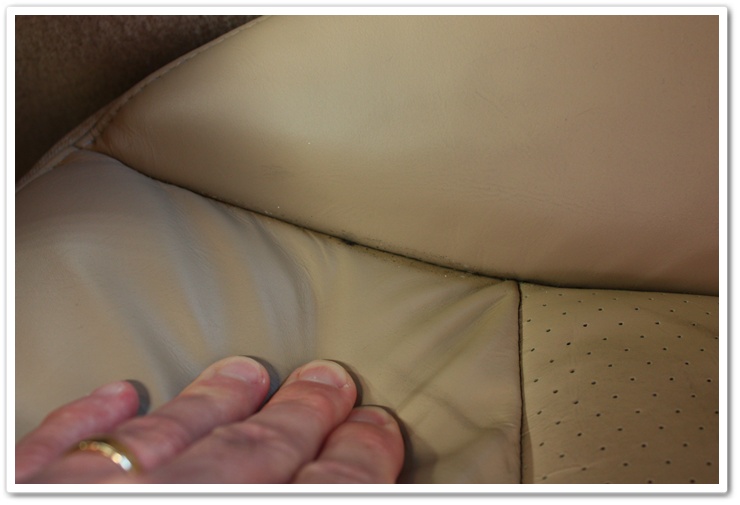
This is supposed to be brand new, light tan leather interior. Fail!
The next discovery was the last piece of evidence I needed to solidify my theory on what went wrong with this car. I’m probably going to receive a call from CSI on this one because my investigative techniques were flawless, I did a complete and thorough analysis of facts, and my conclusions are bullet proof.
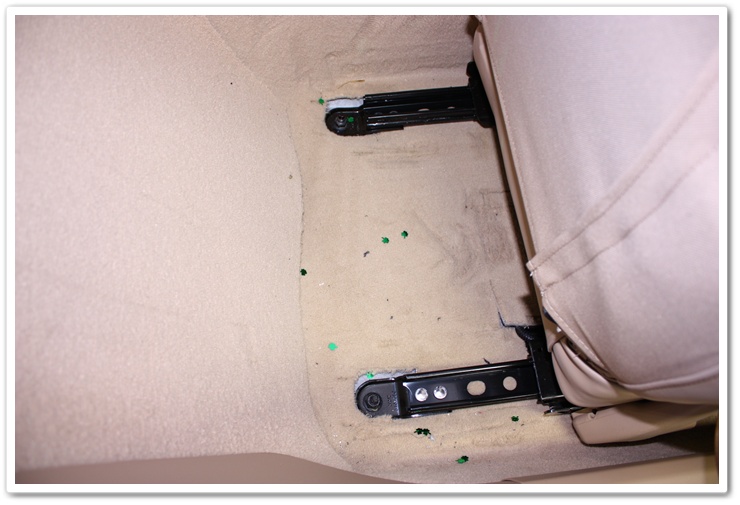
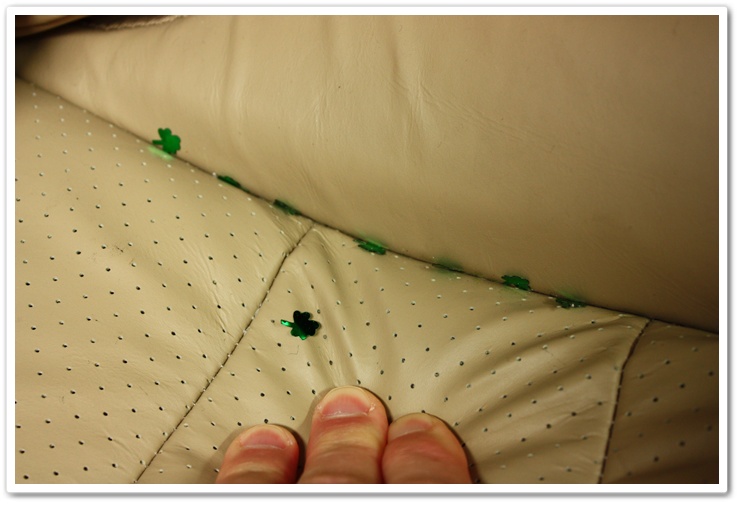
I knew it…LEPRECHAUNS!!! We all know that they enjoy partaking in mischief, and the shamrock is their calling card. I’m thinking that they went for a joy ride in the Vette (for 106 miles) and partied it up a bit (perhaps even in a parade?). Their dirty old clothes messed up the interior, and they hammered the car down the beach on the California coast, hence all of the sand! Mystery is solved…
For those of you who now think I’ve lost my mind, I’ll move on.
Seriously though, can you believe the condition of this new car? The swirls, the scratches, the sand, the crud, the poor body work, and the shamrocks that were everywhere inside this car…it’s amazing! Several weeks later and I’m still finding shamrocks in the Esoteric garage.
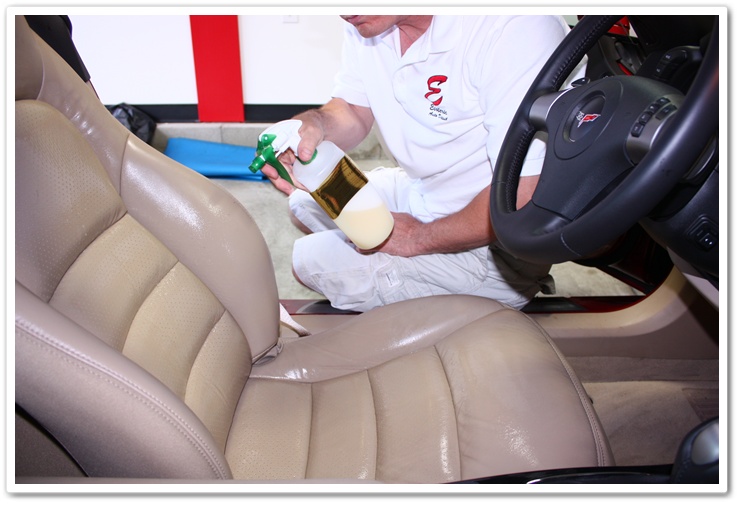
The first step in this complete detail was to address the leather interior with a thorough application of Leatherique. I had the car for several days and it was quite hot out which is the perfect recipe for a successful treatment.
First step is to apply the Leatherique Rejuvenator Oil with a foam brush.
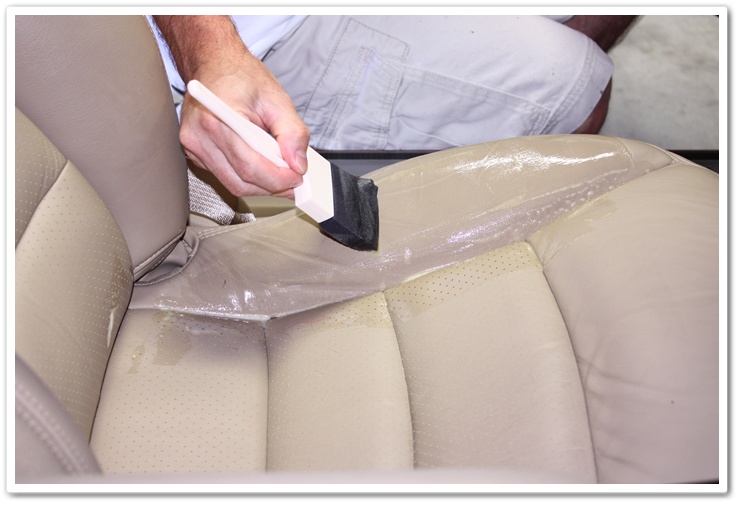
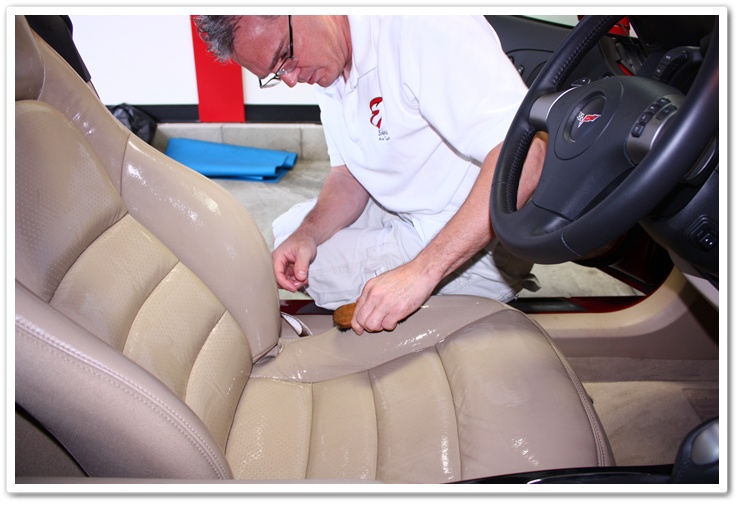
Then thoroughly massage it into the surfaces by hand making sure to get complete coverage.
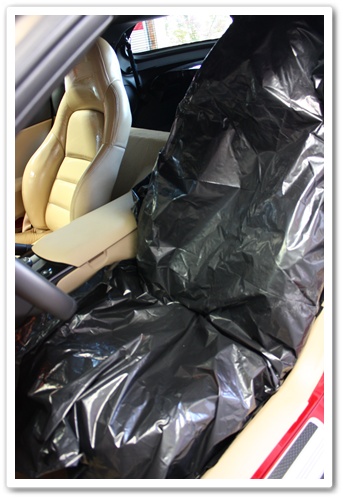
And now cover up with plastic on the driver’s seat so I can get in and out of the car without getting the product all over myself. Once I’m done moving the car around, I’ll remove the plastic. With plenty of heat and the windows rolled up to create a steam-room effect in the car, it’s best to let the product work for at least 8 hours. Since I had the time, I let it work for about 48 hours.
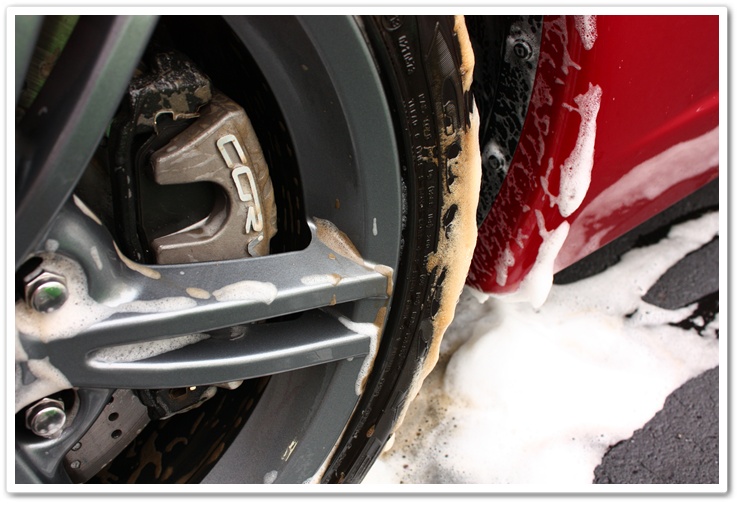
Now it’s time to move to the exterior of the vehicle. The wheels came first, and I used Chemical Guys Sticky Wheel Gel for the rims, and Optimum Power Clean for the tires and wheel wells. Look at the effectiveness of the Power Clean on the tires…this is before doing any scrubbing!
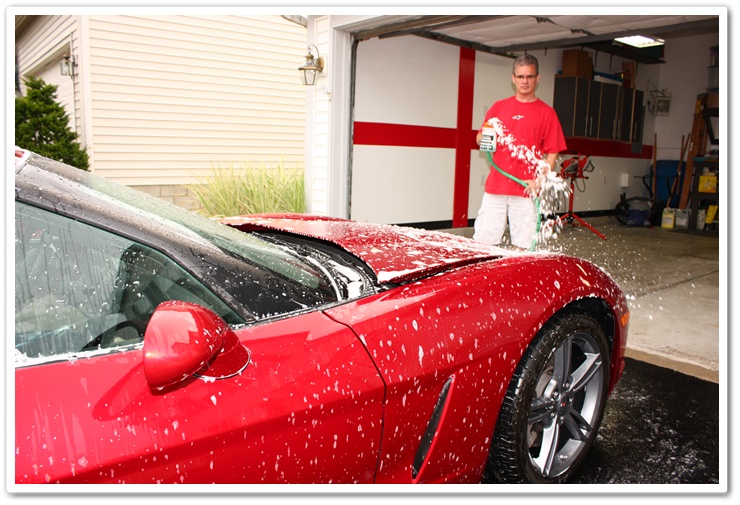
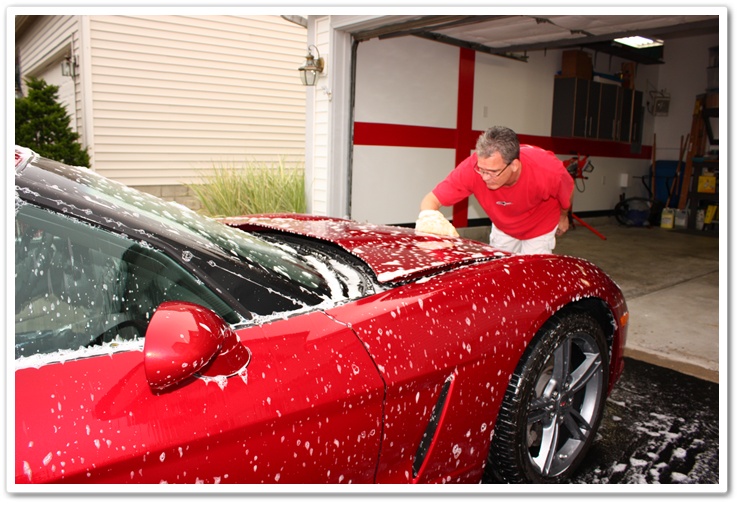
After the wheels were completed, I started off with my normal wash with Chemical Guys Citrus Wash & Clear at paint prep ratio (2oz/gal) to strip any existing wax off of the surface. I loaded up my Gilmour Foamaster II foam gun, thoroughly pre-soaked the car, and then came back and washed it using the two bucket method, Grit Guards, and my DI Sheepskin Mitt.
For the filthy engine compartment, I soaked everything in P21S Total Auto Wash (TAW) first, and then cleaned it up using my Mini E-Z Detail brush and a variety of sponges. For a step-by-step tutorial, check out my article on Engine Bay Detailing.

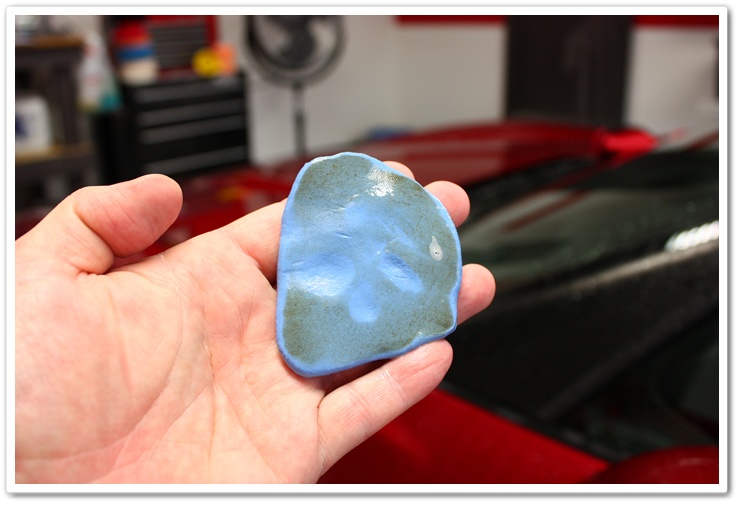
After I was finished with the wash, I pulled the Vette back into the garage for claying. What I found was yet another strike against this car…paint overspray everywhere from the body shop! I had to spend a lot of time claying using DI fine grade clay and Dodo Juice Born Slippy clay lube to remove it all.
This isn’t dirt, it’s red paint overspray! And this is just after one small section.
So if you have your car worked on in a body shop, you should plan on claying it immediately afterwards because chances are it will be covered in overspray regardless of what you had done to it. I have seen it many times before.
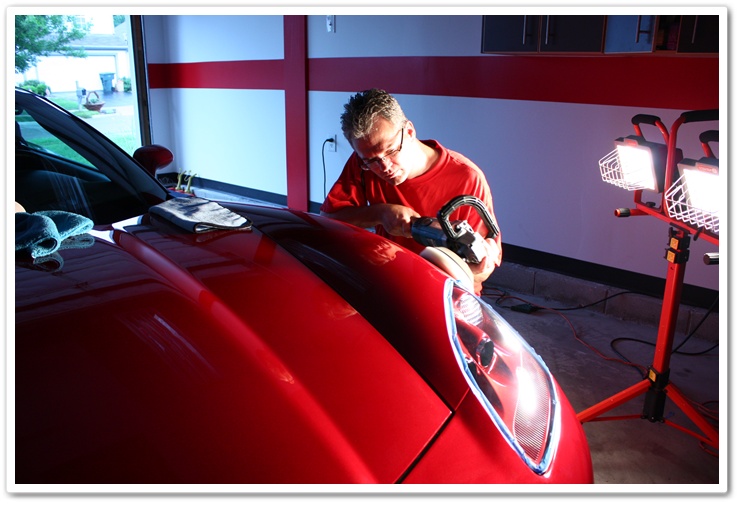
Finally it’s time to do some polishing. Given the amount of time it takes to polish the hard clear coat on Corvettes, the owner decided to go with a one-step polish in hopes of achieving at least a 50% correction rate and amp up the gloss a bit. The first test I did was with Menzerna PO203S and a white LC pad on my Makita rotary, and after doing several alcohol wipe downs to get a true inspection, I found that this combo was getting a much greater correction rate than we hoped for, and was finishing down LSP ready.
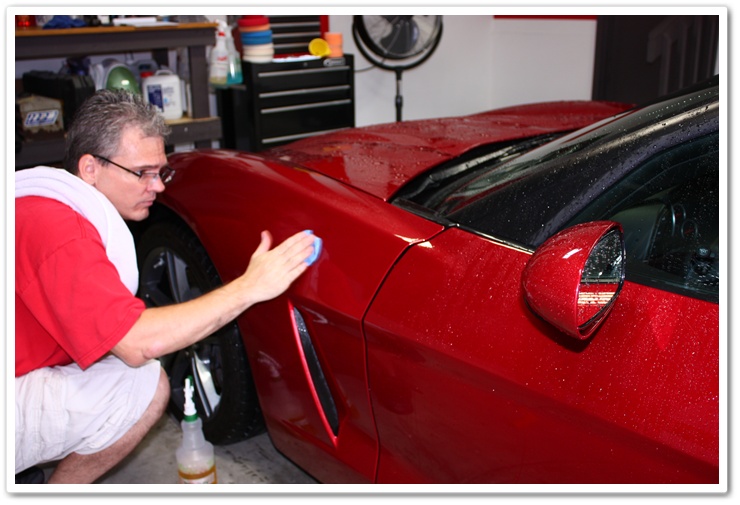
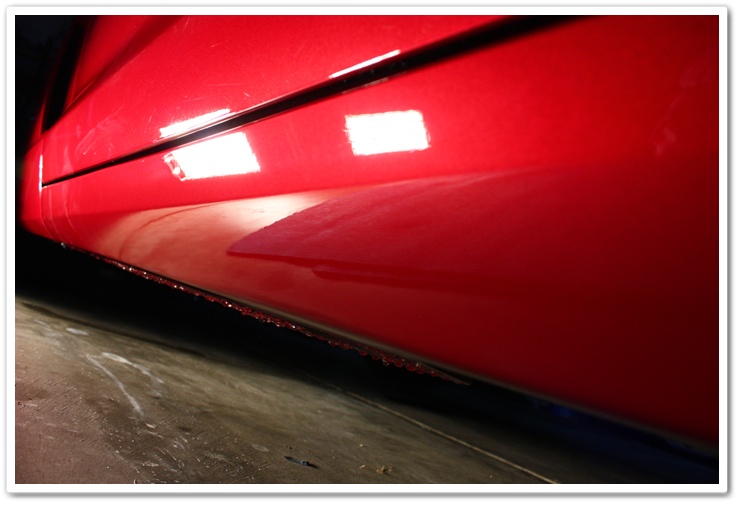
On the rocker panel with the bad body work, I wetsanded the problem areas, and properly polished them back out. As you can see, it wasn’t an easy area to work on without a lift.
After wetsanding.
All polished out.
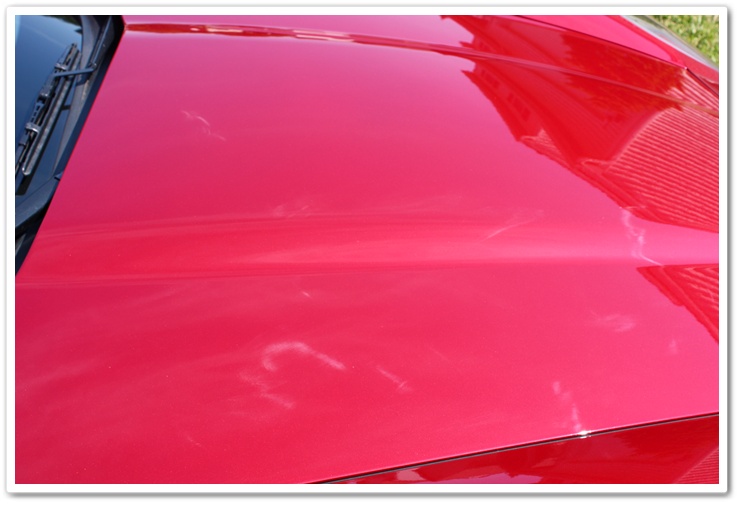
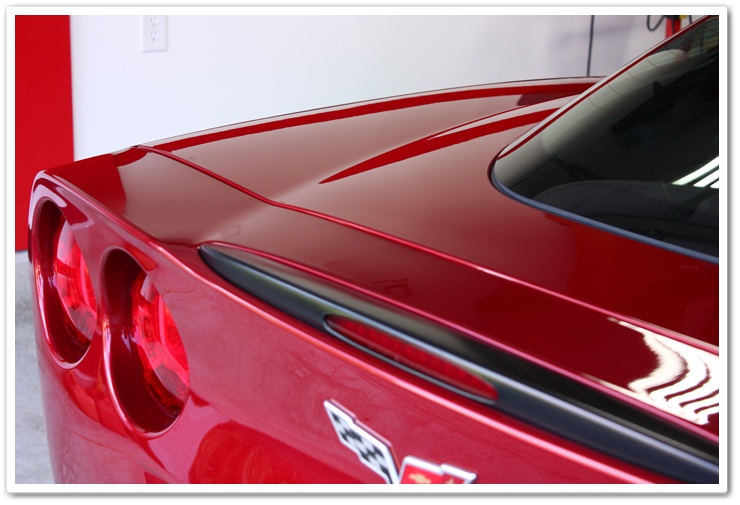
As you can see from the next couple of photos, the swirls were removed and the clarity was restored.
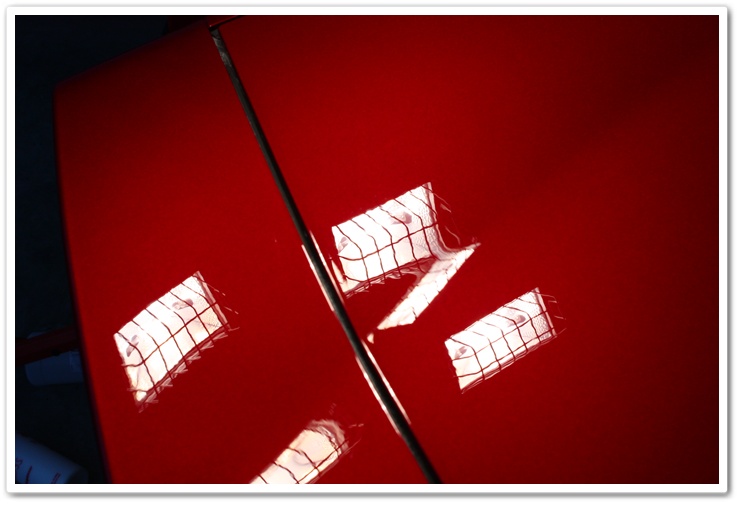

This is post-polishing, but before any sealant or wax:
For a sealant, I decided to go with Blackfire’s Wet Diamond. I love the look of this product!

I apply it with my PC7424XP and a blue finessing pad on speed 3.5-4.
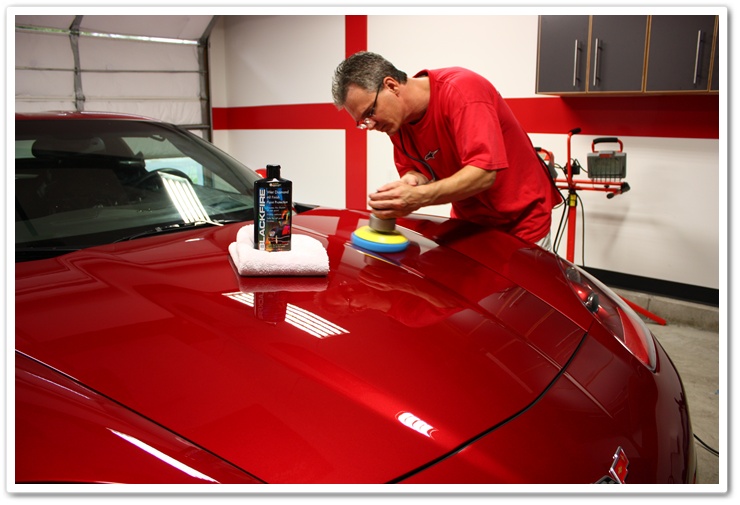
The next few photos are after applying the Wet Diamond, but before applying wax.
When using Wet Diamond, you need to let it cure for at least 8 hours after removal before you can top it with another coat, or with a wax. I was done for the day, and would come back the next morning to apply a coat of wax.
The next morning I started off by finishing up the interior.
I sprayed on Leatherique Prestine Clean that works to remove the remaining Rejuvenator Oil, along with all of the dirt, grime, sweat, and salt that it brought to the surface.
After letting it dwell for a few minutes, I go back and hit any particularly dirty areas with a leather brush.
Then clean it off with a clean, damp MF towel.
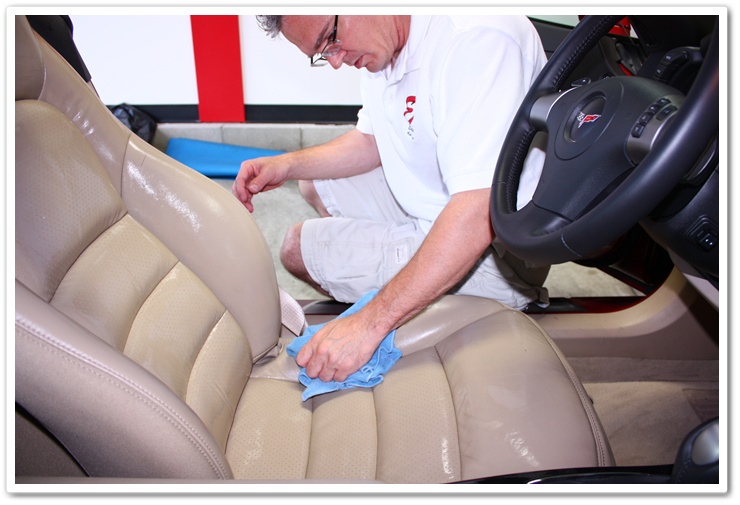
And then lightly buff the surface with a clean, dry MF towel.
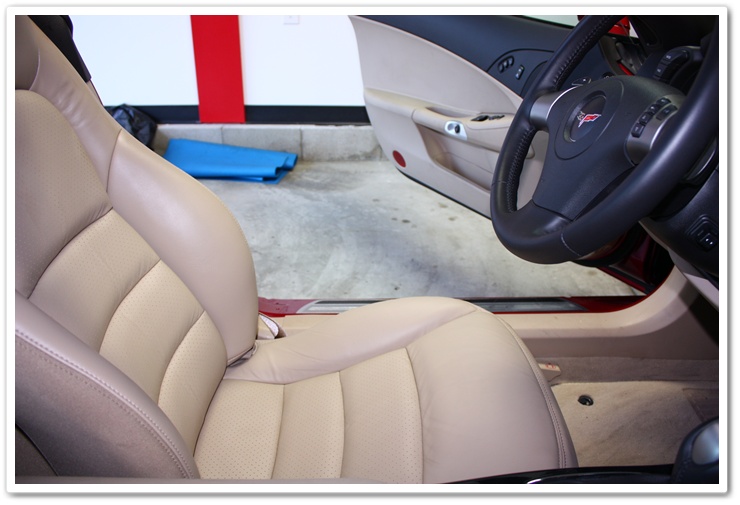
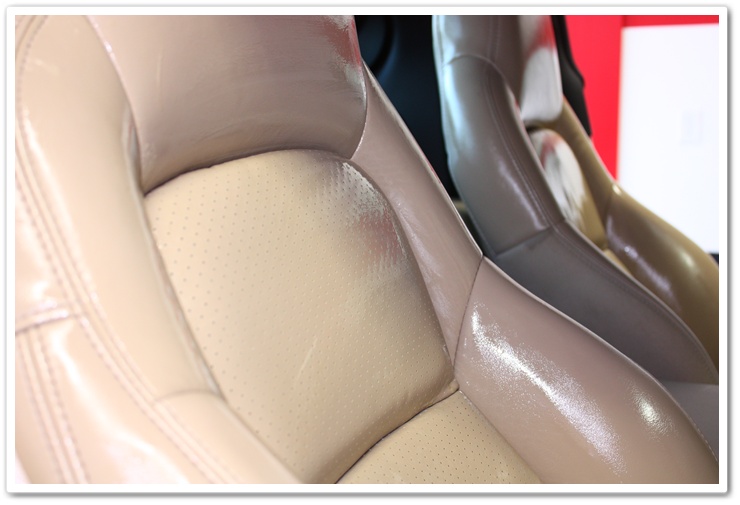
There’s now a huge difference in how the leather looks, and it was very soft and luxurious afterwards.
For the grimy door handles and panels, I just used Prestine Clean and a damp MF towel. It did a tremendous job of restoring it back to new, and it adds some UV protection as well.
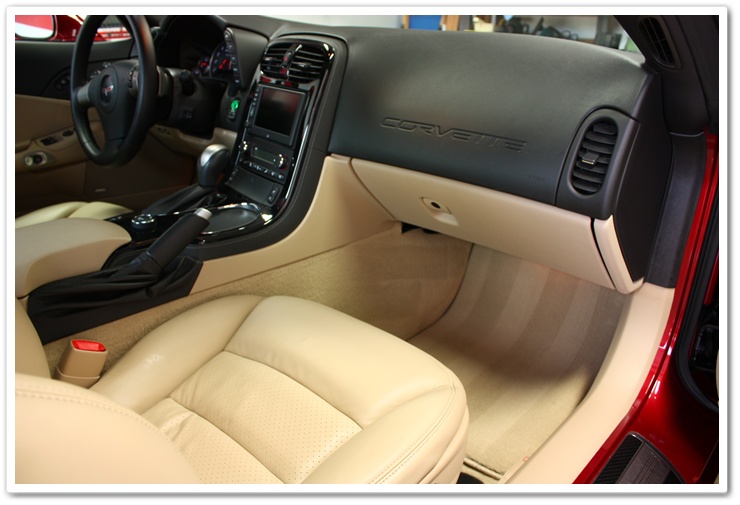
I then cleaned the console, gauges, windows, and thoroughly vacuumed to get rid of all the shamrocks! The interior NOW looks brand new, and is far beyond what a dealer’s new prep service could have provided.
Moving back to the exterior, it’s time to add a layer of wax, and tidy up all of the details.
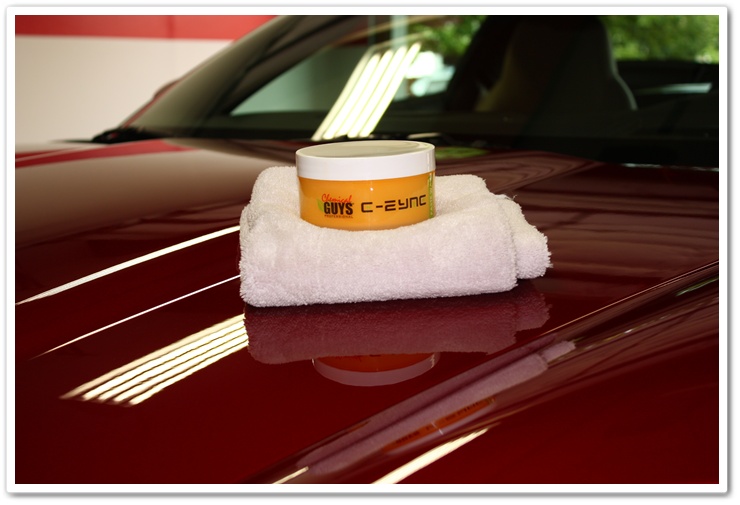
I have found lately that Blackfire Wet Diamond sealant topped with Chemical Guys E-Zyme Natura wax is a beautiful sight, so with the hard life this Corvette has already endured, I figured that it deserved such a fine combination. The E-Zyme goes on like butter, and is ready for removal in about 15-20 minutes. My finishing MF of choice is always the DI reTHICKulous towel.
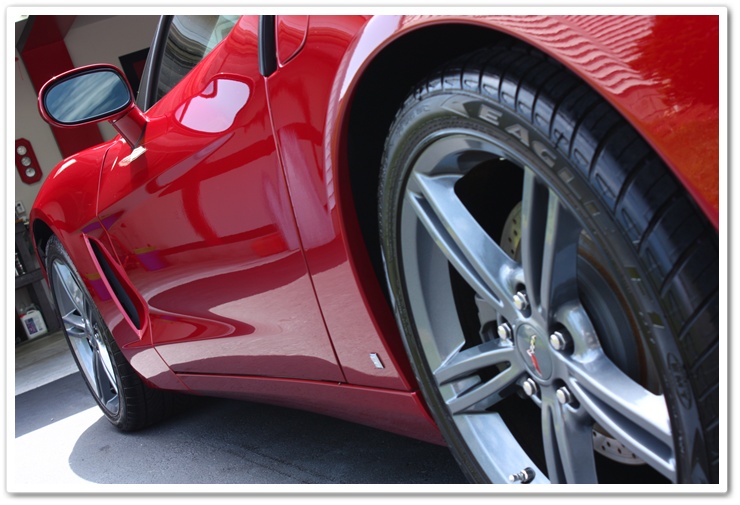
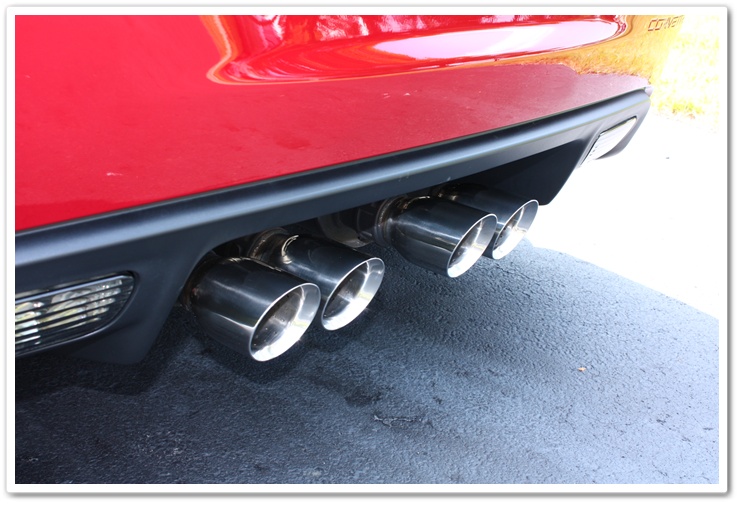
The tires received an application of Blackfire Tire Gel, the wheel wells were treated with Chemical Guys Fade 2 Black, and the exhaust tips were polished with Optimum Metal Polish.
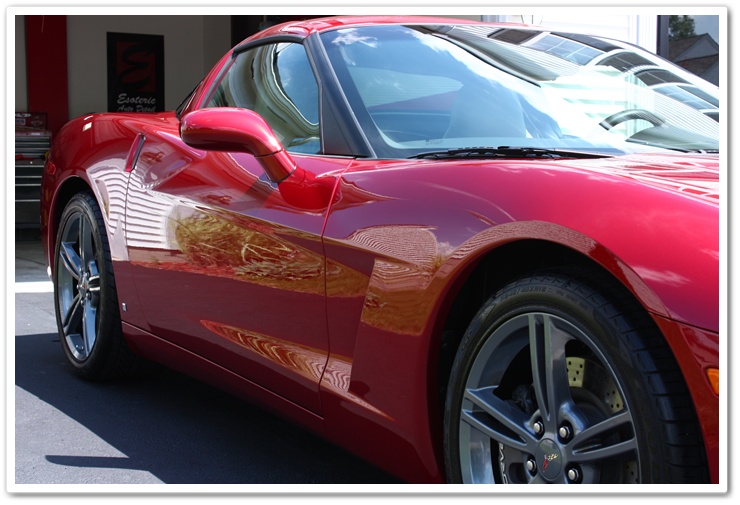
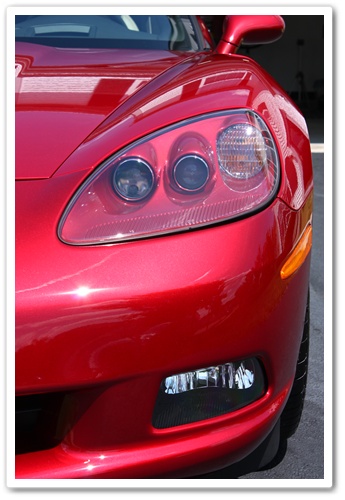
When all was said and done, I was able to achieve about an 80% correction rate even with a one-step polish. The finish was stunning, the interior turned out beautiful, and the engine compartment finally looked brand new again. The car may have started out with some serious challenges, but after I was finished with it, the Corvette had a brand new start on life.
The owner was absolutely thrilled with the outcome, and could now enjoy it the way he should have been able to when he first took delivery. Another satisfied Esoteric customer…
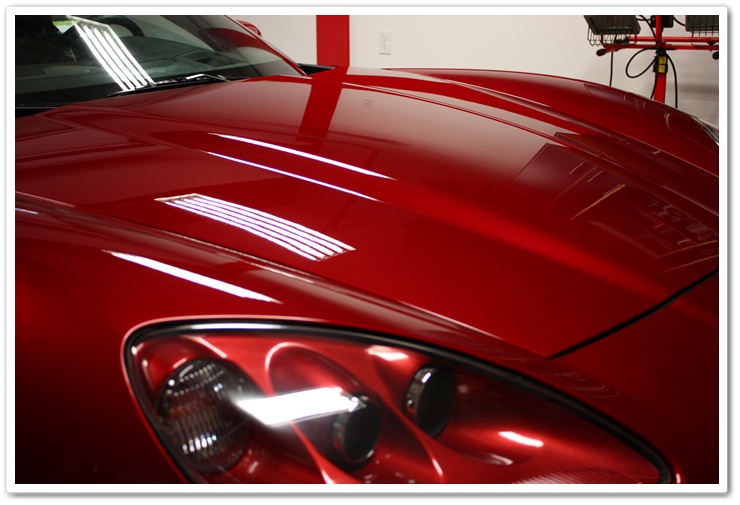
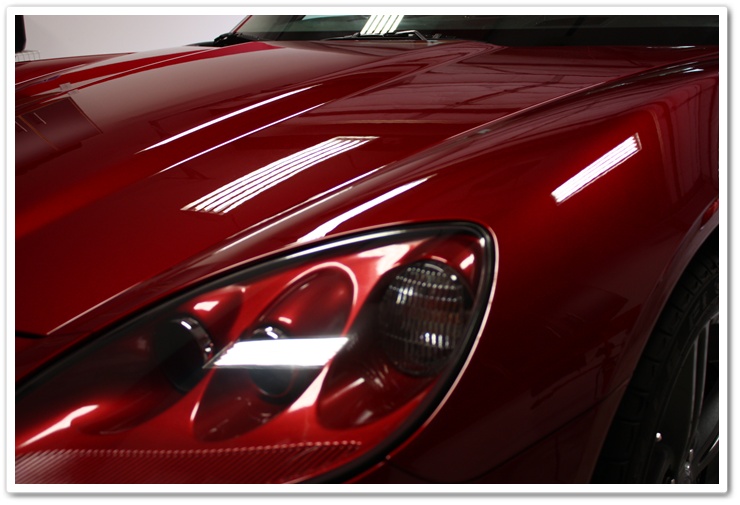
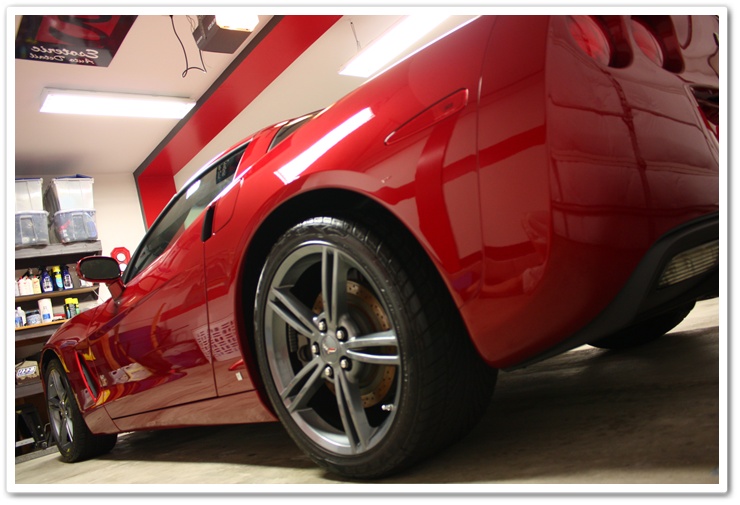
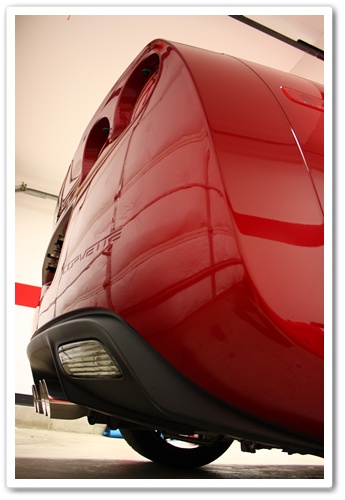
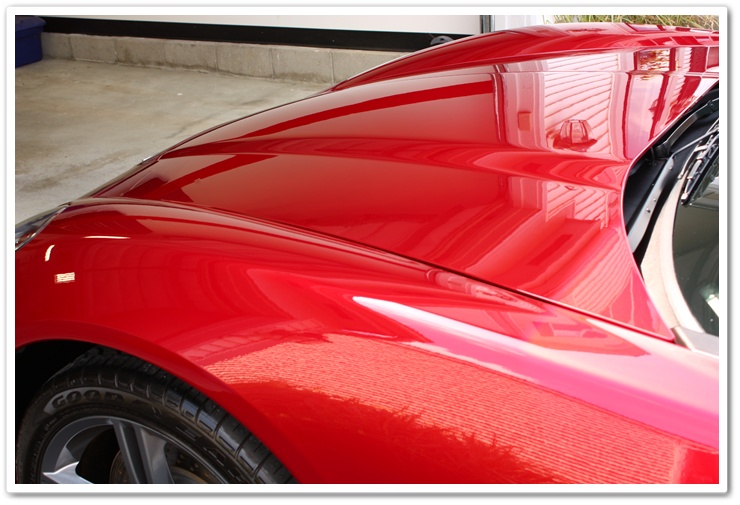
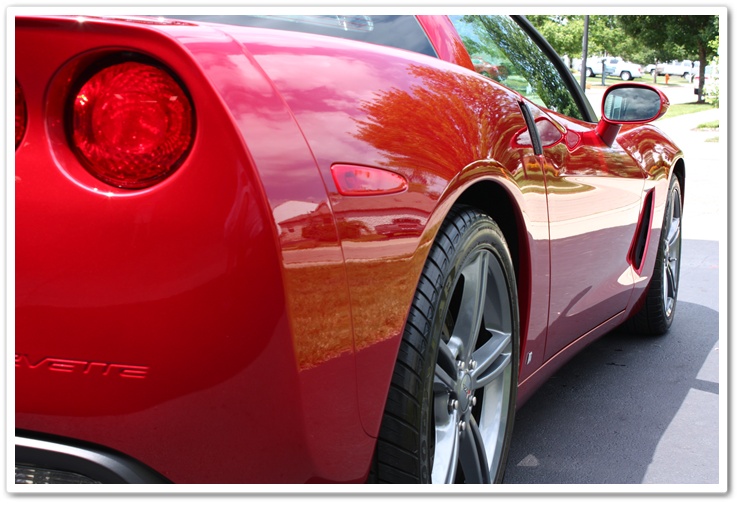
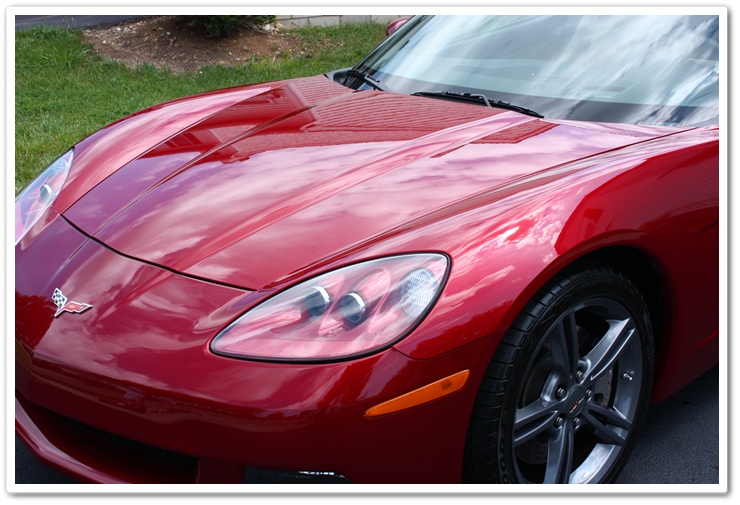
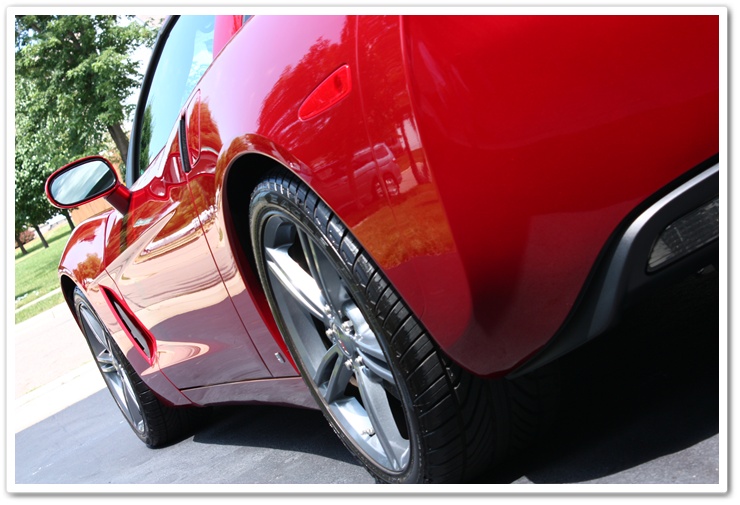
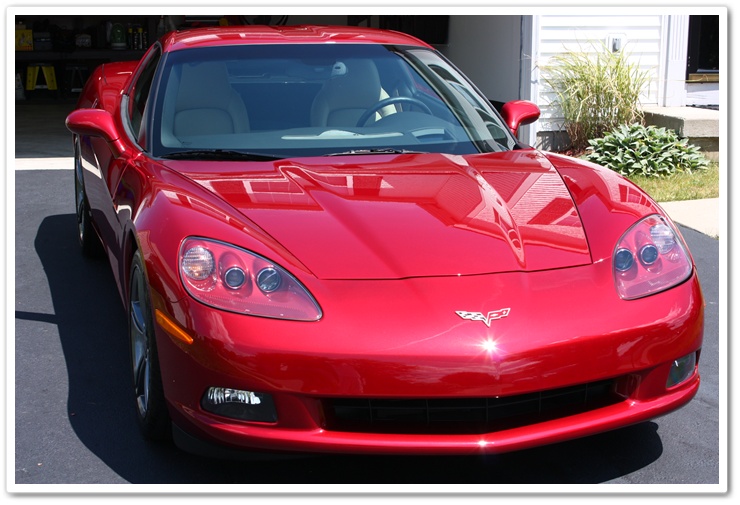
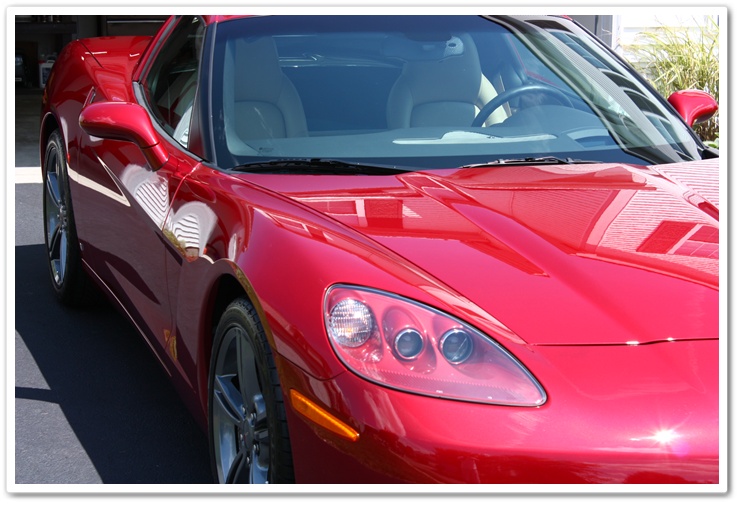
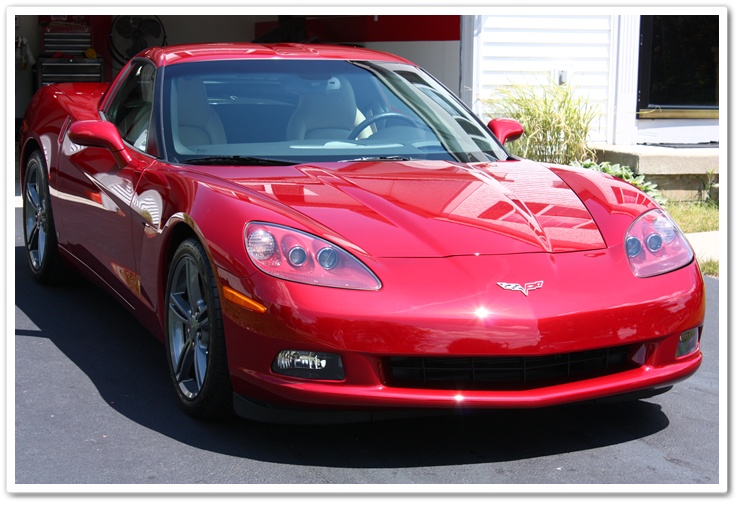
And now for some after shots:
The engine was dressed with Chemical Guys Fade 2 Black.
Dripping wet, and glossy!
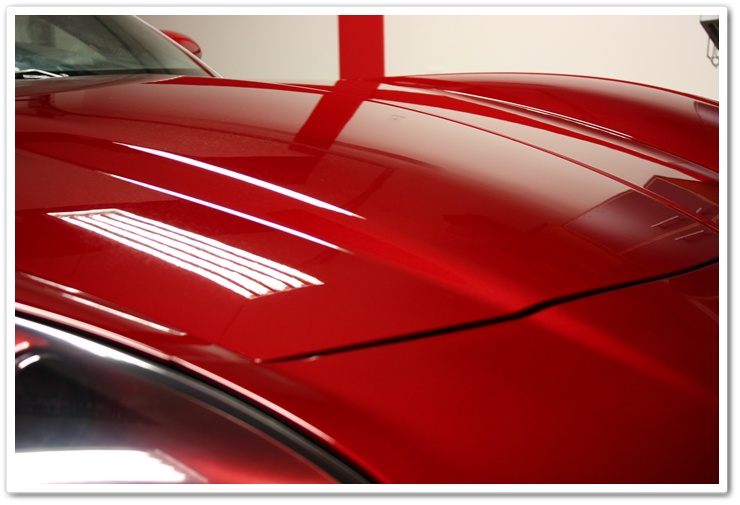
Sunshine…the light of truth.


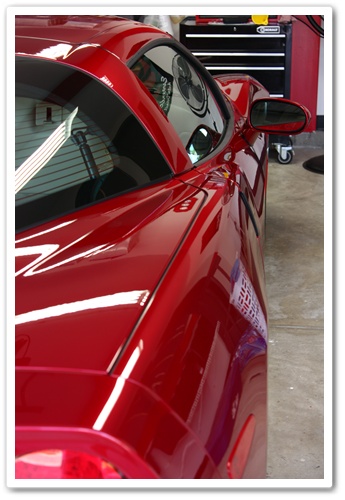
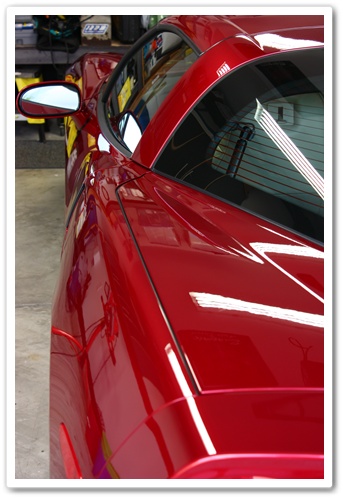

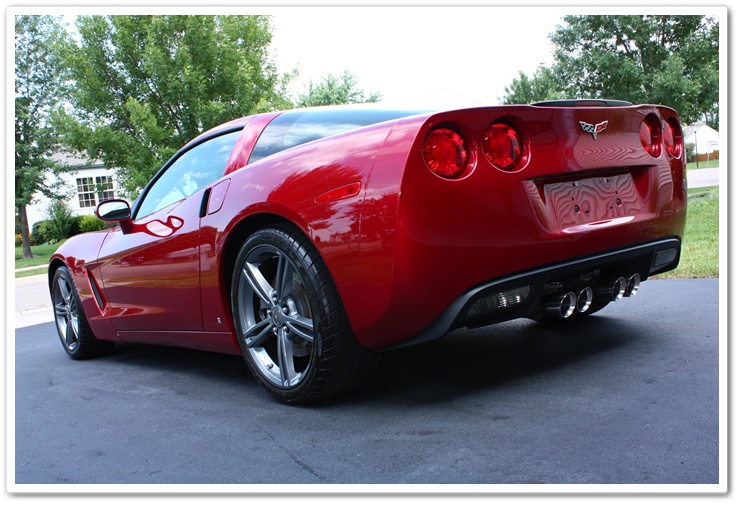
This is one of my favorite shots of this car! Here’s where the Wet Diamond and E-Zyme combo really shines.
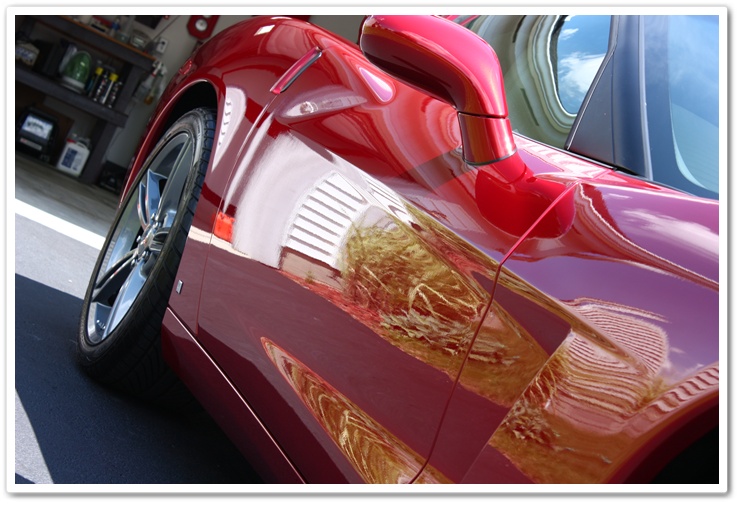

Stunning!
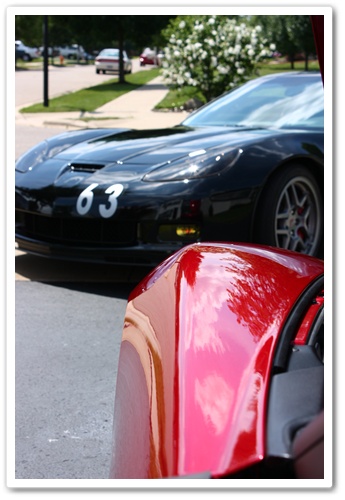
When the owner of this car came to pick it up, he was dropped off by the owner of the black Z06 Vette I worked on earlier this year. He’s been out doing some auto cross events with it, hence the numbers. He was kind enough to throw me the keys to take the Z for a drive, and all I can say is that it absolutely rips!
Thanks as always for taking the time to review my work. Total time = 13 hours.
If you have any additional comments or questions, please submit your reply in the comment box below.