

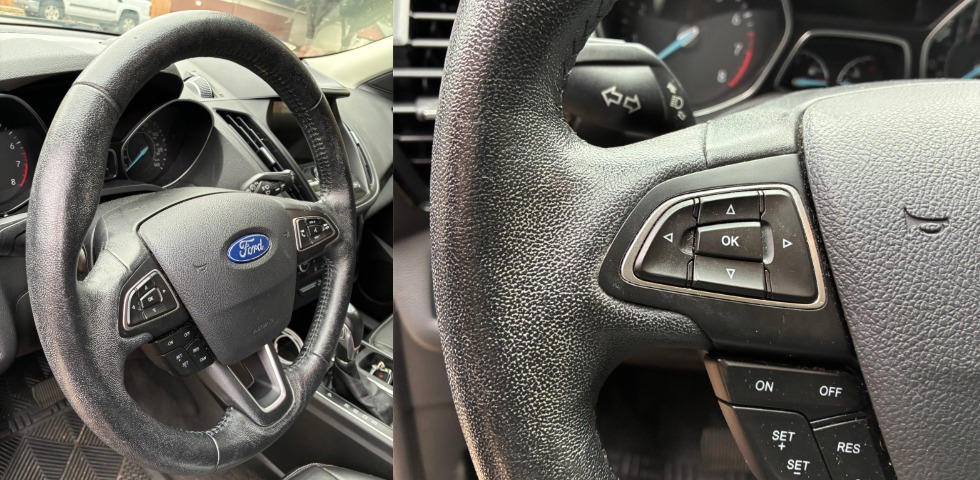
I used the Geist Steering Wheel Restoration Kit on a wheel that while it was not in terrible shape, it was just showing early wear with some white (beneath the finish) starting to show through in a few spots. The kit made the wheel look much fresher and while a few of the steps (sanding, dyeing, using a hair dryer) sound intimidating, they are actually pretty straightforward.
Below I break the process down exactly as Geist lists it, add my tips, and highlight the best parts of this kit. I will be including photos, step by step so you can see the progress as you go.
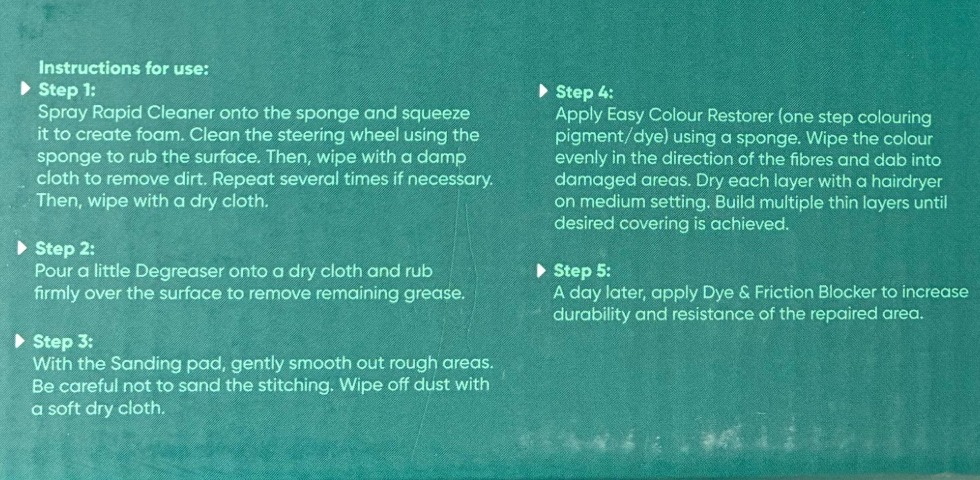
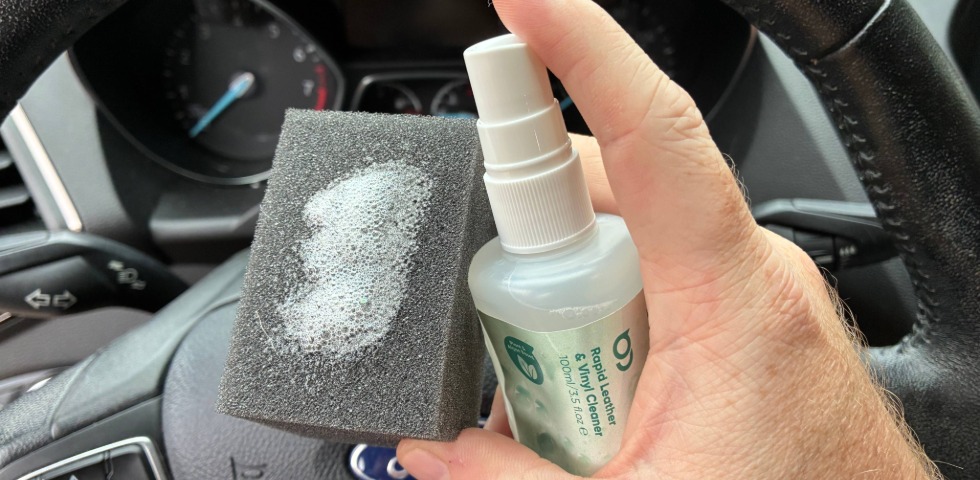
Step 1 – Clean (Rapid Cleaner)
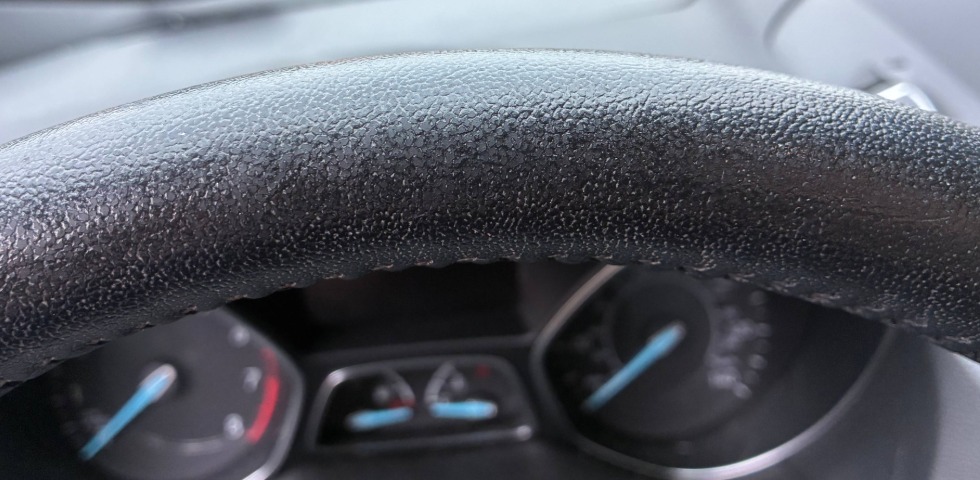
Spray Rapid Cleaner onto the sponge, squeeze to create foam, and scrub the wheel surface (avoid aggressive scrubbing on stitching). Wipe off with a damp cloth to remove lifted dirt. Repeat until the surface looks uniformly clean, then dry with a clean cloth.
Tip: do a final inspection under good light to locate all worn/shiny spots. You want those clearly visible before you sand or dye. Photos below will show before and after the cleaning pass.

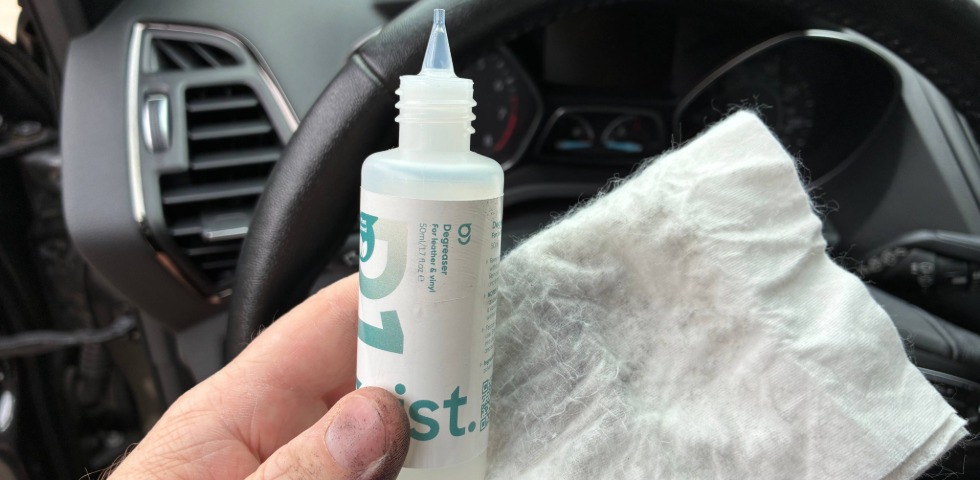
Step 2 – Degrease
Put a little Degreaser on a dry cloth and rub firmly across the wheel to remove oils and any remaining residue. This is important so the dye bonds evenly.
Tip: focus on areas that see the most hand contact (thumbs, top of wheel).
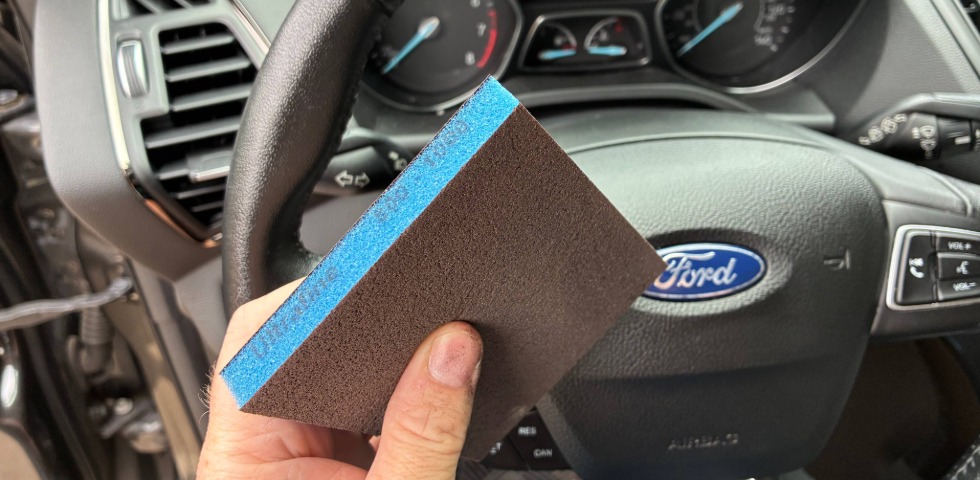
Step 3 – Smooth with the Sanding Pad
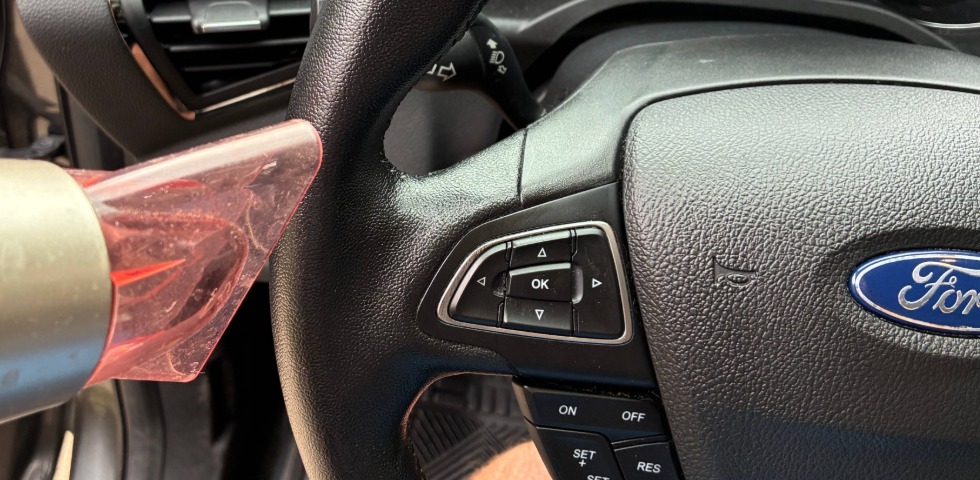
Use the supplied Sanding pad to gently smooth rough or flaking areas. This is the step I want to emphasize and when done carefully, it makes a huge difference in how the dye settles and how smooth the finished surface looks. Be gentle and controlled. The goal is evening the surface, not removing material aggressively. The smoothing of the wheel surface removes raised edges and loose finish so the color layer will be smooth and even instead of patchy. After sanding, wipe dust away with a soft, dry cloth.
IMPORTANT: Do not sand any stitching. Keep the pad on the leather/vinyl only, we do not want the steering wheel coming apart at the seams!
Step 4 – Apply Easy Colour Restorer
Apply Easy Colour Restorer with the sponge. Work the pigment section by section and dab into the damaged spots. Build coverage with multiple thin layers rather than one heavy coat.
This is where the hair dryer becomes invaluable. Dry each thin layer with a hair dryer (low to medium setting) between coats. The hair dryer speeds cure and lets you add additional thin layers quickly and easily.
Tips:
- Thin layers means even layers and less pooling on seams and stitching.
- Drying each layer with the hair dryer prevents tackiness and produces a smoother finish.
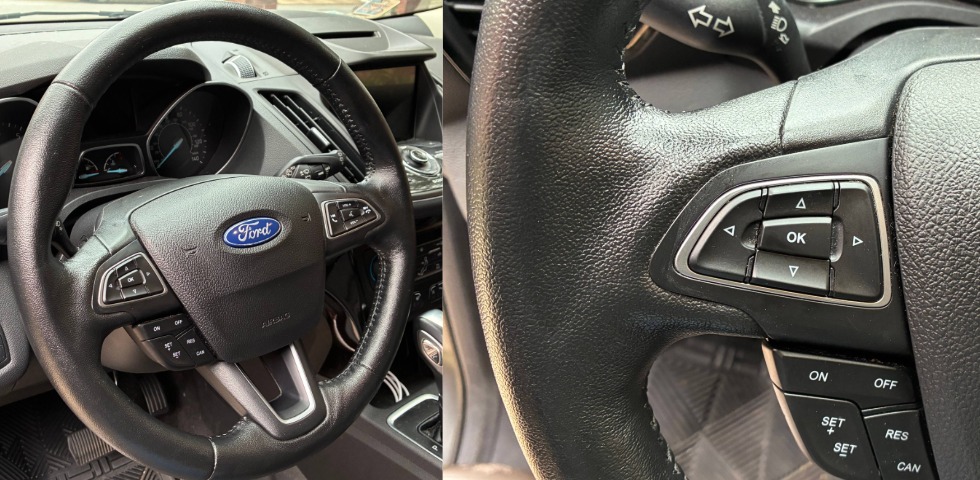
This step is the biggest transformation. The dye fills and hides worn white areas and restores the original tone of the black steering wheel. Don’t rush, thin layers with drying after each step allow for a professional looking finish.

Step 5 – Dye & Friction Blocker
Per Geist directions, a day later apply the Dye & Friction Blocker to increase durability and resistance of the repaired area. This final coat helps protect the repair and reduces premature wear.
Tip: If you are using a hair dryer, finish drying the steering wheel, wait an hour and apply a thin layer of the Dye & Friction Blocker. Follow up with 1-2 more layers the next day for added durability.

Final Thoughts
The sanding pad, the dye, and the hair dryer are the three steps that make the biggest visual impact. The sanding evens the surface, the Easy Colour Restorer restores color, and the hair dryer lets you build smooth, even layers.
It looks harder than it is, but with patience and thin layers you can get excellent results on a wheel that is starting to show wear!