
Italian Excellence: Ferrari 430 Scuderia Paint Correction and Detailing by AutoLavish
by Marc Harris & Jacob BunyanFerrari’s models are all over the top: beautiful yet menacing designs, unnecessary power coupled with sticky tires and superb brakes with a racing heritage that gives way to instantly track-ready automobiles. More and more often, Ferrari owners are realizing the same thing many exotic and super-car owners are finding out: while they might own a dream car, the condition of many of these cars from the factory is less than perfect. This is the story of one such vehicle’s revival to the realm of perfection in Michigan through AutoLavish.

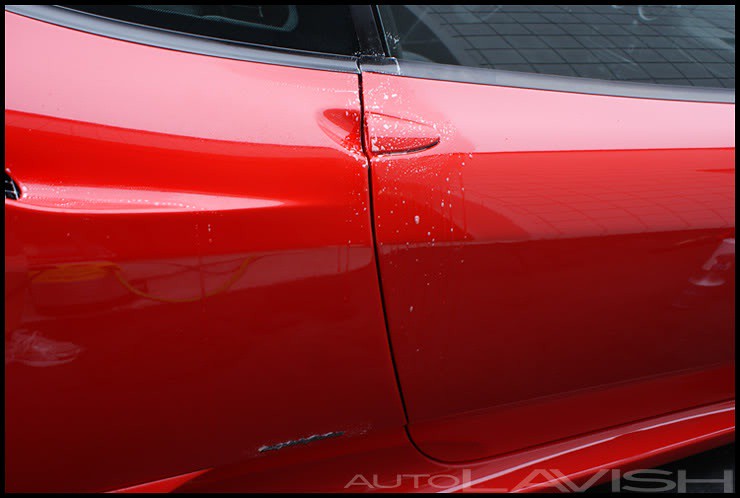
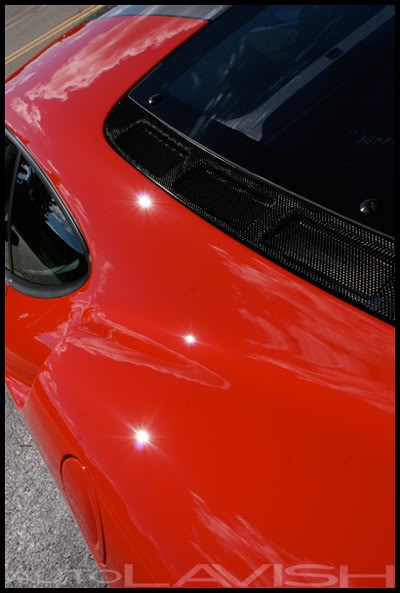
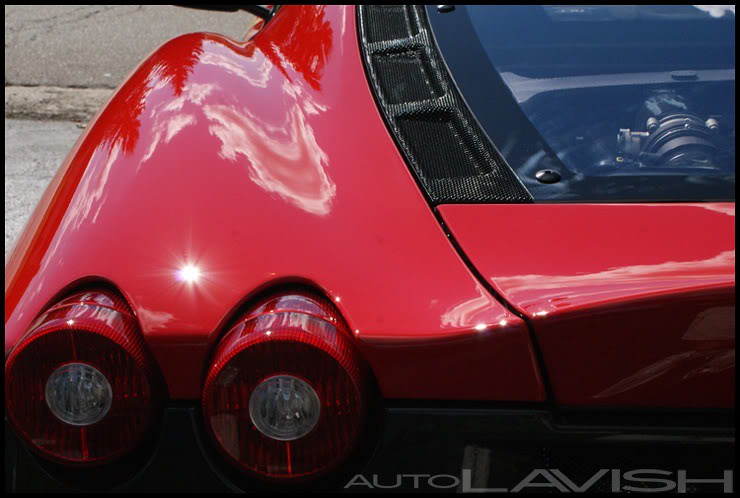
This 2009 Ferrari 430 Scuderia wearing Rosso Corsa PPG paint just might be one of the most beautiful modern exotics, but she came to her owner in less than stellar condition:
Evidence of DA sanding gone wrong…
Buffer trails…
Swirls…
Scuffs…
Random Isolated Deep Scratches…
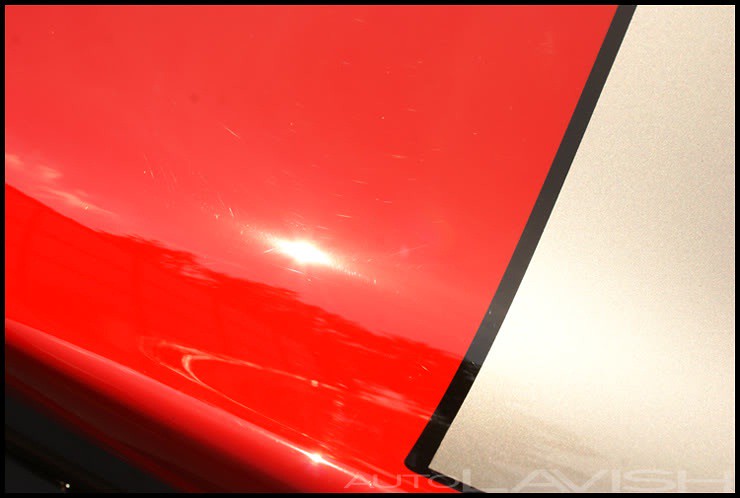
Wax / polish residue…
…And even a section plagued of orange peel that appears to have been looked over and forgotten by the post-paint workers at the factory in Italy:
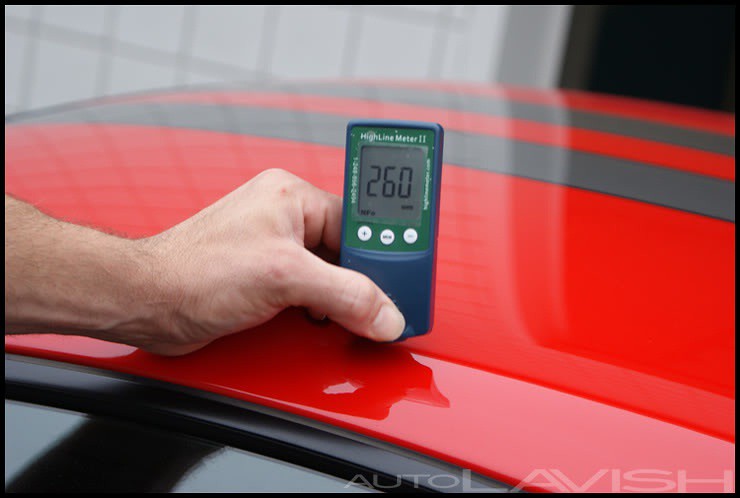
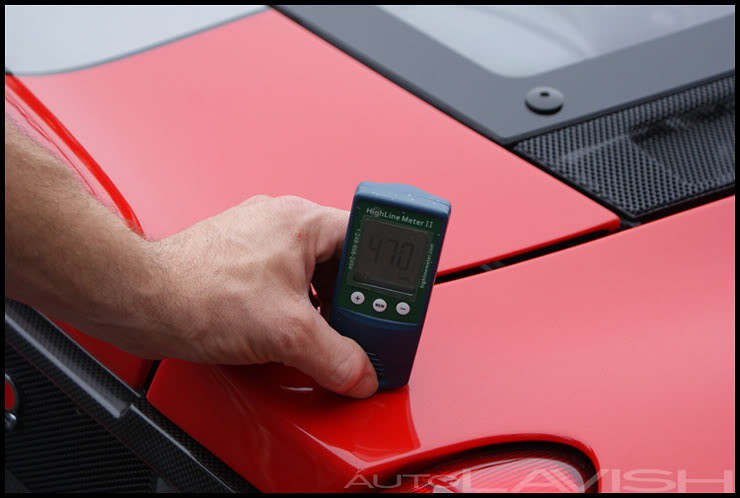
All of this on a car with a very uneven paint job as noted by some of our thickness measurements:
Luckily the owner made the wise choice of choosing AutoLavish to properly fix these issues. We began the project in the same way we always do: a thorough detox and cleaning of the exterior.
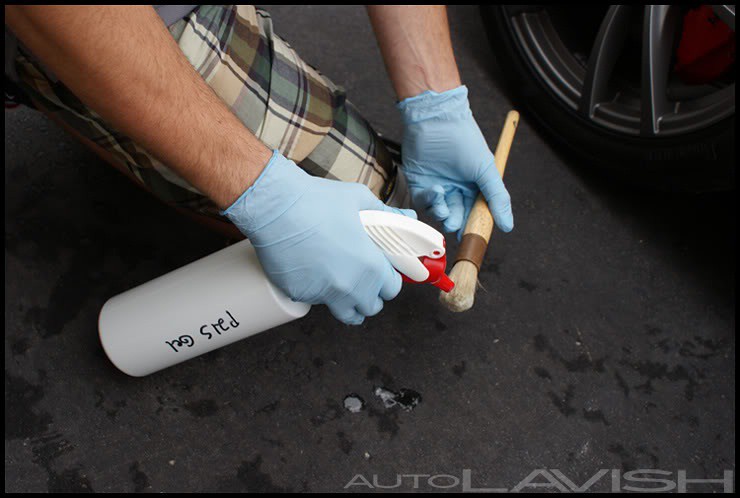
The lightweight wheels needed to be carefully cared for: no cleaners are to be used on carbon ceramic brakes as they can absorb chemicals and be damaged. No owner should spend the $5k+ per rotor to fix a detailer’s mistake, and it is just another reason that spending good money on a quality detailer can save you money.
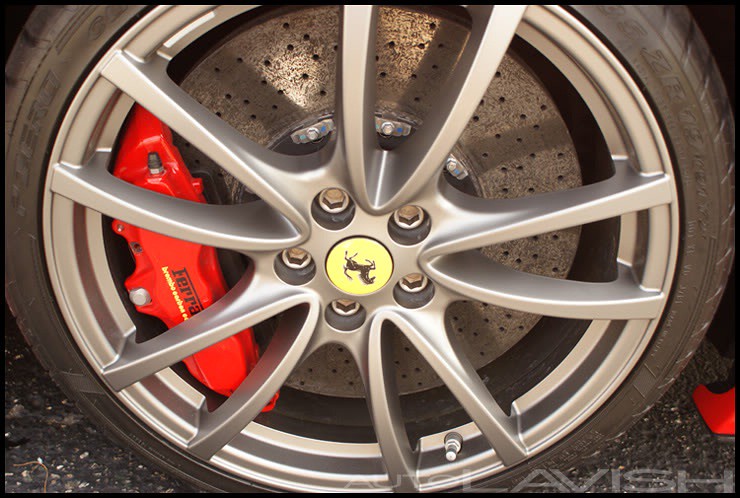
While the carbon brakes are known for their tremendous stopping power as well as how clean they are (no dusting!), we wanted to make sure the wheels would have any dirt, residue, or grime removed properly. We therefore applied P21S Wheel Cleaner Gel to a soft brush:
Then used the brush carefully on areas like around the lugs and on the wheel faces:
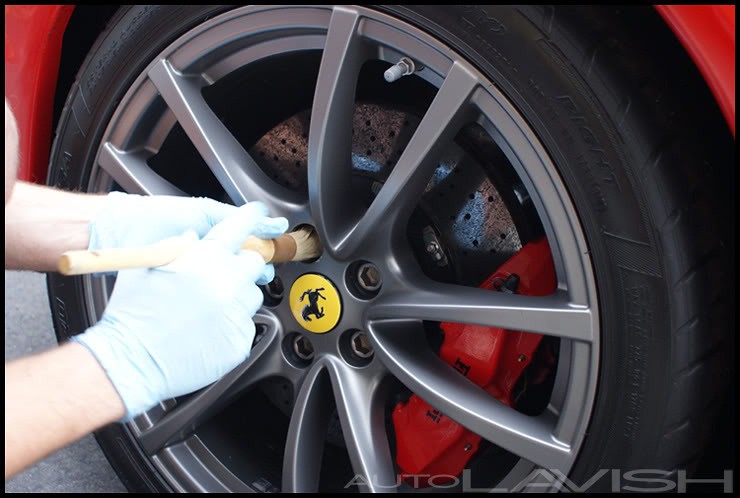
As well as the large brake calipers:
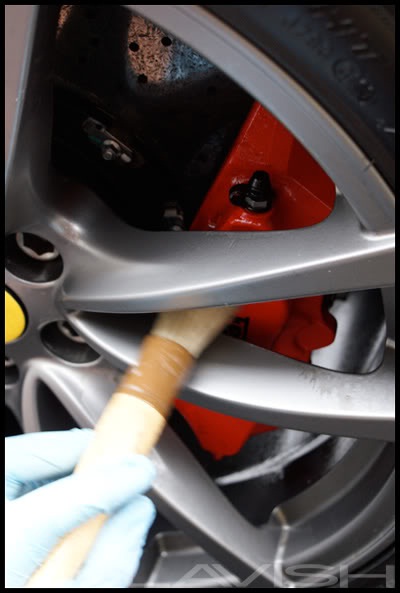
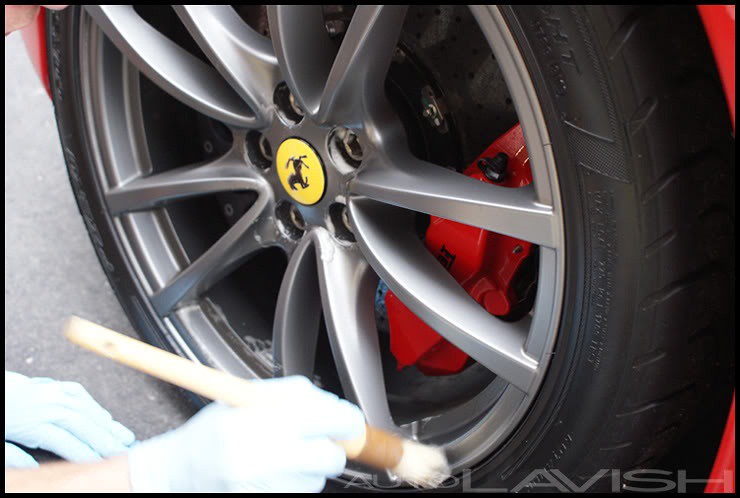
For the inside of the wheels, P21S Wheel Cleaner Gel was applied to the bottom side of our EZ Detail Brush:

And then used on the inside of the wheels as to avoid having the cleaner applied to the rotor:
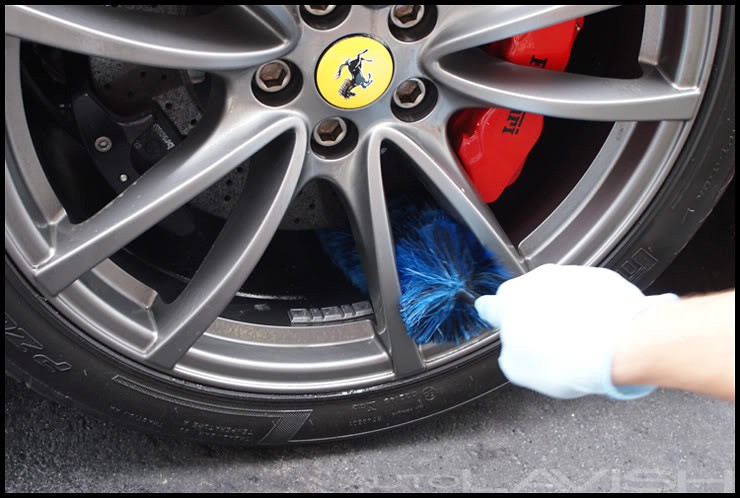
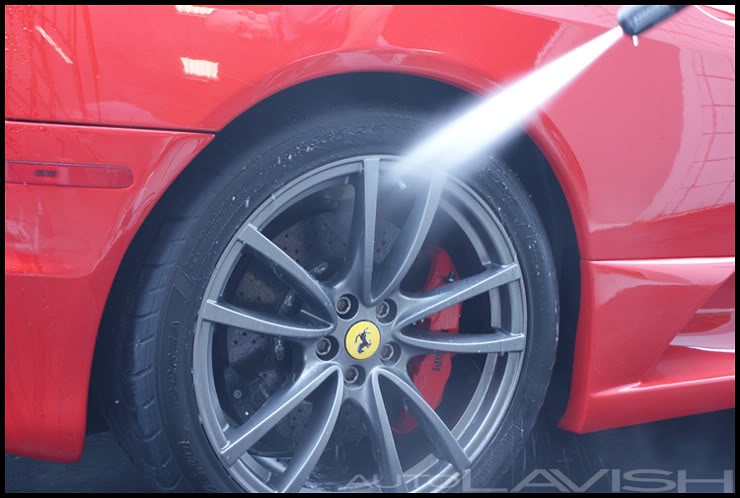
Once finished, the wheel was thoroughly flushed with water from our pressure washer.
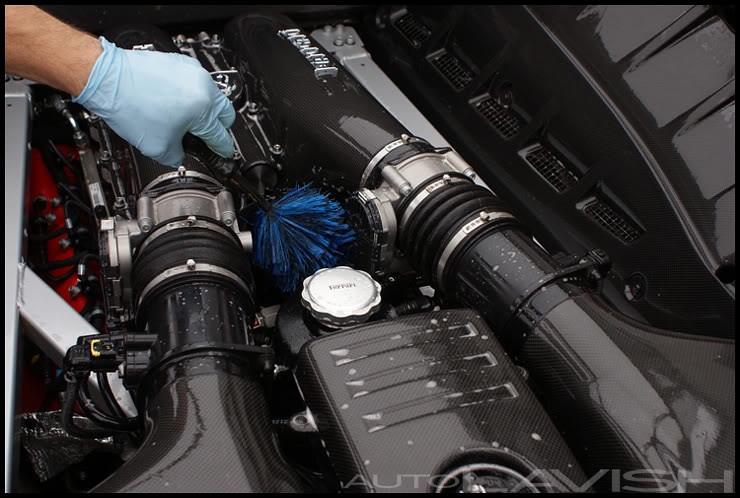
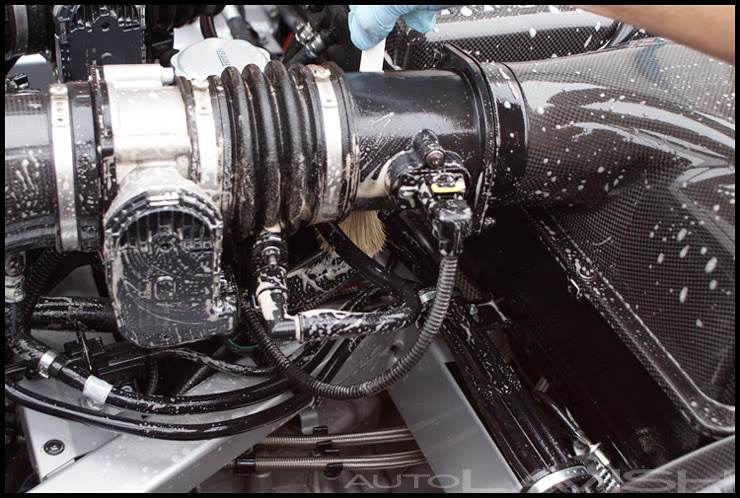
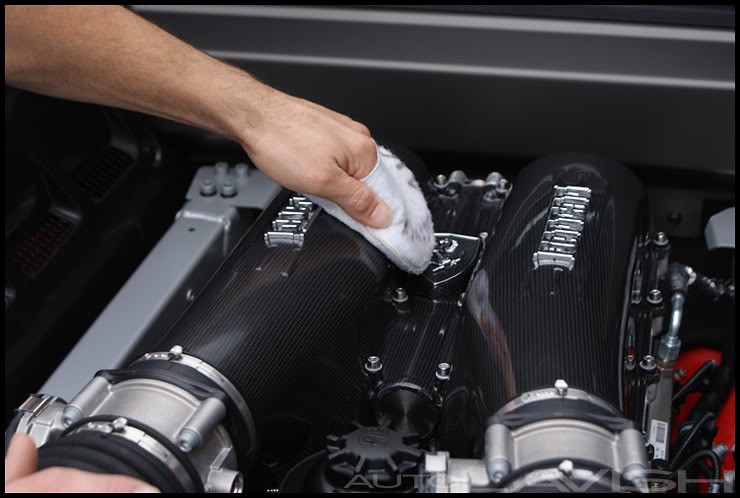
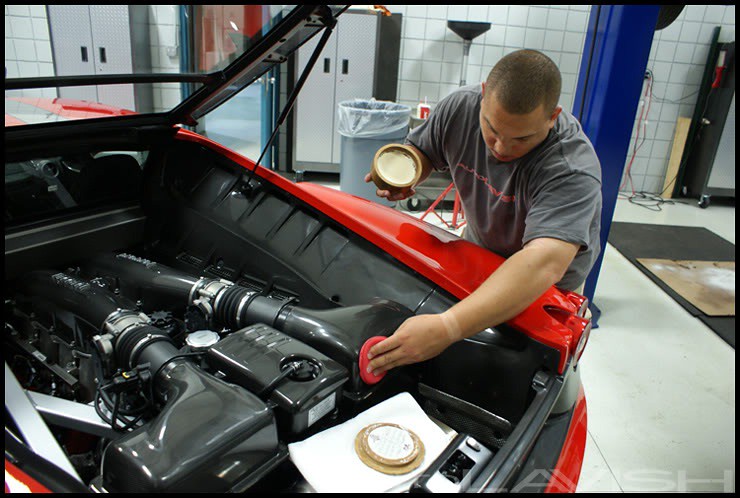
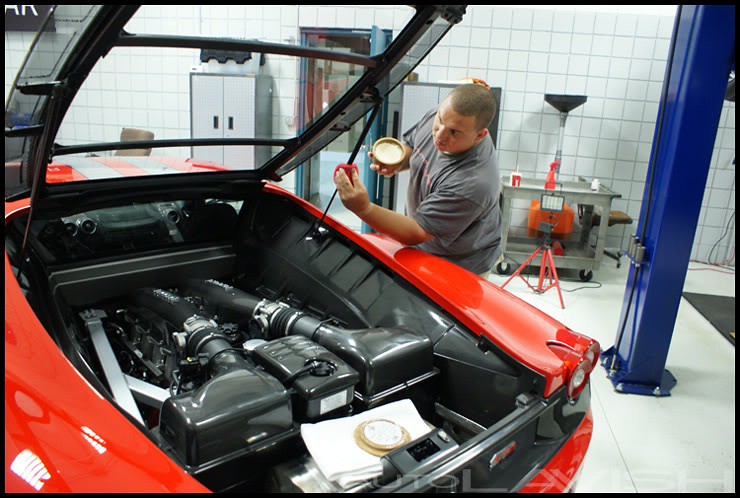
As I continued to work on the wheels, Jacob turned his attention to the engine bay which was only lightly dirty. Cleaning was completed using P21S Total Auto Wash with a boar’s hair brush on larger surfaces and a separate EZ Detail Brush to get between hard to reach areas and further down where hands don’t easily fit.
P21S Total Auto Wash was also used to clean up the old residue around the door handles, mirrors, inside door jams, and other areas that needed some pre-washing treatment.

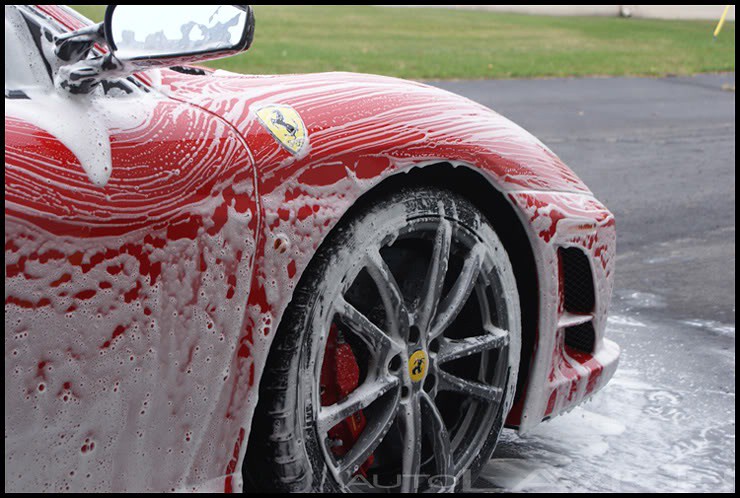
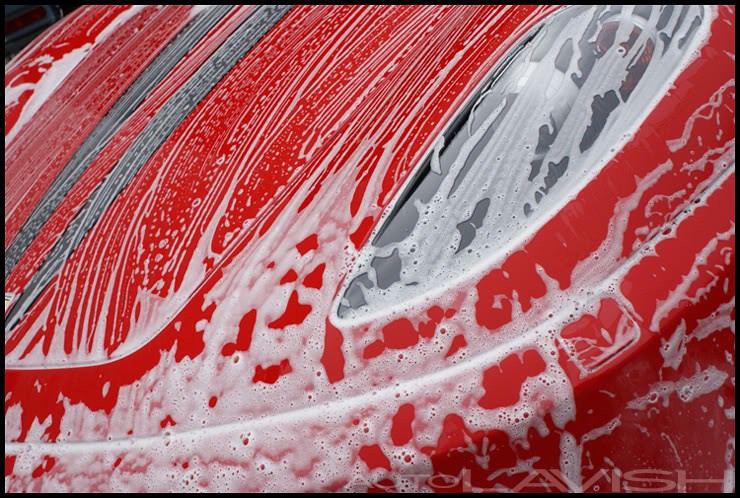
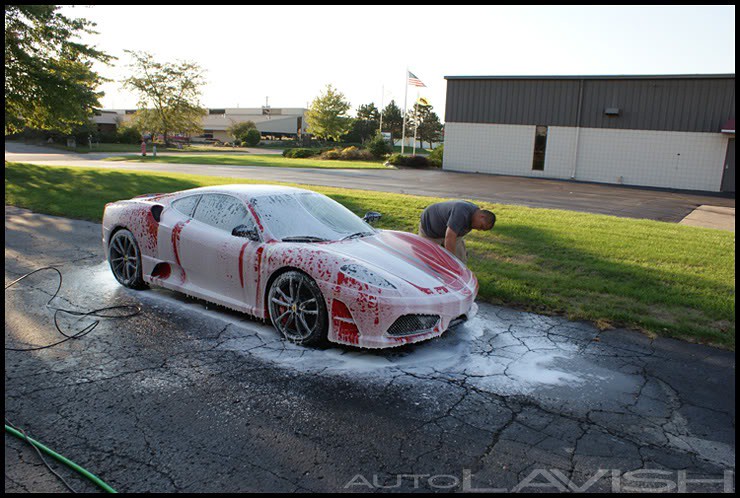
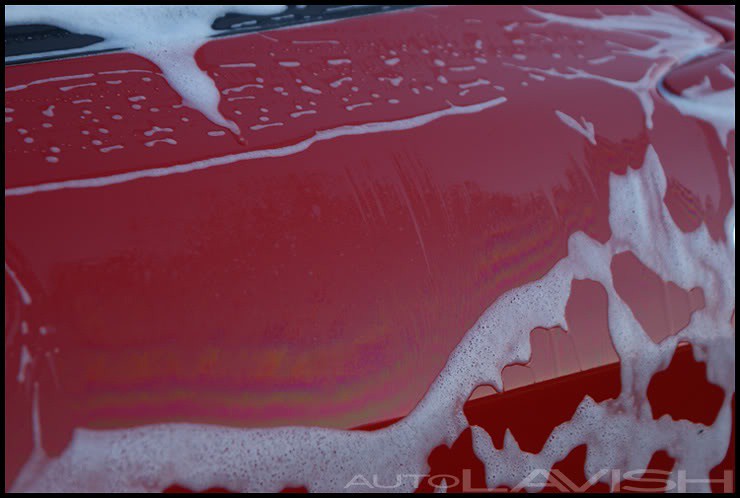
Following the pre-wash cleaning, the Ferrari was foamed down with Chemical Guy’s Citrus Wash to loosen grime prior to being touched.
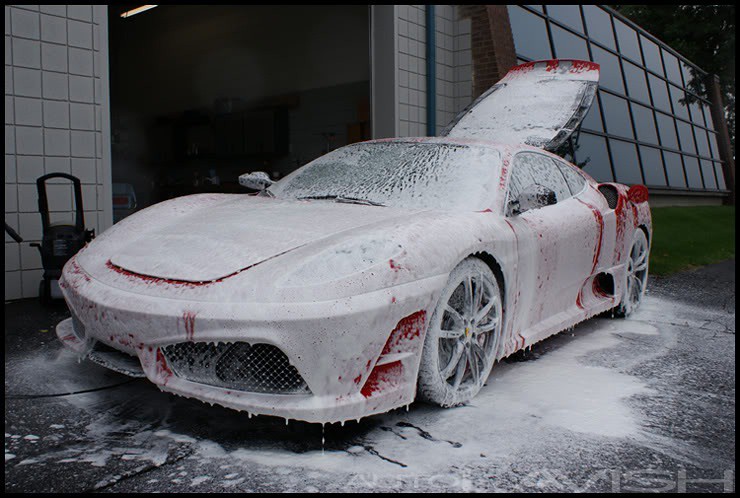
The soapy solution was allowed to dwell for several minutes to all exterior surfaces. While it helps to loosen up dirt and grime, it also helps to remove old wax or sealant residue leaving a sterile surface to polish.
After being rinsed, the vehicle was re-foamed in order to be properly washed. As always; work from the top of the vehicle down!
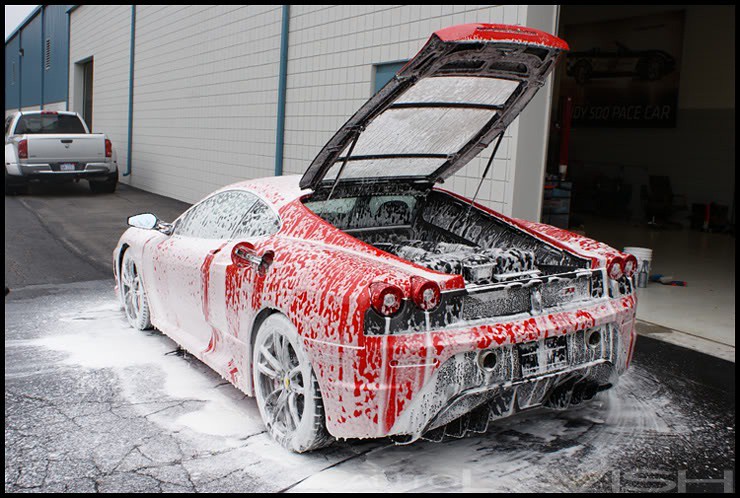
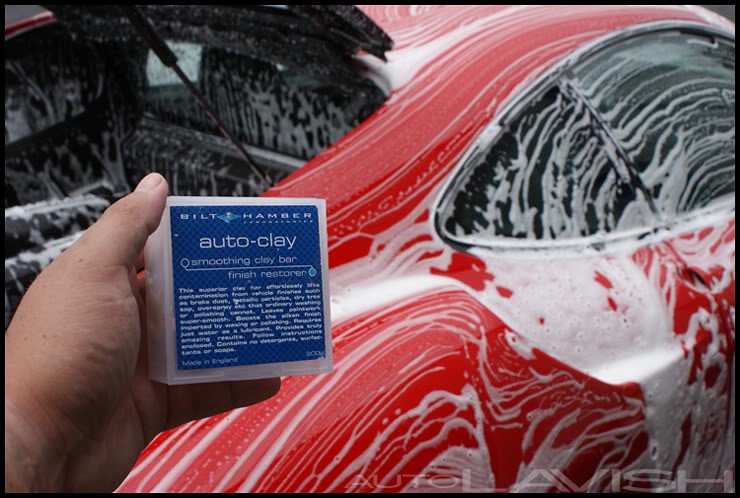
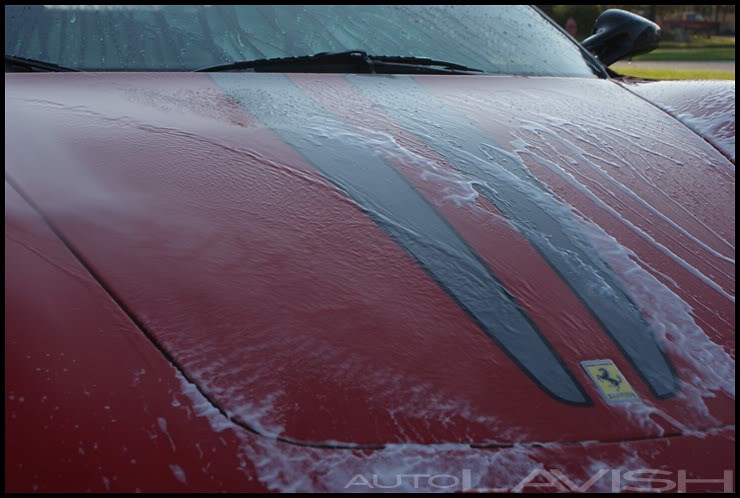
With washing out of the way, we again foamed the vehicle (yes, that’s a lot of foaming) to use the suds as a clay lubricant. Claying was done with a clay that’s not yet available in the US that we had shipped from the United Kingdom (we’re always testing new products and importing things not yet available to North America), but any mild clay can be used on a vehicle that is not heavily contaminated like this 430 Scud.
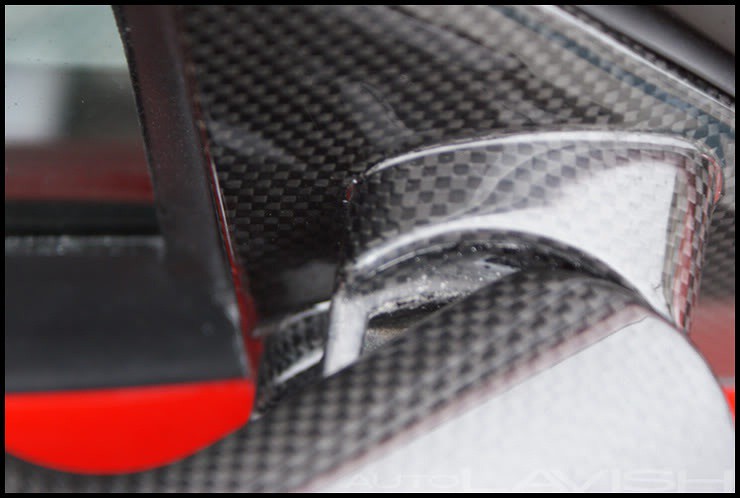
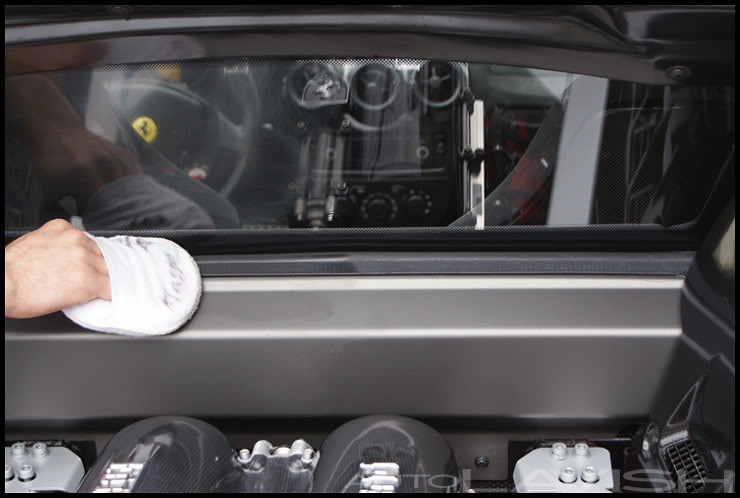
After being rinsed, we sought to bring additional clarity to the carbon fiber trimmings while better cleaning some metal pieces in the engine bay by using Klasse All In One on a Terry Cloth Applicator. Other areas that appeared to be in better shape (many of the interior components) would receive Klasse All In One on a standard foam applicator pad.
On the cross member support below the rear window:
On the electronic throttle body housing (notice the left side looking perfect and the yet-to-be-treated right side showing some oxidation):

Apply Klasse All In One on the engine’s driver side plenum (which distributes air into each runner):
The following picture shows the nice subtle difference that “KAIO” was able to make; notice the near side plenum’s carbine fiber weave shows much better than the far side plenum.
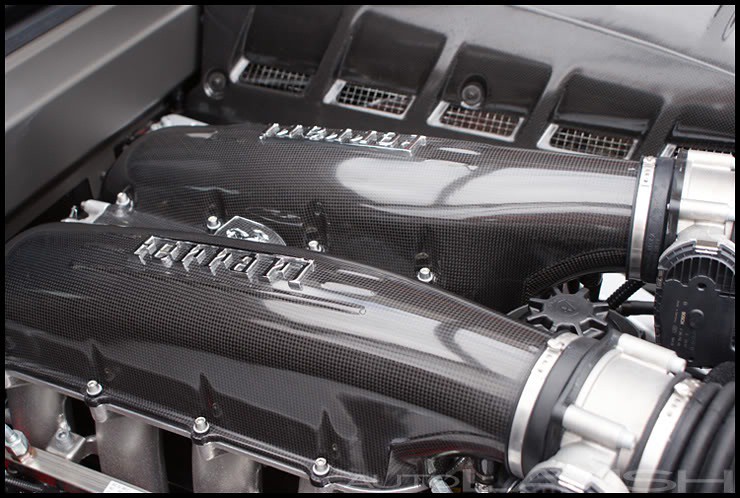
Afterwards, the engine bay looked outstanding as evident when looking at the airboxes:

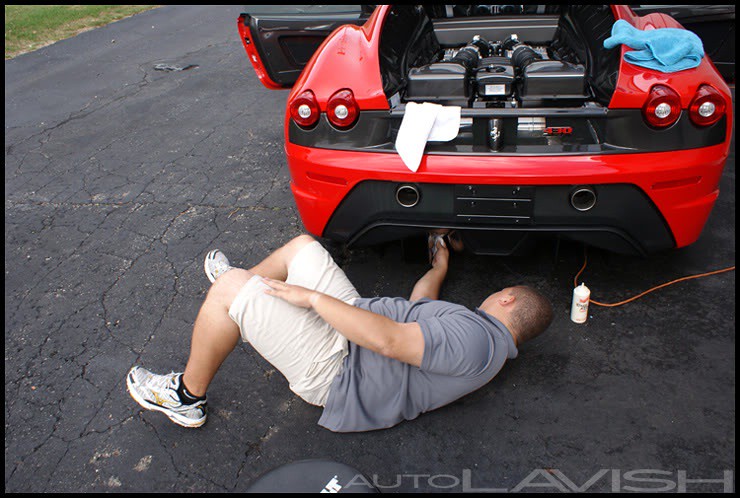
Even the vehicle’s rear carbon fiber underbody diffuser was properly treated.
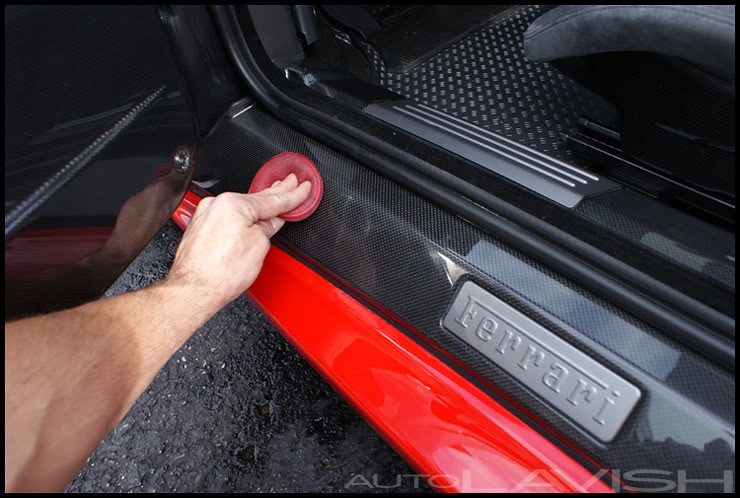
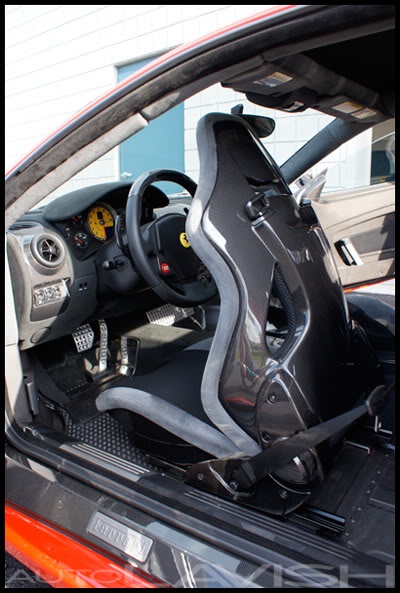
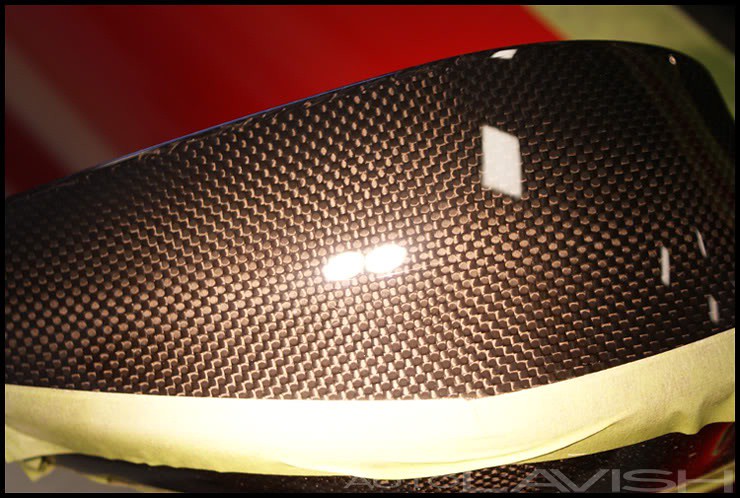
Carbon fiber is everywhere on a 430 Scuderia as the lightweight material is used throughout the interior in order to take ounces off the vehicle’s final weight. All these surfaces would be carefully cared for and renewed with Klasse All In One as well despite the Ferrari having less than 1,000 total miles traveled.
Carbon fiber door sills and carbon fiber door panels:
The carbon fiber center console:
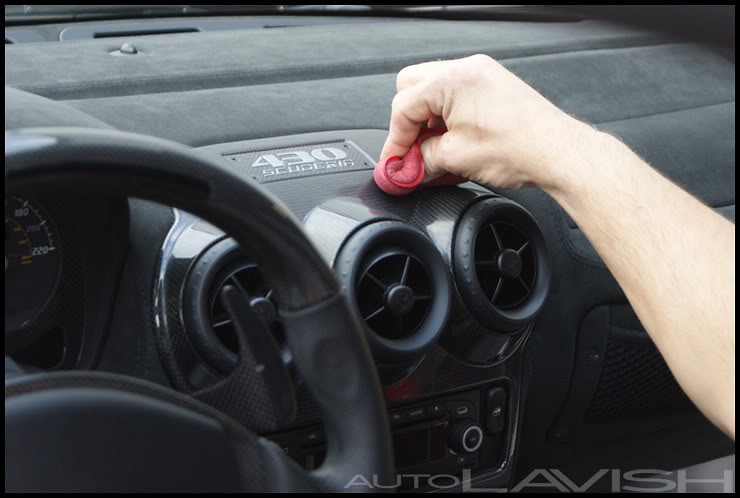
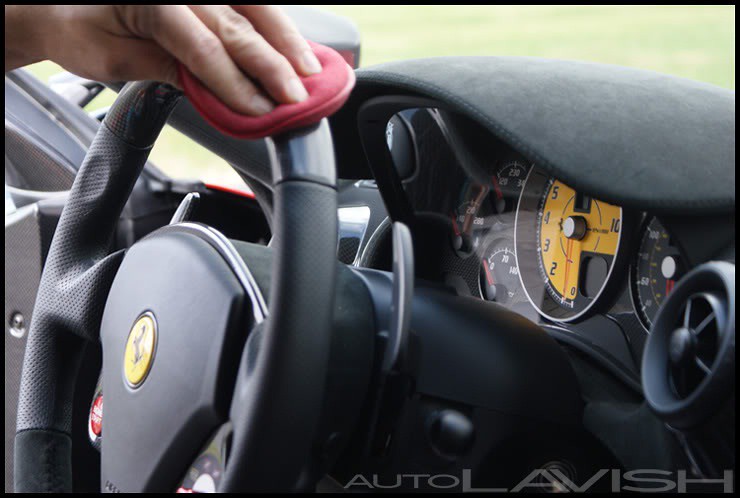
The carbon fiber trim on the steering wheel:
Even the rear window would be coated to help it stay clean longer while making future cleaning easier when it does need attention:

Finished with the interior carbon fiber treatment, the seat backs seemed to glow in their newly found clarity:
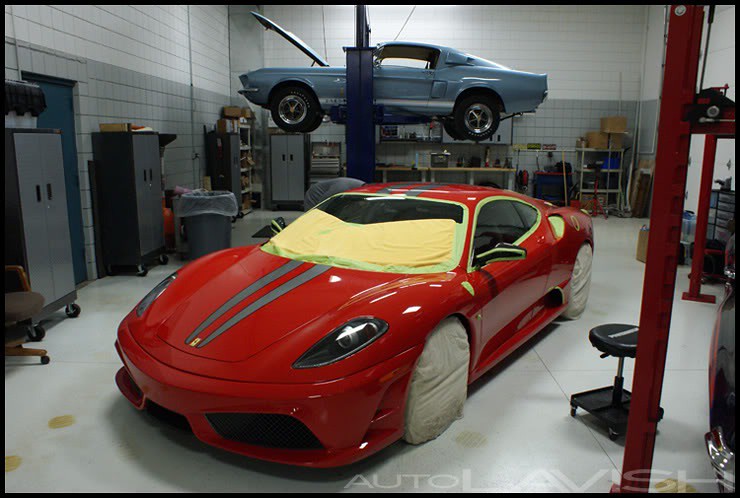
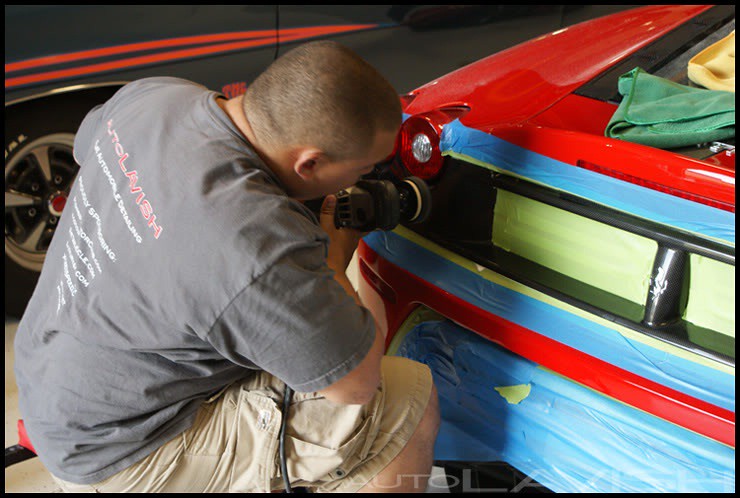
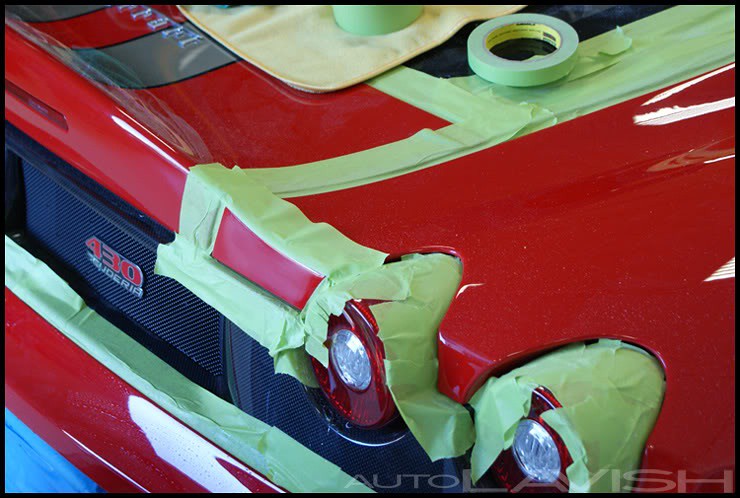
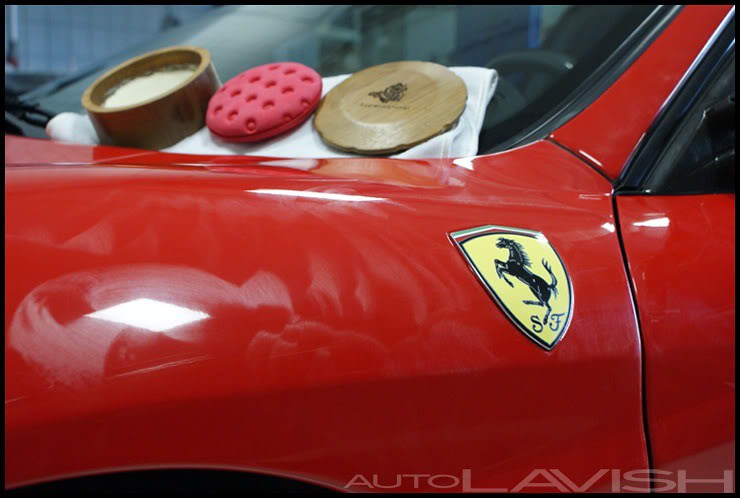
Clean and decontaminated, potentially sensitive areas would be taped off, masked off, and marked, to include covering the wheels from contamination from polishing:
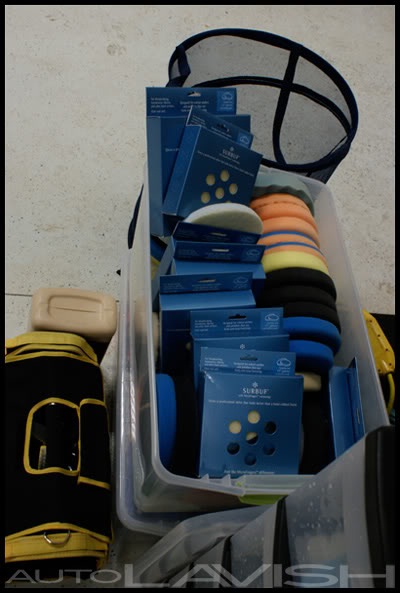
Some of the heavy artillery we brought to assist in the heavy polishing stages (we love our Surbuf pads!):
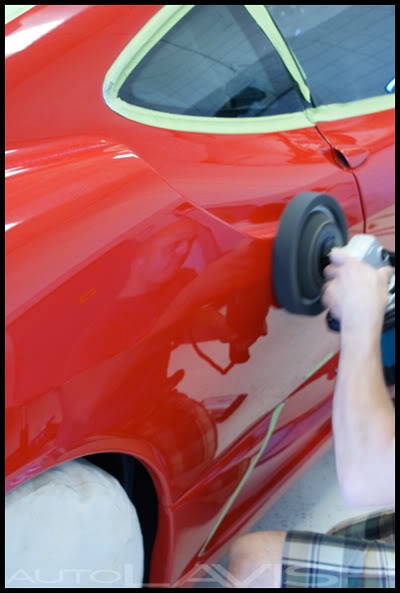
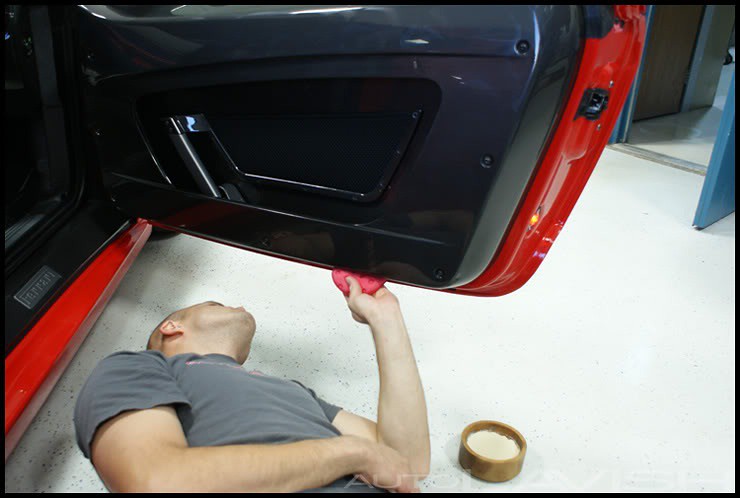
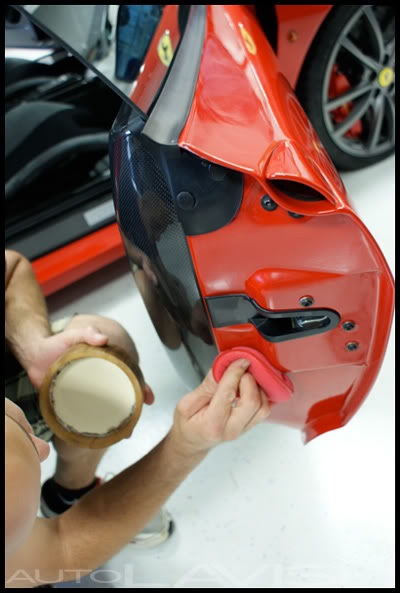
Properly prepped for paint correction, Jacob and I began transforming the less-than-perfect clear-coat into automotive perfection through hours of careful polishing. Major body panels, the rear carbon fiber grill, lower side panels, and all those small hard to reach areas would all be massaged to perfection.


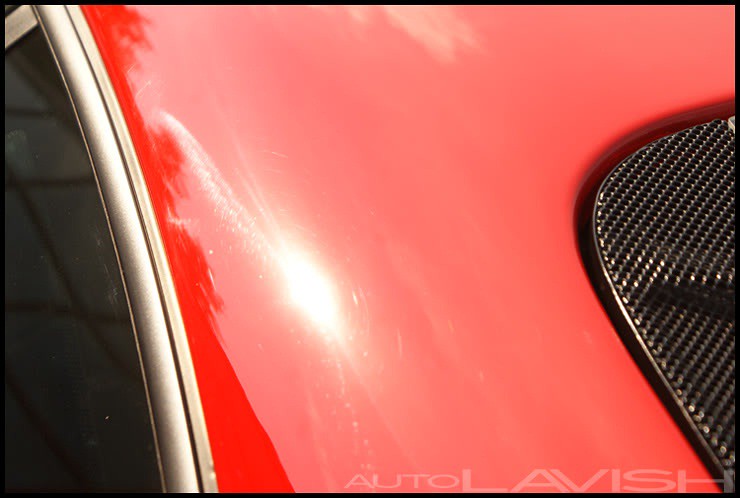
Hazed areas had clarity and gloss properly releveled (50/50):
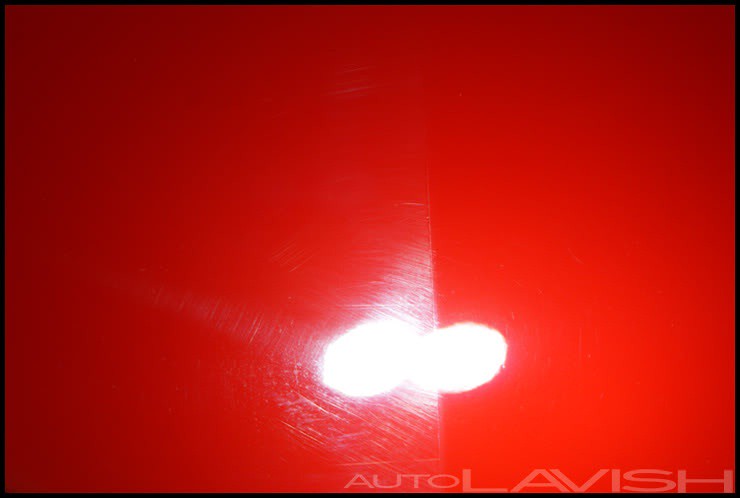
The sanding marks on the passanger side rear fender? Those would be carefully and precisely removed (50/50):


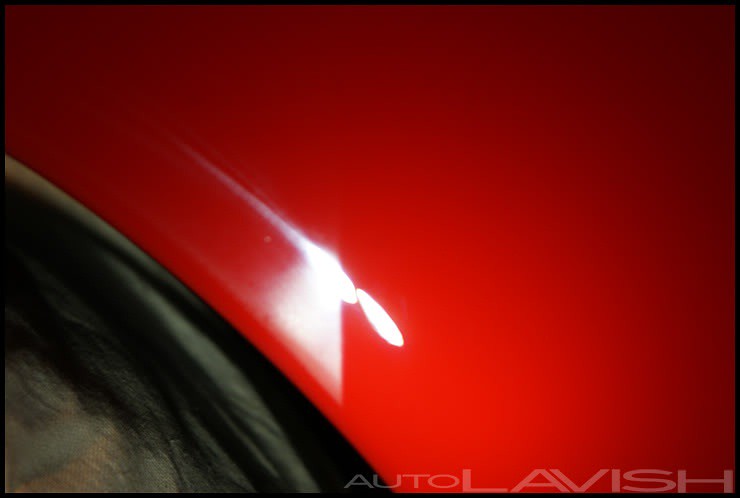
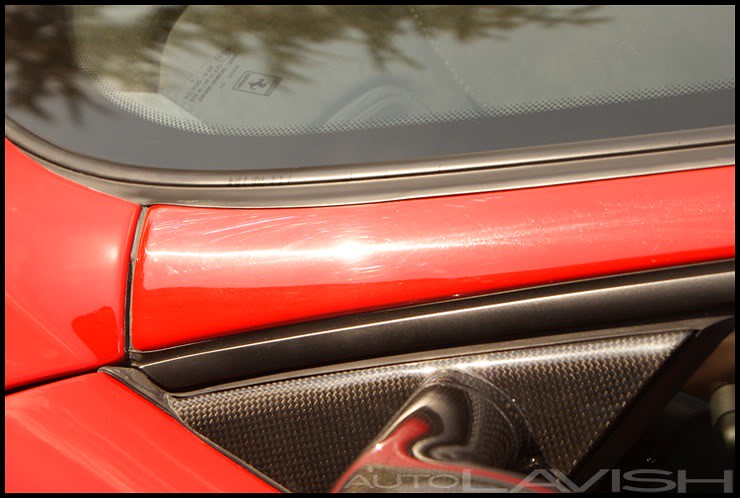
Swirls on the A-pillars?
Permanently removed (50/50):
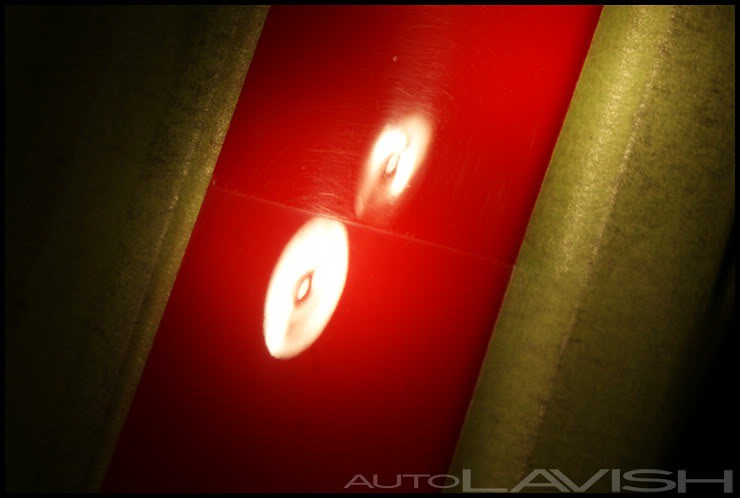
The PPG paint under a Brinkmann Dual LED light after the initial correction stage (more clarity would come from the next two steps):

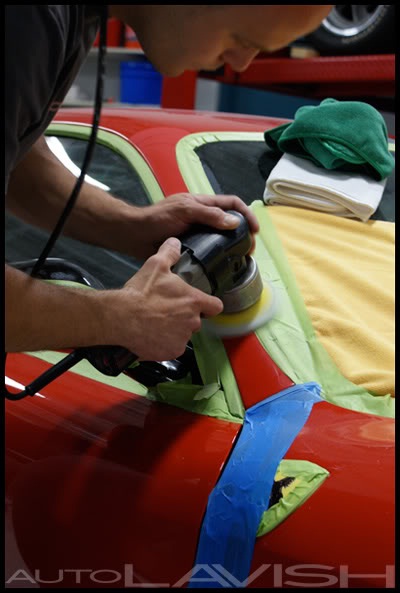
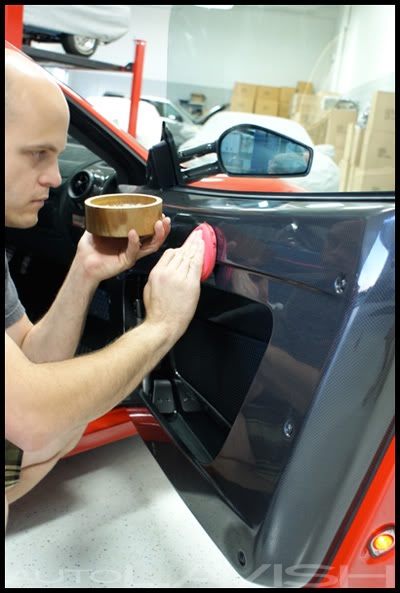
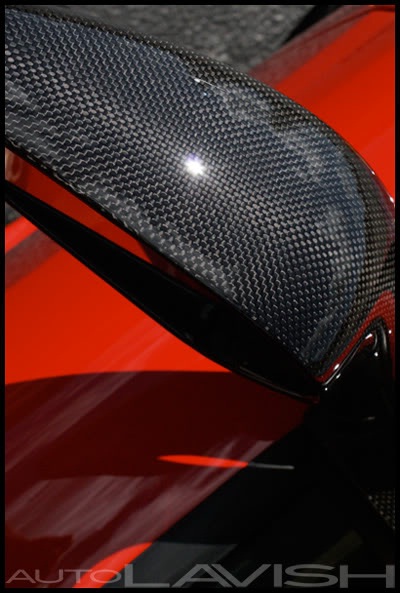
Even the carbon fiber mirrors were coming back nicely as Jacob worked them with a small Surbuf pad and Meguiar’s 105.
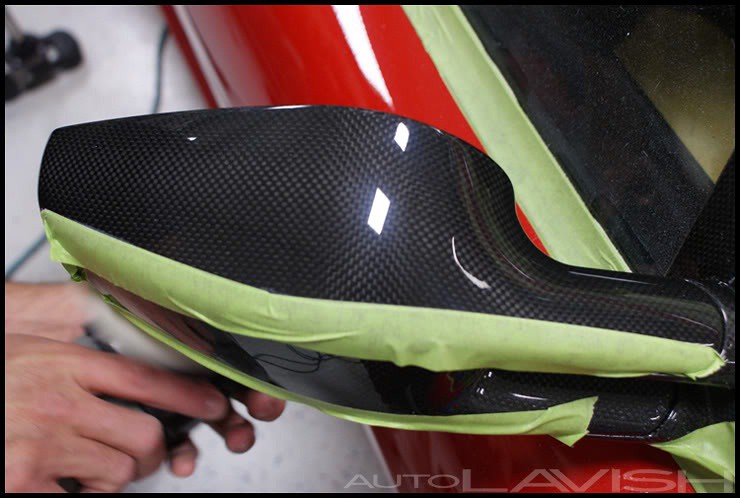
After additional refining, they looked perfect:
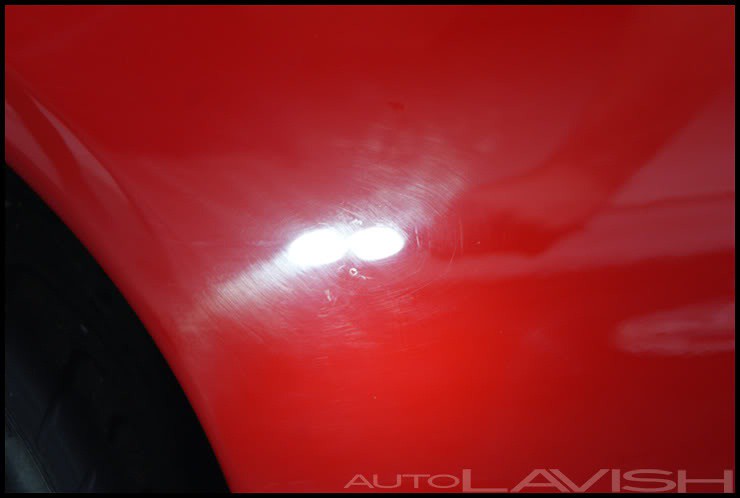
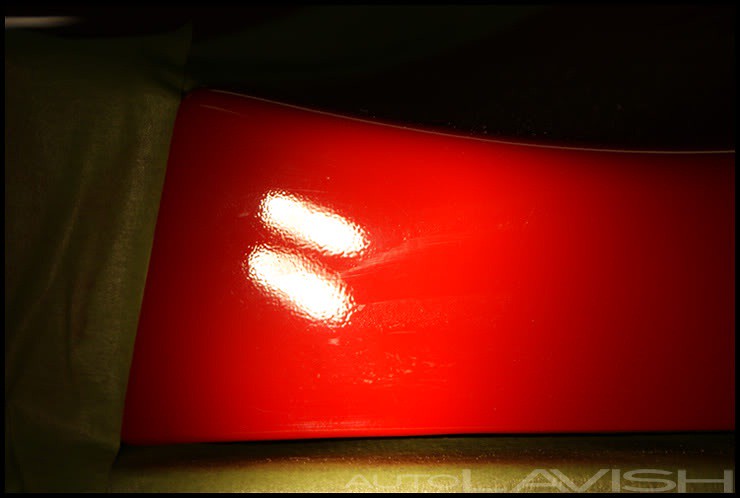
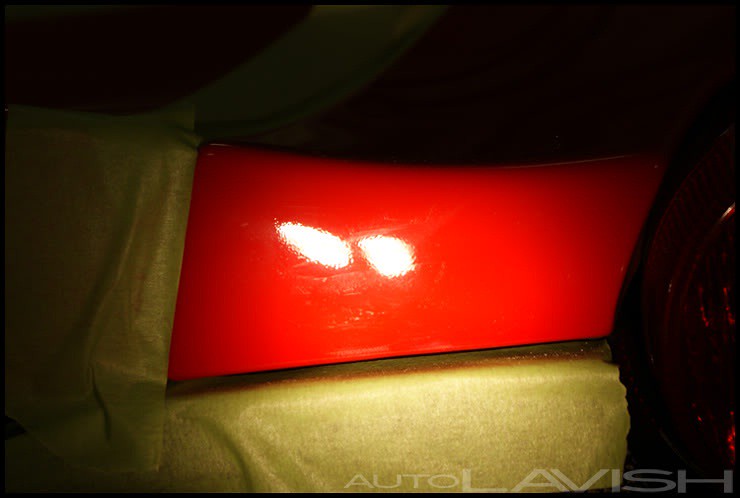
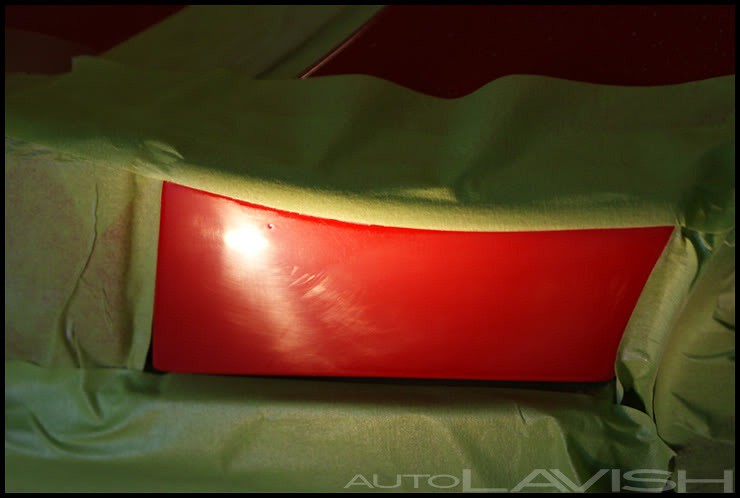
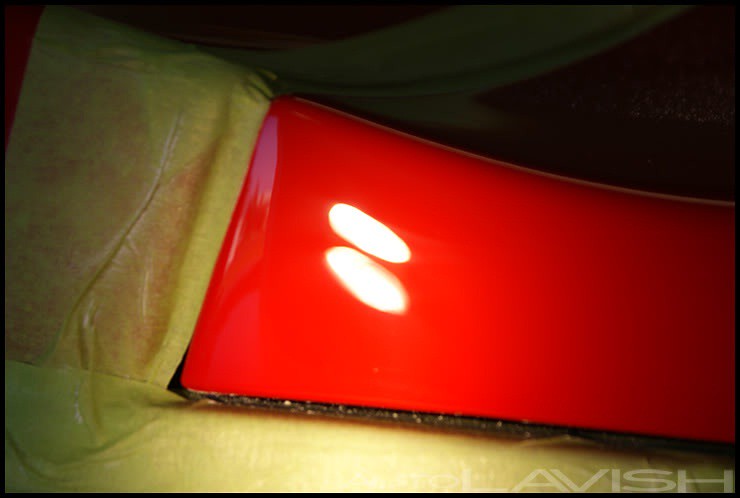
A major problem area of the vehicle was a rear-facing section of paint between the tail-lights on the passenger side of the vehicle. It seems some forgetful workers in Italy forgot to attend to the area after it was painted. The area had an unusually high amount of orange peel and was extremely hazy.
Under the Brinkmann Dual Xenon, you can see the unusual amount of texture in the paint:
Sanding the area allowed us to “shave” away the extra texture:
Unfortunately, the sanding block couldn’t appropriately get near the edges of this section. The following photo shows the lack of sanding at the edges:
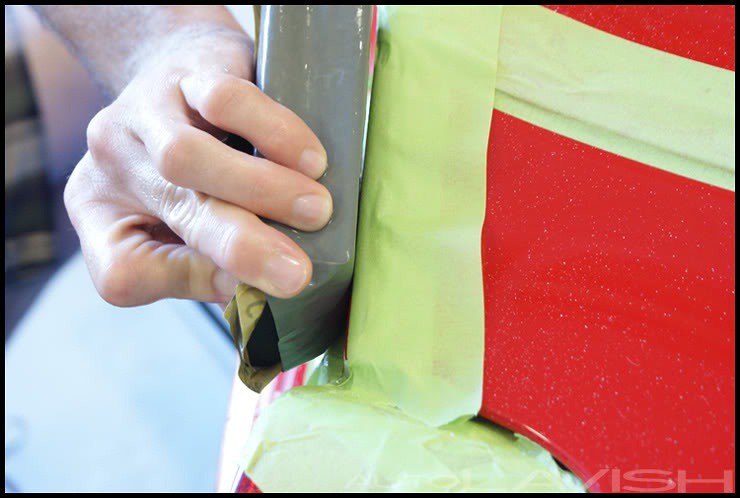
To combat this small imperfection, the paint closer to the edges would need to be done by hand: something that requires extreme patience, time, a steady hand, and an artist’s touch. Luckily Jacob and I are a pair of lefties that like to channel the spirit of fellow lefty Michelangelo in the work we do:

Finally leveled, there was a much more uniform haze to the small section that could now be properly polished.
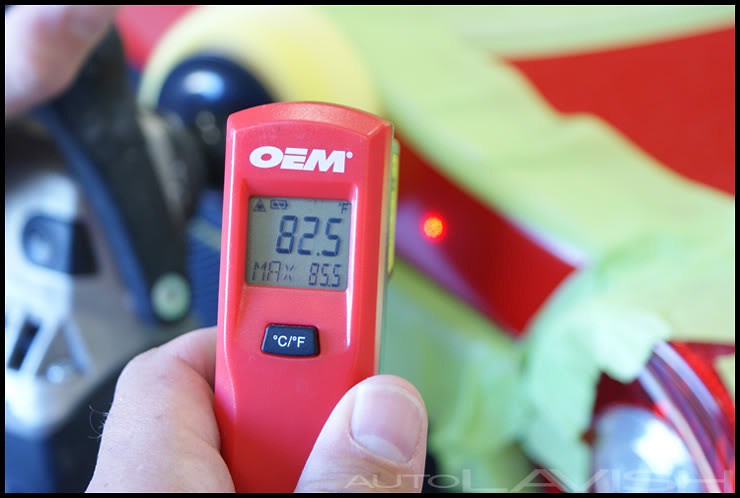
The two-man advantage: on small delicate areas like this, one man can work while the other monitors the temperature to insure the complete safety of the vehicle being worked on:
Finished, the area now matched the rest of the beautiful vehicle’s finish. Before we show you the result, let us remind you of what the area looked like before:
And now after (prior to further refining):
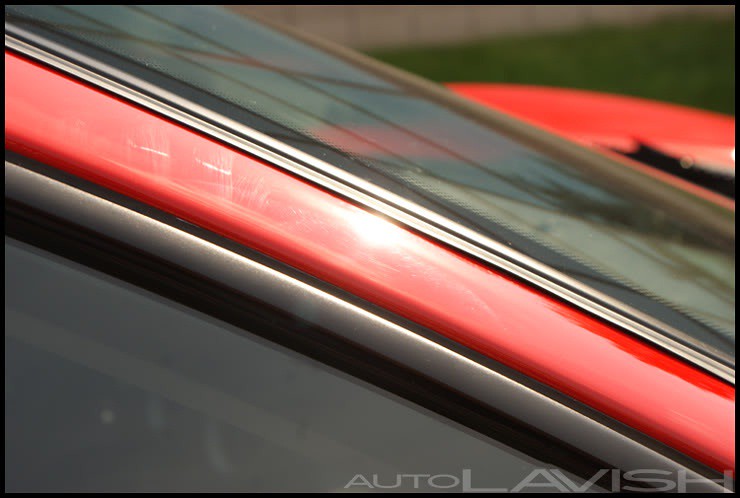
Nearly complete, Jacob inspects the roof after he refined the area with Menzerna 106fa and then moved on to refining the passenger door:

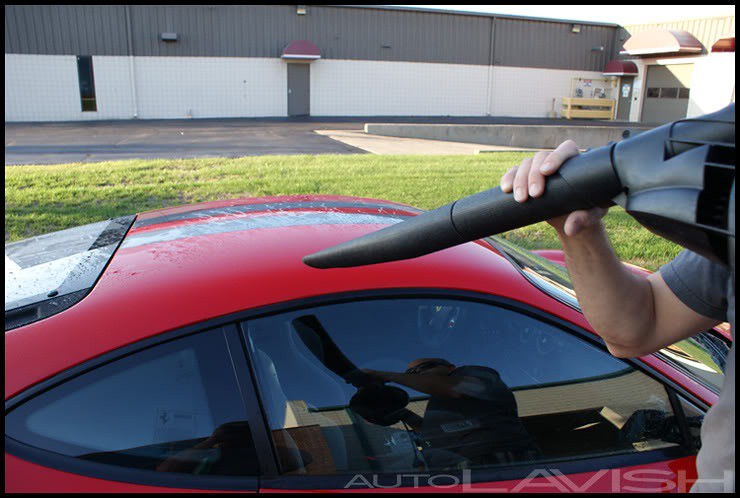
With polishing complete, there’s plenty of dust from polishing residue and clear-coat residue covering the car. In order to gently remove the particles along with any oils from the polishing process, we gave the Ferrari 430 Scud one final gentle wash.
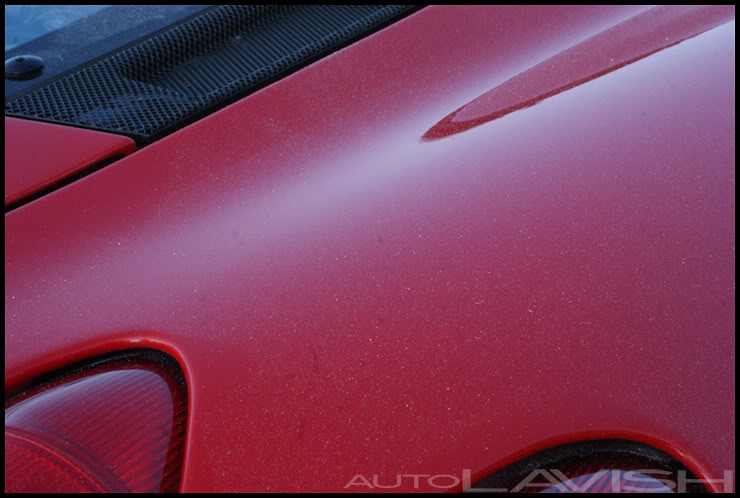
Oils and residue (rainbow colored) from polishes coming off:
One last reason for our final wash process: proof that we aren’t hiding anything. Polishing oils and residue often increase surface tension on the paint which gives water a strong beading effect. By stripping the oils from polishing, we can prove that what you see is what you get; there’s nothing on the surface that could mask or hide defects. Surface tension drops with the paint completely bare resulting in the complete absence of water beading. This means the last step product we use is going directly onto the paint.
Using a blower means we get more water out of cracks and crevices while physically touching the vehicle less. Anything we can do to mitigate risk of scratches, swirls, and marring is done without hesitation: that’s part of what you can expect when you choose to do business with high-end professional detailers like those you’ll find here on the Ask-A-Pro blog.
Before we even finished, we already knew what we were going to use to protect the now perfect paint: Dodo Juice Supernatural carnauba wax.
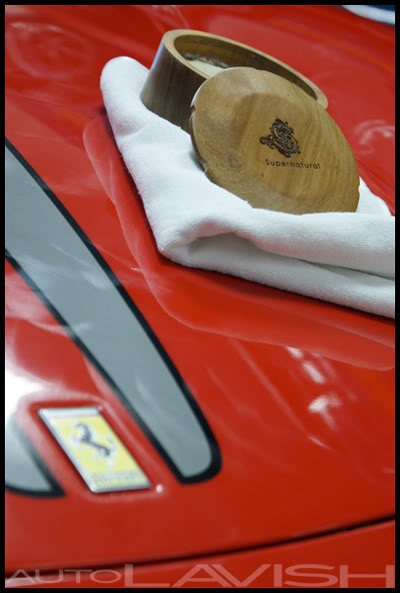
This is a product designed to be the absolute best wax possible for an automobile: no added color, no added fragrance, no unnecessary ingredients: simply pure and uncompromising gloss, clarity, and protection.
Supernatural would be used extensively throughout the vehicle to help protect the finish of all painted and carbon fiber pieces.
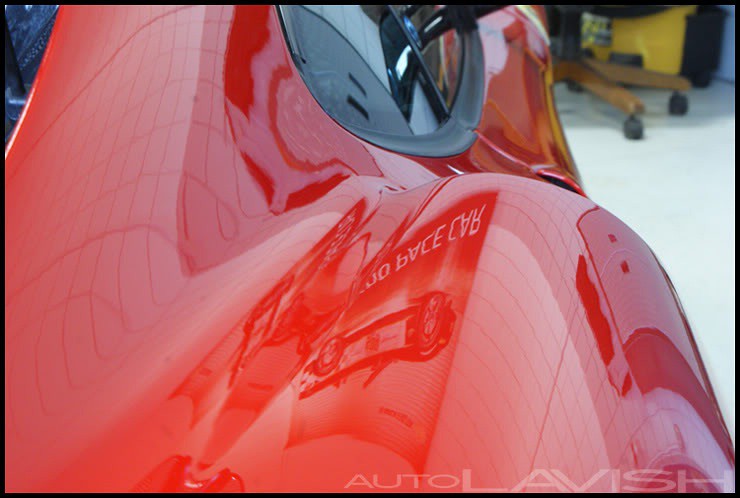
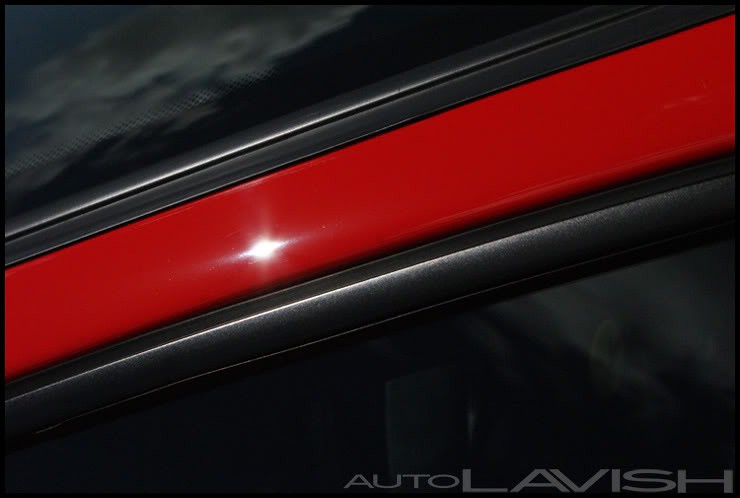
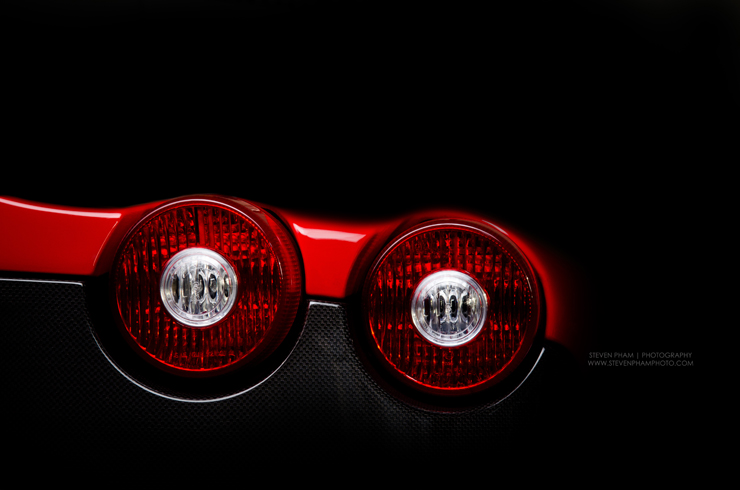
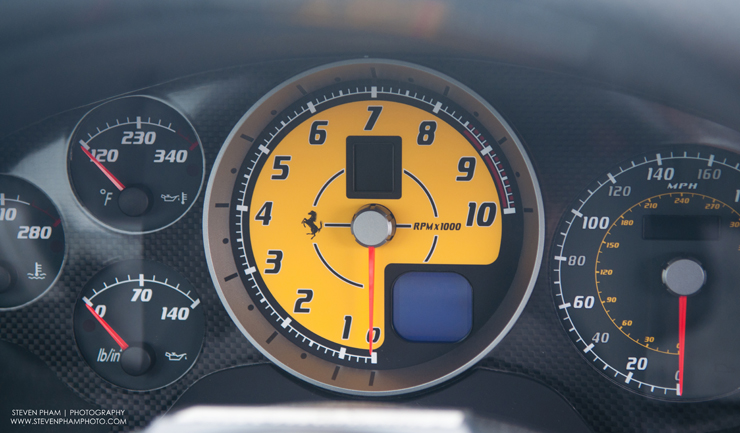
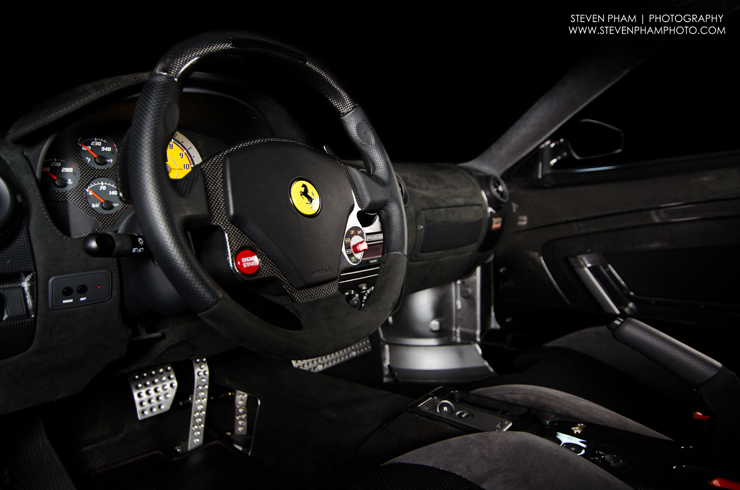
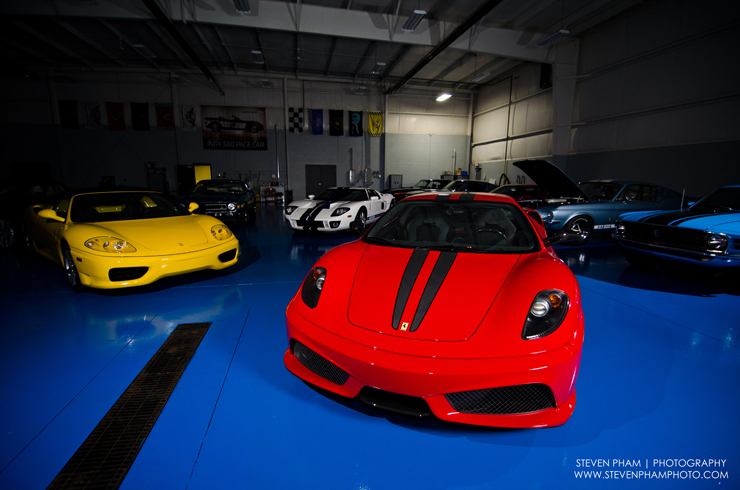
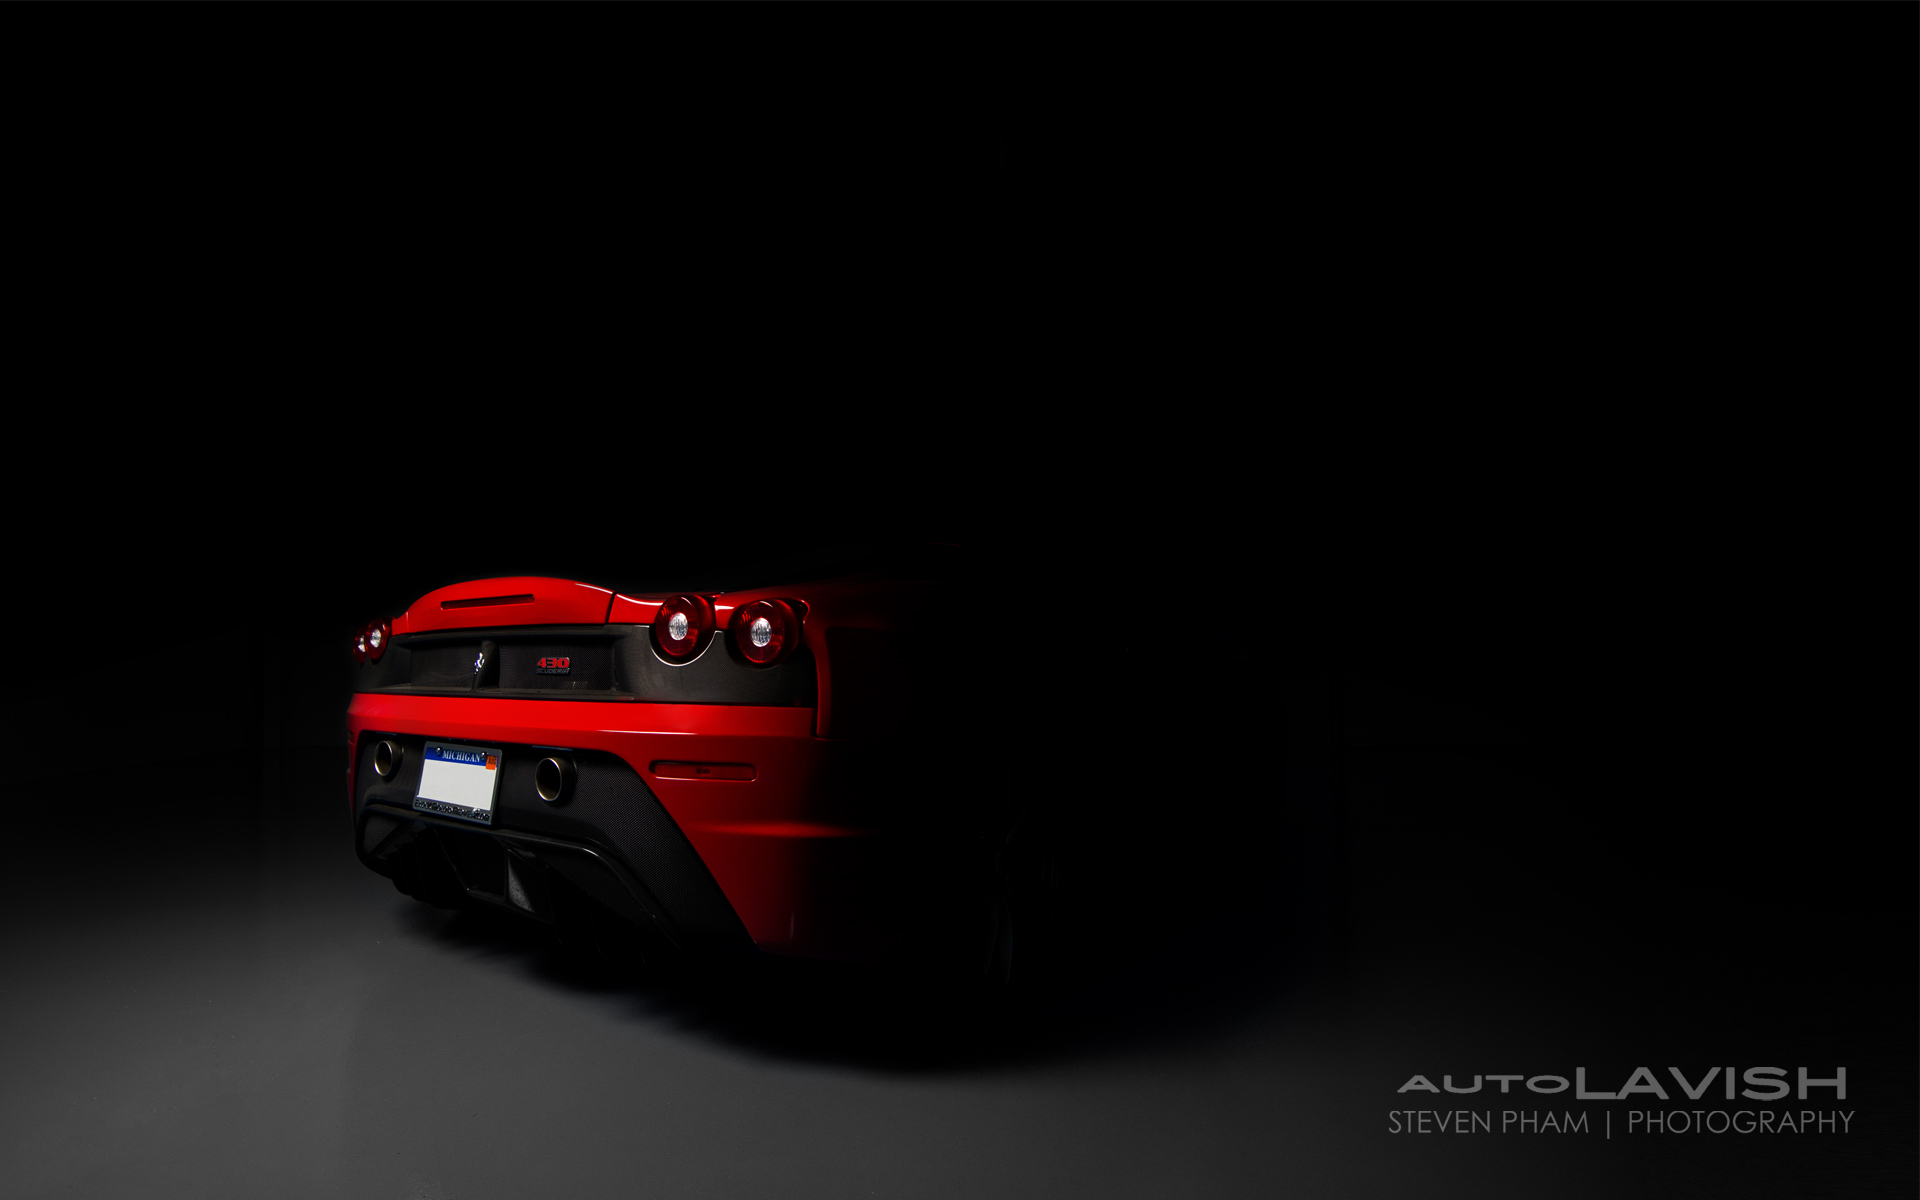
Our afters. Please keep in mind that all of our pictures are straight out of the camera and unedited aside from resized with a boarder and watermark. No funny business here: just pics straight from our Sony A200 DSLR. The hours and hours we pour into our work is the way we’re able to achieve what we like to call “photoshopped in real life results.”


Pulled back in, we gave a final gentle wipe to any area of need and tucked the beauty away for her photo shoot with Steven Pham.

Naturally the next step was to freeze the beauty of this vehicle in time. Photographer Steven Pham was brought in to work his magic. While we consider ourselves average at best, we’ve found photography to be much like detailing: if you want the best results: you have to bring in the best professionals.


Here are three high resolution desktop background wallpapers prepaired for our Ask-A-Pro audience. Simply click on one of the links to pull up the picture, then right-click on the image and choose “save as,” then use your computer’s setting to set the picture as your background!
We appreciate you taking a look and we hope you enjoyed the journey as much as we enjoyed helping to create it!
-Marc Harris & Jacob Bunyan from AutoLavish of Michigan with guest photographer Steven Pham.


Beautiful work and great documentation guys! We all know that exotics…while beautiful…require a tremendous amount of refinement to bring them to the level that they deserve. The owner has to be thrilled at the transformation you two put this beast through. Thanks for sharing!
Much appreciated Todd. You’ve certainly done a lot to shed light on the condition that many of these cars are in from the factory, and we also believe that educating owners is the most effective method to making sure those lucky enough to own them will know what to look for on theirs. It’s always rewarding to take a beautiful machine and transform it to her full glory!
That Ferrari looks very good!!
I’m going to ask you a similar question than I have to Todd and to Greg before, and it’s simply to just get the different opinions. You did I think 3 or 4 foam washes, each time I use the foam gun I use like half a bottle of soap! You get the car perfectly covered so it sits, I can not achieve anything close to that, the soap runs off before I can get it to sit, is this the setting I am using on the foam gun or the fact that I only attach the foam gun to a garden house as the water supply? How many oz of soap do you put in the container? I use like 6 oz and then mix it with water, I am not sure if this is also affecting my ability to allow the soap to sit on the car and dwell? I also tend to get a lot of soap residue left on the car is this normal? And this is another reason why I get scared to do multiple foam washes, because after the initial foam gun wash I am left with this awful soap film, which I worry more about removing with a regular wash mitt and two bucket method. It is much easier to remove previous layers of protection with the foam gun though.
Sorry for the long questions, I do not want to take away from your masterpiece, there was a lot of foam gun action so I thought it would be appropriate.
Thanks
Thank you Adam.
If you’ve already questioned Todd and Greg, you likely already have heard two great answers, but I’ll throw in my 2 cents as well.
1. You can not and will not get the type of foam we do if you’re not using a foam cannon set-up that’s made to be used with a pressure washer. A hose attachment foam gun doesn’t have the same effect.
2. A foam gun can be a very useful tool that works well as long as you’re using it correctly. Using too much shampoo, as it seems you’re doing now, will waste a lot of product and give you residue problems. Cut down your shampoo use to 3 or 4 ounces at most. That’s currently 1/2 to 2/3 what you stated you’re using.
3. Once you’ve added your shampoo, thoroughly mix the contents so that you have a good homogeneous solution. Thoroughly mixed and using less soap, you’ll likely find that the solution is more water soluble and therefor rinses off a little cleaner.
4. If you’re still getting a lot of residue, it may be you shampoo type. Leave the wash & wax products to traditional two-bucket washing and only use products like Citrus Wash & Clear or Citrus Wash in the foam gun. Shampoos like those are made to not leave any residue behind while others are meant to leave gloss enhancers.
I hope this helps and happy detailing!
Can the Gilmour Foam Gun attach to a pressure washer? That is the foam gun that I use, and I do have some Citrus Wash that I will use rather than the Citrus Wash & Gloss. Thanks for the advice I will use it the next time I take my foam gun out. Keep the articles coming!!
No the Gilmore can not attach to a pressure washer that I know of as it is specifically designed to be used with a hose. Don’t worry so much about max foam when using the Gilmore and take peace in knowing you’re still making a difference.
GL and be on the look out for more outstanding articles from the Ask-A-Pro team!
Awesome job gentlemen! I appreciate the nuanced response to the foam question, too. It’s in the seemingly small explanations where a lot of learning occurs.
Thank you Andy and I completely agree.
Was a sealant used after the polishing, or just the wax. If it was just the wax, why did you decide not to use a sealer?
No sealant was used. I’m not quite sure why anyone would think it is mandatory to use any type of synthetic protection on a vehicle: keep in mind that sealants are popular for their higher durability and slickness, but waxes can offer very nice protection and optimal etching resistance (especially high carnauba content waxes like Supernatural) themselves. This vehicle is well maintained and doesn’t sit outside nor does she get driven a whole lot, so a nice coat of a beautiful wax is all she’ll likely need for a year or more.
I hope that helps to shed some light on why we went with the protection we did, and thanks for taking and look and leaving a comment.
Awesome article Marc/Jacob! Very well written, great documentation, very educational, and obviously stellar pics from Steven too!
I love the idea of the wallpapers too! 🙂
Thank you very much Chad and I look forward to reading your next article!
OUTSTANDING work, autoLAVISH. Jacob, Mark this is an incredible detail on an incredible machine. Good work!
Always appreciate kind words of a great detailer like you Aaron. Thanks a lot and I look forward to being in touch.
No doubt, that is stunning work on a beautiful vehicle. Here’s a plebian question and may announce my ignorance: Between washes and waxes, what do you think of “dusting” the car with a product such as the California Duster or the like?
Plebe? Ignorant? I’d say you’re quite the opposite: being inquisitive to the needs of your car and questioning what is best for her shows you’re much more advanced than the majority of car owners. Asking such specific questions in pursuit of taking the best care of your expensive vehicle as possible shows you’re no “noobie” nor ignorant in the needs your car has.
I, like many other detailers, don’t like the idea of items such as “dusters.” Dust particles outdoors can often be made from dirt particles which often time are broken down sand particles. Sand contains things like quartz, and surely we all can agree our clear-coats / paint isn’t harder than quartz. Any time you touch your vehicle’s surface, you’re putting it at risk, which is why those of us in the “anti-swirl” car care crowd try hard to touch our vehicles as little and sparingly as possible. There’s no way to 100% remove risk, so we all take specific steps to reduce risk as much as possible through things like implementing certain products (Girt-Guards, car specific shampoo, keeping a layer of sacrificial protect on our paint, etc) or techniques (two-bucket method, washing top to bottom, pre-rinsing, foam guns and cannons, etc) in our routine maintenance schedules.
Removing dust, dirt, and debris from your paint is usually the riskiest thing a detail enthusiast will do. Not using a liquid like water, car wash shampoo, or quick detailer, etc means you’re likely sandwiching contaminates between your paint and the medium you’re attempting to use to remove the contaminates. The risk is very high.
That’s not to say there aren’t owners who like, trust, and continue to use dusters, but I’m willing to bet you won’t find many owners with a swirl-free car that do use them.
Awesome work on a beautiful car, that was fun to read!
Thank you Greg!
great article. thank you !
Much appreciated Michael 🙂
really waiting on the M3 article, as that is a car from my dreams that is a bit more accessible. 🙂
What blower was used to dry the car!
A normal leaf blower! The type that can be purchased from your local Home Depot!
Thanks for taking a look. but why are we using exclamation points? 😀
Great writeup about a beautiful car. The pro photos are also great. One question: what type of polish/compound did you use and how many steps?
Thanks for taking a look Ice.
Polishing consisted of Meguiar’s 105 on Surbuf pads on a DA (some areas needed multiple passes of this), Meguiar’s 205 on white pads on a DA, and finally Menzerna 106fa on black pads with the rotary on low speed.
Awesome work I can look at those pics all day!
Very much appreciated Greg and I hope all is well out east.
Guys,
Awesome work!!! By the way, the work you did on my car is still outstanding. Can’t wait to see your article on the M3.
Awesome Job guys!! That was a fun article to read and see the pictures! And as a side note the black figure in the background of desktop background #3 looks like darth vader haha.
Thank you Eric, and we’re happy to hear you enjoyed the article. Also, good eye 😉
Great job guys…Amazing photos….
And thank you for sharing the desktop background pictures 🙂
We’re glad you enjoyed Iwan 🙂
Amazing work and writeup, and you know what’s better, you guys are right by me. I could spend $400 and buy all the stuff and do it myself. But I’ll never get the experience, which is what counts. I’m looking over your pricing now. My CPO is in need of some work.
Brett,
Thank you for the kind words and the interest in our company. If you have any questions, please let me know. -Marc
Mark and Jacob… as usual, you have taken a beautiful piece of automotive machinery and refined it to its full potential.
Ron,
We deeply appreciate your kind words and for taking a look at this thorough documentary of some of our work. Thank you!
What an amazing job. How many hours were spent on the car?
Hello everyone!
Question: when cleaning the engine bay of the F430, do you need to wrap the wires or key items when you start to foam and such? Are there “don’t’s” for cleaning the engine bay?
Thanks so much
Most modern cars have most of the important pieces covered and protected, however you can take a few precautions for extra safety. Check out this article for some step by step engine bay detailing: https://www.detailedimage.com/Ask-a-Pro/how-to-detail-your-engine-bay/