
While I was recently on a flight from Columbus to Las Vegas to the SEMA Show with my good detailing friends DJ Mayo and Addison Good, we were having a conversation about inspecting paint and paint defects and it gave me the idea to do a quick article about the subject. Addison was talking about a metallic green Lamborghini Gallardo that he was working on, and said that when he did a closeup inspection using his Brinkmann LED light, he found it difficult to see the defects, but when he stepped back a few feet with the light, he was able to see the swirls and holograms easily. This is pretty common with metallic paints in particular, but it brings up a few good points about varying your inspection distance to see the defects, or to see different types of defects.
Back in February of 2011 I wrote an article about using different types of light sources to improve your work: Do You Want to Step Up Your Detailing Game? In that article I talked about how different light sources show off different types of defects, and how through the use of a strong LED light like the Brinkmann you can see defects that you can’t under halogen or fluorescent sources. By referring back to that article, you will see why it is so important to have one of these lights in your arsenal if you really want to produce great work.
So when you’re inspecting the level of defects in the paint either before, during, or after your paint correction, be sure to vary your viewing distance to see different types of defects. When you view from a farther distance, say 3 to 6 feet, you will see bigger issues like holograms caused by a rotary polisher. Also be sure to keep your head still, but move the light from side to side and up & down…then compare that view to moving both your head and the light at the same time. And as Addison commented, this may help to see defects on metallic paints that you might not be able to see at very close distances.
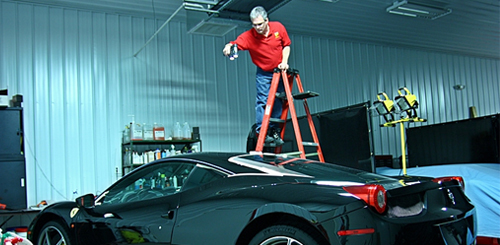
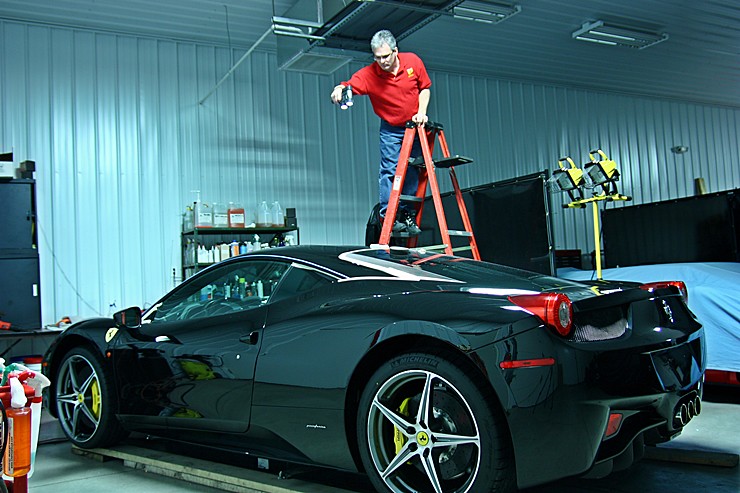
In this photo, I am inspecting this Nero Ferrari 458 Italia for holograms at a great distance. The sun is also a great way to inspect for holograms, however the work was done on a cloudy day and I couldn’t pull it outside.

For most of your general inspection needs, a distance of about 2 feet from the light source / your eyes to the surface will give you a good view of the overall condition. You’ll be able to detect scratches, swirls, haze, and other types of defects.
And when you are going for paint perfection, or you’re dealing with dark colored paints that may be challenging to finish down properly (soft paints in particular), you really want to get the light and your eyes up close to the surface to make sure you’re seeing nothing but pure reflections. I have seen black paint that looks good even in the Brinkmann light from one or two feet away, but when viewed from just 3 or 4 inches from the surface, you could detect slight swirls (from a rotary) or haze (from a D/A) that remains from the polishing process. Also be sure to move the light around and hold it at varying angles because the surface may look great when holding the light directly above it, but you could discover slight issues when holding the light at an angle while still viewing from directly above. Be thorough and methodical in your inspections, and it will greatly improve the quality of work that you’re producing…and the quality of the finish when you’re done.
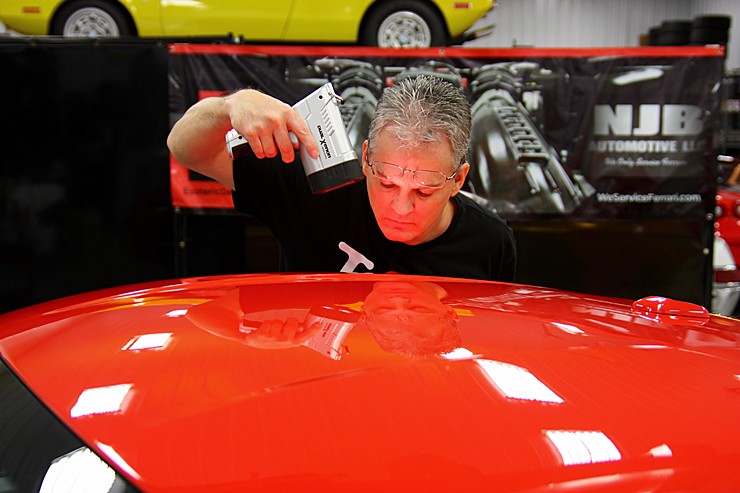
On this 458 Italia in Rosso Corsa that I just worked on this past week, I needed to closely inspect the paint from just a few inches away from the surface in order to find those last remaining defects in order to get it perfect. By taking the extra time to make sure the surface shows nothing but pure reflections even from a few inches away in such a strong light source, I know that when it gets outside in the sunshine, it’s going to look absolutely ridiculous (and I mean that in a good way!).
Now grab your Brinkmann or handheld inspection light of choice, and vary the distance and angles of your next inspections to make sure that you’re achieving the best rate of correction possible!