

Washing and drying is the foundation of any detail, whether it is simply maintaining your vehicle with a wash and dry or the start of a longer detailing process. It is often overlooked that properly washing and drying your vehicle is the single most important step in any detailing process. This is due to the fact that most imperfections (swirls, scratches, water spots, etc.) are added during this step from improper removal of dirt, grime, pollen, dust, salt, etc. Removing this contamination will not only enhance existing shine, but also reduce any risk of grinding contamination into the paint during any next detailing step. Have no fear though! With the proper tools, products and techniques, you can easily minimize adding imperfections and thoroughly clean your vehicle!
Grab Your Gear!
Washing Processes
Rinseless Wash – This process uses a type of shampoo that is typically low sudsing and high in polymers, providing you with lubricity without the need to flush away excess residue with water. This is great for lighter buildups, along with water restricted areas, apartment complexes, etc.
Waterless Wash – These products are packed with a high concentration of polymers designed to quickly emulsify and encapsulate dirt and grime for safe removal by simply spraying and wiping away with a clean microfiber towel. Another name for these are instant detailers and quick detailers, perfect for light dust buildups and quick cleaning procedures.
Traditional Wash – This is the more traditional washing step, including multiple cleaning buckets and a thorough rinse before the drying process. You will use standard shampoos designed for a slick, foamy, cleaning experience, perfect for a thorough cleaning of the vehicle’s exterior.
And so we begin!
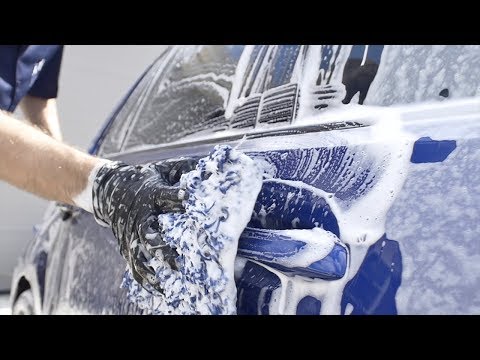
How to Properly Wash Your Vehicle
Using the two bucket wash method is one of the safest ways to maintain your vehicle while minimizing the possibility of adding imperfections to the paint. The two bucket method features two buckets, each for a different process. One bucket with shampoo and water and the second bucket is just water for rinsing out your mitt or wash media. It is very beneficial to master this process as it can be used in conjunction with various other washing methods, such as using a foam gun or a rinseless shampoo.
- Whenever possible, wash your vehicle out of direct sunlight and on a cool surface.
- Add roughly one ounce (or the recommended amount) of shampoo to your wash bucket, then fill with water.
- Starting from the top of the vehicle, gently glide your wash mitt or sponge over one section at a time using light pressure.
- After each section, rinse your wash mitt or sponge in the rinse bucket, rubbing it against the Grit Guard insert to release dirt and debris.
- Repeat steps 3–4 until the entire vehicle has been washed.
- Thoroughly rinse all the soap and suds from the vehicle.
- Proceed to drying your vehicle using a clean, high quality drying towel and/or blower.
Sheeting Method
The sheeting method is a simple process that allows you to dry most of your vehicle without ever needing to touch the paint with a drying towel. The main idea behind the sheeting method is to create a cascading effect where the water flowing onto the car combines with the water already on the surface, pulling it down off of the vehicle. Simple physics states that like particles stick together, which is why this method is so successful. When done properly, especially on freshly protected paint, you are left with only a few drops of water on each panel, which can easily be absorbed with your drying towel.
Ideally, remove the hose nozzle so the water is free-flowing and start from the top of the vehicle. As water drops down the panel, continue to follow with your hose. You will notice the water almost pulling itself down toward the ground. Slowly follow the downward direction of the water until you reach the lower panels of your vehicle.
You will be left with less water on the surface, making the drying processes much quicker and easier overall!
How to Properly Dry Your Vehicle
- After rinsing, gently sheet water off large panels using the sheeting method mentioned above.
- Using a clean, high quality drying towel, start from the top of the vehicle and work your way down.
- Lightly drag or blot the towel across the surface, avoid pressing hard, using excess pressure or wiping aggressively.
- Once fully dry, inspect your paint and glass for any remaining streaks or spots, and touch up as needed.
Pro Tips
- Using a foam gun, lance or cannon can help shampoo suds stick to the surface longer, breaking down dirt and grime in the process. This addition to your wash process will help minimize wash induced swirls and scratches by removing more dirt and grime with less effort. For more foam gun, lance or cannon information check out the AAP Blog Post, How to Implement a Foam Lance into your Wash Routine.
- Always separate your wash and rinse buckets to avoid cross contamination
- Use separate wash media and buckets for your wheels and tires, essentially treating these areas as their own wash step.
- Don’t be afraid to use a tar remover, bug remover or pre wash to knock down heavy contamination before your wash step.
- Utilize the sheeting method to remove most of the water from your vehicle. More on the sheeting Method and drying tips via the article, 4 Simple Car Drying Tips.
- If you have access to a blower, blow out panel gaps, trim pieces, lug nuts, between mirrors, glass, and lights to stop any dripping.
- For added drying safety, use a drying aid or quick detailer while towel drying to add lubrication and slickness.
- Use a high quality drying towel to finish the wash process.
Related Articles
- How To Properly Wash and Dry a Car
- The Grit Guard 2×4 Wash Method
- How to Properly Apply SiO2 Based Spray & Rinse Sealants
- Rinseless Washing
- Ask-A-Pro: Should I Take My Car Through A Car Wash?
- Detailing Car Wash Methods Examined: Traditional Washing
- Car Cleaning – Car Soap Versus Dish Washing Detergent
- Drying Tips for Coated Vehicles
- Read All Washing & Drying Articles