
The Brinkmann Dual Xenon light was a staple in the automotive detailing industry for years before the item was discontinued. Many of us still use these lights for inspection, however if you’re like me and use it frequently, you may be due for a new battery by now.
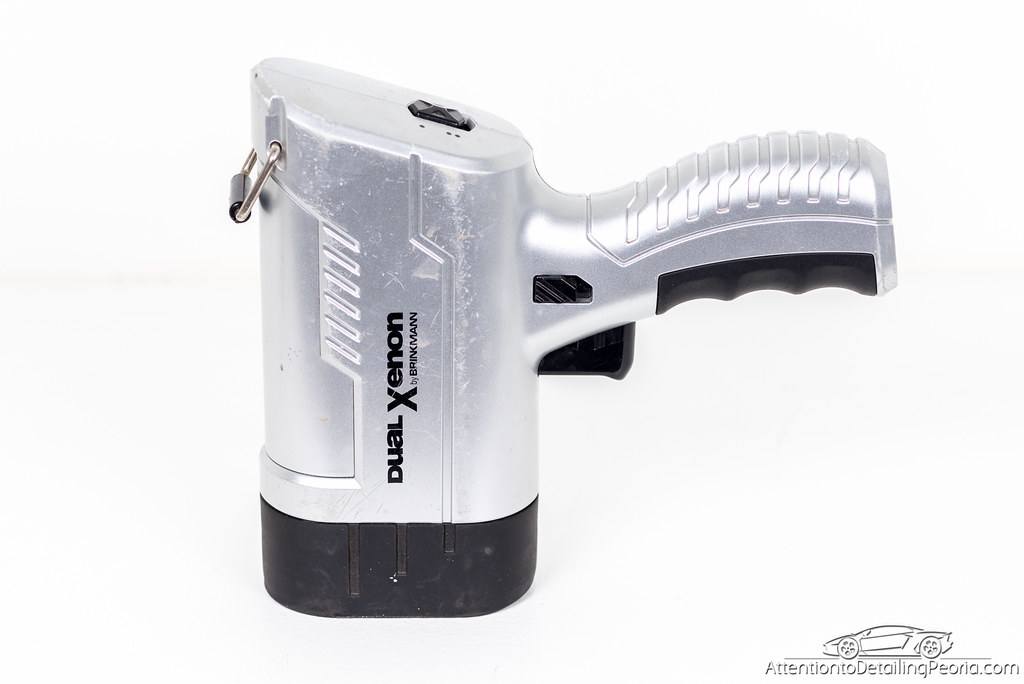

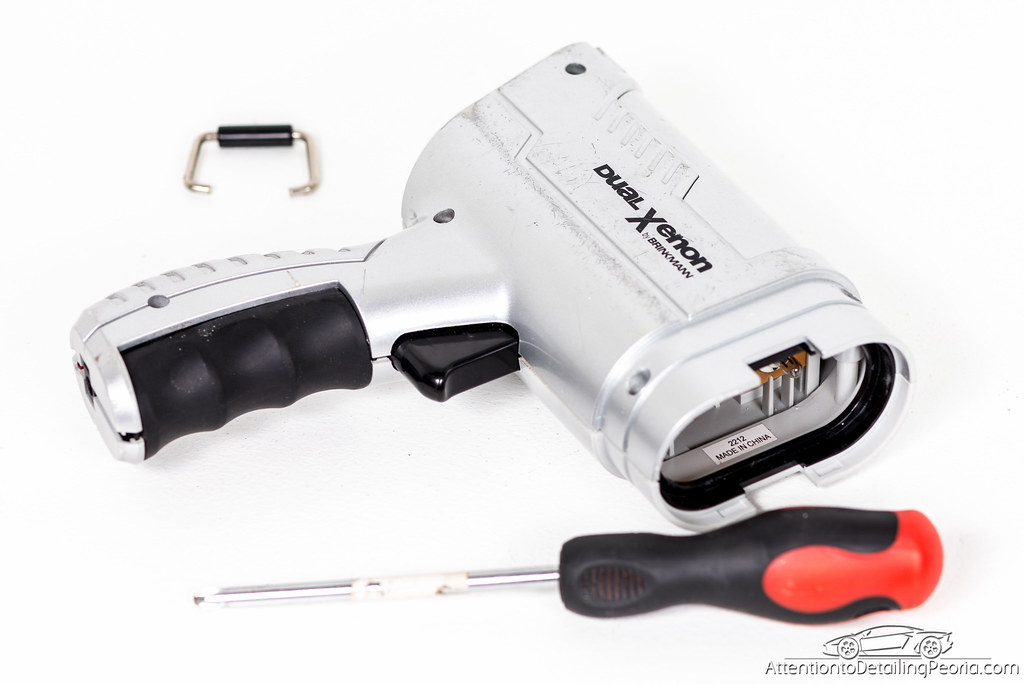
After years of constant use, my Brinkmann has gone through its fair share of wear and tear (as you can see in the image above). It survived many drops, bumps, and a lot of time on the charger. It was clear that the tool was having issues when the red light that indicates if the battery is charging would no longer remain lit while the device was plugged in. I decided to disassemble the light with hopes that the parts were serviceable and that I would be able to repair the light.
Disassembly Process
Required Tools: Phillips Screw Driver, Flat Head Screw Driver
Estimated Time: 5-10 minutes
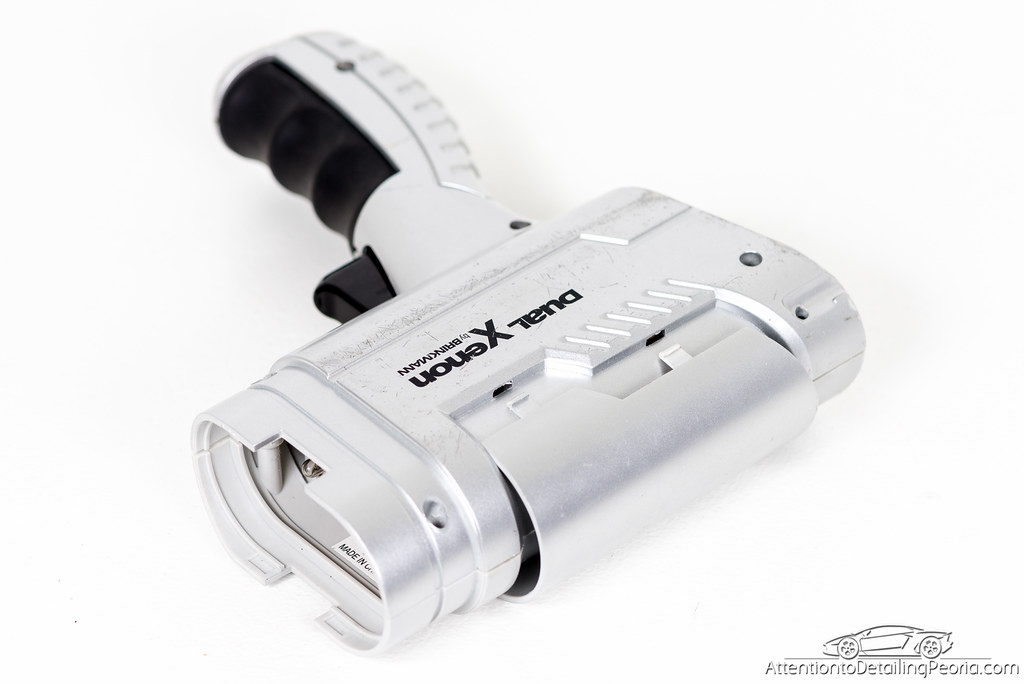
Begin by removing the rubber cover from the front of the light. This piece is simply pressed into place and is easily removed by grabbing the light with both hands, and using your thumbs to push the rubber piece off.
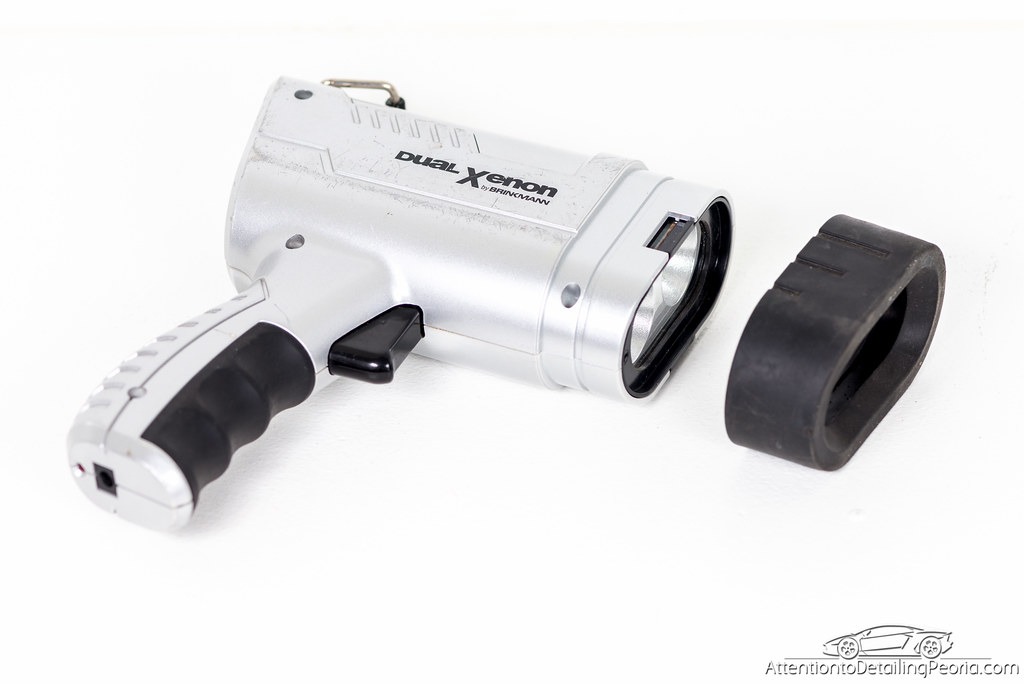
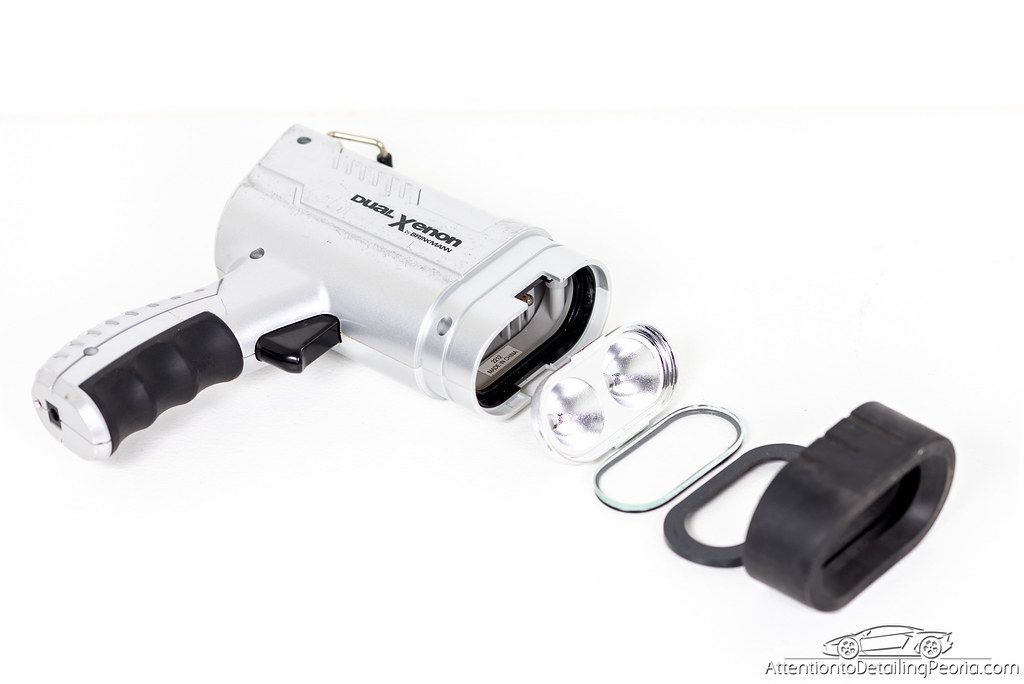
Next, carefully remove the plastic cover, lens, and reflectors from the front of the unit. These are loose fit and will fall out on their own if the light is angled downward, so keep the unit on a level surface to avoid the risk of dropping these pieces.
Remove the 5 screws on the right side of the light with a Philips head screwdriver. Remove the belt clip from the rear by spreading apart the lower ends of the clip until one side is free, then lift off of the unit.
Next, remove the top panel from the light. This piece is assembled to the sides with 4 plastic clips, 2 on each side of the light. 
Use your flat head screwdriver to disengage the clip that is visible from the front of the light while simultaneously pulling the top panel away from the light with your other hand to remove this panel from one side of the light.
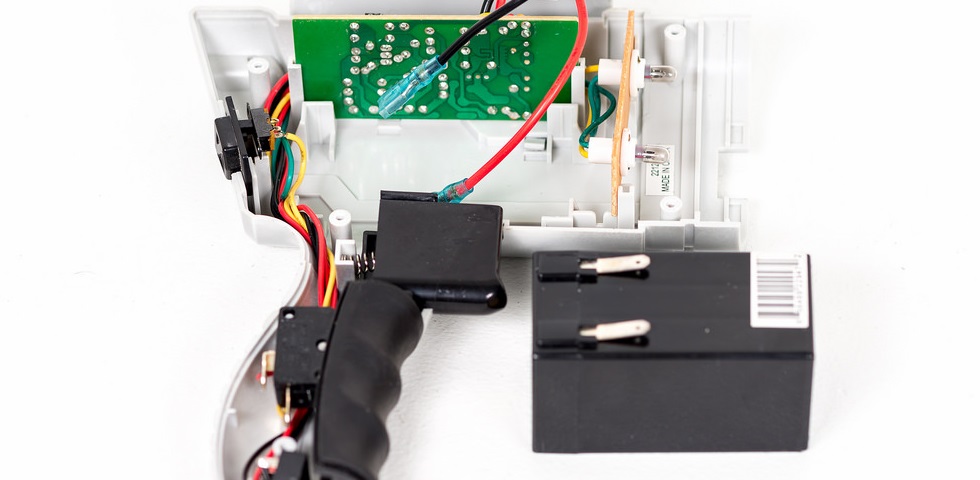
You are now able to completely remove the side panel. Lay the unit on a flat surface and carefully lift the right side cover. There are many pieces (switches, springs, battery, trigger, grip, circuit board, etc.) which can fall out or be moved during this process, so be careful. It is likely that one or more pieces will be moved, so use this image as a guide for replacing the pieces in their proper location.
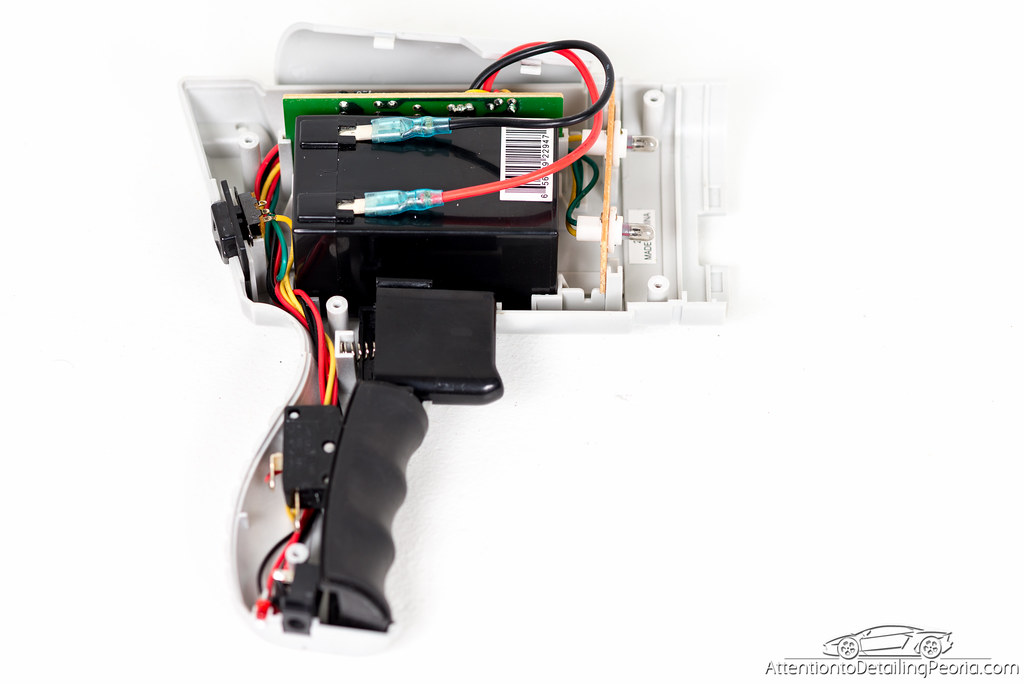
Disconnect the leads from the battery and remove the battery from the unit. Take the battery to a local battery store to find a replacement.
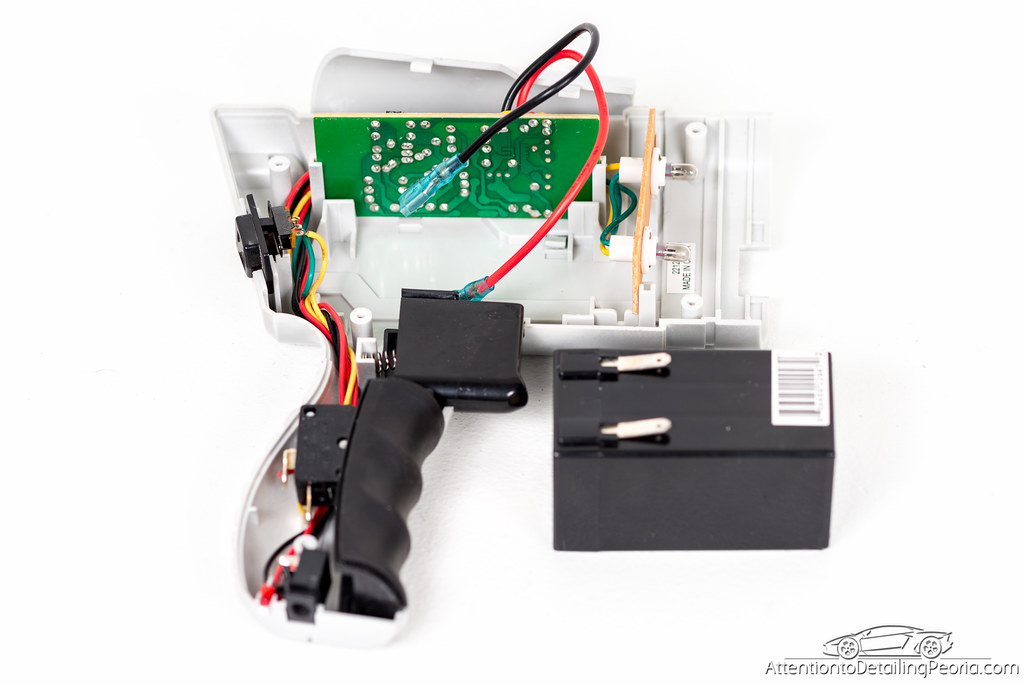
Install the new battery and reassemble the unit. It is a good idea to ensure the unit is fully functional before completely reassembling.
*Disclaimer: Please keep in mind that this is just a guide and does not account for all possible scenarios that may be encountered during the repair. Neither Detailed Image nor myself can be held liable for any damage to equipment, injuries which may have been incurred as a result of this procedure, or any other mishaps. Attempt this at your own risk.*