
Holograms, also known as buffer trails or buffer swirls, are formed by the improper use of a high speed rotary buffer, poor pad/product choice, or the overall lack of polishing knowledge. Holograms are simply micro scratches instilled into your vehicle’s paint by the fixed circular rotation of a rotary polisher combined with an aggressive pad and or polish.
Proper polishing takes a lot of time, and when you are removing severe defects it will require many polishing steps to refine the paint into a hologram-free finish. If you currently have holograms in your vehicle’s paint, it’s either because the person polishing your vehicle didn’t follow up with the required refining steps needed, or they simply lacked the knowledge to properly use the tool. It’s not uncommon to find body shops, dealerships, or high-volume detail shops constrained by the amount of time they can spend on a vehicle. Because of this, rather than taking the required time needed to go through the proper refining steps, they simply choose to apply a glaze loaded with heavy fillers. These fillers hide defects like swirls, scratches and holograms and usually conceal them until you’ve washed the car a couple times.
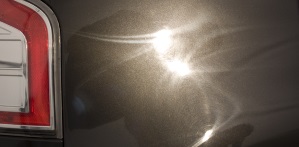
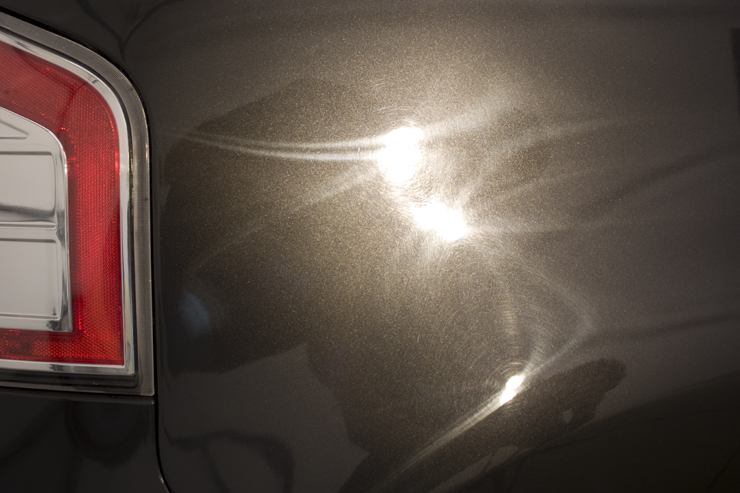
Here is an example of a vehicle with moderate holograms. This vehicle was purchased used from a dealer and some panels had recently been repainted.

Here is a 50/50 shot of how it should look once you’ve performed all the proper polishing steps and performed an IPA wipe down ensuring there is no filling from the polish carrier oils.
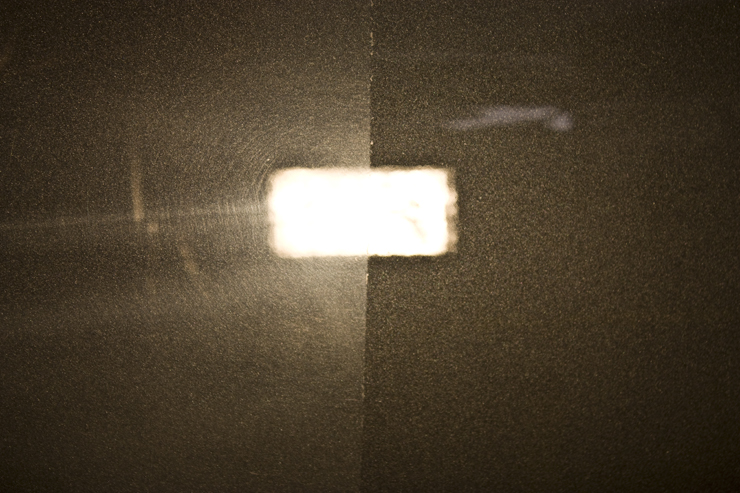
Since the removal of holograms with a rotary polisher requires a fair amount of experience, I often recommend that newcomers to detailing use a dual action polisher like the Porter Cable 7424XP, or even the Flex XC3401VRG to remove holograms from their finish. The random orbit movement of these polishers ensures a hologram free finish and they are very user friendly. The above 50/50 picture was actually corrected using a DA polisher in two correction steps. The first step consisted of a heavy compound (Meguiar’s M105) combined with a light cutting pad (orange LC). The Finish was then refined even further by the use of a finishing polish (Meguiar’s M205) and a finishing pad (black LC). All paints are different and it is recommend that you use the least aggressive method to achieve your goal, and always, always do a test spot first.
For more information on polishing, please check out our “Imperfection Removal” section.
If you have any additional comments or questions, please submit them in the comment section below.
Related Posts
- Full Detail and Paint Correction: Ferrari 458 Italia by Todd Cooperider of Esoteric Auto Detail
- Full Detail: Ferrari Challenge Stradale in Rosso Scuderia
- 2008 Cadillac STS-V, Major Paint Correction
- Full Wet Sanding of 2005 Acura RL in Nighthawk Black Pearl to Reduce Orange Peel.
- Audi R8 Spyder Detail and Modesta Coating