

Being a big photography enthusiast plays very well into my detailing business. Having the ability to properly document your work will really show off your abilities to potential customers and can help to make you stand out when you are being compared to other businesses in your area.
The 50/50 shot is a great way to show the true transformation that a vehicle is going through. With this shot, you are able to show both the ‘before’ and the ‘after’ in one simple photo. There is no denying the results of a side-by-side comparison of a swirled out section to a nicely polished section, and most owners are shocked when they see the drastic difference.
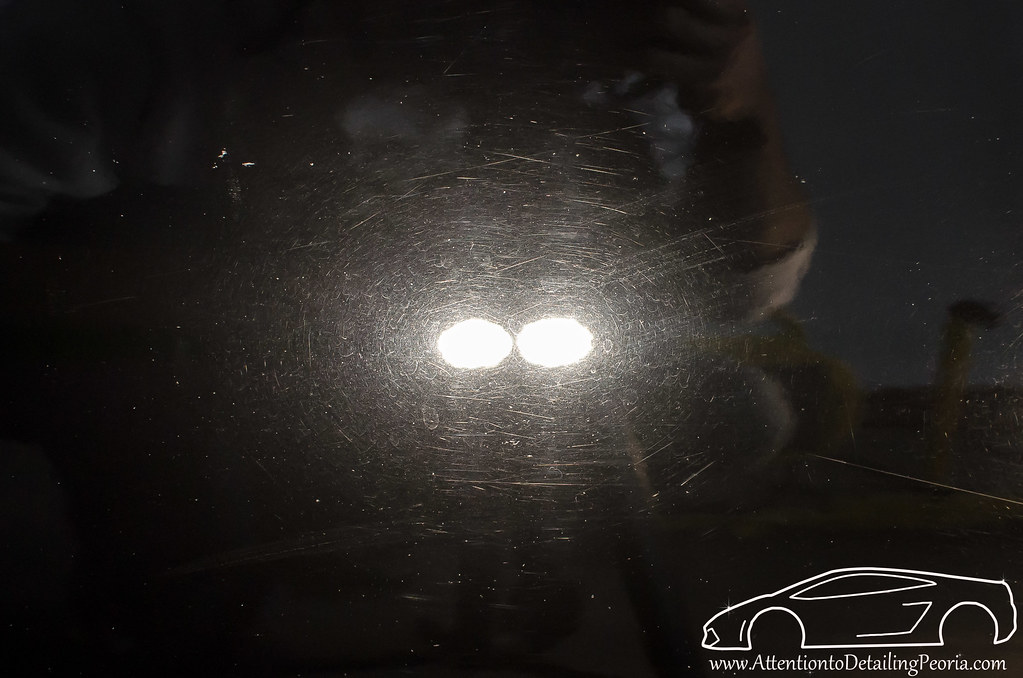
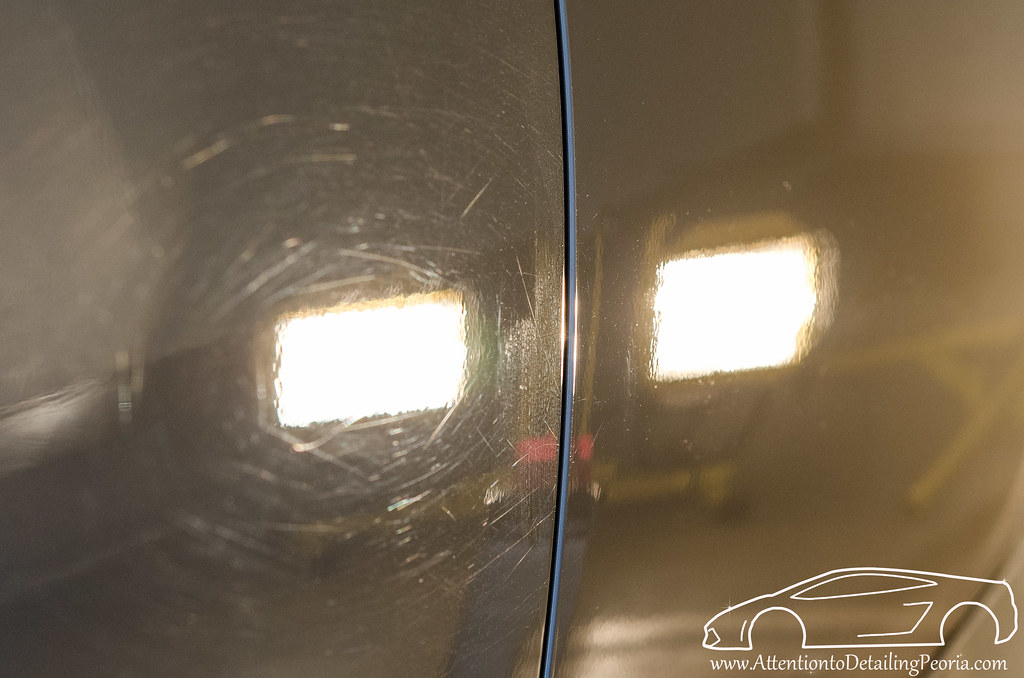
There are a few key factors that make up a great 50/50 shot. First, you obviously need a vehicle that has enough defects to make for a good before and after comparison. Darker colored vehicles typically make great candidates, but you can get some great shots on a lighter colored cars too! The following photo shows a jet black bmw that has your typical swirls, scratches, and water spots – all common defects for a daily driven vehicle.

Next, you need to create a clear dividing line between the area that you are going to polish and the original, neglected paint. This is easily achieved using a piece of Automotive Masking Tape. This tape line will serve as a visual aid as you are polishing, and will also create a perfect straight edge that separates your corrected area from the non-corrected area.
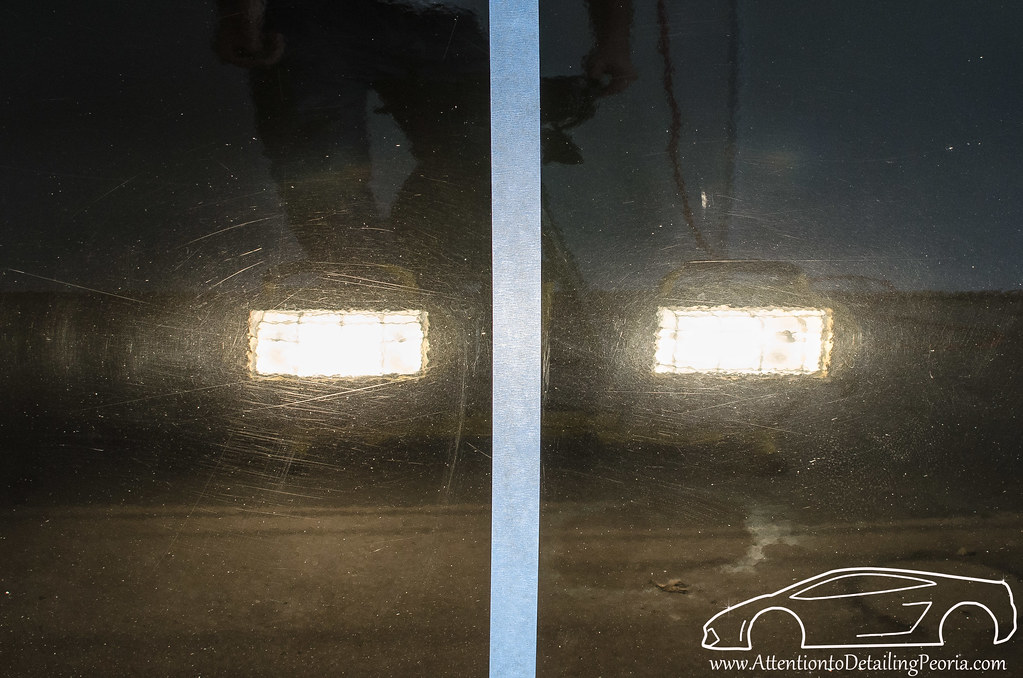
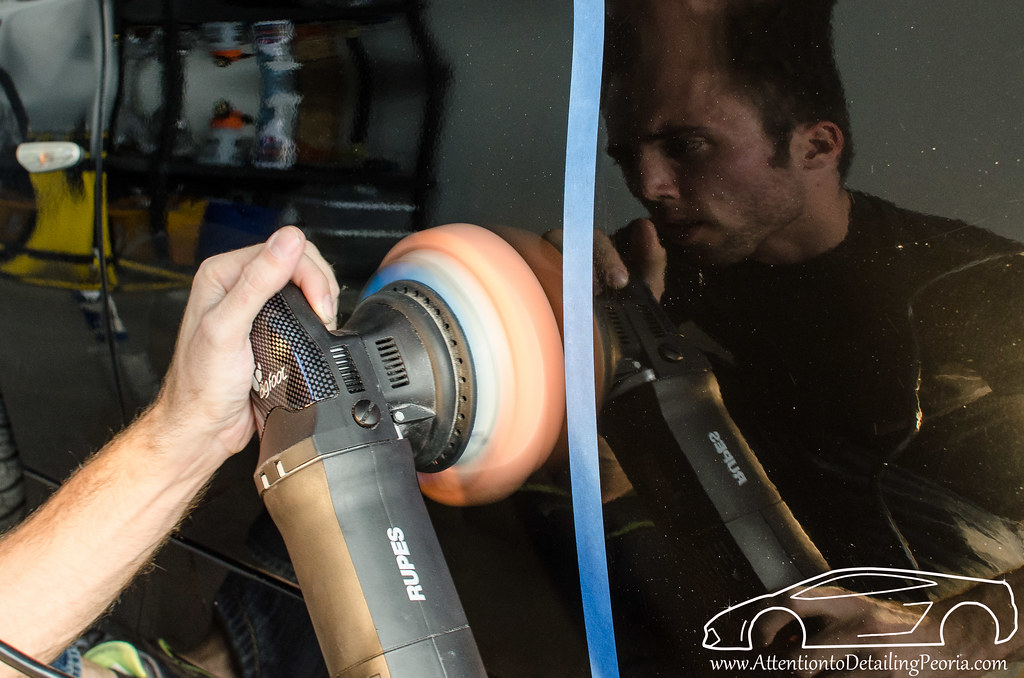
As you are working, it is important to polish all the way up to the tape line. Don’t be afraid to allow your polishing pad to touch the edge of the tape, as shown in the image below. This will help to create a nice, sharp line that separates your work from the original condition of the paint.

Perhaps the most crucial element in achieving a great 50/50 shot is your lighting. Typically, the best way to truly reveal your results is with intense, direct lighting. Some common lighting tools include the Brinkmann MaxFire Marine Dual LED Spotlight, the 3M Sun Gun, or a pair of Halogen Work Lights that are available at most hardware stores. I tend to place the camera and the light perpendicular to the surface so the light is reflected directly back at the lens.
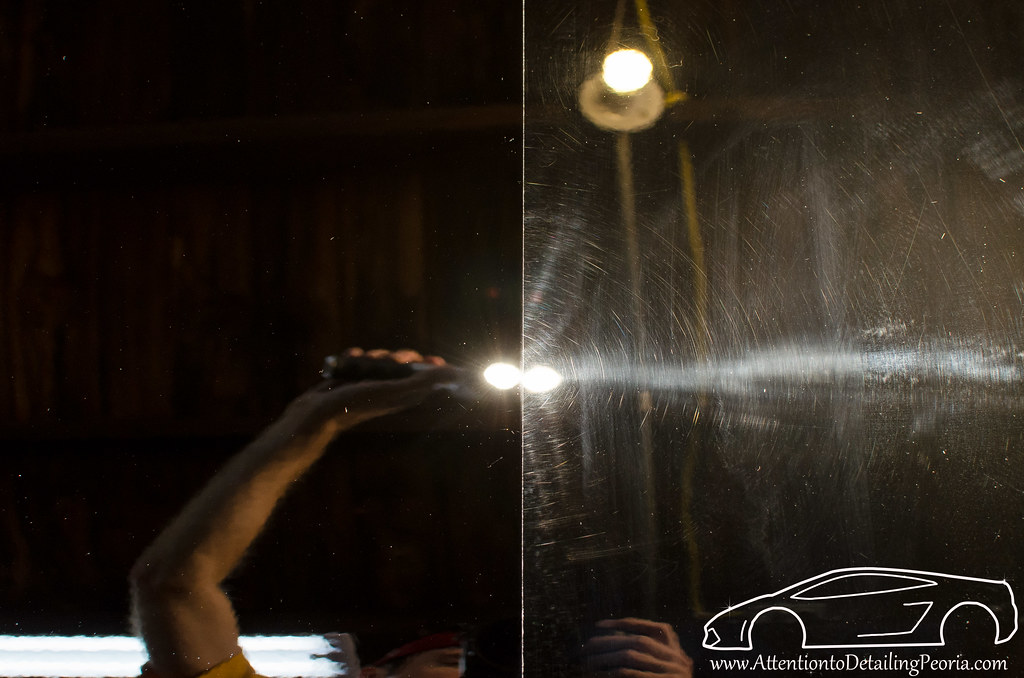
Note: This direct light shining back into your camera lens may fool your camera into thinking it is in a particularly bright environment which would cause it to underexpose the image. I highly recommend shooting in manual exposure mode for the best results. While a DSLR is not required to capture great images, learning to utilize the manual settings can drastically improve your detailing photos.
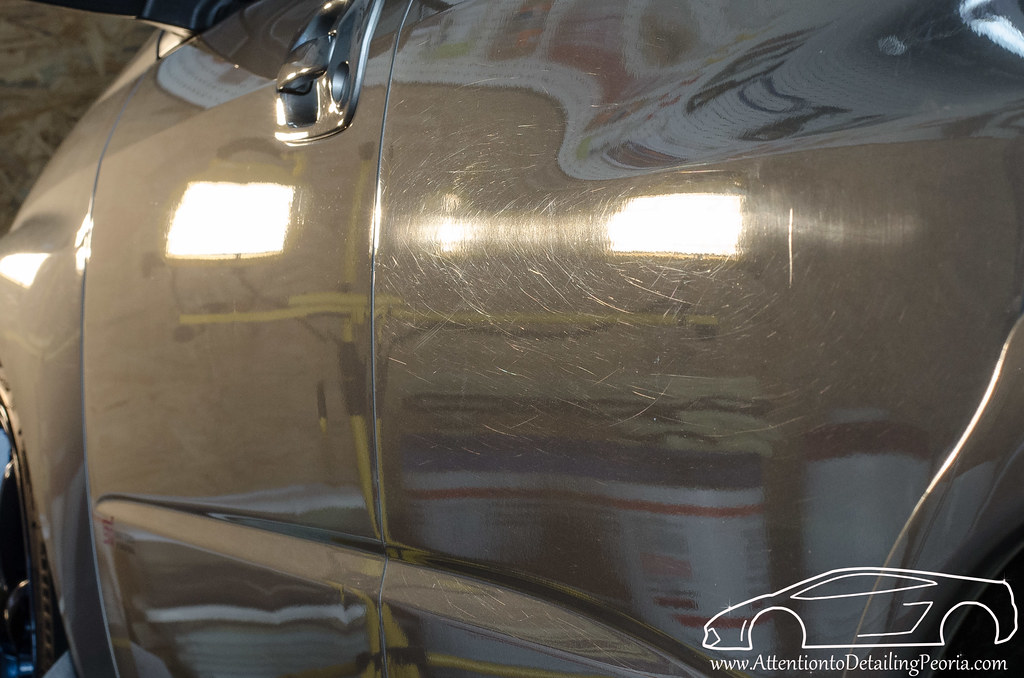
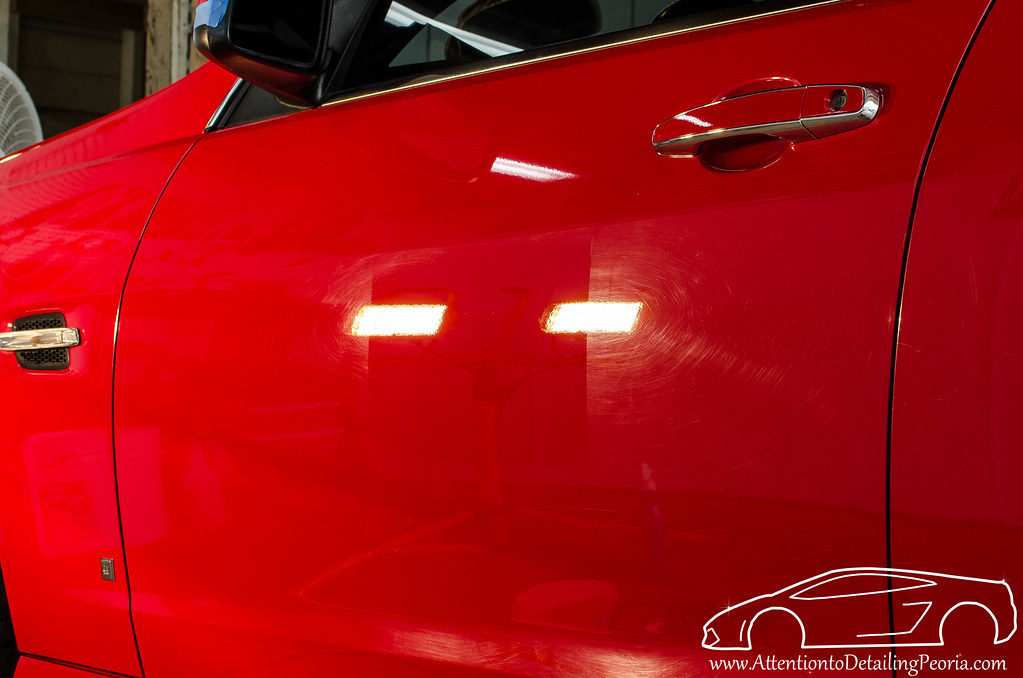
An alternative setup is to place the light off to the side and take your photo at an angle. Remember that the angle of reflection is equal to the angle of incidence. This essentially means that when you are positioning your camera and your light for this angled shot, you need to point your camera at the same angle as you have pointed your lights in order to get the full amount of reflected light in your shot. You may also choose to utilize physical body features, like the gap between door panels, to dictate your 50/50 shot. The following two images demonstrate angled 50/50 shots and also use body lines to separate the polished section from the uncorrected areas. (They are also great examples of 50/50 photos captured on light colored paint.)
These are simply guidelines towards creating standard 50/50 shots. Don’t be afraid to get creative and think of other ways to demonstrate how a proper paint correction process can rejuvenate an aged paint job. In this example I simply taped off a small square section in the middle of the door and polished within the boundaries. This is definitely not a traditional 50/50 photo, but still very effective in showing the differences between a corrected area and the original, swirled paint.
Hopefully these tips will help to produce some amazing 50/50 images for you to share with your customers.
Thanks for reading!