
I have been using the Porter Cable Random Orbital Buffers ever since I first got into detailing over seven, maybe eight, years ago. It was THE machine to have and it was extremely easy to use. Now, we have all heard how great the Porter Cable 7424XP Random Orbital Buffer (PCXP) performs and how easy it is to use, but a few weeks ago I started thinking about it a different way. After looking over all my detailing supplies one day mid August, cleaning, counting, etc., I thought back to the days when I was first buying tools and products. I thought about how much money I had already spent, how much I was still going to spend, and how many headaches I went through figuring out not only what to order, but also how to use it. The PC came up while thinking about this stuff since I had an impossible time figuring out which backing plates to purchase, which counterweight to install and how to best utilize this great machine (back then it was the PC 7424).
Thus this article… I wanted to go over the basics, the 1+1=2, the baby steps to using your first polishing machine… No, my intention is not to insult the intelligence of every quality detailer and knowledgeable enthusiast out there :), rather to hopefully help that one lost soul that might be searching the web with these simple questions, as I once did.
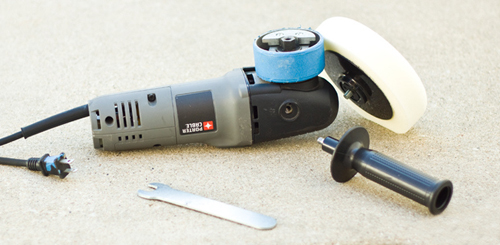
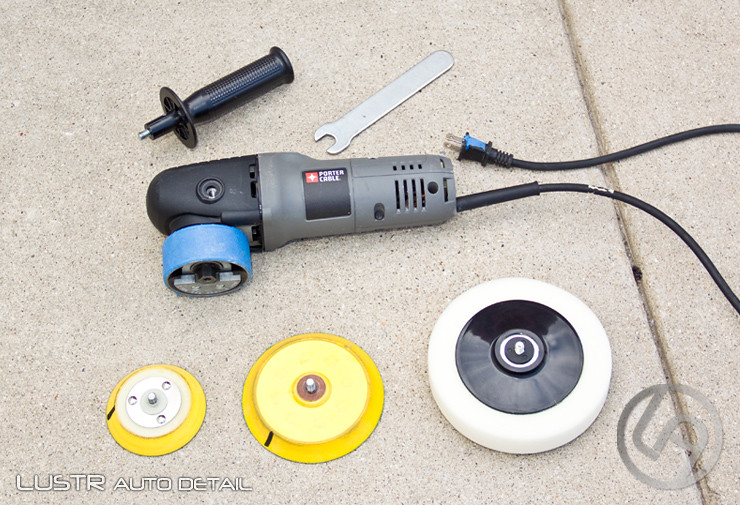
First off, here’s a photo of what you get with the PCXP order:

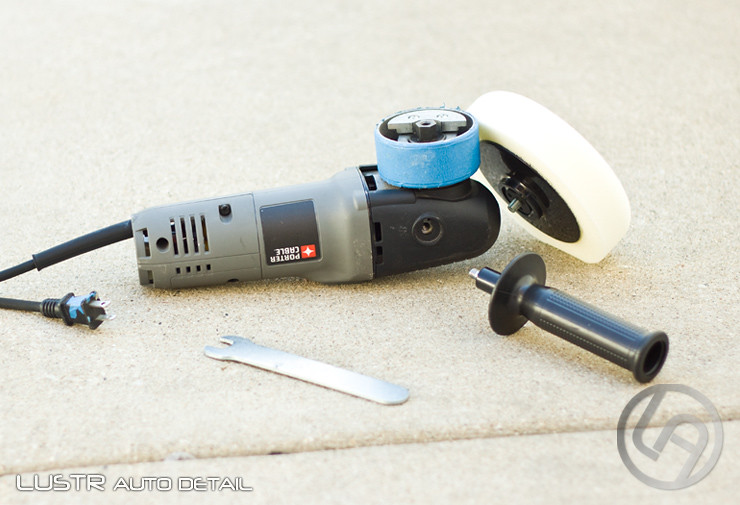
As you can see, mine is a bit “customized” and is showing its age, but still runs as good as new after about two years of fairly heavy use. The polisher comes with a white pad permanently attached to a backing plate, a side handle and a wrench. I have tried out the white pad that comes with the PCXP and while it does a fine job, something along the lines of a Lake Country white pad, I never liked using it and prefer to utilize the versatility of the PC by using different sized pads and backing plates. The tape you see around the polisher head is there just in case I come across an “oops” during detailing. I’d rather be hitting paint with painters tape than bare metal, as I’m sure anyone else would. I can’t remember if I picked this up from another detailer or just did it myself, but it’s common sense either way and something I’d highly recommend. The tape around the power plug is leftover tape from taping the PCXP cord to an extension cord many, many times.
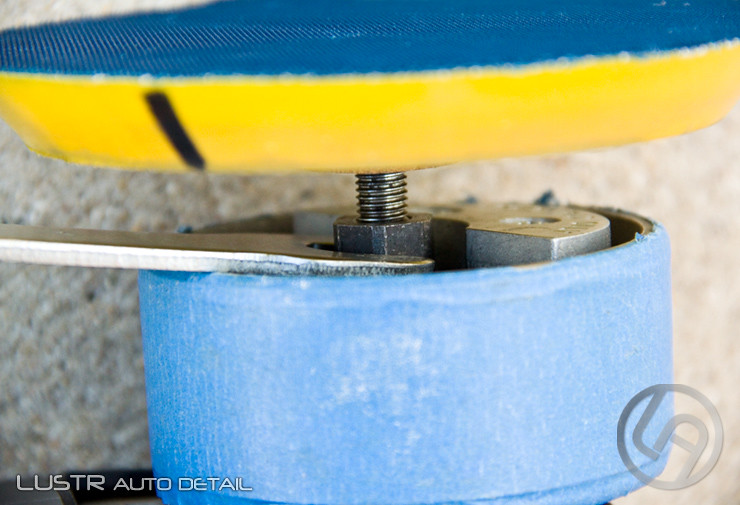
Looking closer at the PCXP, we find the counterweight and threaded female end that allows the use of many different sizes of backing plates and, with that, different sized pads.
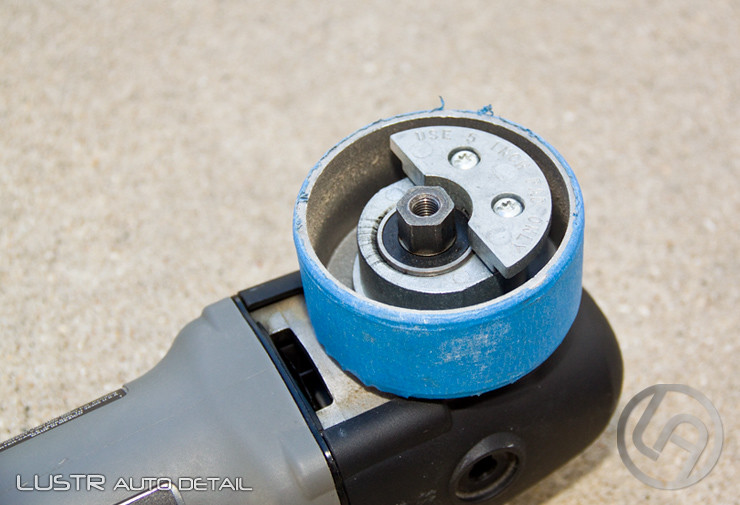
As you can see in the photo, it says to use 5 inch pads only. This would be the “5 inch counterweight”. There’s also a Porter Cable 6 inch Counterweight available through Detailed Image. Since I mostly use the PCXP with 4 inch pads (sometimes also with 5.5” pads) I never found a need to even try the 6 inch counterweight. Also, I did try both counterweights a while back with the older Porter Cable polisher, and I couldn’t tell much of a difference when using the 5 or 6 inch counterweight with 6.5 inch pads. Another reason I never personally looked into the 6 inch counterweight. That said, I would definitely suggest picking up both as it’s only an extra $5 and you can see what best fits your style of detailing.
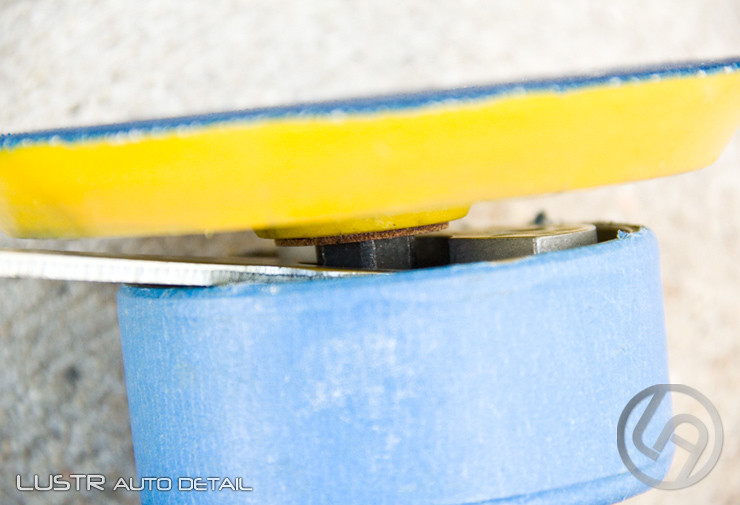
Moving on… once you have everything together, you need to put it all together. Since the threaded end rotates freely, it’s better to put the wrench on it before screwing in the backing plate.
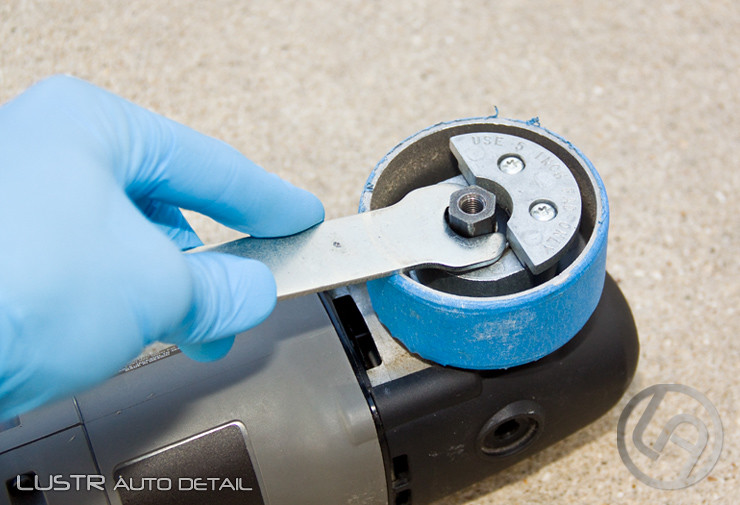
Next the backing plate goes in. It screws into the threaded end fairly easily…
The backing plate should be tightened fairly well, but there’s no need to overdo it since the spinning action of the polisher would theoretically keep it from ever coming off.
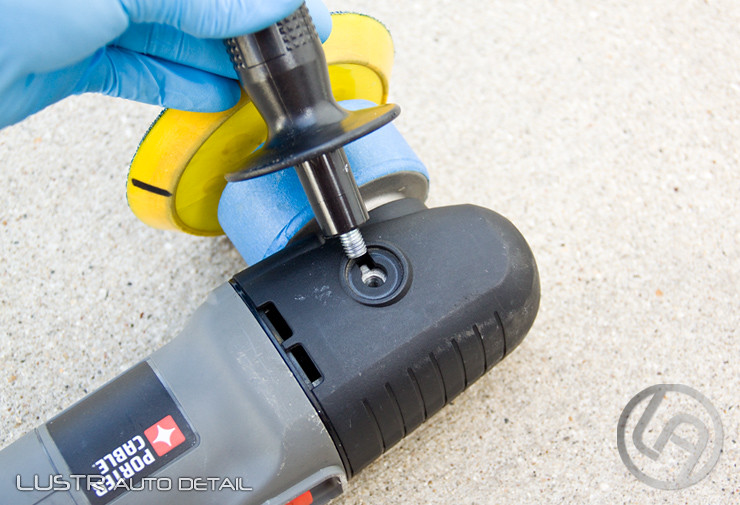
Next, the side handle goes in. The handle can be threaded into either side of the polisher, which is extremely helpful not only for users that have a preferred hand, but also for using the polisher with the handle on different parts of a vehicle.

The handle simply screws into the side and shouldn’t be tightened too much. I’ve had a few handles on different polishers fail due to over tightening. Whichever way the bolt is attached to the handle (some are melted within the handle plastic while others are glued to a groove inside the hollow part of the handle), over time it can fail due to the stress from over tightening. So it’s better to lightly tighten it every few polishing sessions than break it within a few months!


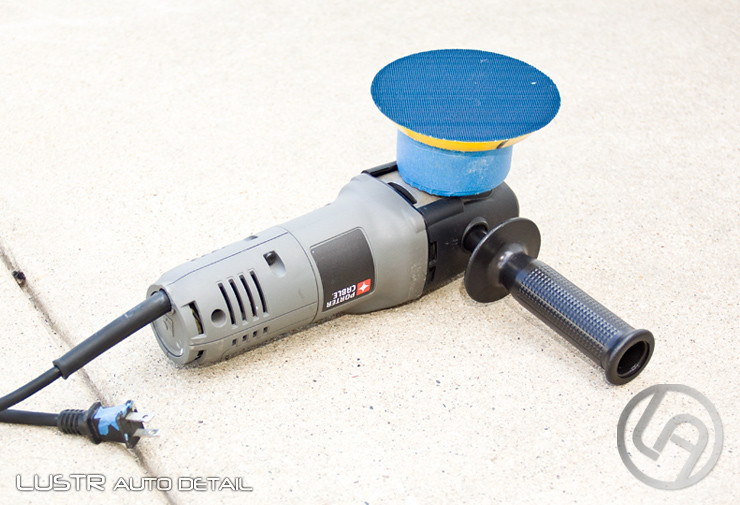
And that just about covers the very simple assembly guide of a PCXP. Here you can see the polisher completely assembled and ready for action.
Now that the simple stuff is out of the way, here’s a bit about how I like to utilize the PCXP. First off, here’s what I use with the polisher, as well as what I’d recommend for any enthusiast detailers when ordering a polishing package:
- Porter Cable 7424XP Random Orbital Buffer(with wrench)
- Lake Country 5 inch Backing Plate
- Lake Country Backing Plate for 4 inch pads
I personally don’t like to use the handle with the PC as I feel it vibrates way too much (I mean that the handle vibrates, not the machine due to the handle being used), so I keep it off. Also, since I use the PCXP mostly with 4 inch pads, there’s really no need to utilize a handle in my situation. As I mentioned above, the white pad that comes with the PC simply sits in a garage drawer, so it’s never used.
The stuff I do use a lot is the 4 inch backing plate and, when needed, the 5 inch backing plate with larger pads. As you can see in the photos, I like to mark the backing plates with a permanent marker. This is done to ensure that I know the pad is spinning and how fast it’s spinning. In certain situations the PC doesn’t have enough rotational force to spin the pad, so it helps to know when it stops spinning and revise the plan of attack for that, usually small, section.
Well that brings me to the end of my mission for this little article. As simple as it is to assemble the PCXP, I hope this article does answer a question someone may have while reading the blog and I hope readers take something away from it.
As always, thanks very much for reading and hope you enjoyed it!
Ivan Rajic