
In my first article about Water Spots, we discussed the science behind water spotting, and the resulting damage that can occur when water spots are left on your vehicle. In this article, we will explore the various ways to remove water spot deposits and etching.
Mineral Deposits (Above Surface Contamination)
As we previously discussed, when beads of hard water dry on your paint, the water evaporates leaving mineral deposits behind. These deposits are what you can see and feel on the surface of the paint.

There are several ways to attempt to remove mineral deposits from your paint. The first choice is simply to try washing your car. If the spots are not too severe, or are new, they may simply wash away. If that does not work, grab your clay bar before you dry the car and do a test spot. Detailing Clay is used to remove all sorts of bonded surface contaminates, and can be effective at removing some water spot deposits as well.
If you’re unable to remove the deposits with washing or claying, and you are certain the defect you are seeing is an above surface defect, then you should consider purchasing a dedicated water spot removal product like CarPro Spotless or Optimum MDR. Hard water is more alkaline (pH greater than 7) than pure water due to the high mineral content, therefore most water spot removers are usually acidic (pH lower than 7) in order to neutralize the deposits. These products can make quick work of mineral deposits. For more information, check out my Product Review of CarPro Spotless.
Etching (Below Surface Defects)
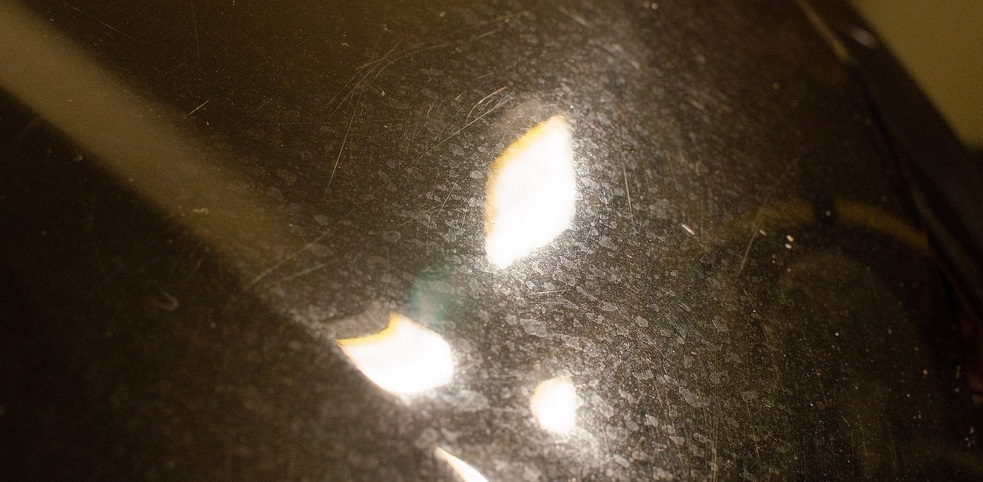
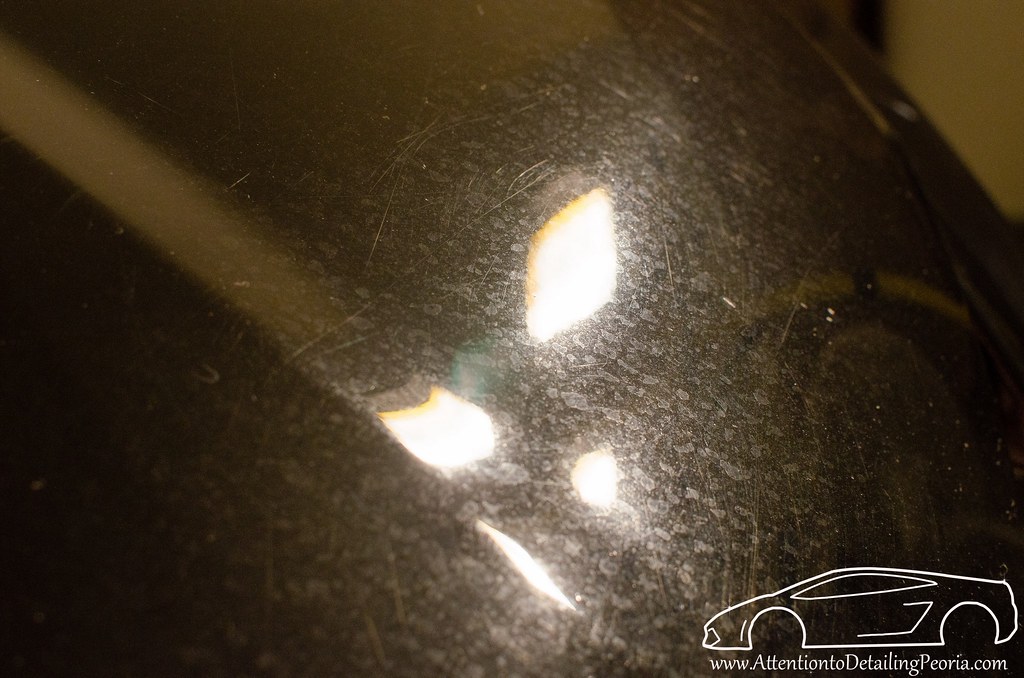
If you have tried washing, claying, and water spot removers but haven’t been able to remove the spotting, chances are you’re dealing with a below surface defect. The minerals that form the water spot can start to eat into your paint creating a small etching below the surface of the clear coat. Like swirls and scratches, these etchings are repaired by removing paint in order to level the surface. In order to do this, we must begin a paint correction process utilizing various pads, products, and machines to refine the surface and eliminate the defects.
I mention this quite often, so I might as well say it again, but it is always important to start with the least aggressive method and work your way up. Clear coat is quite thin, and if you jump right to a heavy cutting pad and cutting compound, you’ll most likely see good defect removal, however you may be removing more paint than is needed to level the particular defect therefore you’re “wasting” valuable clear coat. Water spot etchings can become very severe, however it is still important to take the time to analyze the defects and perform the necessary test spots to determine the best process to remove your unique defects.
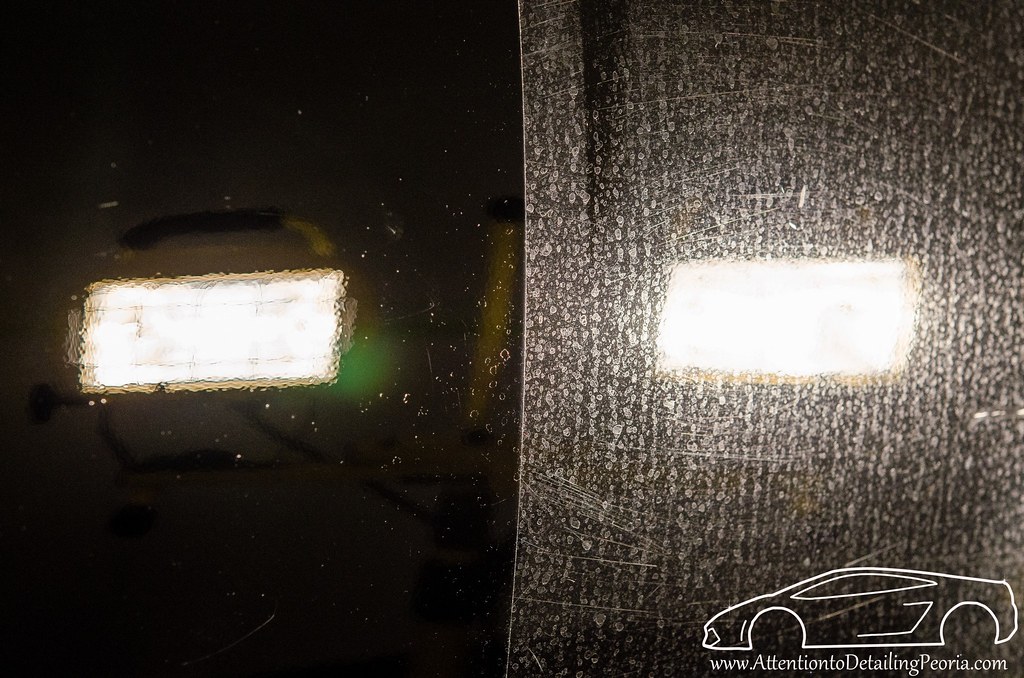
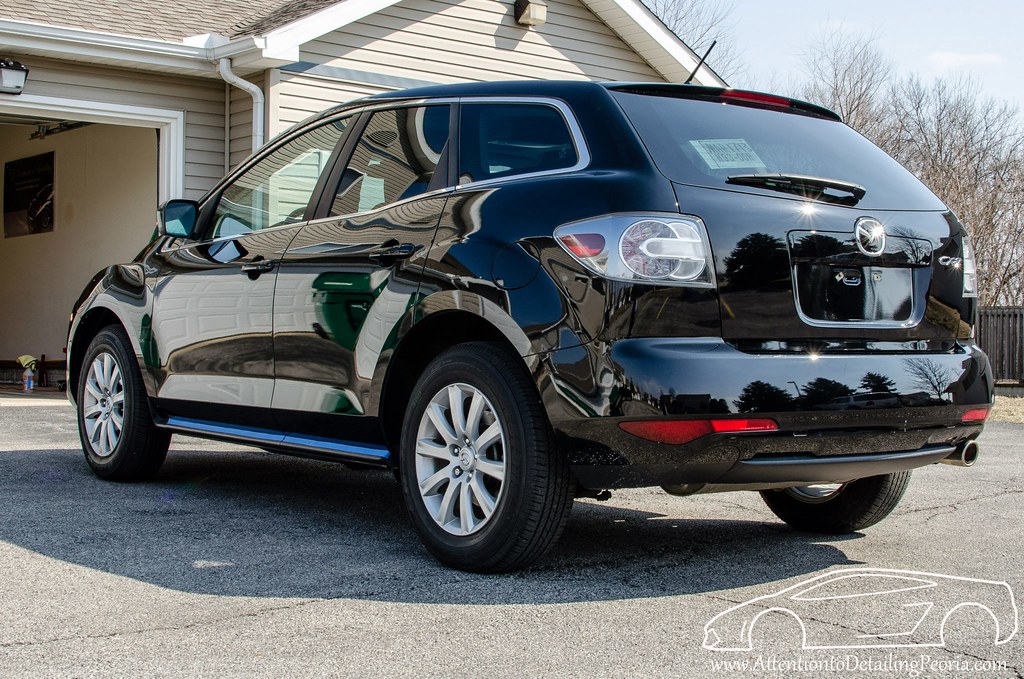
As you can see in the image above, this vehicle was plagued with an incredible amount of hard water spots (owner must have parked by a sprinkler for years as the damage was only to one side). The left side of the photo has undergone a 2 step paint correction process, and you will notice there are still some heavy etchings that remain (notice how you can actually see the ‘crater’ left in the paint). Due to the very thin paint on this car, I was not willing to go any further with the correction, therefore this damage can be considered permanent. With that being said, the improvement was still drastic and the overall appearance of the car was dramatically enhanced after the correction process as seen below.

Once the water spots deposits and/or etchings have been removed, it is a great idea to add a new layer of protection to your vehicle to help protect the paint from future spotting and other environmental contamination.