

As many of you already know, Optimum No-Rinse (ONR) has many uses in the detailing world. Greg of Reflections Detailing explains in this article how ONR can be used as a quick detailer, interior detailer, glass cleaner, etc. That said its greatest advantage lies within its name: no-rinse washing.
Washing the vehicle is undoubtedly the most important step in the paint maintenance process and we shouldn’t let the lack of time or sub zero temperatures affect our washing routines (well maybe just a little 🙂 ). All kidding aside, it’s extremely important to wash the paint well, especially in the colder areas of the country, where the car will see snow and extremely low temperatures. With snow and winter comes salt on the roads, which results in extremely dirty cars, ultimately resulting in rust if not washed off immediately. Winter presents an issue for most DIY guys/gals in that the temperatures are just way too cold to stand outside your garage and perform a proper 2-bucket wash as you’ll simply be covering your car in ice! As stated earlier though, we simply must overcome this challenge because the alternative is much worse. So get the gloves and hats ready and let’s go through the steps of a proper winter wash.
Products:


- Optimum No-Rinse (I use 4oz or 8oz dispenser bottles as they’re small yet carry enough liquid for the process. They also make it easy to tell how much ONR I am pouring out.)
- ONR “Quick Detailer” (I use a 32oz spray bottle with about 1-1.5oz ONR and the rest water.)
- (2-3) 5-gallon buckets (I usually use two rinse buckets so I don’t have to replace the rinse water after doing part of the car, but you can get away with just one rinse bucket. Just remember to replace the water as needed. The other bucket is your wash bucket.)
- Grit Guard Inserts (I use two in each bucket, but one is a must to keep dirt off the wash mitt and avoid swirl marks.)
- (1-2) Sheepskin Wash Mitts (I usually use two as I feel it’s more efficient but one is perfectly fine.)
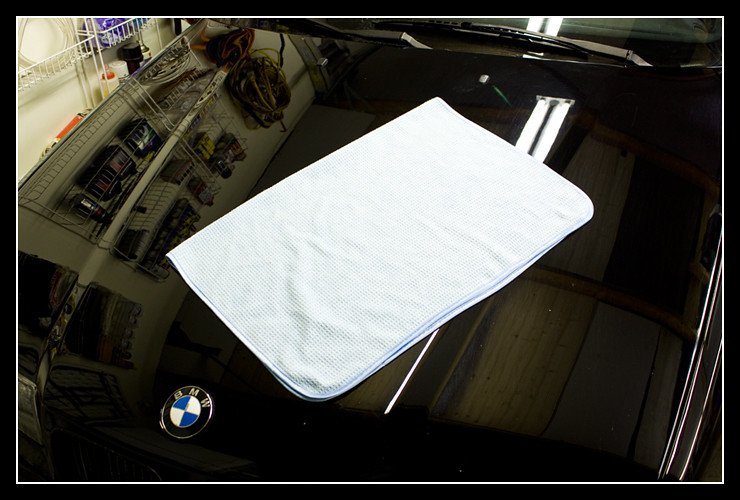
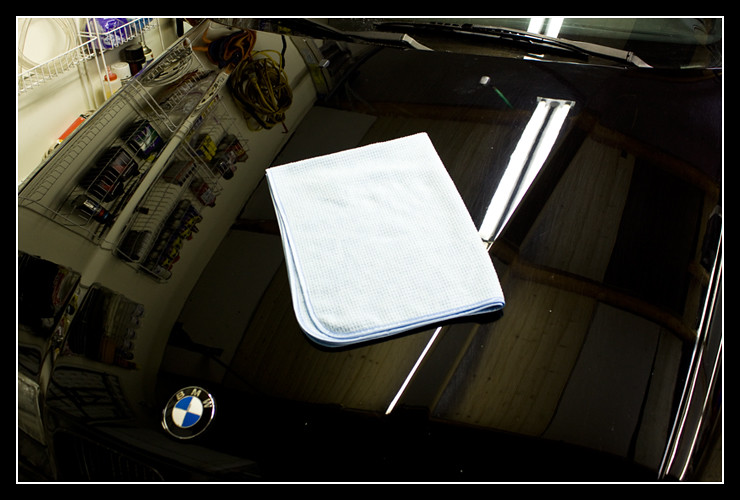
- (2-3) Microfiber Waffle Weave Dry Towels (After a few washes you’ll be able to tell how many you need to properly dry your particular car.)
- (4-5) Ultra Plush DI Microfiber Towels (For any touch-ups with QD after the wash)
Optional/Recommended:
- Blackfire Wet Diamond (Or other sealant/wax (This is for those running it through a touch-less car wash as described in the following process.)
- (2) Buckets & (1) mitt for wheels (Same process will be done as on the paint, but with two different buckets and a separate wash mitt.)
- (2) Buckets & (1) mitt/sponge for wheel wells & tires (Again, same process but you don’t want to cross- contaminate the water and mitt.)
Before I go into the process, I’d like to briefly mention an alternative to a typical ONR wash. It’s the way I have always washed my cars in the winter and I find it works best to clean the paint well and keep it protected. The alternative I’m talking about involves running the car through a touchless automatic car wash near your place of residence, if at all possible, before doing any work with the products listed above. Reason being is that the touchless car wash uses high pressure and strong cleaners to remove a lot of the built up dirt, salt, etc. from the paint. Most touchless washes also have the undercarriage sprayer to rinse off all the built up grime from the bottom of your vehicle. This is extremely important because owners usually neglect the underside of their vehicles and are surprised when over the years there are multiple rust spots down there. The one downside of starting off a winter wash by visiting the auto touchless wash is that their cleaners are extremely strong and will more than likely compromise any protection layer you have on the paint. This means that every time you wash the car in this manner, you’ll need to re-seal it to restore the protection. I don’t mind doing the work as I know the car will be thoroughly cleaned and well protected, but it is only an option. On the other hand, if you do ONR winter washes often enough when the vehicle isn’t too dirty, you will more than likely end up needing to use the touchless wash method only once a month or so. Now you’re almost back to the usual waxing/sealing schedule so nothing is out of the ordinary.
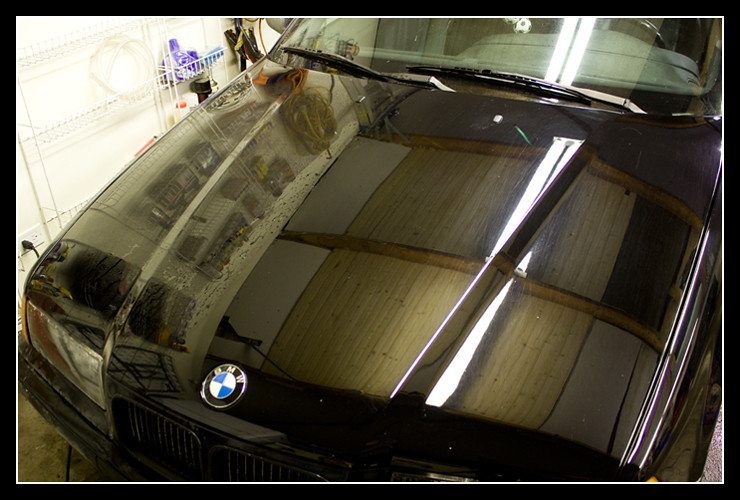
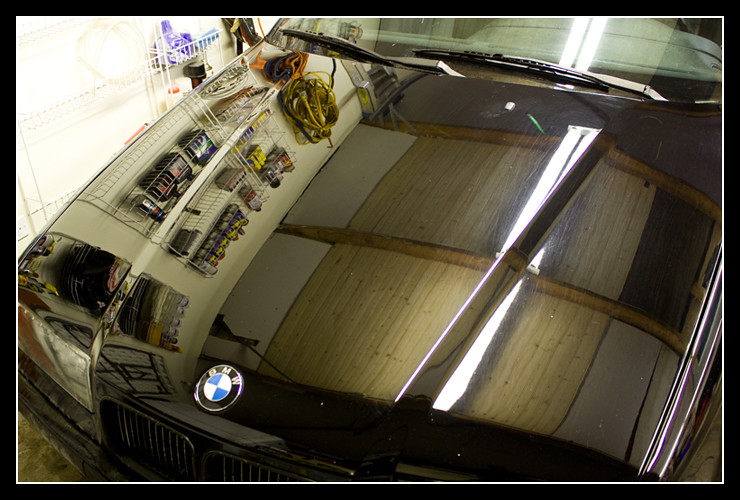
As you can see in the photos below, the touchless washes create a much cleaner surface and leave much less dirt to be removed by you during the wash process. This ensures you’re far less likely to introduce swirl marks into the paint through the wash process.
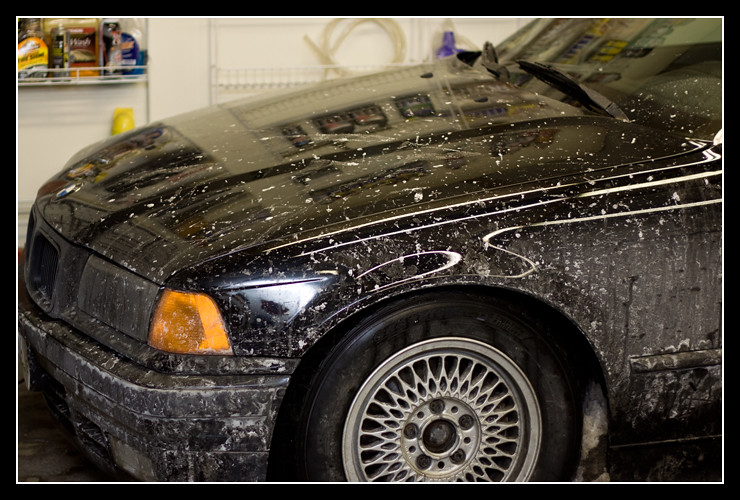
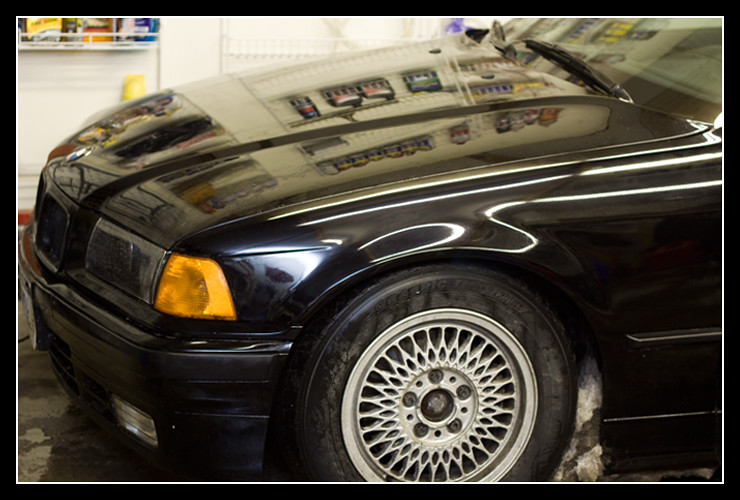
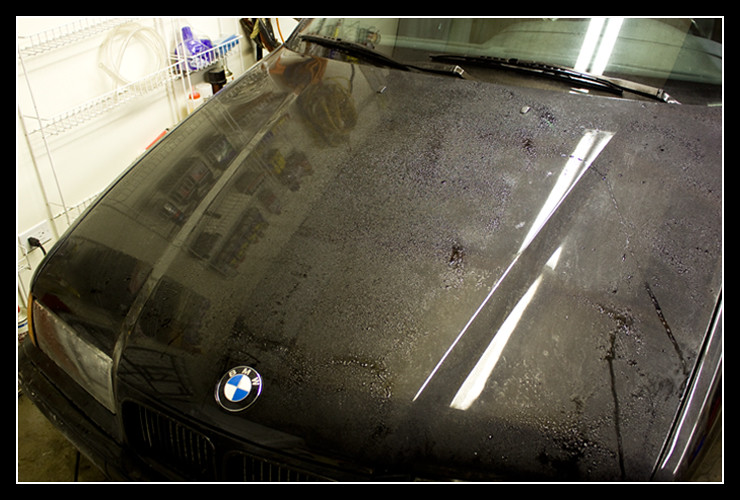
If you are unable to go to an auto touchless wash nearby, you can still follow the wash process below. However keep in mind that the vehicle will be much dirtier, making it necessary to wash smaller areas on each panel in order to avoid carrying too much dirt in the wash mitt and creating swirl marks. It also means more mitts might need to be used and the rinse water should definitely be replaced often. As you will see in the following photos, the vehicle in question (mine) was not properly washed, dried or cared for by the previous owner(s), resulting in horrible swirl marks and somewhat dull paint all over. The paint job is only about one year old and I plan on doing a proper rejuvenation come spring time. For now, I just want to preserve the paint and try to protect it as well as I possibly can.
On to the process
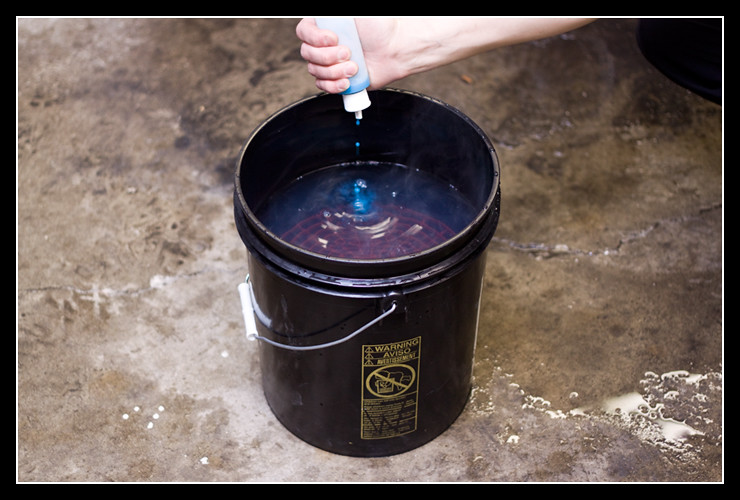
So you’re done going through the touchless wash and you’re back home, hopefully in your warm and insulated garage. First thing you want to do is place the grit guards into each of the buckets. Follow by filling them up with water and adding an appropriate amount of ONR to your soap/wash bucket. I prefer to use warm/hot water and bring it out to the garage as it’s much easier on my hands and I think my car likes it as well! 🙂
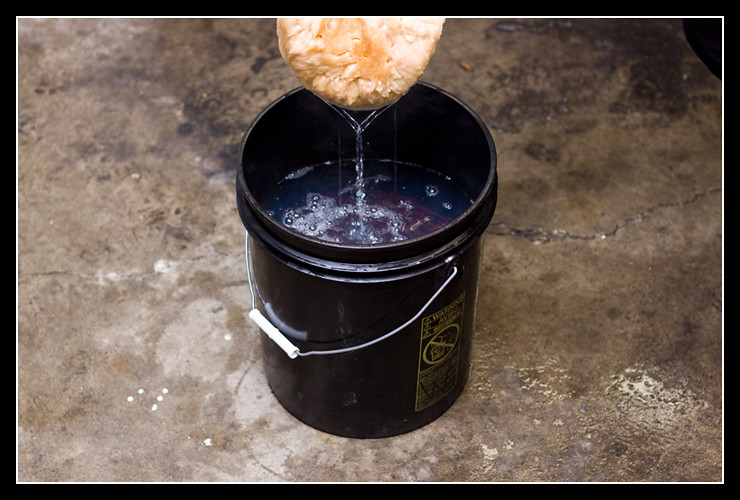
Here is the wash bucket with about 3 gallons of water inside.

Now I like to pour in about 1.5-2oz ONR, then keep filling the bucket to about 3.5 gallons. This gives me a little more than the recommended 1oz ONR to 2 gallons of water, but I find it works very well.
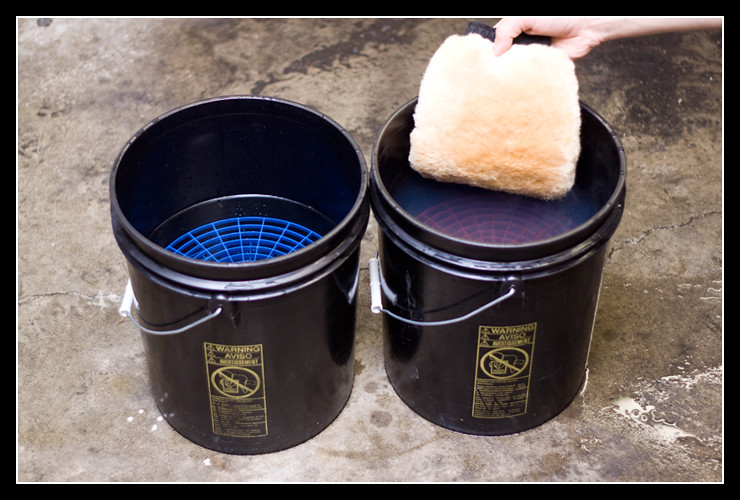
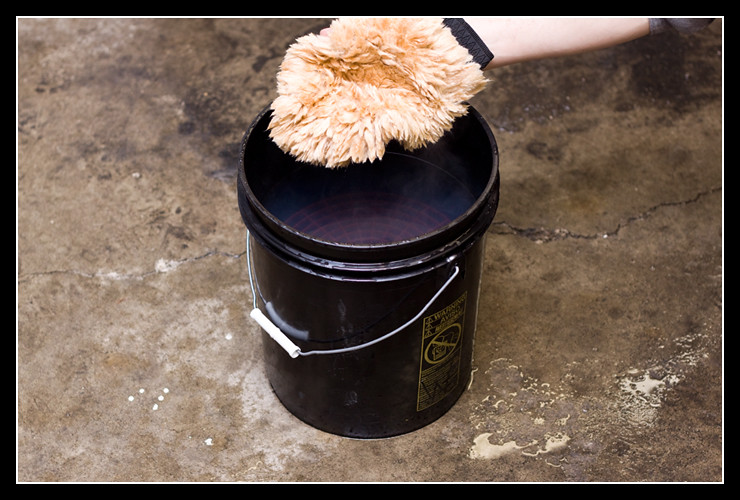
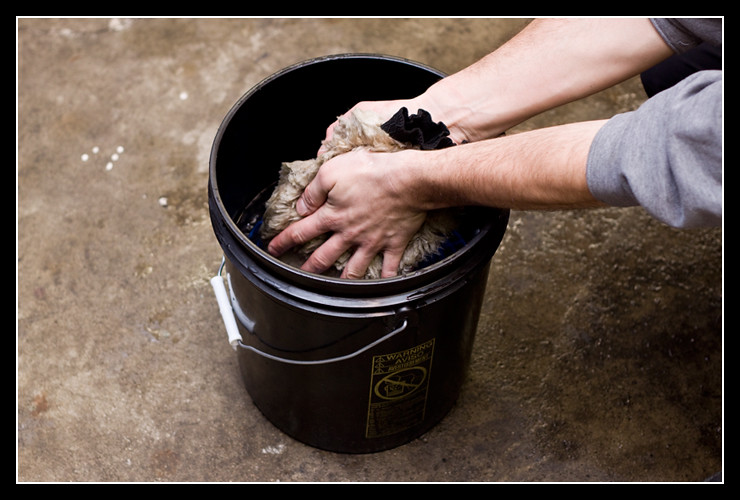
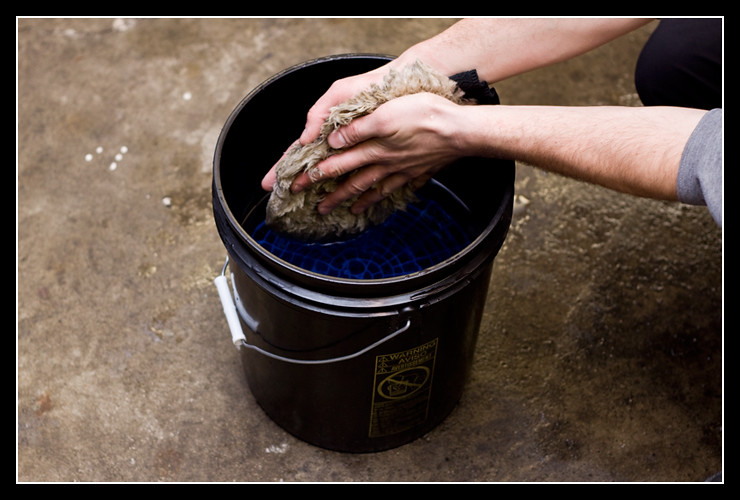
Once my buckets are full and ready to be used, I take my wash mitt(s) and throw it into the wash bucket so it can soak up some of the solution and soften up.
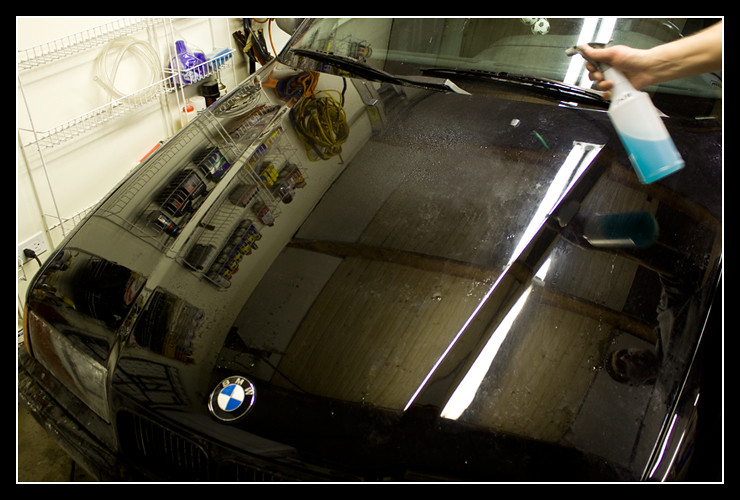
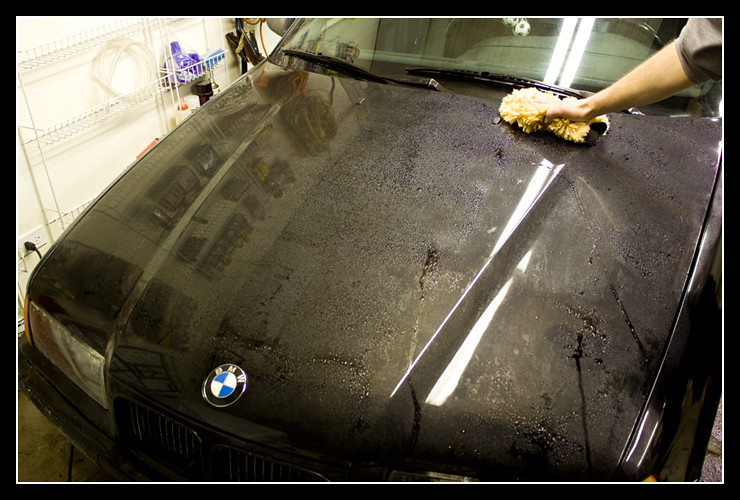
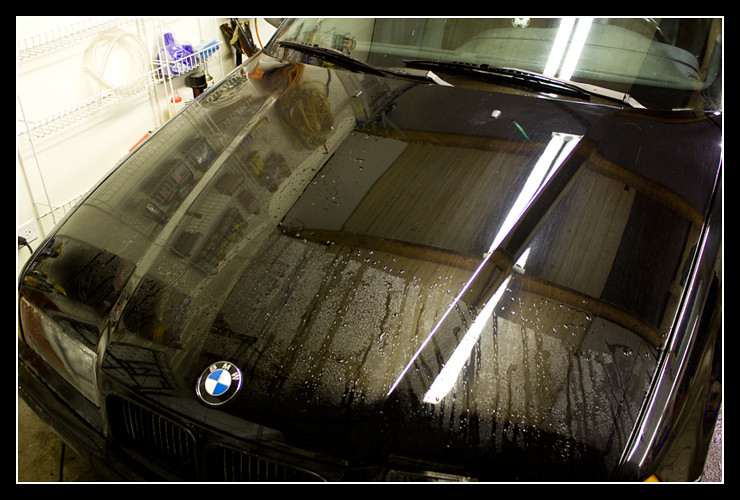
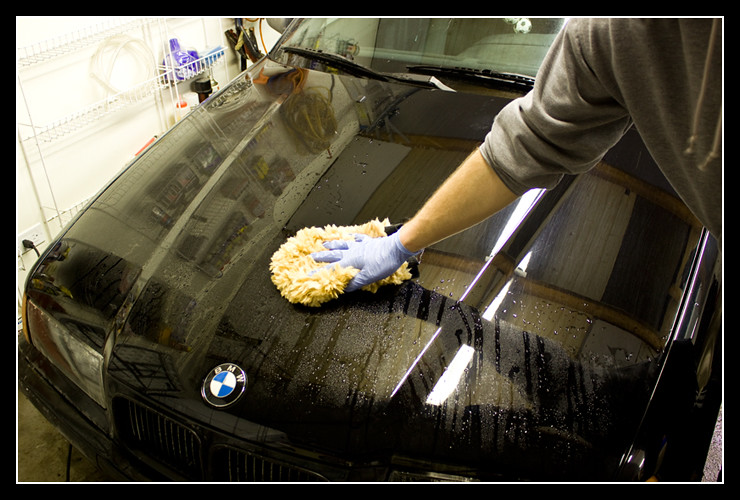
As with any washing, I start from top of the car and move onto the bottom. Washing in small sections (roughly one quarter of the roof), I wash in the following order: roof, windshield, hood, rear glass, top of trunk, glass on driver side, top part of driver side (first doors, then rear quarter, then fender), glass on passenger side, top part of passenger side, rear of trunk, bottom part of driver side doors, bottom part of passenger side doors, rear bumper, front bumper, side skirts. You want to wash in small sections because, as mentioned above, the smaller the section the less dirt you trap in your mitt, reducing your chances of causing swirl marks with that dirt. You also want to start with the cleanest panels and move onto the dirtiest panels, so the list above can actually change sometimes, but generally that’s the order of cleanest to dirtiest. In the following photos, I will be using the hood as the sample panel.
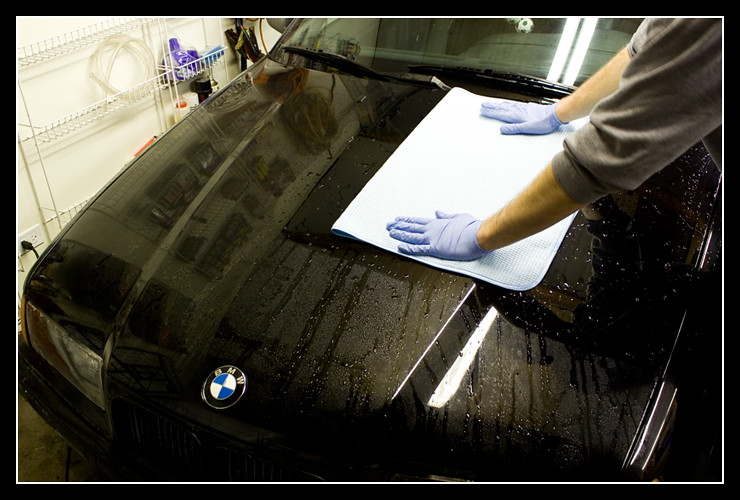
To start washing, it’s best to pre-treat the paint with some ONR QD. Spray the hood with the ONR QD bottle in order to loosen up some dirt and make it easier for the wash mitt to pick that dirt up. I tend to spray the whole panel when it’s colder outside, but I spray only the section I am washing when it’s warmer because the solution tends to dry up on the areas you’re not washing.
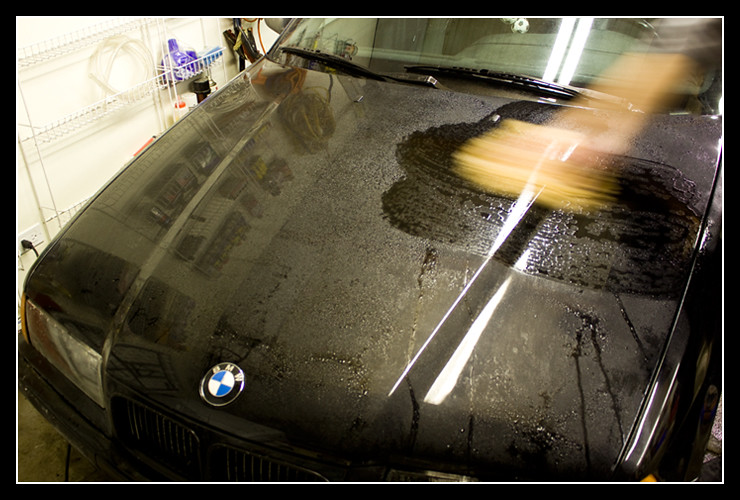
Next, you want to get the wash mitt and wash the section. Before fully removing the mitt from the wash bucket, you want to squeeze some water out of the mitt so it isn’t fully soaked. However, you don’t want to completely squeeze out the water. It’s hard to explain without seeing it in person, but you basically want a few drops to still drip from the wash mitt. It takes a little practice but you get the hang of how much to use fairly quickly. However, this is very subjective, so this is just my $0.02. In the following photos I’ve tried to show too much, too little and just enough water in the wash mitt.

Once you have the mitt properly soaked, lift it up to the panel and begin to wash in straight strokes and very light to no pressure. I prefer holding the mitt on the outside rather than putting my hand inside. Use one side of the mitt to go in one direction, then turn it over and go in the other direction on that same section. When doing an ONR wash, or any wash for that matter, it helps a lot to go outside the imaginary borders of the section you’re washing. For example, if you’re doing one half of a trunk lid, don’t do exactly 50% of the trunk, but go an extra couple inches over the halfway line. Same thing should be done on the other half. By doing so, you ensure that you’re washing the entire panel and not missing even the smallest spot in the middle.
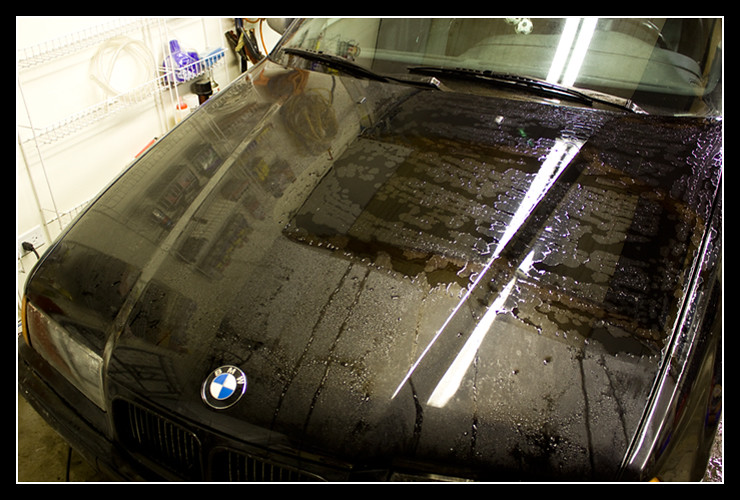
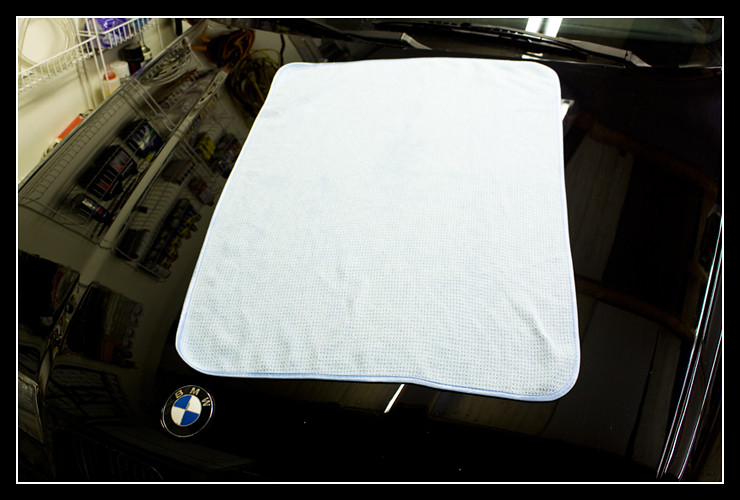
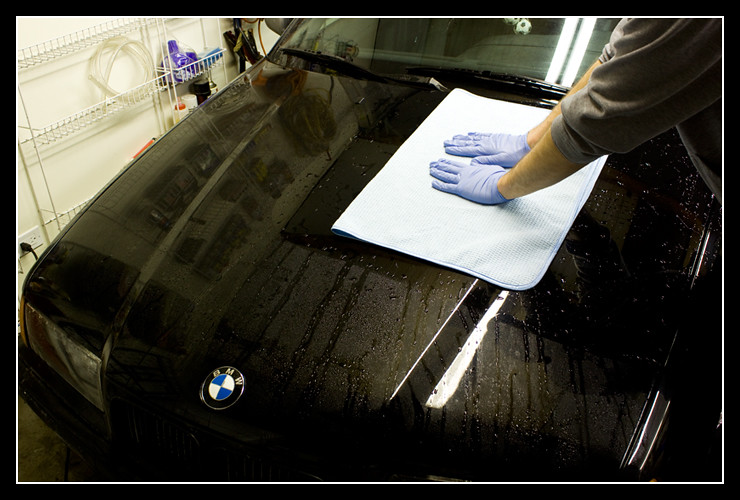
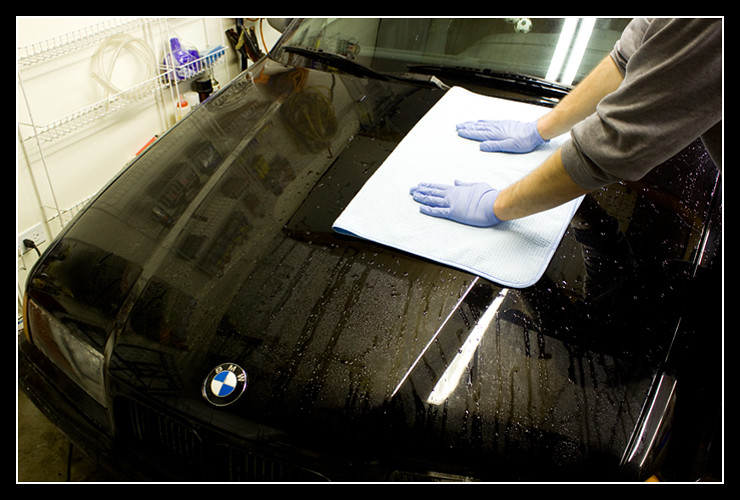
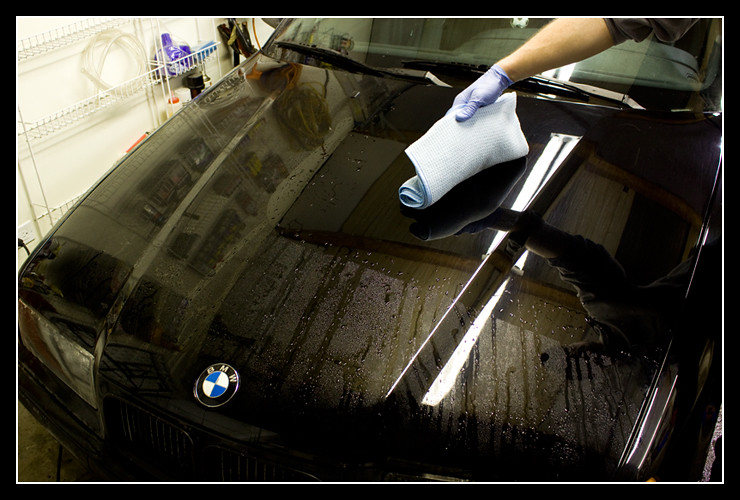
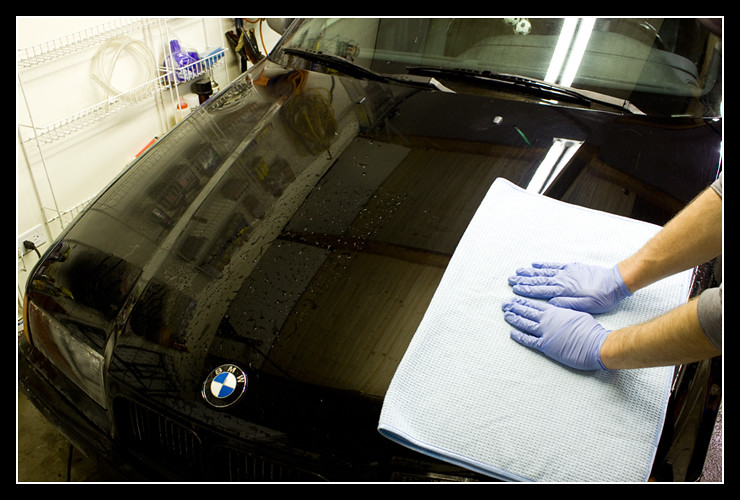
After washing the section with both sides of the mitt, throw the mitt into the rinse bucket and leave it there for a minute. Then immediately dry the section you just washed with ONR. To dry, use one of the MF WW Dry towels. For me, the best way to use the dry towel is to fold it in half once or twice (the three photos showing the folded towel were taken after the wash on clean paint), then place the towel over the washed section and blot-dry the section. To do this, simply place your hands together, palms down, in the middle of the towel, and with very light pressure move them in the opposite direction to the edge of the towel. Repeat until you’ve covered the entire towel surface, then pick up the towel, fold it in half again and with absolutely no pressure wipe off any wash solution left over.
Once done drying the section put the dry towel away and reach into the rinse bucket to rinse off the mitt you placed in there a few moments ago. To rinse the mitt, simply hold it from one side, lightly rub the other side against the grit guard, then flip over and repeat. I then like to hold the mitt in the rinse bucket, not touching the grit guard, and with a hand on each side, slowly massage away at the mitt to loosen up any more dirt particles stuck in the nap.
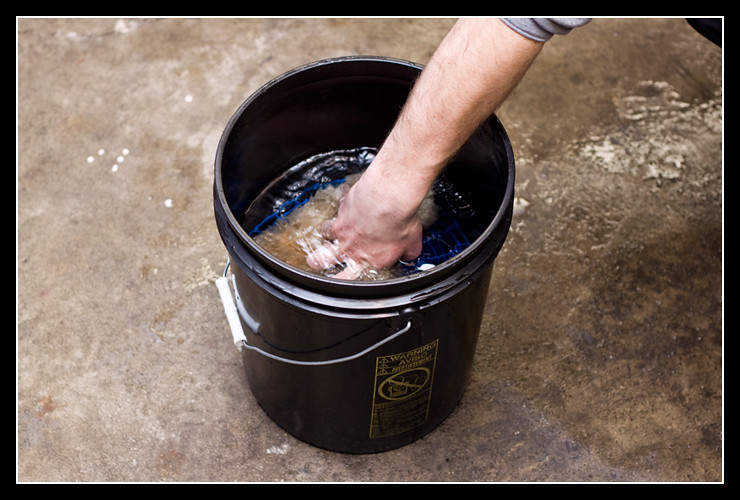

Now simply pull it out of the rinse bucket, swish it around a bit in the wash bucket, and proceed to squeeze some water out. Then wash and dry the next section.
Keep going until the entire vehicle is washed and dried in the same manner. While washing, make sure to check that the section you’re washing is completely washed before drying it. If necessary, wash the section, rinse off the mitt, soak the mitt in the wash bucket again, and re-wash that same section to get off any remaining or stubborn dirt. If there is any left over water you can take care of it by lightly spraying an Ultra Plush MF towel with the ONR QD and doing a quick wipe down of the area.
As I mentioned before, wheels, tires and wheel wells should also be washed regularly during winter. As with a usual 2-bucket wash utilizing a hose and rinsing with water, I prefer to wash the wheel area first. Even though there’s no overspray water such as with the regular wash, you will still get a little solution on the paint. This usually happens when washing the wheel wells and covering the part of the fender or rear quarter panel that’s bent under, going into the wheel well. More often than not you’ll end up with a thin streak of water on the actual surface of the panel, which you can later wash off. As I said earlier, the process will be the same for wheels, tires and wheel wells, in that you’ll pre-soak them with ONR QD then wash with a mitt or sponge as you would the paint. If the wheel area is extremely soiled and the automatic touchless wash didn’t do much to clean them up, I prefer to pre-treat the area with a dedicated wheel cleaner instead of ONR. This way you get the wheel area much cleaner without needing high pressure rinsing, etc.
Finally, after completing the thorough wash, reach for some Blackfire Wet Diamond and protect the paint. I generally apply the sealant with a Blue 5.5” Lake Country Pad using the Porter Cable 7424XP polisher to ensure that just enough is used and that I get even coverage. I then use a small foam applicator pad to get into areas where the polisher won’t reach.
Well there you have it, the final product: a clean, shiny and well protected car, ready to take on winter and whatever winter throws at it.
Buy Products From This Article
Purchase the products used in this article individually or in one convenient package here!