
The Ferrari 288 GTO is an exotic homologation version of the 308 GTB that was produced from 1984-1986. The GTO was built to compete in the new Group B Race series and a minimum of 200 units were required for homologation. During its 2 year production run in 1984 and 1985, only a total of 272 units were ever built.
Although the GTO looks similar to the 308, it is actually quite different. It’s longer, wider, and packs considerably more power under the hood. The GTO utilized a 2.8 liter, twin turbo charged V-8 motor that produced an impressive 400hp and 366 lb-ft of torque. As for performance, it achieved 0-60 times in the upper 4 second range, and had a top speed of 189 mph (304 km/h) making it the first street legal production car to reach 300 km/h!
I was fortunate enough to go for a ride in this particular GTO, and the owner was kind enough to drive it the way it was intended…wide open! This car flies, and you would never guess that it was almost 25 years old. The acceleration and sound of the twin turbos were intoxicating, and I had a big grin on my face for hours afterwards.
As for the GTO…”It is so choice. If you have the means I highly recommend picking one up!” OK, so I created a slight breach of etiquette on movie references there since it’s not the proper model Ferrari (1961 250 GT California from Ferris Bueller), but you get the point! And if you picked up my secondary movie reference in that last sentence, then you have as much worthless movie trivia in your head as I do!
The car had very low mileage as to be expected, and even spent 12 years of its life in a museum. The paint still had a decent gloss to it, but years of improper washing, drying, and wipe downs had created a fair amount of swirls in the finish. The owner and I discussed the plan of attack, and decided to take a more conservative approach to preserve as much of the thin paint as we could since this car will be around for many years to come. The goal was to get about an 80% correction rate.
This GTO was being shipped out to Pebble Beach in a few weeks for the first-ever Ferrari 288 GTO Reunion held in the United States to celebrate its 25th Anniversary. The event is running during the same week as the Pebble Beach Concours d’Elegance, and should bring in some really nice examples from across the country.
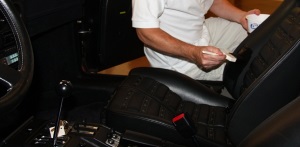
The leather was in good condition, but given its age I decided that it should get a full Leatherique treatment. This would help maintain a soft and supple finish in the GTO to ensure that it keeps looking good for a long time. Since the first step of the process needs to sit on the leather for about a day, I started with it before doing anything else to maximize the amount of time to work. I was there for two full days, so I knew that it would have plenty of time.
Day 1:
I first applied the Rejuvenator Oil with a foam brush.


Then I massaged it into the surfaces by hand.

The seats, parking brake boot, and leather door handles were all treated.

Here’s a helpful tip for when you’re using Leatherique and need to move the car around. Get a large sheet of plastic (I cut a lawn bag) and cover the seat so you can get in and out of the car without getting it all over yourself.

Now that the leather is being cleaned and deep conditioned, I moved the car outside to wash.
I took the photos below in the sunshine to show the true condition of the paint. As you can see, there are plenty of swirls to deal with.


First up were the wheels. I sprayed them down with P21S Wheel Gel, which is probably the safest wheel cleaning product on the market. I’ll usually give it a few minutes to sit on the surface, and then clean the wheels with my Mini E-Z Detail wheel brush and a dedicated wash mitt (don’t use the same wash mitt for the wheels and painted surfaces).

I started the wash process by spraying P21S Total Auto Wash in the cracks, crevices, and emblems to help break down any build up of old wax and polish. After letting it dwell for a few minutes, I agitated those areas with a soft brush.


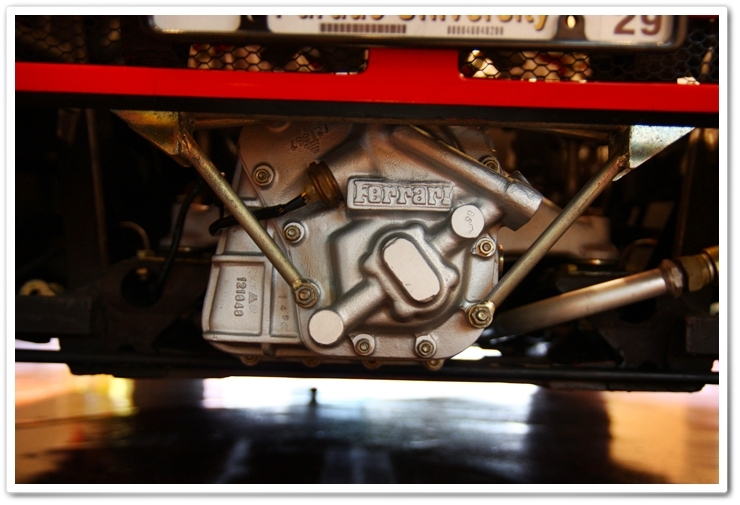
The gearbox had a bit of grime built up on it, so I also cleaned it with P21S Total Auto Wash.

For the rest of the vehicle, I used Chemical Guys Citrus Wash & Clear at paint prep ratio (2oz/gal) to strip off any wax to ensure I have a totally clean surface for polishing. For maintenance washing, the Wash & Clear is safe for existing coats of wax if used at a ratio of .5oz/gal. As usual I used the two bucket method with Grit Guards, and a DI sheepskin wash mitt.
The GTO is now completely clean, and ready for claying.

Once I pulled the GTO back into the garage, I clayed it using DI fine grade clay with Dodo Juice Born Slippy lube to remove any embedded contaminants on the surface. This will provide a totally smooth finish to polish on. As expected, I found the GTO to have very few contaminants since it hasn’t seen much driving time.
Now that the cleaning and decontamination stage is complete, I had to painstakingly tape off all seems, high points, and any other areas that could be damaged during the polishing process.

The first step in the process was to determine what polish/pad combination I would need to remove the defects. It’s always smart to begin with the least aggressive combination first and work your way up as necessary until you determine how hard or soft the paint is and what it will take to achieve your desired level of correction. Remember, paint preservation is the key.
After a few trials, I found that Menzerna Super Intensive Polish and an orange pad was the winning combination for my first polishing step. As you can see from the photo below, I’ve already removed all of the swirls, and there is a high level of clarity in the reflection even before any finish polishing.

Because of the angle you can’t tell the difference in the paint between the fender (corrected), and door (uncorrected), but I liked this shot since it shows the beautiful lines of the car.

On the door here you can see the severity of the swirls and light scratches when you look at the reflections of both the halogens and the camera flash.

This is just after polishing with SIP/orange. The defects are gone, and there’s a lot more clarity, but you can tell in the camera flash that there’s a little bit of haze that will be cleared up in the finish polishing stage.

The GTO presents a lot of challenging areas because of the curves, lines, and difficult to reach areas. For most of the car I chose to use my Porter Cable 7424XP random orbital polisher since it’s smaller and easier to get in and out of tight areas. For the roof and much of the hood I switched to my Makita rotary.

The rear deck lid proved to be the most challenging of all (you’ll see why in later photos), and I spent most of my time back here. In the first photo you can see the “before” condition of the paint prior to correction.

After just the first polishing stage with SIP you can see a big difference.

In this 50/50 shot you can see that the top half of the photo has been polished, whereas the bottom half has not. Although the camera didn’t pick it up as much as was visible in person, the true color of red was restored once the fine swirls and scratches are removed. Once you accomplish this surface leveling, the depth, gloss, and reflectivity of the finish are improved dramatically. You can still see a few scratch remnants in the polished part here, so I went back over another pass to remove them as much as safely possible.

Fast forward here a bit as I’ve made my way around to the front of the GTO. Since the horizontal surfaces typically have the heaviest defects, I worked on the larger flat surfaces of the roof and hood with the more powerful rotary, and used the PC for the more intricate work as seen here.

Unfortunately the day went cloudy, and the next day was calling for rain so I couldn’t get any outside sun shots so you can see how it compares to the initial photos I took. I had 3 different types of light sources for inspection, and I can say that it turned out very good.

It was time to call it a day after about 11 hours. The heavy polishing was complete, and I would come back in the morning to proceed with the finish polishing.
Day 2:
For the final polishing stage, I used Menzerna 106FA with a grey finishing pad on the PC 7424XP. This removed any slight haze from the medium-cut SIP, and really brought out the gloss and the true color of the beautiful Ferrari red!

Once I finished with this polishing stage, I opened it up and began to clean any polish residue and dust from everywhere. The only reason you see the polisher laying on its side is because I’m finished with that stage, and the attached pad will be tossed into the laundry basket. You don’t want it to touch the floor while working with it because if you pick up even the smallest piece of dirt or debris in the pad, you can wreak havoc on the finish you’re polishing! (OK…important safety tip…thanks!) I normally won’t allow it to touch the floor even after I’m done, but I obviously got careless, and you caught me on film…

For the difficult to clean areas I used a very soft (non-scratching) brush.

The GTO has louvers…lots and lots of louvers!

Now that everything is cleaned up, and I’ve wiped the surface down with isopropyl alcohol to ensure the carrier oils from the polish are fully removed from the surface, it was time to apply a sealant. For this application I chose Blackfire Wet Diamond applied by PC7424XP and a blue finessing pad. It takes perhaps a little more effort than some others, but provides an incredibly wet finish that will last for up to 6 months. I’ve been very impressed with the look it provides on every car I’ve used it on, and the GTO was no exception!

For the tight areas I applied the Blackfire Wet Diamond by hand.

It worked great on the bumpers as well and made them look black again!

For the rims I used Klasse All-In-One. It cleans them up nicely, and adds a layer of protection as well.

This is art! The engine only required a light wipe down, so I used my spray bottle with Optimum No Rinse and a microfiber towel.

To finish up the interior, I sprayed down the leather with Leatherique Prestine Clean, and wiped it down with a damp towel. Most of the other surface areas were a velour-like material, so I used compressed air to clean it. The windows were cleaned with Stoner Invisible Glass.


Are you about ready for some after shots? It’s unfortunate that I couldn’t get any outside in the sunshine so you can see just how good the GTO looked when I was done. The owner and I just stood there for a while admiring it without saying a word…it was absolutely stunning! We were aiming for an 80% correction rate, but I achieved at least 90%.


You can see why I spent so much time back here!


From this angle you can get a feel for just how wide this car is.

The gear box looks much better now.
If you look closely, you can tell that it was pouring rain outside.


Here you can get an idea of the level of gloss that the car now had.

Just look at how wide the fenders are flared…beautiful!


For the tires, I chose to use Optimum Opti-Bond. It provides a deep, black look without being overly shiny. On a car like this, most people will want a more natural matte finish. The owner liked the look so much that I gave him my bottle of Opti-Bond.


While I was there I did interior leather preservation on one of this GTO’s rare stable mates…a 1967 Ferrari GTB/4!

Tucked back in its spot, and waiting to be taken to Pebble Beach.


As always, thank you for taking the time to review my work. This was a very special vehicle to work on and I was glad to share it with everybody.
If you have any additional comments or questions, please submit your reply in the comment box below.