
Quick Jump
This is part 2 of a 4 part series (read part 1, part 3, part 4)
- Using a clay bar to properly prep the surface
- Polishing your paint to a swirl free finish
- Measuring the paint’s thickness
- Properly taping your vehicle prior to polishing
- Choosing the right polish
- Using the proper amount of polish
- Results after one pass of Menzerna Power Finish on an orange pad
- Polishing lower panels with problem areas
- Removing deep etchings from the paint
- Safely polishing the trunk lid
- Removing scrapes, scratches and other deep imperfections
- Safely polishing pillars
- Alcohol wipe down after polishing
- Post-polish clean up with ONR
- Protecting your paint with a sealant
Using a clay bar to properly prep the surface (Return to Top)
Next up is to clay the surface to remove any contaminants that still sit on the paint. After you’ve washed your car and it is still wet, you can lightly glide your hand across the surface to see if it’s completely smooth, or if you feel any rough areas. The contaminants causing the rough feeling need to be removed. I recommend using a clay bar at least once per year (after coming out of winter) to keep the finish looking its best.
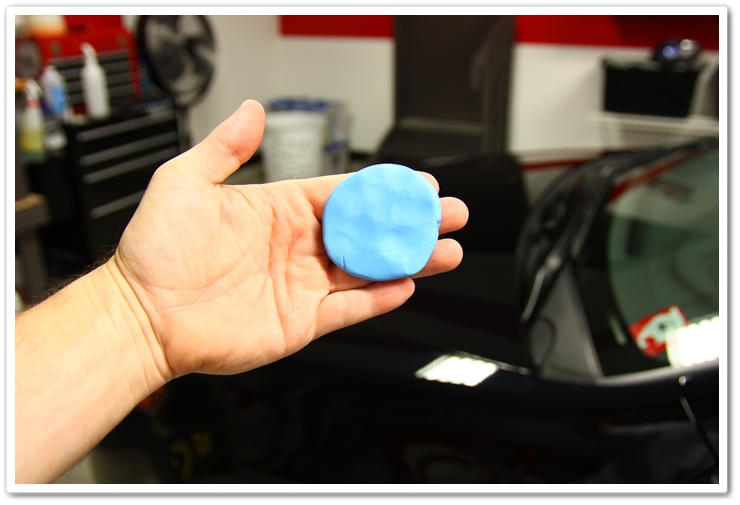
Since Acura paint (and most Japanese manufacturers) mar so easily, you want to do this process very carefully if you’re not planning to polish afterwards. I recommend using the DI fine grade clay bar, and Dodo Juice Born Slippy clay lube. Remember during the process to use very light pressure and to use plenty of lubricant to protect the finish from marring. For a complete step-by-step guide, please refer to my Tutorial on Proper Clay Bar Usage.
Start with a fresh piece of clay.

Apply plenty of clay lube, and lightly glide the clay across the surface in a straight back and forth motion. You should hear and feel the clay picking up contaminants.
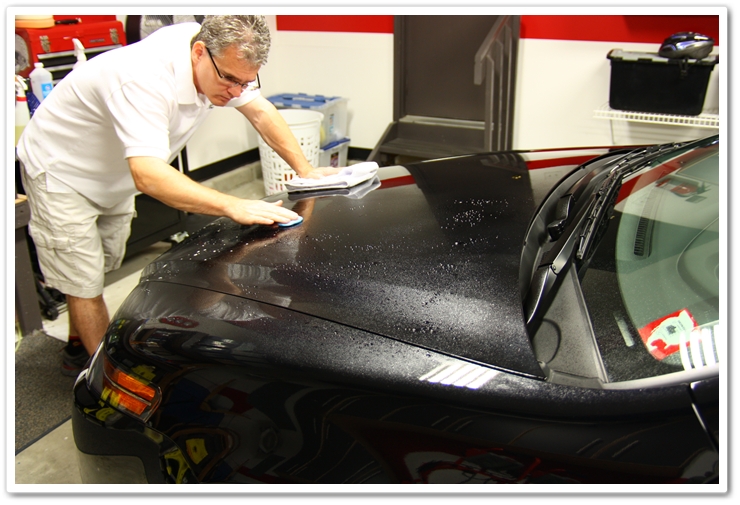
On most cars you will find that the most contaminated areas are the horizontal surfaces, the areas just behind the wheels, and the front and back bumpers.
Polishing your paint to a swirl free finish (Return to Top)
Measuring the paints thickness (Return to Top)
So far I’ve covered techniques and methods that can and should be performed by enthusiasts at all levels. Now I’m going to go over more advanced topics, but I don’t want the average enthusiasts to stop reading here! There is still plenty to discuss and learn, and later I will be reviewing interior detailing that everybody will benefit from.
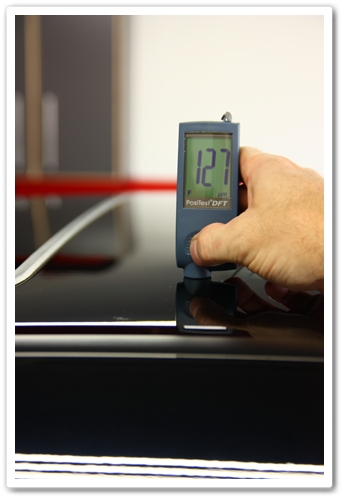
The next step is to take some paint thickness readings to see if any work has previously been done to it. While I’m looking for overall thickness, I’m mainly looking for consistencies. If I find an area that’s very thin or thick compared to the rest of the vehicle, then I know it’s been worked on (body work or heavy compounding) and will treat it accordingly. If I find a thin area in particular, I’ll be extra cautious and only lightly polish it.
Here I’m using my DeFelsko PosiTest DFT paint thickness gauge, and the readings are consistent with what are normal on Acuras.

Properly taping your vehicle prior to polishing (Return to Top)
Once the car has been clayed and wiped down, and measurements taken, it’s now time to prep for polishing by taping up plastic and rubber trim, and other areas that can get damaged by the polisher. Some polishes have a tendency to stain black plastics and rubber, so you want to be sure to get it all covered up. I find that 3M’s blue painter’s tape works perfectly, and is readily available at your local home improvement store.
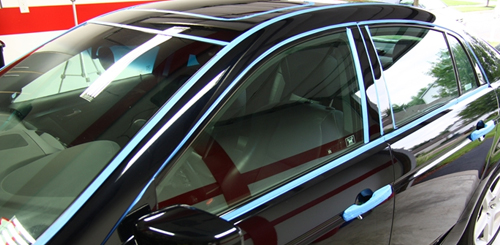
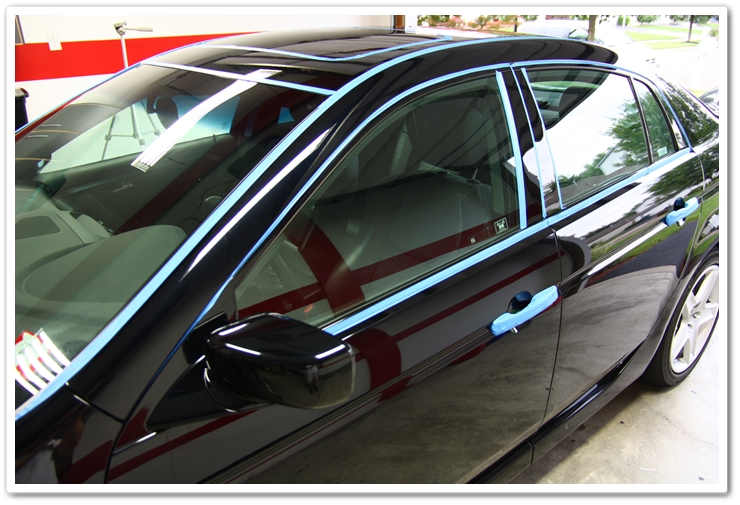
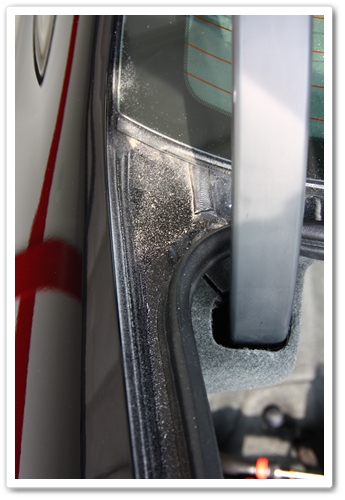
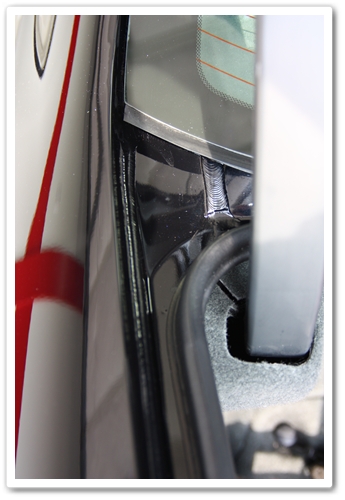
On the TL doors, the rubber seal comes over the top edge of the door, and then overlaps the pillar above it. This is a common area to get stained by polish or wax, so you definitely want to cover it up. Instead of just taping directly over it, I’ll open the door and cover the inner and outer area (fold it over). This way it’s covered, and you can still get in and out of the car if needed.

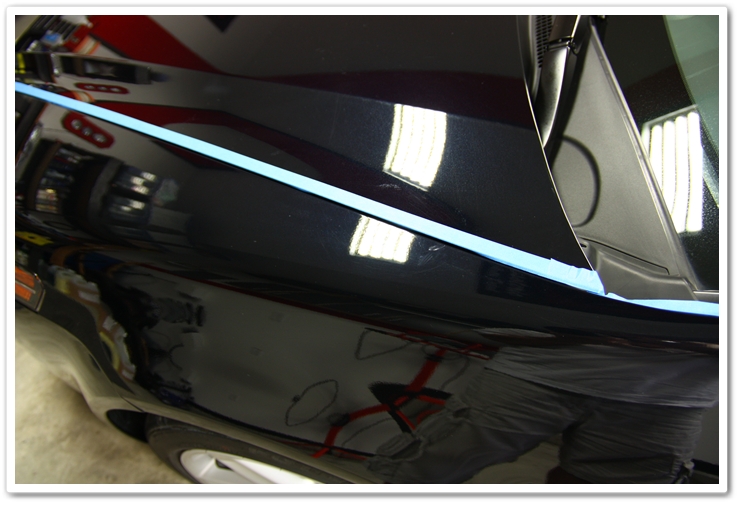
Other areas you need to be careful of on the TL’s are the hood and trunk. If you look closely at the seams where the hood/trunk lid and fenders meet, they are not even (especially the trunk area closest to the rear windshield). If you try to polish over these, there’s a good chance you could burn through the paint on the higher of the two surfaces if not careful. This is more of an issue when using a rotary versus a random orbital, but better safe than sorry!
What I’ll do is tape over the hood-side of the edge and tuck it into the seam when polishing the fender. When I move on to polishing the hood, then I’ll remove the tape from that side, and move it over to the fender. You could also just apply the tape where it adheres to both edges and covers the seam…whatever works best for you. The key is to always be careful at seams, edges, and high spots because that’s where the paint is typically the thinnest.
Choosing the proper polish (Return to Top)
Are you ready to start polishing (finally)?
Since I know the Acura paint so well, I had a plan of attack for polish and pad combinations based on the level of correction it required. I grabbed for an orange Lake Country pad (light cutting), and a bottle of Menzerna PO203S Power Finish. This is a medium-cut polish that finishes down extremely well. I could have used a heavier polish (Menzerna SIP) and a less aggressive pad (white polishing), but it wouldn’t have finished off as well. The goal is to use just enough cut with first polish and finish down as nicely as possible so that your final polish step is much easier. NBP finishes extremely well with Menzerna PO85RD, and the combination of PO203S/orange allowed me to go straight to the ultra-fine PO85RD afterwards.
Using the proper amount of polish (Return to Top)
Just 3 or 4 small drops of polish is all that is required for a working area (the bonus dribble in the middle is unnecessary).

Results after one pass of Menzerna Power Finish on an orange pad (Return to Top)
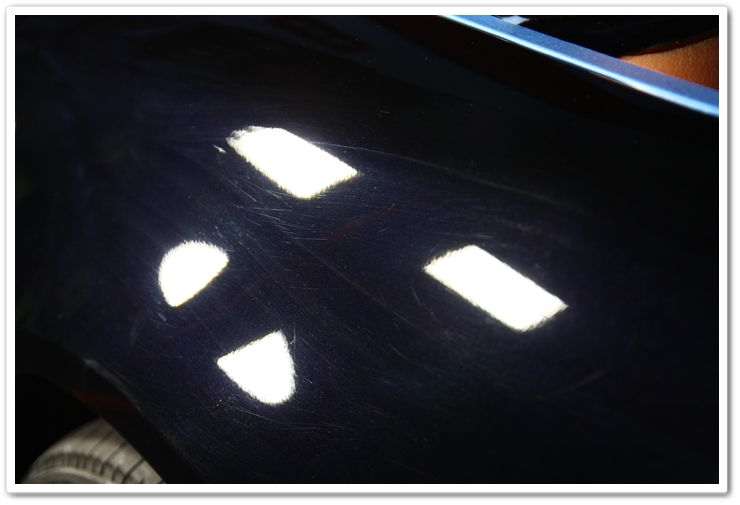
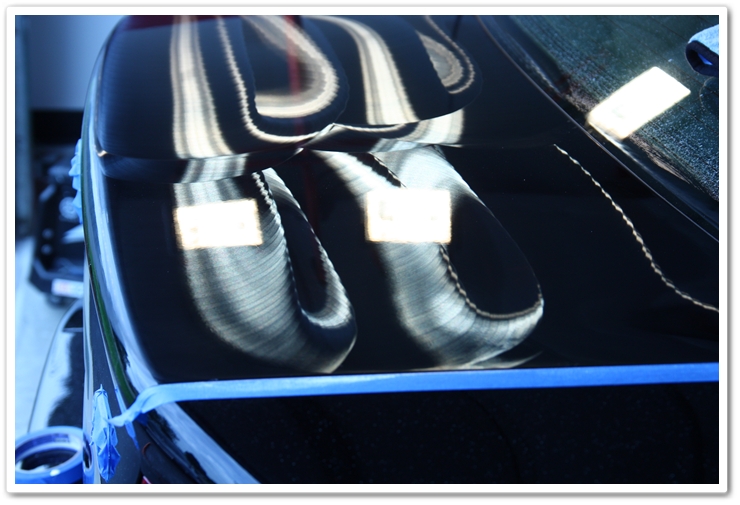
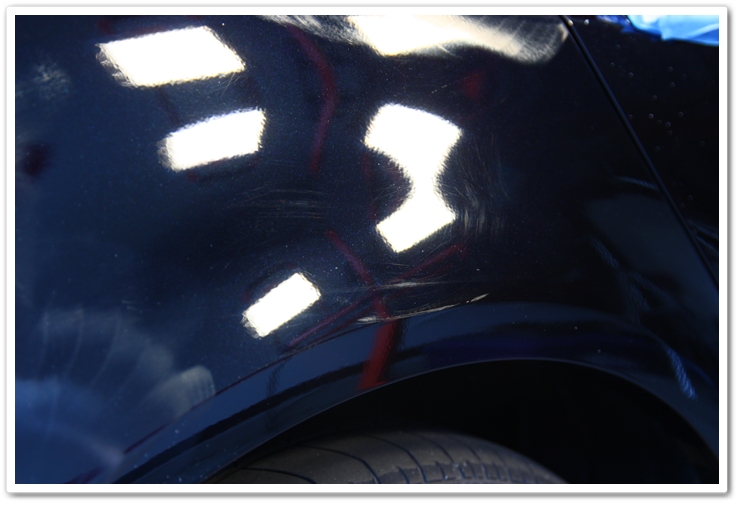
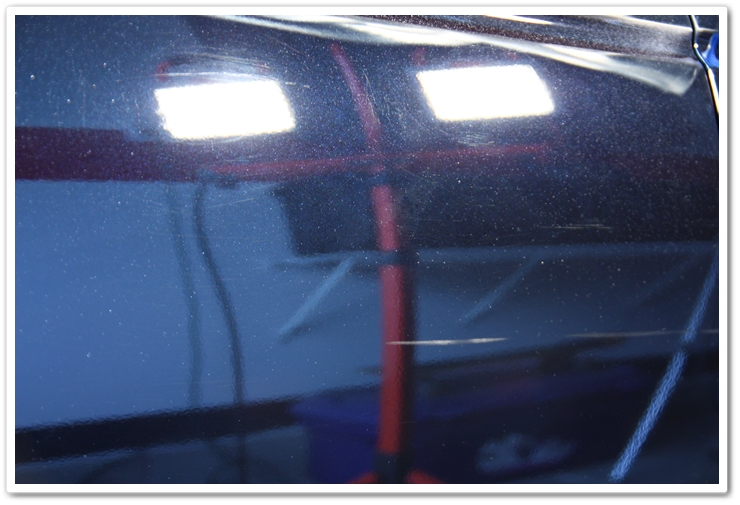
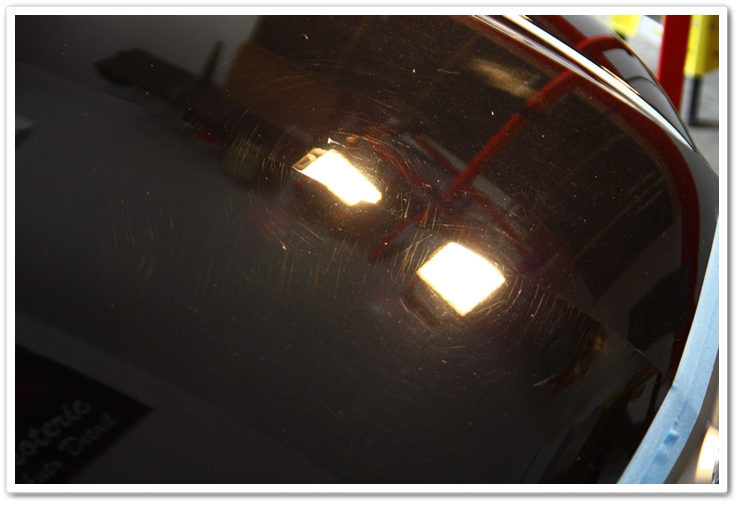
Here is the fender before. Notice that it is hazed over with fine scratches and swirls that prevent the blue flake from showing that well.
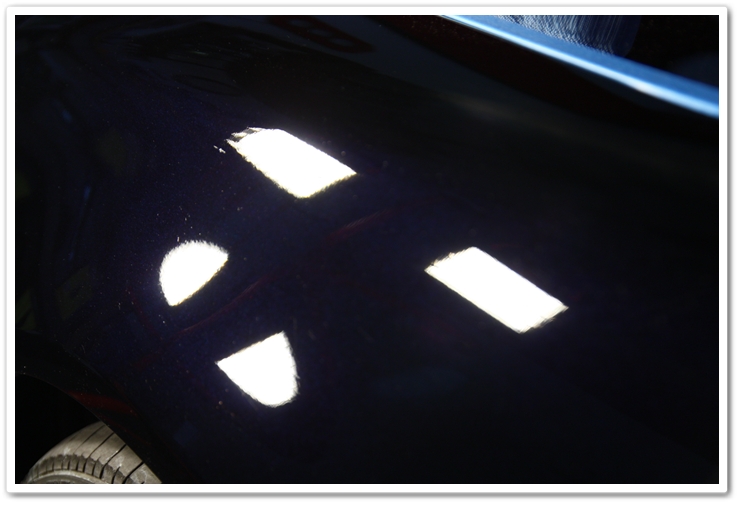
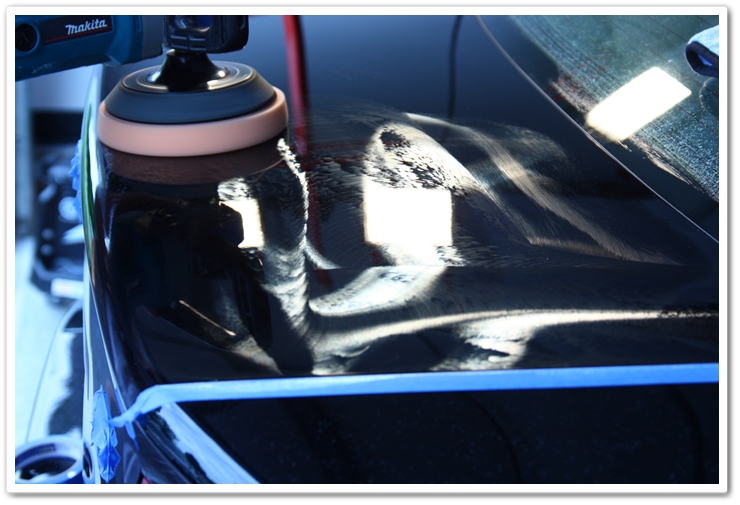
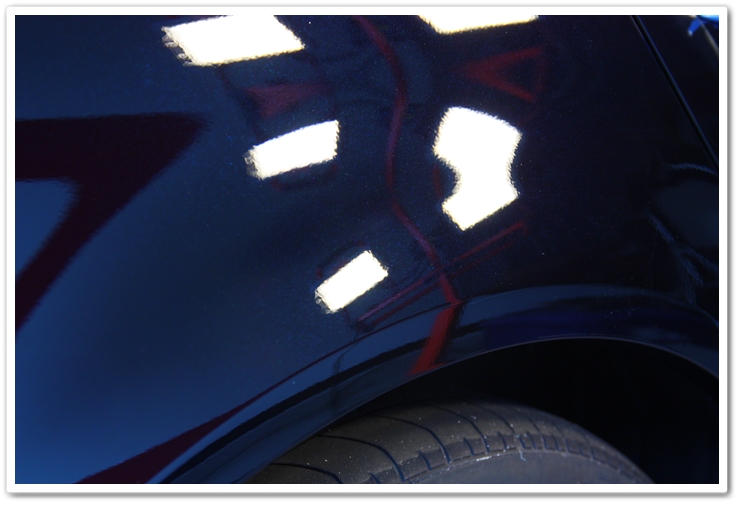
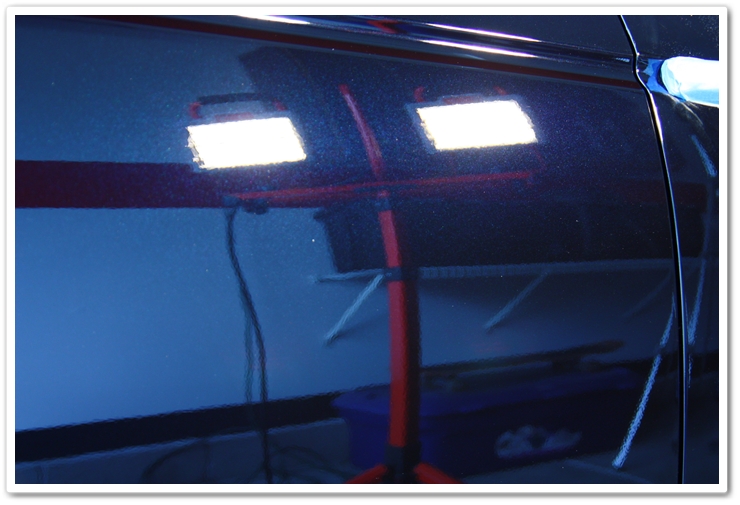
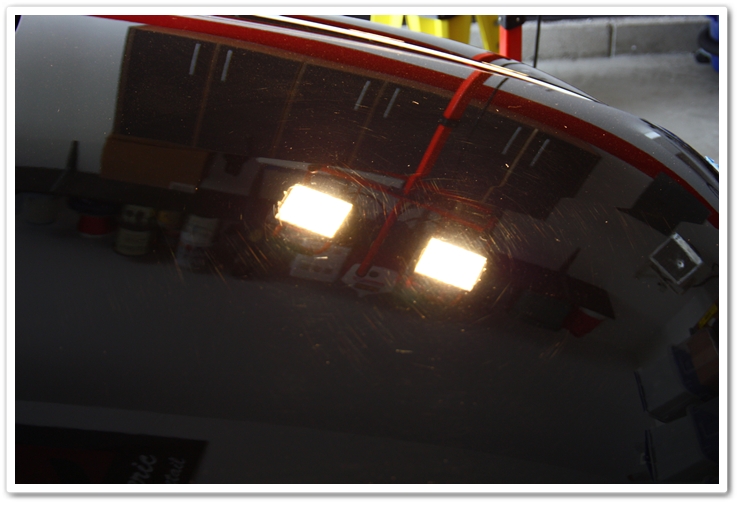
After just one pass of Power Finish / orange pad on the Makita rotary. I first worked the polish in at 900rpm’s for a few passes, then kicked it up to 1500rpm until the polish was fully broken down, and then backed it down to 900 rpm’s for a few more passes to burnish the paint and leave a nice finish.
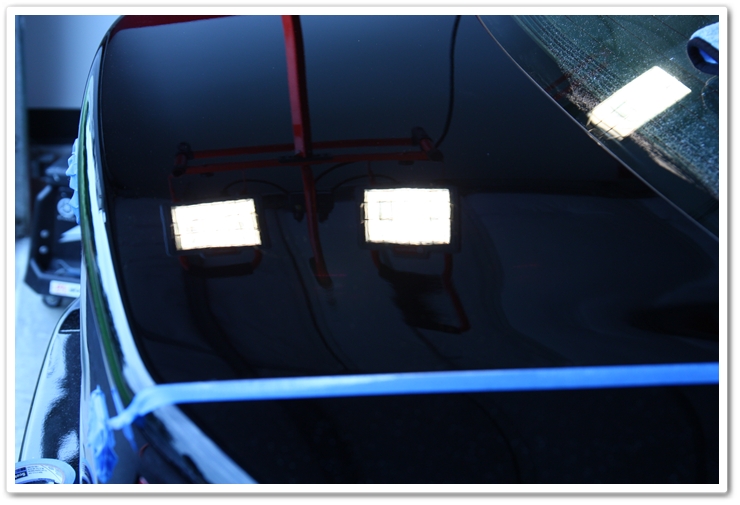
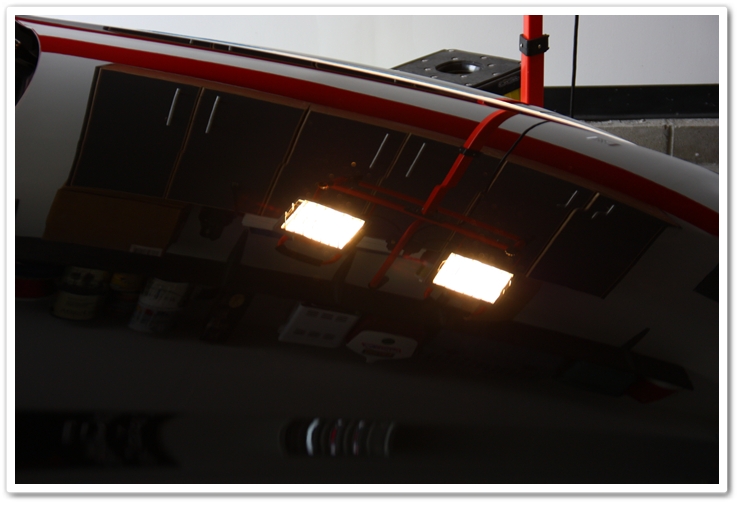
Look at the difference in clarity in the before and after photos. This first step restored the natural deep blacks, and allowed the blue flake to show through.
Polishing lower panels with problem areas (Return to Top)
Now it’s time to move on to the hideous rocker panels. This is always the worst area of every TL, and I knew it would require more aggressive tactics to get it looking good. I knew that some of the defects would be too deep to safely remove, but if I could at least get it 80% corrected I would be happy, and the transformation would be huge.
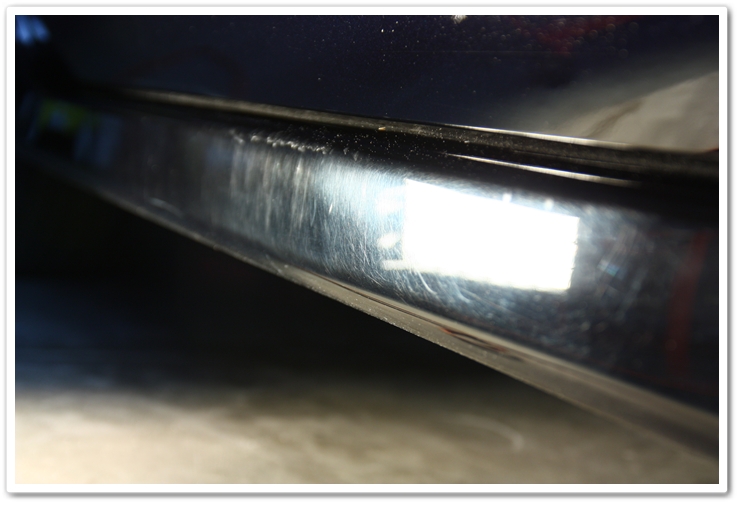
For this area I used Megs 105 and an orange 4″ spot pad. After a couple of passes, all of the swirls were gone, leaving just some of the deeper imperfections.
Sorry that this photo wasn’t in better focus…it’s hard to get these shots perfect while lying on the floor in poor lighting. It sure looked good in the viewfinder after I took it.
Removing deep etchings from the paint (Return to Top)
I’ve moved my way around to the back of the TL, and it was time to tackle the heavy stain. You can see here how severe it was in addition to the general cloudiness of the paint because of swirls and scratches.

First I tried the regular combination I was using on the rest of the car (Power Finish/orange), but the stain laughed at me! It was personal at this point so I broke out the big guns…Purple Foamed Wool pad primed with Megs 105. I hit it at 1500rpm for a bit and then checked my work to see how the stain looked. I was happy to see that I made a major dent in it, and then applied more 105 and hit it again. I was able to get rid of about 98% of the stain, as it left some very slight but deep etching into the clear. You had to really look hard to even see it.
As is to be expected, the Purple Foamed Wool left a bit of marring and holograms on the soft Acura paint, so I went back over it with the combination of Power Finish and an orange pad to clean it up.
Polish worked until broken down, and ready to be removed.
All cleared up! Look at the difference between this photo and the first one that showed the stain and haziness. Big transformation!
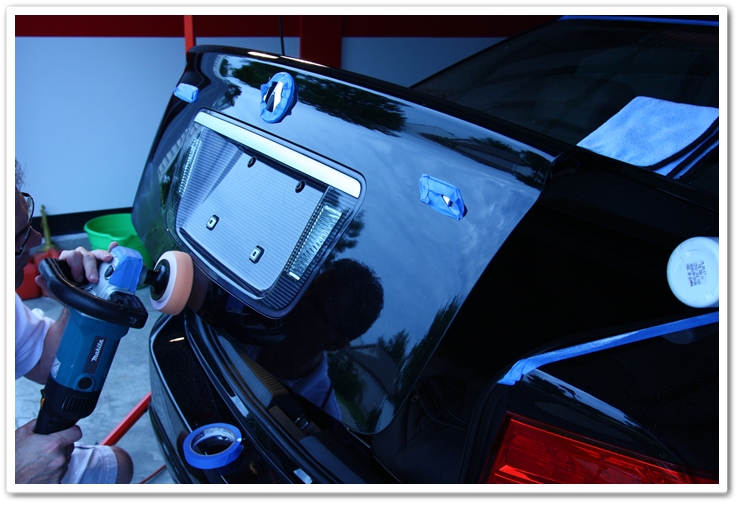
Safely polishing the trunk lid (Return to Top)
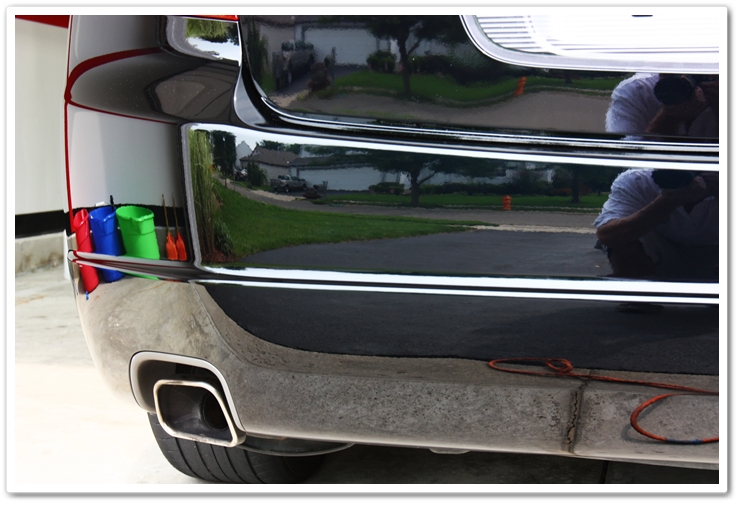
For working on the back face of the trunk lid, you need to prop it open to safely polish the lower portion…otherwise you risk damaging the top face of the bumper underneath. For this I simply place a bottle of polish on either side of the trunk jambs to prop it open.
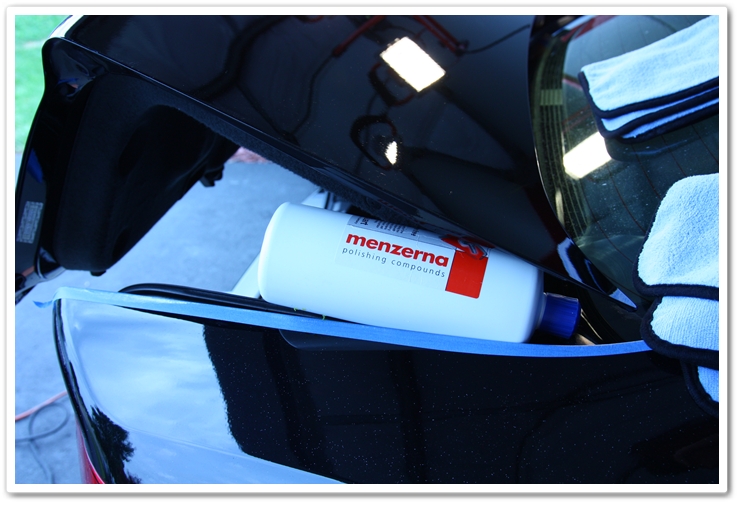
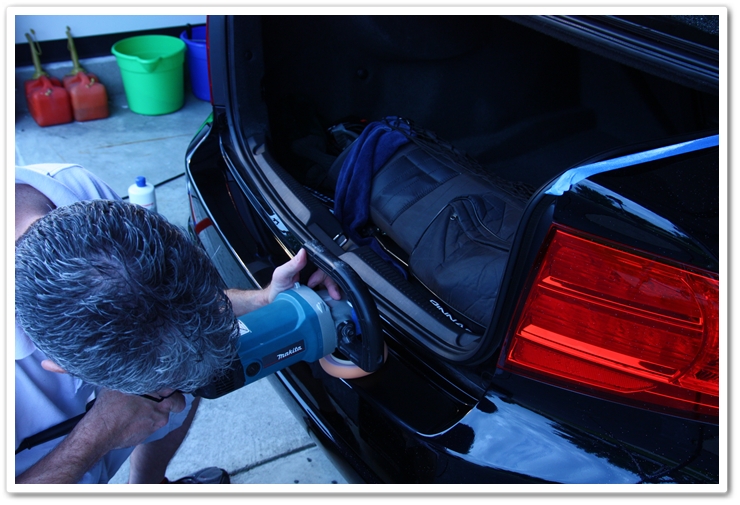
And here you can see how much easier it is to polish these areas.
Just keep the trunk lid open to work on this part of the bumper with a 4″ spot pad. This is typically another area of the car that gets abused pretty badly because of getting stuff in and out of the trunk. And there’s no need for grey-hair comments here…I’m completely aware!
Removing scrapes, scratches and other deep imperfections (Return to Top)
As I work my way around to the right side of the TL, I start to encounter all of the scrapes. Here’s a bit on the right rear fender.
Once again…big difference in the color and the blue really shines through now.
More scrapes, and more cloudy finish.
Afterwards it looks like a completely different panel.
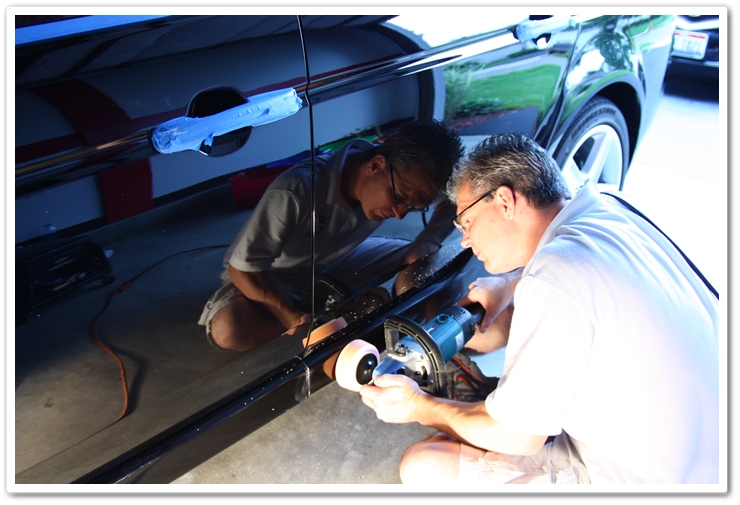
I’m just hanging out in the garage…on the floor…taking pictures of myself. I think the high heat and humidity are getting to me.
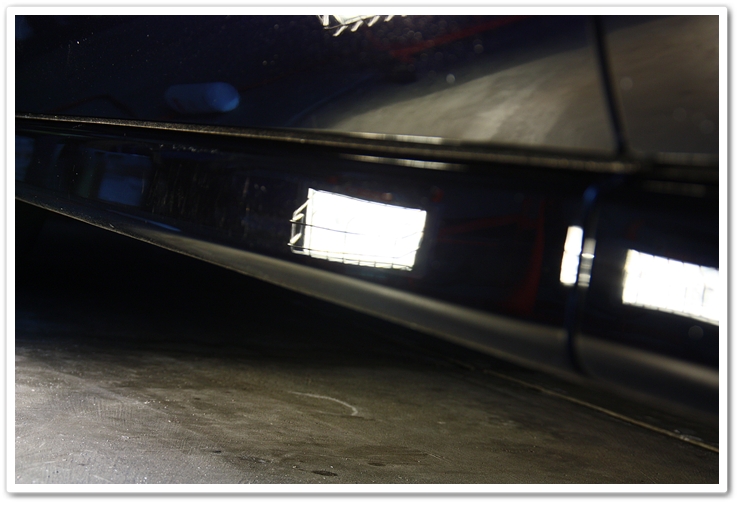
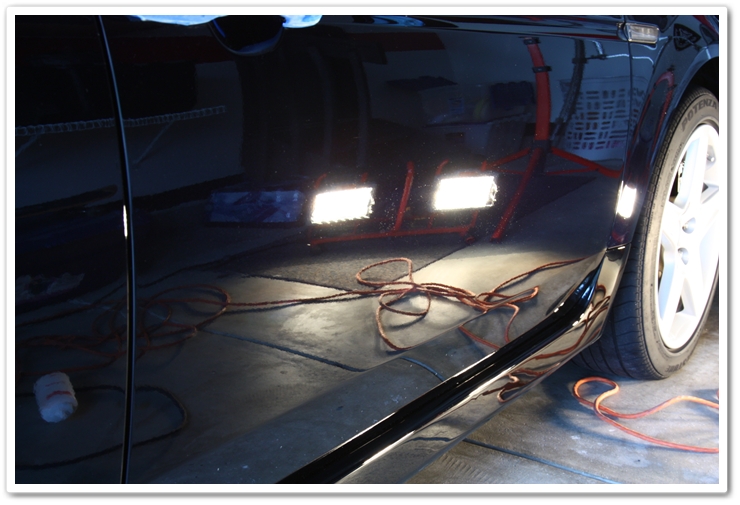
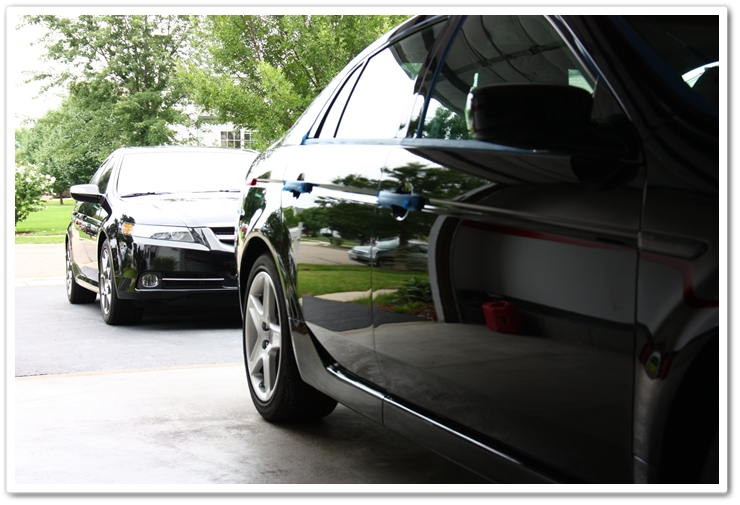
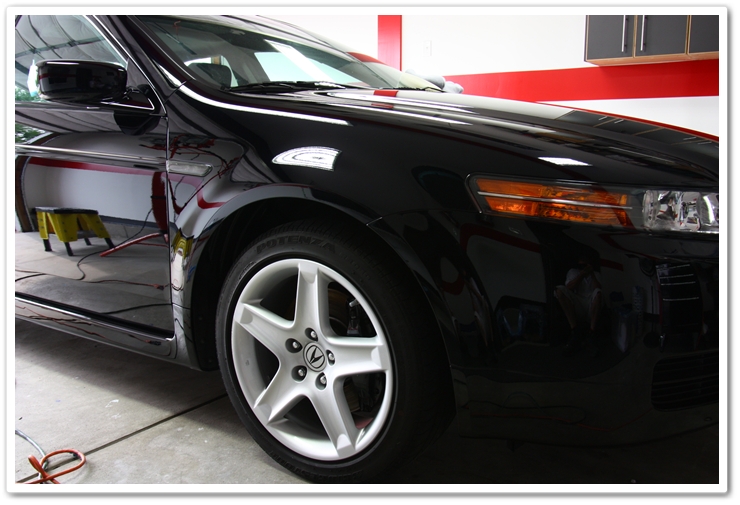
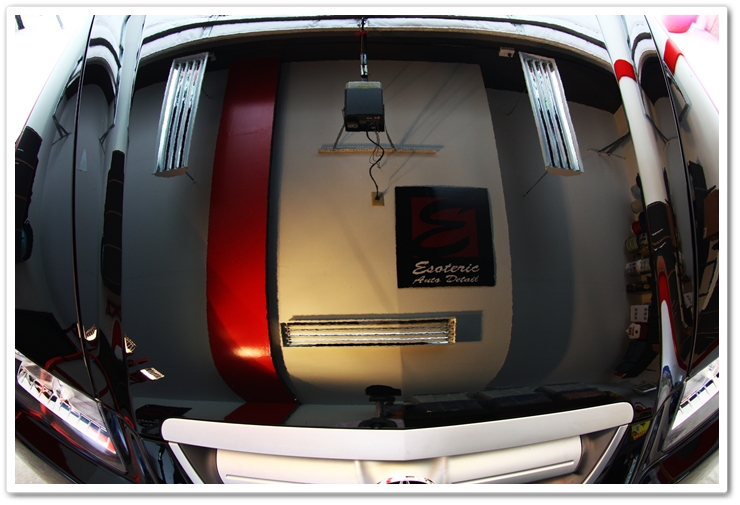
Remember how bad the lower rocker panels looked in the first photos? There was no reflection in them whatsoever. Now look at them…like mirrors! Proper leveling of the painted finishes really creates a high level of reflectivity.
I kept my TL-S parked right behind the one I was working on so I had an easy reference for the gloss level of the finish. Since I had not gotten to final polishing yet, my TL-S still had the edge…more work to be done!
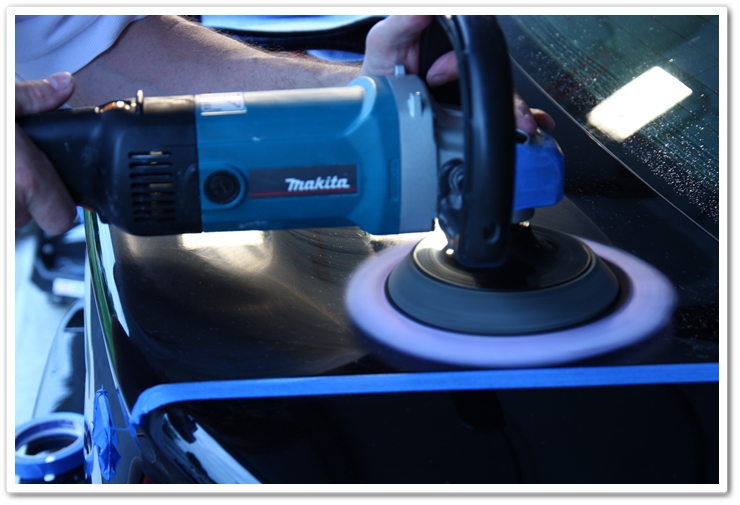
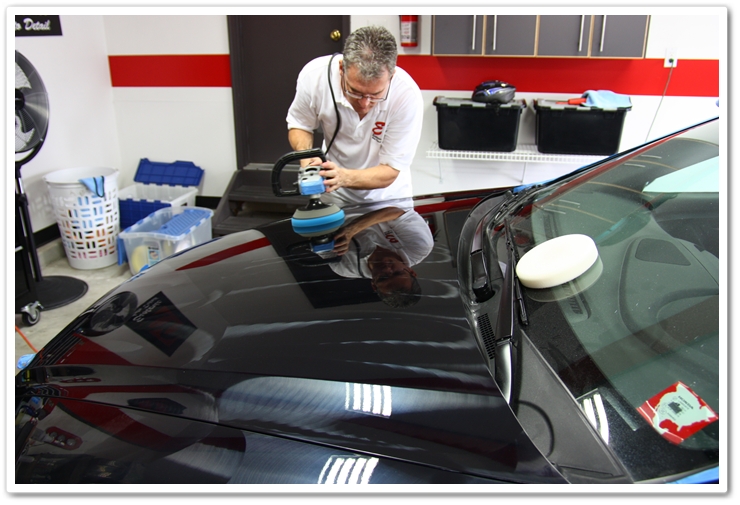
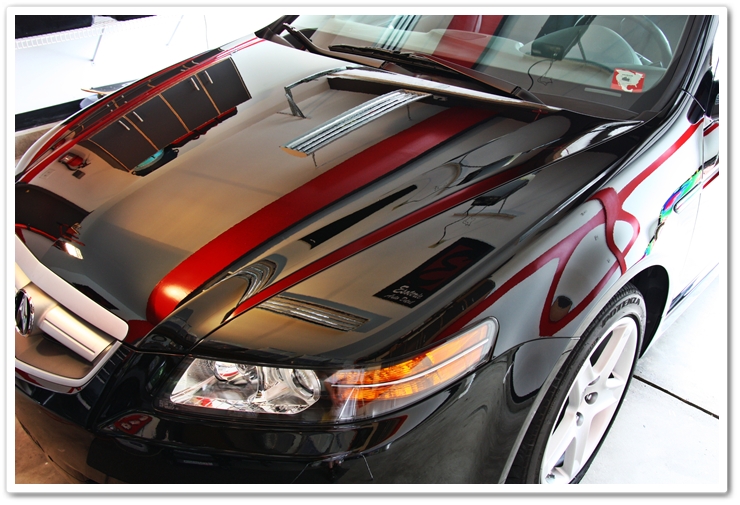
The hood typically gets beat up quite a bit, and requires more effort than most parts of the car. This TL was no exception.
First I polished it with Purple Foamed Wool and Power Finish to remove the deeper defects, and then followed that up with an orange pad and Power Finish to remove the haze left by the heavy-cutting wool. Even before the final polish you can see that the clarity is greatly improved.
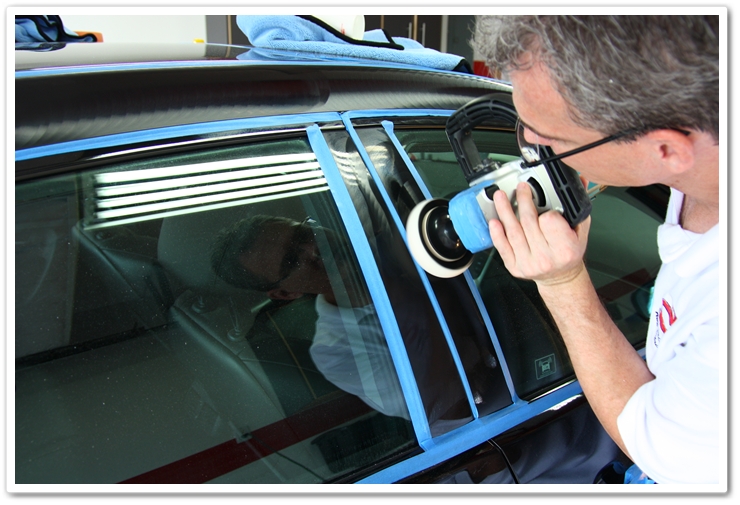
Safely polishing pillars (Return to Top)
These pillars are soft, and get swirled and scratched very easily. This is another area where people like to grab hold of to close the door. They polished out easily with a 4″ white pad and Power Finish.
Jeweling your paint to a new level of gloss and depth (Return to Top)
I’ve finally completed the first polishing stage to remove all of the defects, so I’m ready to go back over the entire car with Menzerna PO85RD ultra-fine polish to jewel the finish and bring out the highest gloss possible. I did this step with a very soft blue (finessing) pad. The most effective method I have found for this polish is to work it in at 900rpm, then move my way up to about 1400rpm with medium pressure, and then back it down to 900rpm with no pressure and slow passes for as long as you can work the polish without it drying up. This ensures maximum gloss and clarity without any worries of holograms.
PO85RD is arguably one of the absolute best ultra-fine polishes available, and it is very easy to work with. When you think that the finish looks good, you can almost always do another polishing step by using PO85RD and take the gloss to another level. In polishing, there’s a significant difference between a finish that looks good, and one that looks great!
Post-polish alcohol wipe down and clean up (Return to Top)
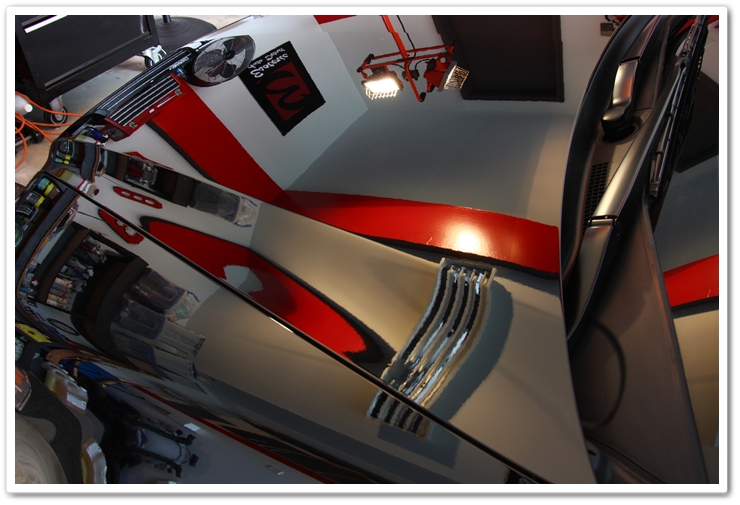
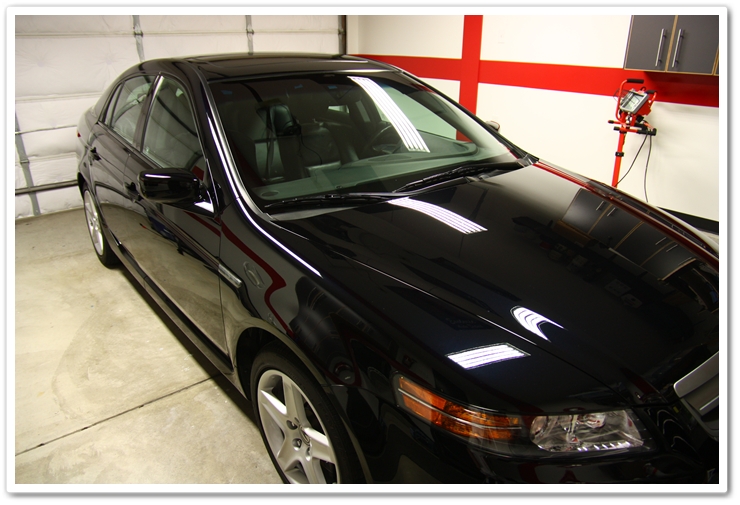
All the polishing is now completed, I have thoroughly removed all of the polish and carrier oils from the surface by (gently) wiping it down with a plush towel and Isopropyl Alcohol, and I’m getting ready to start cleaning polish dust out of door jambs, the trunk area, etc. I wanted to snap a few photos before applying sealant so that you can see the true condition of the paint. As I’m sure you will agree, the NBP now looks absolutely stunning!
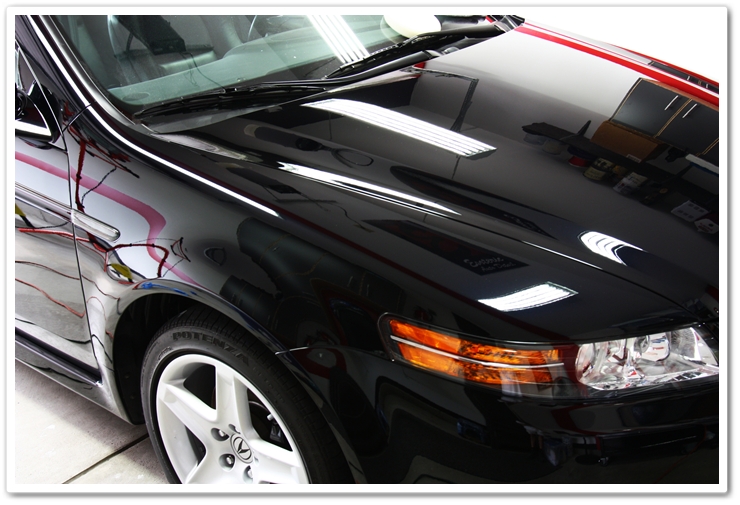
Look at the clarity in the bumper. When you look into the reflections, it really looks like a mirror.
A few money shots for sure…
Post-polish clean up with ONR (Return to Top)
Now onto the dirty work of cleaning polishing dust out of everywhere. Even if you’re not polishing, these areas need to be tended to on occasion. The easiest solution I have found is to keep a spray bottle full of Optimum No Rinse at their quick detailer ratio on hand. Lightly spray the area and wipe it down with a clean microfiber towel. This works great for the trunk lid, inside the hood, door jambs, and for the fuel fill area.
After
Protecting your paint with a sealant (Return to Top)
Once all of that is cleaned up, it’s time to do the final step on the painted surfaces…apply a durable and long lasting sealant. Today I chose to use Blackfire’s Wet Diamond sealant applied by PC 7424XP on a blue finishing pad. I have found that both the Blackfire and Optimum Opti-Seal look tremendous on NBP, so you can’t go wrong either way. For more in-depth information on both products, please refer to product reviews I have written about both of them: Blackfire’s Wet Diamond Paint Sealant Review & Optimum Opti-Seal Review.
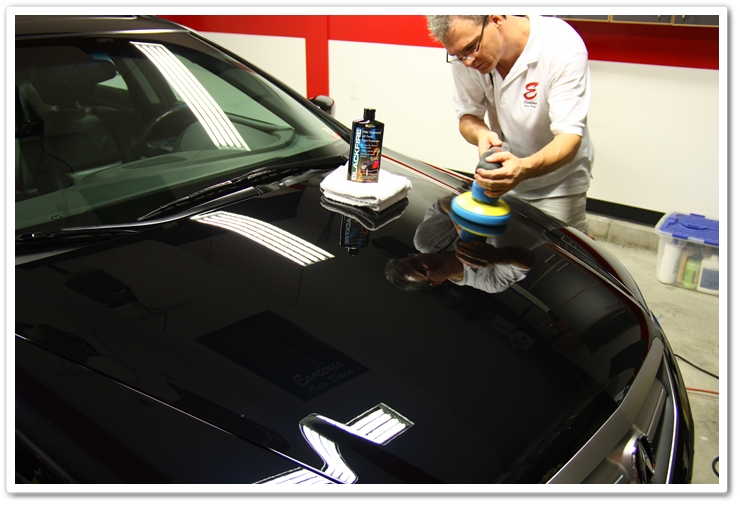
Polished, sealed, and waiting for finishing touches.
This is part 2 of a 4 part series (read part 1, part 3, part 4)
If you have any additional comments or questions, please submit your reply in the comment box below.