
I’ve always loved the BMW M cars, and it was a pleasure to work on this beautiful M6 in Black Sapphire Metallic. This is an amazing machine at all levels…what’s not to like about a 500HP V10 motor coupled to an automated clutch and 7 speed sequentially shifted manual gearbox. It is capable of 0-60 runs in just 4.6 seconds with a 12.8 second quarter mile. Pretty impressive for a 4-passenger grand touring coupe! The finishing touches of the car are also at another level…
The owner of this car contacted me about several of his vehicles, but the M6 was to come first. When I went to his house for the initial inspection, I found it to be in pretty good condition, albeit very dirty coming out of a bad winter. This is his wife’s daily driver, and she likes detailing her own cars, but their schedules have just been too hectic this spring. I ended up hanging out at his place for a while talking about cars, business, and a little bit of everything. I really enjoy getting to know my customers!
And as always, the photos are straight out of my camera with no post processing other than to resize and add a border.
The car was dropped off on Friday evening and picked up Sunday afternoon, so I’ll break it up over the 3 days so you can get a better understanding of the workflow.
Day 1:
The first day was dedicated to the interior. The floor area on the driver’s side was in need of help, and the leather had already shown some serious signs of wear and dye transfer. Before I get started I always ask the customer what their biggest areas of concern are, and by simply asking, I found out that the leather was perhaps the most important area for her.
Here you can see that even after less than 7,000 miles, the leather needed quite a bit of work!


Winters can be harsh! This is why we use all-season floor mats up north.

The first step was to thoroughly vacuum the interior and trunk areas. Once the carpets were clean, I could concentrate on all of the hard interior surfaces. I mixed up a bucket of Woolite and water, and set it aside while I worked on debris removal from all of the cracks and other hiding places.

After that was done, I thoroughly wiped everything down with the Woolite and water mixture and then moved on to the pedals and foot rest. I agitated the heavy areas with a stiff brush first, and then cleaned them with Chemical Guys Grime Reaper (5:1 ratio).
Before:

After:

For the console, gauges, and other hard surfaces I used Megs Quick Interior Detailer.

Now it’s time for the leather! My go-to product for leather cleaning, conditioning, and restoration is Leatherique, and this job was no exception. Usually it’s a two-step process (Rejuvenator Oil and Prestine Clean), but the Prestine Clean by itself is a tremendous one-step product for cleaning and conditioning. I wanted to first test the leather with Prestine Clean to see how well it would clean up and decide weather or not I needed to use both products. It did a fantastic job of cleaning the leather on my test section, so I could save some time by doing just the single step. I’ve been chatting with George from Leatherique quite a bit the past month or so, and after every conversation I walk away with a much better understanding of leather, proper leather care, and places to use it. The guy is a walking encyclopedia for leather…very sharp individual!
First I’ll thoroughly spray down the leather with Prestine Clean, and then firmly massage it into the surface with my hands making sure that it gets into the seems and stitching areas as well. I’ll apply it to all of the surfaces, and then work my way back around for removal so it has a few minutes to sit on the surface (usually 10-15).

Here you can get an idea of how much product is used, and you can actually see the dirt and grime being lifted from the leather surface.

If the dirt buildup is a little more severe, I’ll also use a leather brush to agitate the grime and help break it up.
Once it’s ready to be removed, I’ll get a bucket of clean water and a microfiber towel and wipe all of the Prestine Clean off of the leather to reveal a clean, soft surface.
After: Big difference!


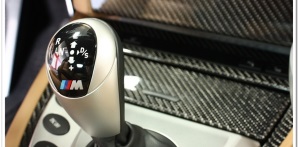
I also used the Prestine Clean on the leather insets on the doors, on the console, and the leather shifter/brake boots as well.


A few after shots of the interior: (Note: I also treated the carpet with 303 High Tech Fabric Guard)


You’ve got to love the details of the M cars’ blue and red stitching on the steering wheels.

I treated the black plastic trim in the trunk area with Chemical Guys VRP, and then tidied up the owner’s belongings:

OK, the interior’s done after about 2 hours, so I figured that I would snap a couple of before shots prior to closing shop for the night.
The engine compartment was dirty, but nothing too bad:

The exhaust tips were going to need a bit of work:

A little known fact about the M6…it also does well offroad! Maybe I was stretching that one a bit, but it sure looked like she’d been out muddin’ it! I’m going to go out on a limb here and say that I probably have a bit of clay work to do tomorrow morning.

Day 2:
Since the car was so dirty, I spent a lot of time and effort on the washing and decontamination process to both ensure that I get the surface completely clean and prepped for polishing, and to make sure I don’t add my own scratches and swirls from the heavy dirt and deposits.
The M6 had brand new HRE wheels and Pirelli P-Zero tires installed the day before, so I knew they didn’t require heavy cleaning. I simply washed them with my Lake Country grout sponge (these things are awesome!), and then used my Mini E-Z Detail brush to clean the calipers.


After the wheels were complete, I moved on to the rest of the car.
First I started off by treating the lower areas with Optimum Power Clean to break down the heavier deposits.

Then I mixed up some Megs APC in the foam gun to pre-soak the dirt to loosen it up. I let it dwell for a few minutes, and then rinsed it off with a sharp stream of water.

After that I loaded the foam gun with Chemical Guys Citrus Wash & Clear at paint prep ratio (2oz/gal), soaked the vehicle with foam, and then washed it with the same product/ratio using two buckets and a sheepskin mitt.

Don’t forget to clean in here!

For the engine compartment, I sprayed it down with P21S Total Auto Wash, let it dwell, and then agitated it with various brushes and sponges:

Once everything was done, I pulled the car in the garage for clay-a-palooza! Even after multi-stage washing, the surface felt like sandpaper. I later found out that there had been a lot of construction and/or demolition going on where the car spends its days, and it had left something that was concrete-like all over it.
I used an entire bar of Chemical Guys fine grade clay bar in the process because the surface was so bad. For a clay lube I used the new Dodo Juice Born Slippy product. It’s a tremendous clay lube that provides a super slick surface without leaving behind a slippery residue when you’re done.
The washing and claying alone took 3 hours!
At this time the sunshine had come out so I could snap a few photos showing the condition of the paint when it was clean.


It had its fair share of light to moderate swirls and deeper scratches on the high solid content (hard) BMW clear coat.
First up I measured the paint thickness with my DeFelsko DFT gauge, and was surprised to find how inconsistent the readings were on the car (it’s never had body work or repainting done). The hood alone ranged from a low of 102 as shown, up to about 135 microns. Armed with the knowledge of it having “thin” spots, I decided that the hammer approach of a heavy compound wouldn’t be used other than to spot treat more severe defects.

After a few tests, I found that Meznerna Super Intensive Polish with an orange light cutting pad on the Makita rotary was the way to go. Some areas required a few passes to get the correction I wanted, but with finessing it a bit I was able to correct it and leave it with a nice finish. Later I found that I could go directly to Menzerna PO85RD finishing polish with a blue finessing pad for the final burnishing stage.
Now I’ve had a lot of people tell me lately that they would like to come over and work with me, or “shadow” me if you will. Every time I hear that I take it as a tremendous compliment and thank those accordingly.
I’d like to have everybody over, but quite frankly my garage isn’t big enough to fit all of you, and I doubt that I have enough food either!
Since I’ve had so many requests, I figured that I would do the next best thing and give you all the opportunity to look over my shoulder while I work:

How was that? If you didn’t see enough, I’ve got some more opportunities for you later in the thread.
Alright enough goofing off…I’m going to move a bit quicker through the process now.
Here are a few before and after photos during the SIP polishing stage:

After:

Before:

After:

Before:

After:

Before:

After:

After about 5 hour’s worth of medium-cut polishing with the SIP, I moved on to the final polishing stage with PO85RD. I spent about 3 on the final stage, and it left the finish with a brilliant shine, high reflectivity, and a beautiful gloss.
It was late in the day, so I figured I would do an inspection in the sun, and snap a few shots of the progress. I haven’t done any finishing details at this point (final wipedowns, wheels/wells, sealant, glass, etc) and the car still has polishing dust everywhere.
Swirls permanently removed, and no holograms!


This is still before final cleaning:


Day 3:
Almost done now! I’ve got 3 or 4 more hours of finishing touches, and the car will be ready to go.
First I started off with cleaning the polishing dust out of every nook and cranny…door jambs, trunk lid, hood, and of course the fuel fill area. I use OPT No Rinse in a spray bottle with a MF towel to accomplish this.
Before:

After:

I dressed/protected the engine compartment surfaces with 303 Aerospace Protectant, and then Chemical Guys Fade 2 Black on the hoses and hard to reach areas (you don’t need to puddle it like I did…I was just trying to time the shot properly, and after a few shots I ended up with Lake Erie!)

The HRE’s got polished with Klasse All-In-One, and then the tires were dressed with Optimum Opti-Bond tire gel, and the wheel wells were dressed with Chemical Guys Fade 2 Black.

After:

The exhaust tips were first cleaned with Chemical Guys Grime Reaper and 0000 steel wool (worked very well), and then polished with Optimum Metal Polish.

As usual when I’m looking for great looks and good durability, I went with Optimum Opti-Seal and Optimum Spray Wax. Dodo Juice Supernatural would have really kicked it up a notch for looks, but the she needed something that would last for several months.

I’ll mix up the inside and outside shots. And yes, I DID get a bit carried away with the photos thank you very much…
OEM carbon fiber roof to reduce weight and lower the center of gravity:


295/30×20 Pirellis. Nice!

Gratuitous logo shot…


It was about 1pm when I took these shots, so the sun was directly overhead making some of these a bit harsh…but they still turned out pretty good.


As a former military member myself, I appreciate and support the owner’s efforts to promote such a great cause!!


Gloss!!


I couldn’t decide between these two photos, so I just put ’em both:


Those aren’t smudges on the grill trim…just funky reflections.


And finally…

Whew!
Total time = 16 hours!
As always, thank you for investing so much time to review my work.
If you have any additional comments or questions, please submit your reply in the comment box below.