
Tony has some classic cars with single stage paint, and wants to know if he should care for it differently than he would a modern 2-stage paint.
Hello,
I recently purchased a 7424xp with a bunch of pads and accessories and have reviewed all of your blog entries and FAQ’s. they were very helpful.. I plan on using this buffer with my new vehicles as well as some older classic cars I have. My question has to do with single stage paints (not clear coated) and the best way to work with them. How should the selection of pads, polishes, and procedures differ with these paints since there is no clear coat.
Car 1: Is an unrestored 1969 Mustang with original paint that is in very good condition except for some nicks, and minor swirls/scratches. It is original Ford lacquer paint from 1969.
Car 2: Modern acrylic single stage paint (to get that original look) with minor swirl marks.
Thanks
Hi Tony, and thanks for submitting your questions.
First let’s take a quick look at the different paint types for those unfamiliar with them. Single stage paints have the color and gloss mixed in together, and this type was the standard up until about 20 years ago (although you’ll still find the occasional car newer than that with single stage paint). Modern paints are two-stage, meaning they use a base color coat which is then topped with a clear coat to provide gloss and protection. If you have an older car, and want to find out if it is single stage or two-stage, then do a simple test on an inconspicuous area like the door jamb. Take a microfiber cloth and some light polish, and rub against the (clean) paint. If the color rubs off onto the cloth, then it is single stage.
Fortunately for you Tony since you just purchased a PC7424XP, pads, and polishes, you really don’t need to do anything special in comparison to your newer clear coated vehicles.
The best way to approach the polishing of your single stage painted vehicles is to pick a test area on the car and try the least aggressive combination first. Most single stage paints I’ve worked with have been relatively soft, which requires a less aggressive method and polish/pad combinations. If for instance you were using Menzerna polishes, then I would try 106FA and a white pad first to see what kind of correction you get. If it works to your satisfaction, then continue on with the rest of the car. If you still need more cut, then step up to either Power Finish or Super Intensive Polish with a (fresh) white pad. If you still need more then use the same polish with an orange pad (and so on). When you switch polishes during your testing, be sure to grab a fresh, clean pad so you’re not mixing polishes.
Keep in mind that when you’re working with single stage paints, you will get color transfer onto your pads and microfiber towels, so don’t be alarmed…this is normal. Be sure to use fresh pads regularly throughout the process to ensure that you’re getting the best results. For each polishing step (same polish) around the car, you can expect to use 3 or 4 pads.
When you’re working with these older cars in particular, always be very careful around seams, edges, and high spots and tape them up accordingly because the paint is at its thinnest in those areas. If you don’t have a paint thickness gauge, then be cautious because you don’t know how aggressively polished it has been over the years. In my opinion it’s always better to preserve as much paint as possible. I’d rather leave a few defects in the paint in the interest of paint preservation than to get very aggressive and risk going too thin.
With single stage paints, they also have a tendency to oxidise over time, which means you’ll want to perform the occasional light polishing.
Once you’re finished with polishing, you can use your favorite wax or sealant just as you would with a modern base/clearcoat system.
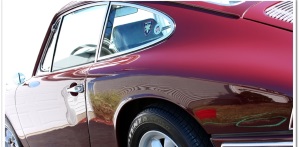
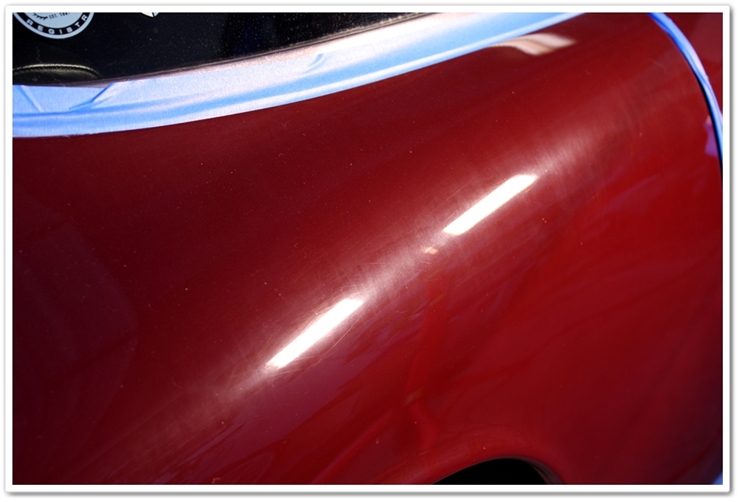
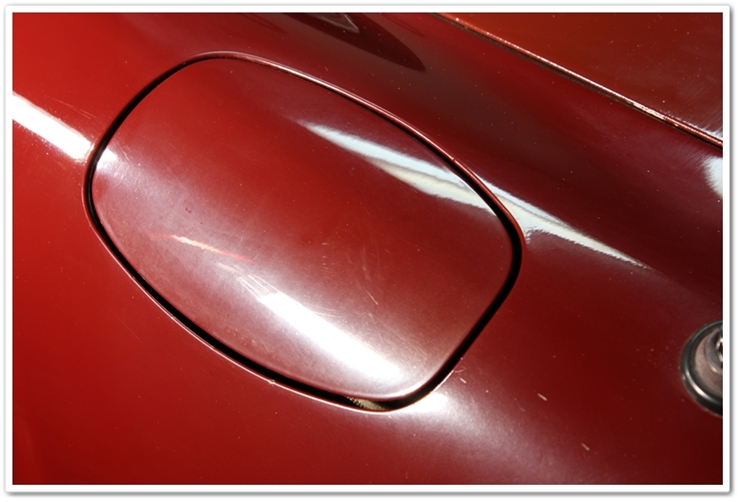
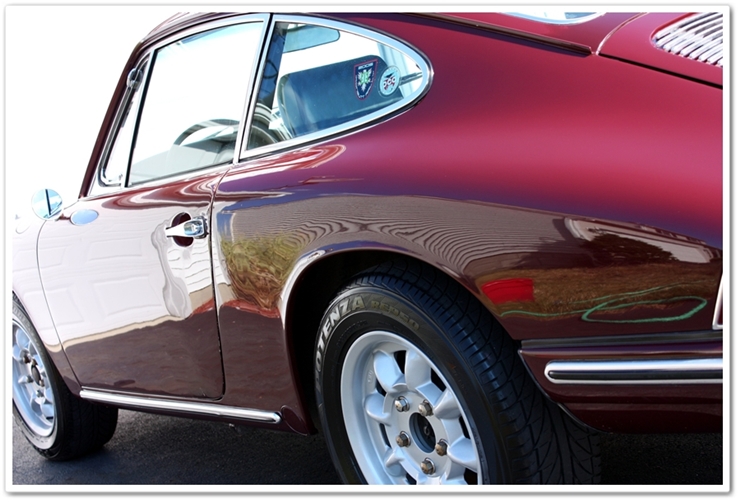
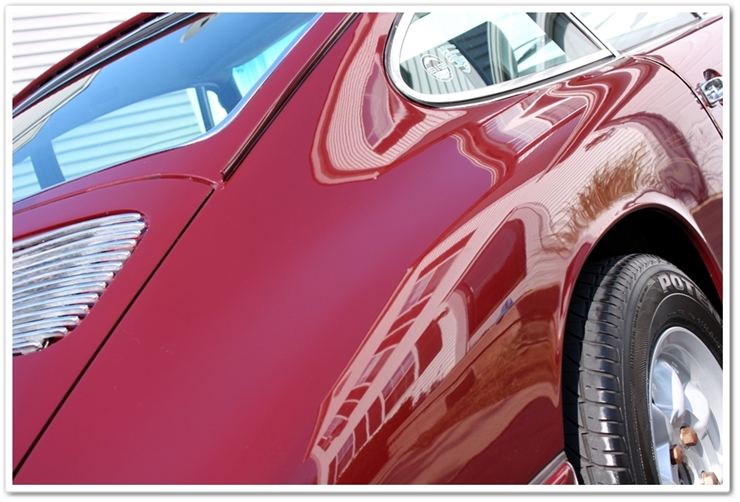
Here are a few photo examples of some single stage paint from a classic 1968 Porsche 912 that I worked on. It was surprisingly hard, so I needed to take a more aggressive approach with a combination of Meguiars M95, Menzerna SIP, Menzerna 106FA, Optimum Poli-Seal, and then topped with Optimum Car Wax. There were heavy swirls and scratches, along with a tremendous amount of oxidation. When I was done however, the color was deep, and the gloss was outstanding.
Before: Heavy oxidation, scratches, and swirls

After polishing single stage paint:
Well hopefully I’ve covered everything for you here Tony, but if you or anybody else has additional questions or comments, please reply in the comment box below.