
If you drive an aging car with plastic head-lamp housing, then you’re likely to experience the dangers and unsightfulness of hazy head-lights. Faded, hazy, non-clear housings cause light to refract prior to exiting the plastic rather than shining true. Not only does this result in a car looking older and losing resale value; this can also be dangerous for the operator and all others on the road as the driver struggles to make out objects through the dim light output. Changing the bulbs out for newer “true white” ones, converting to an aftermarket HID set-up, or using your brights are only temporary solutions that don’t address the true problem. Many owners are reluctant to fix the issue because of the cost of power-tools usually needed for favorable results. While using a machine like the Porter Cable 7424XP can provide much better results and take much less time to do so, many people are looking for a cheaper solution.
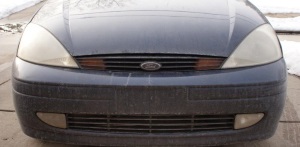
The vehicle being used for this educational write-up had horribly hazed-over head-lamp housings that provided very little light at night.


To begin, the headlights (and car overall) needed to be cleaned to provide a good working surface that allowed for a true inspection of the plastic housing. If you’re not worried about swirls and slight paint defects, you can take your car to a local car wash. For those looking to keep their paint looking its best, the standard two-bucket method is preferred. No-rinse washing using products like Optimum No Rinse can be a great solution for those without access to a hose.
With a clean surface, we can see just how bad things look. This will also show us how well our results may truly come out.


Protect the painted edges of the body and body molding pieces around your head-lamp housings using painter’s tape.


Because we were going to be doing the work by hand, we needed to use a heavy-cut compound. In this case, Meguiar’s M105 Ultra-Cut Compound was paired with a normal foam applicator pad.

Spread a generous amount of the compound on the pad and work small sections at a time.

Working small sections at a time and adding more polish as needed, use the product in a circular “polishing” motion. Here we used painter’s tape to mask off a small area for comparison purposes.


Gently wipe of the polish residue with a microfiber towel and inspect the finish. Though this took over 20 minutes, the results say it all:


Ten-minutes after inspecting the first section, the final results for head-lamp housing number one look stunning. Though this one housing assembly took over 30 minutes to polish by hand, the cost savings for someone without a machine may definitely be worth it.


Hand polishing is slow going, tiring, and won’t yield as good results as using a machine, but you’ll only spend a fraction of the money. If you have any questions or tips to share, please do so in the comments section below.
Buy Products From This Article
Purchase the products used in this article individually or in one convenient package here!