
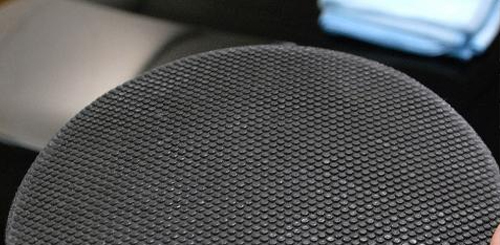
I recently picked up the NanoSkin AutoScrub Foam Pad. After reading the product description below, I was highly interested in the product.
“NanoSkin AutoScrub Foam Pad will leave you speechless with how well it cleans your exterior in so little time, replacing the need for a clay bar. The new advanced rubber polymer technology removes paint over spray, light water marks, tree sap, rail dust, road grime and other extra stubborn surface contaminants safely and easily. Simply attach the pad to a dual action orbital buffer with a hook and loop backing, spray on a copious amount of lube (i.e. NanoSkin Glide) or your favorite instant detailer, and start working it in on speeds 1 – 2. You will be amazed at how AutoScrub removes contaminants from the surface in so little time. The advanced rubber polymers safely separate the contaminants bonded to the exterior. You can use this on not only the paint, but the glass, moldings, and plastics. If you ever drop AutoScrub, no worries, it is also a breeze to clean unlike a traditional clay bar. If you ever drop it on the ground, or are simply done with an application, just rinse the pad clean with water and its ready to be used again! You can get about 30 or more applications out of one pad before you need to replace it! There is no need to spend 1 – 3+ hours with a clay bar anymore, with the NANOSKIN AutoScrub Foam Pad get the job done in 15 – 45 minutes! Very simply this is the most effective way to deep clean your paint in a very short period of time.”
Sounds amazing, and for me it was an interesting idea that we could remove contaminants from the surface with a pad rather than using a clay bar. With the amount of times I have thrown away clay from dropping it, I really liked the fact that if it was dropped it could be washed off.
Since this is a new product, I wanted to get some more information about it before just using it on a car. I decided to contact David Sylican at NanoSkin to get some more information on the product. David has a lot of experience using them in the field as he is also the owner of InnovativeDetailing located in California.
What is your official title for NanoSkin?
My official title for NanoSkin would be that of a Technical Advisor and a Manufacturers Sales Representative for South America.
How long have you been using the NanoSkin pad?
I have been using the Nanoskin Autoscrub pad system since November 2011 .
Is there a break in procedure for the NanoSkin Pad?
To break in the NanoSkin Autoscrub effectively it is recommended this be performed on the glass of the vehicle. Using NanoSkin Glide 7:1 concentrate, mix accordingly with water then dispense in a sprayer. Apply Glide liberally to the windshield and for 1-2 minutes rub the Autoscrub pad, polymer side down in circles to remove the protective coating that is on the product. After this one time break in period it is now safe to use on the vehicles surfaces.
Do you have any tips for a first time user?
Breaking in the pad is very important, always inspect your work as you progress for the desired results. For first time users, select the “Fine Grade” Autoscrub until you become familiar with the product and its results.
What is the proper procedure for using the NanoSkin Pads? Specifically, speed on a DA, how much glide to use, how long should I work an area, and how much pressure?
The proper procedure for using the NanoSkin pads are as follows, by hand using no pressure you want to concentrate on an area that is about 2ft x 2ft to ensure thorough surface prep. Apply Glide mixed 7:1 with R/O or DI water liberally to the surfaces, do not skimp out to ensure proper lubrication and minimize marring. After Glide is applied lay the pad down on the vehicle making sure the surfaces are cool, then in a back and forth, side to side motion run the pad along the surface. You will feel the contaminants immediately exfoliate as you make your passes, then the surfaces become instantly smooth. Wipe dry with a Micro Fiber towel and inspect for desired results, fluid will flash, then dry.
With a D/A you must use it at speed 1.5 – 2.5, using no pressure and following the same procedures as stated above. Keep the Autoscrub flat at all times and since you are now working mechanically you can enlarge your working area to 4ft x 4ft. You will also run the machine side to side, back and forth to ensure complete decontamination to the surfaces. ALWAYS KEEP SURFACES THOROUGHLY LUBRICATED WITH SUFFICIENT GLIDE to avoid marring. Wipe with a Micro Fiber towel to flash off the Glide then with another towel dry completely.
Why does the pad not induce swirls while removing contaminants from the surface?
The Fine Grade Autoscrub pad will not induce swirls in broken in properly and surface lubricated as explained. The Glide formula utilizes “Glycerin” and a minor foaming action, unlike other lubricants which helps to suspend the contaminants and therefore allows the the pad to work and not swirl or marr. The new Fine Grade pad is 15% finer than the Meduim Grad pad.
Will the pad remove paint overspray and rail dust?
The Medium Grade Autoscrub is ideal for paint overspray removal, from aggressive industrial coatings to lighter waterborne paints. Just like clay, always try the least aggressive Autoscrub formula first to minimize marring, if this does not eliminate the paint overspray easily then step up to the more aggressive formula. The Autoscrub pad removes rail head dust with no problems at all, and without having to knead like conventional clay bars.
Is there one go to product that you use for paint decontamination from Nanoskin?
My go to product is definitely the 6″ Fine Grade Autoscrub pad, either by hand or d/a it gets the job done.
Is a wash required after using the pad and Glide, or can polishing start right after using this combination?
After prepping the vehicle with the Autoscrub pad and Glide, there is absolutely no need to wash the vehicle before starting your correction, polishing or waxing steps.
What can we look for in the future from NanoSkin?
Stay tuned for a whole new revolutionary line of products that will take Professional Auto Detailing and Reconditioning the next level.
I started by following David’s instructions to “break in” the pad on a glass surface. Fresh from the package it may be a little too aggressive for paint. The glass will “smooth” out the pad slightly, breaking it in, allowing for a reduction in potential for marring to the paint. It also does a great job at deep cleaning the glass, an added bonus.
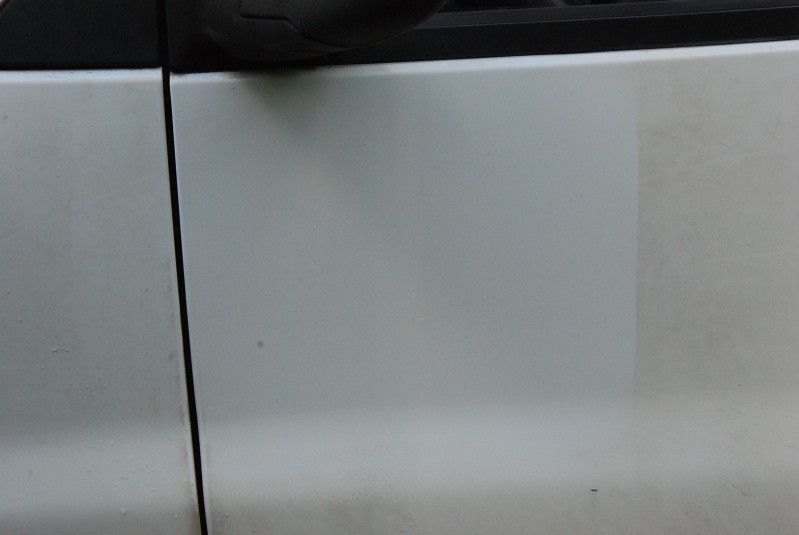
I decided to really put this pad to the test. I was using it on a work van that hasn’t had a wash in years. This isn’t just surface dirt, this was after washing the entire van. It was basically surface staining and contamination.
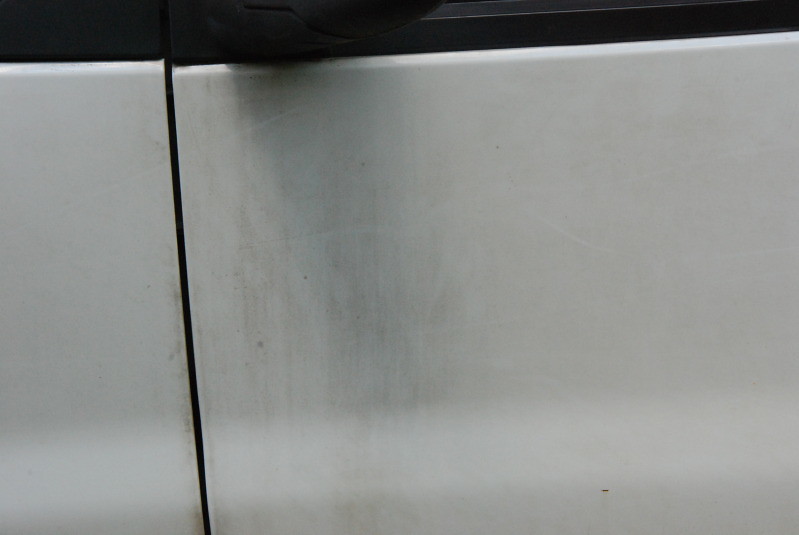

After spraying with liberal amounts of Glide, I followed David’s recommendation, using no pressure and back and forth actions with the machine. Within two minutes of using the pad I was amazed. You can see the results. Please ignore the dark spot, I have to clean my camera lens.
Moving on, I wanted to see how it worked on another car. Rather than using a car that was garaged and for the most part taken care of, I decided to use these pads on a car that really needed them. This vehicle was covered in sap and light rail dust.
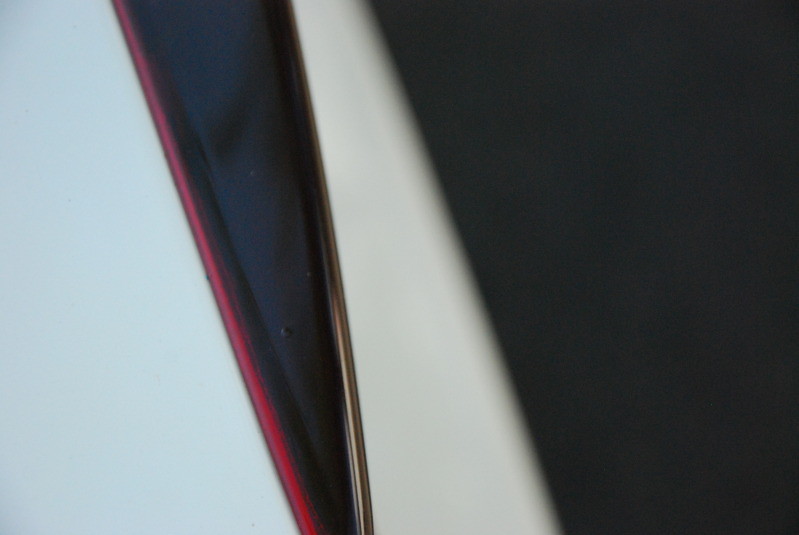
I used the glide product suggested from NanoSkin. First, because it is recommend. Secondly, after some testing I felt that it did give the best lubrication compared to a normal clay lubricant. Proper dilution for the glide is essential, 2oz. of glide makes one 16 ounce bottle. As you can see on the rear tail light, there was sap. Since it was a white car it near impossible to capture the sap all over the paint. You could certainly feel it though, talk about a rough surface.
Here you can see the rail dust throughout the paintwork on the car.

I then went around the entire vehicle using a mixture of the 6″ and 4″ pads. I used the 4″ pads for the tighter spots that a 6″ pad wouldn’t fit, including side skirts and tighter areas of the the bumpers. One thing I also did was take the 4″ pad off the machine and use it by hand for even tighter areas, this worked wonderfully. For the machine I used a slow speed, 2 on a DA or 1.5 with a more powerful DA. Using no pressure on the pad itself is key. I just used the weight of the machine to remove the contaminants. Remember, this isn’t polishing where pressure on the machine is needed. We are removing particles, and letting the pad do the work. If pressure is used marring may become an issue. The rail dust and sap was easily removed using these pads.
This is a wonderful product, which removes surface decontamination times to less than 1/2 with a traditional clay bar. This has now become my go to product for surface decontamination. I hope you too can find the added times savings from using these pads.