
Meguiar’s M105 Ultra Cut Compound
For as long as people have been performing heavy paint correction on cars, detailers and body shops have been reaching for heavy-cut compounds for their most aggressive needs. While these abrasive compounds have done a tremendous job of removing the most severe defects, they would unfortunately leave a significant amount of micro-marring and compounding swirls that would require several additional polishing steps to completely refine the finish.
A short time ago, Meguiar’s recognized the need for a heavy-cut compound that would finish down nicely and save time in the process. Their product development team started to work on this project, and when they emerged from behind closed doors they introduced the detailing world to one of the most significant breakthrough polishes that the industry had ever seen: Meguiar’s Mirror Glaze #105 Ultra Cut Compound! I don’t like to over-hype a product, but a product that cuts like a (very) aggressive compound yet can finish down like a polish while saving time is simply unheard of.
The key to M105 is their super micro-abrasive technology. Unlike traditional polishes that require a long working time to break down the abrasive particles, M105 utilizes ultra-hard non-diminishing abrasives that retain their size and shape throughout the polishing cycle. These abrasives are designed to cut hard and fast, and the fact that they maintain a consistent cut from start to finish means that the process goes much more quickly than traditional polishes or compounds. The end result is a heavier cut, with a finer finish, in less time! M105 is capable of removing 1200 grit and finer sanding marks, scratches, acid rain etching, and severe swirls and holograms.
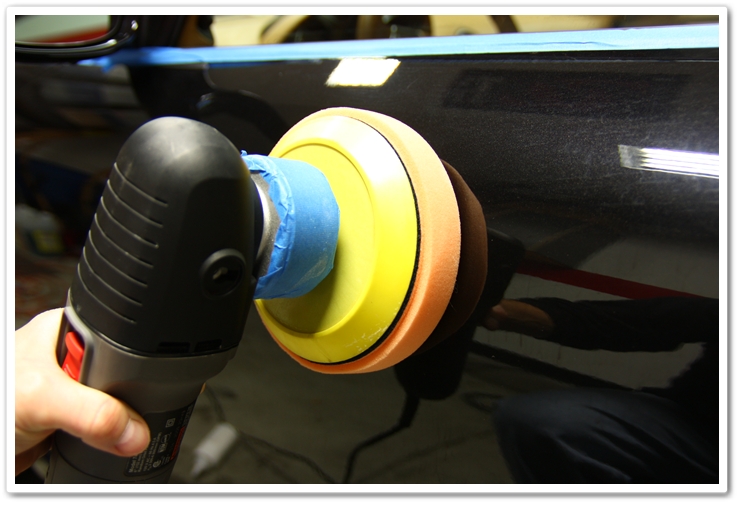
And another great feature of M105 is that it produces tremendous results whether you use a random orbital polisher, such as the Porter Cable 7424XP, a rotary polisher, like the Makita 9227C, or by hand. For those who own a random orbital polisher, and thought that you weren’t able to achieve heavy correction without stepping up to a rotary…think again! You can achieve great (and safe) results with a PC7424XP, an orange pad, and a bottle of M105.
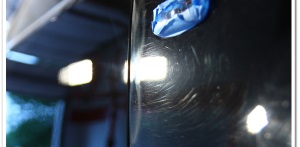
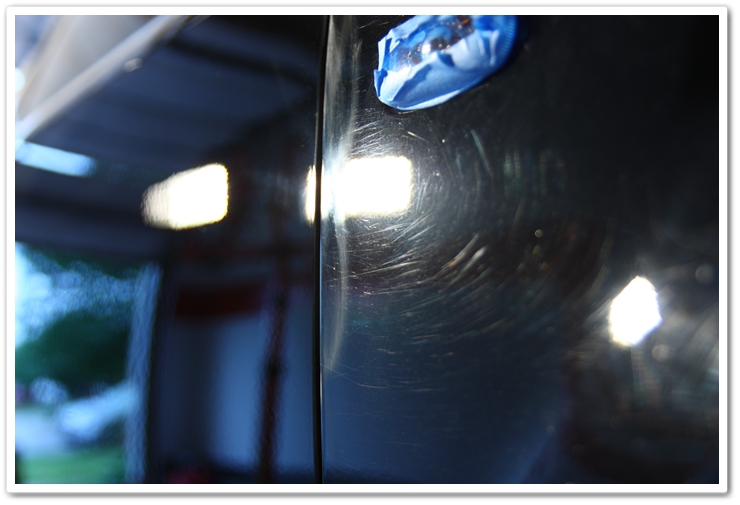
Here are a few examples of M105’s capabilities:
M105, wool pad, Makita rotary on ultra-hard Audi paint. Left side corrected, right side un-corrected.


Meguiar’s M205 Ultra Finishing Polish
After the Meguiar’s team released the powerful M105 compound to the market, they developed M205 Ultra Finishing Polish as a companion to create the most complete two-step polishing system available. Utilizing the same super-micro abrasive technology, M205 is the perfect follow up to M105 to remove slight hazing and to restore a deep gloss, and it acts as a great one step polish to remove light swirls and defects.
M205 quickly restores a high level of gloss after compounding with M105; so long working times are not required. You will be amazed at how little effort is required with M205. It provides incredible results with minimal time.
M205 permanently removes swirls and light defects from all paints, and can be applied by hand, by a random orbital polisher, like the PC 7424XP, or by rotary, such as the Makita 9227C.
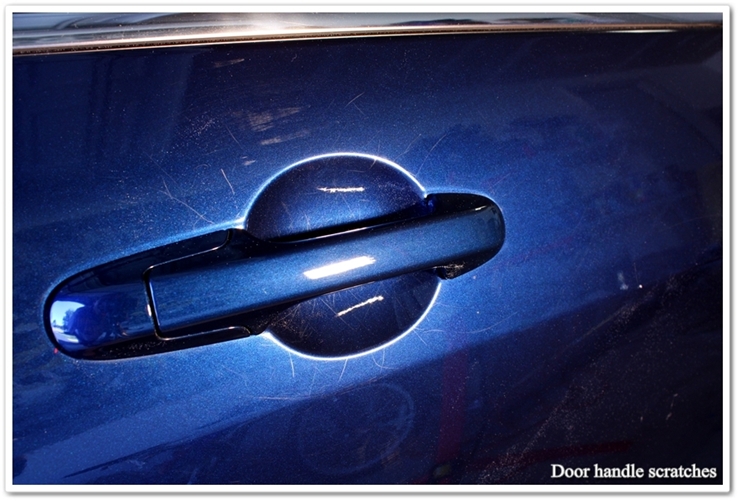
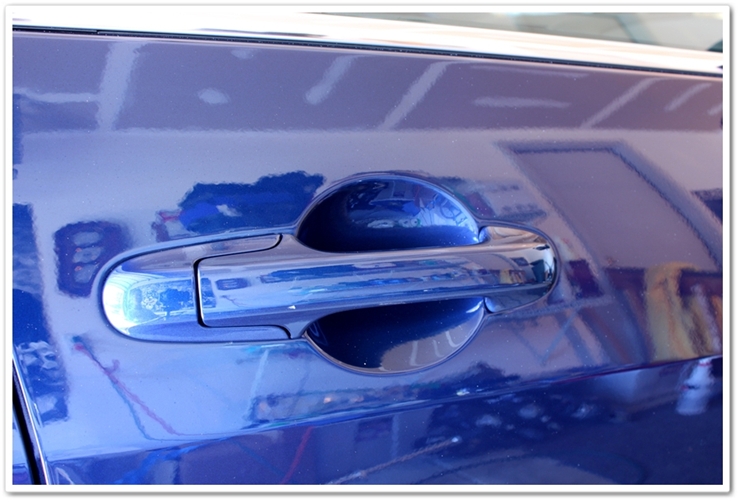
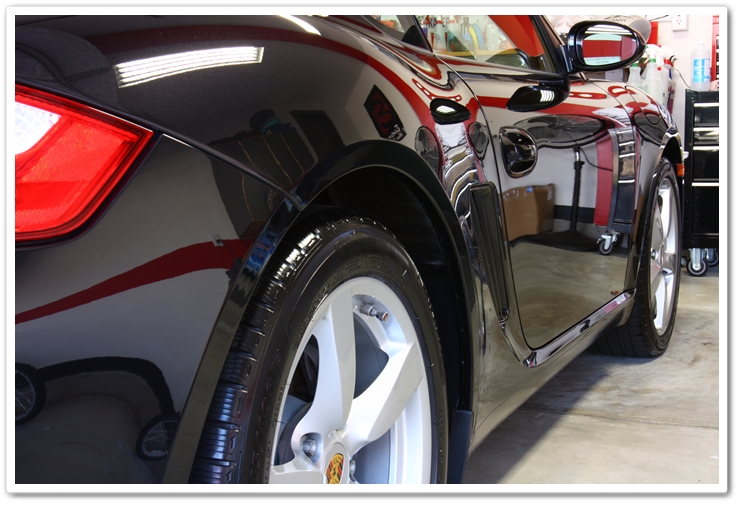
Here’s an example of what M205 is capable of as a one-step polish to remove light defects and to produce rich, deep reflections: Light swirls and haze were permanently removed after one pass with M205, a White Lake Country pad, and a PC 7424XP. Door has been corrected, rear quarter panel has not. 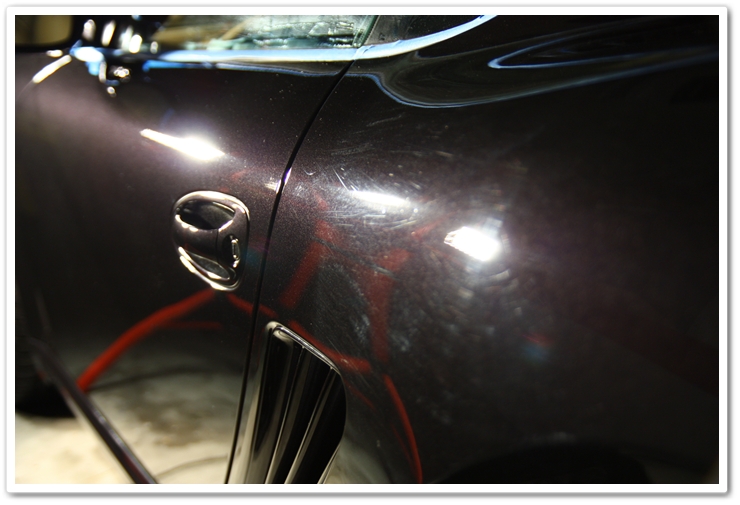
Meguiar’s M105 / M205 Tutorial on a Porter Cable 7424XP
The combination of M105 / M205 is capable of correcting a variety of paint conditions, and it is very dependent upon pressure and pad selection. If you require heavier correction, then use a combination of more aggressive pads and higher pressure. If you have lighter defects to tackle, or you’re working with softer paint, then use a less aggressive pad combination with reduced pressure.
Pad Selection:
There are a lot of different factors to consider when choosing a pad to use, so it is always best to test a few combinations going from least to most aggressive before deciding which to use. What may work perfectly on one car may not for another, so always use pad selection tips strictly as a guideline.
In terms of pad performance from least to most aggressive, your choices are Black (finishing), White (polishing), and Orange (cutting).
For lighter defects, or for vehicles with traditionally softer paint (such as Acura/Honda, Lexus/Toyota or Porsche): M105 with a White polishing pad, M205 with a Black finishing pad.
For heavier defects, or for vehicles with traditionally harder paint (such as Audi, BMW (except Jet Black), Mercedes-Benz, or Corvettes): M105 with an Orange cutting pad, M205 with a White polishing pad.
Like I stated though, these are merely guidelines. You may find that your needs require the use of an Orange pad with M105, and a Black pad with M205. Always do a test section first to see what works best for your specific needs.
Pad Priming:
Meguiar’s non-diminishing abrasives work best when the pores of the pads are evenly primed with polish. This ensures the fastest and most complete cut, as well as the finest finish when complete.
The first step is to take a fresh, clean pad and apply a generous amount of M105 or M205 on the surface.
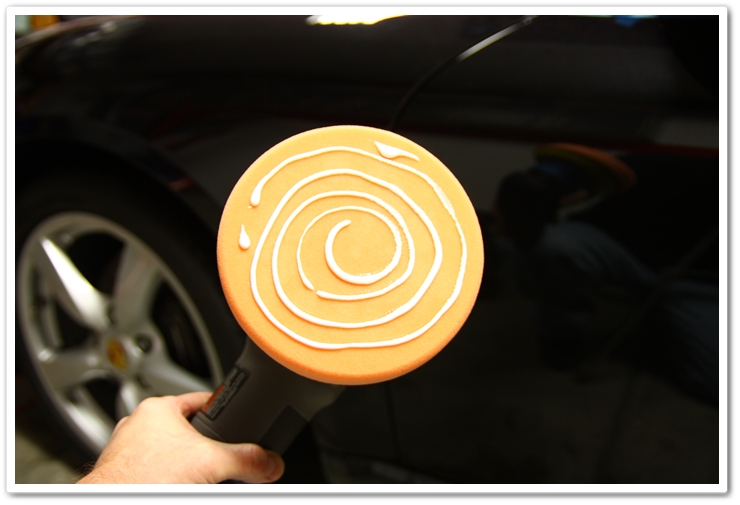
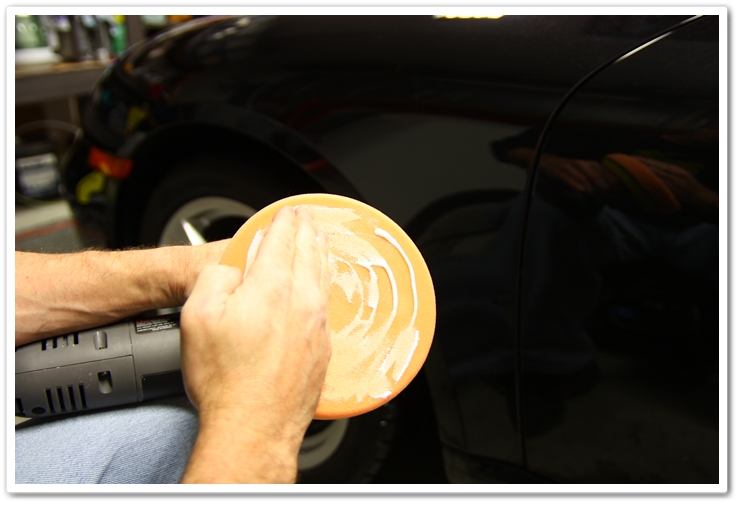
Now that your pad is primed, you are ready to begin polishing on your prepped finish (washed and clayed).
Pressure:
Both M105 and M205 are sensitive to pressure. Typically speaking you will achieve heavier correction with higher pressures, and less correction but a finer finish with lighter pressures.
Especially when performing heavy correction with M105, you will be using more pressure than you’ve probably used in the past with other polishes. You want to apply enough (even) pressure that the pad starts to spin slower, but not so much that it stops spinning altogether.
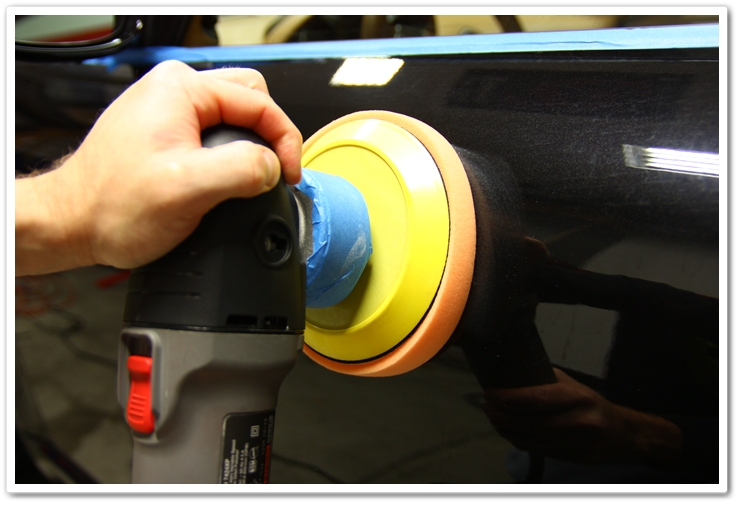
In this photo, I have my PC 7424XP resting lightly against the surface. There is no compression on the pad whatsoever.
Meguiar’s M105/M205 Summary:
Now that you have the basics of pad selection, priming, and pressure down, let’s put it all together with some other important notes so you can use the M105/M205 system to polish your car’s finish to perfection!
- Thoroughly prime your pad.
- Apply a small bead of polish (approximately 2″) directly to the surface.
- Work in a small area, roughly 2′ x 2′ or smaller
- Do not spread the product around, as the M105 in particular dries (flashes) quickly.
- Place the pad on the bead of polish, and immediately start at speed 5 or 6 (depending on the condition and your comfort level).
- Work in a cross-hatch pattern with high pressure…up and down, then left and right, overlapping passes. Work the section until the defects are gone or until the polish begins to dry. If defects still remain, apply another bead of polish on surface (no need to wipe off residue from previous pass), and work the area again. On the final passes, reduce pressure to burnish the finish.
- If you work the product too long, it may harden on the surface. To remove, apply a small amount of polish and quickly re-work the area at slower speeds (3~4) with very light pressure.
- After each panel, clean off the built-up residue on the pad by using compressed air or a soft brush (turn machine on lowest speed while brushing). If you allow product and clear coat residue to build up too much on the pad, the polish will be less effective and can induce micro-marring.
- When performing your finish polishing with M205, you will use the same basic techniques as with M105, but you will typically use less pressure and a lower speed (4~5). You will also find that the polishing residue left over from M205 is very easily removed with a plush microfiber towel. M205 has a longer working time available since it’s less aggressive, so for the best results work the polish with medium pressure until desired results are achieved, then reduce pressure for the final two passes.
The M105/M205 combination from Meguiar’s is capable of heavy paint correction while finishing with a high level of depth and gloss, and it does it in less time than traditional polishes. It does require a different technique than you may be used to, and it may take you a few times to get the system down to make it most effective. Once you’ve accomplished this however, you will be very pleased that you gave it a try!
If you are looking to get started using a buffer and the Meguiar’s polishes, be sure to check out this PC7424 and Meg’s polishing package for a great value!
Buy Products From This Article
Purchase the products used in this article individually or in one convenient package here!