Headlight Restoration Process
by Todd CooperiderWe’ve all seen car headlights that have turned into a foggy haze. Not only does it look bad, but it’s also unsafe because it can’t produce as much light. Sure you could buy a new headlight, but for modern cars you can plan on paying a couple hundred dollars for a replacement.
I’m going to take you through a few simple steps to restore a headlight. Depending on the condition, you can probably get it back to 90+% of new.
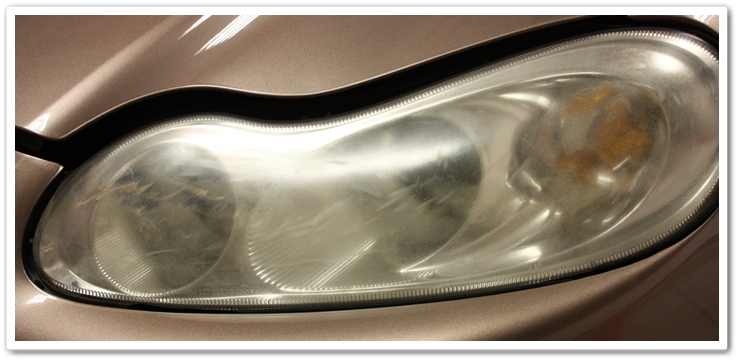
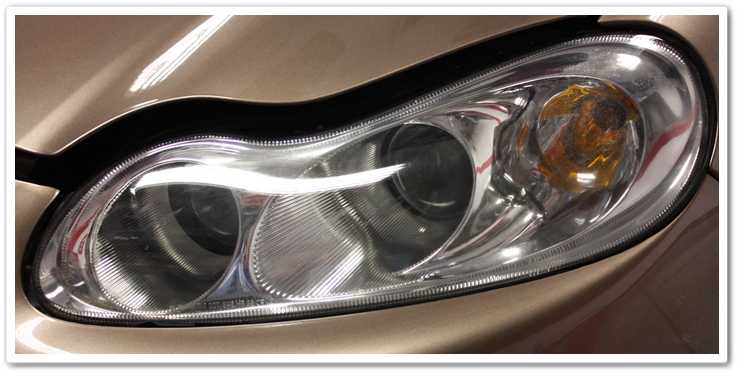
This example had some pretty serious damage to it. I could tell that it had been hit by something as it had pretty deep gouges all across the light. Given the condition, I knew I was going for “better” as opposed to like-new.
For this condition, you’re going to need at least several steps of wetsanding followed by several steps of machine polishing. You also want to tape all around the headlight to protect any seals/trim as well as painted finishes. If the lens has only a mild haze to it, then you should be able to clean it up with just the polishing steps without having to wetsand.
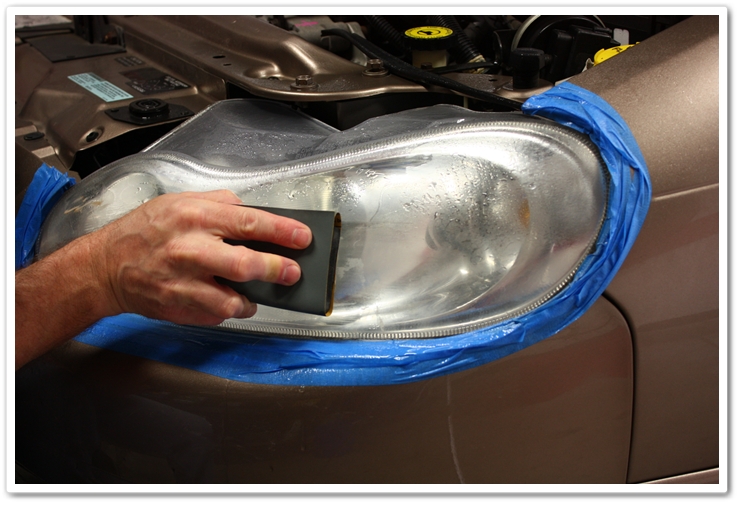
Here I am starting with 1500 grit sandpaper. I started off just like I would with any wetsanding project…go in one direction first, and then alternate directions as you move up through the different levels of paper (cross hatching). Here I started with horizontal passes. I know, I know…my tape job was less than stellar on this one!
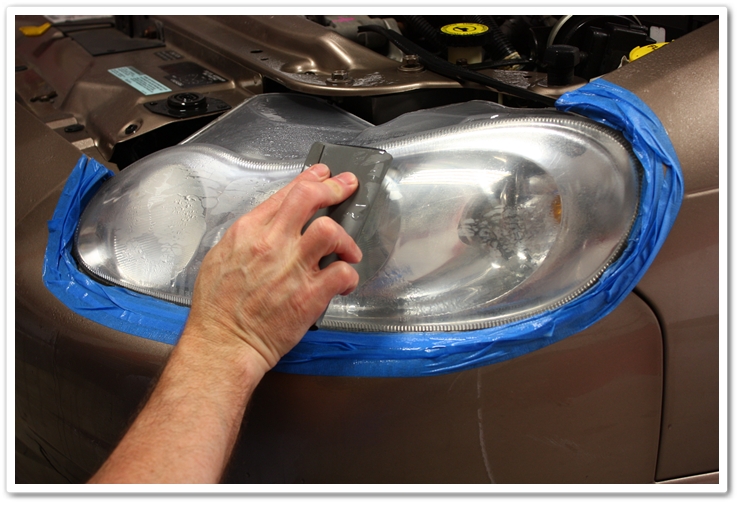
Next I stepped up to 2000 grit sandpaper, and I switched to vertical passes:
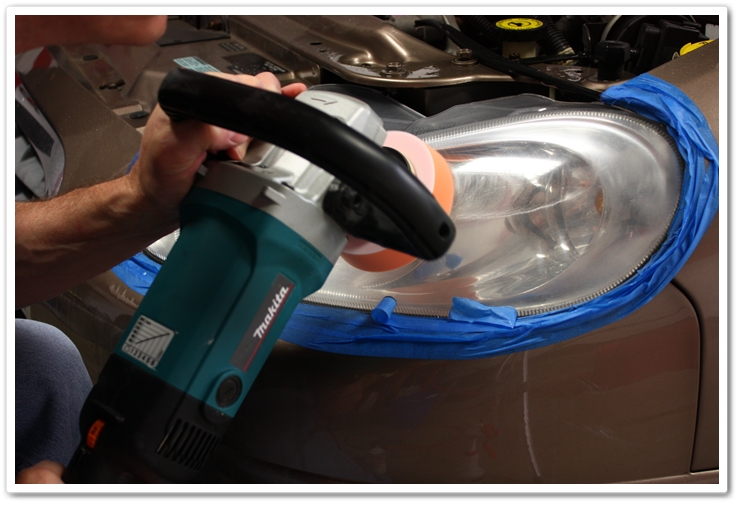
After about 4 different grits of paper, I switched to the Makita rotary to take out the sanding haze and to polish out the finish. I first used a 4″ Purple Foamed Wool pad with Megs 105 compound (alternatives would be Menzerna Power Gloss, Optimum Hyper Compound, or Poorboy’s SSR3), and then used an orange pad with Menzerna Super Intensive Polish, and finally finished it up with 106FF and a white pad.
Once again…before:
After:
Since this light was hit with some force, it had micro-fractures all through the lens that was well below the surface and obviously couldn’t be corrected. When it was done, it looked probably 75%-80% of a new one.
One thing to remember is that headlights typically get to this point after they’ve lost their UV protection (some are/were made better than others). Once you polish it out, you’ll need to give it a light polish every now and then to prevent the haziness from returning. This simple maintenance step can even be done by hand.
Don’t be afraid to give it a try. It’s quick, it’s simple, and it can make a big difference in the overall look of the vehicle!
Buy Products From This Article
Purchase the products used in this article individually or in one convenient package here!






Hi Todd, Would it be a good idea to seal the headlight assy after polishing it with a sealer like a wax sealer for UV protection. I did this to my Acura TL Headlight about two weeks ago.
Hi John!
Yes it’s always a good idea to apply a sealant and/or wax to the headlights just the same as you would the rest of the vehicle. If you wanted to add even more UV protection, then I would recommend a product like 303 Aerospace Protectant.
If you were to use a wax/sealant about how long does its protection last??
Hey Todd what speed do you use with the makita for the wool pad, orange pad, and white pad? i think the last two typically i use 1500-1800 rpms but i do not know on the wool pad. thanks
Jose,
The speed is more polish dependent than it is pad dependent. When using wool with a product like M105 I’m typically at about 1500rpm.
I went to 303 Aerospace Protectant for headlight uv protection after restoring them. The site says it leaves a matte
finish and doesn’t mention headlight use. Should I use it or what else can I try? My headlights look great now and I would like them to stay that way.
Thank you
John,
Yes, you can use it on your headlights…303 is incredibly versatile!
Thank you.
I’ll try it.
Hi Todd, you mention 4 grits of sandpaper but you only list the 1500 and 2000, what are the others? Thanks.
2500 and then finally 3000…
Hi Todd:
Firstly I want to introduce myself : My name is Juan Carlos and I’m trying to start a “HeadLight Restoration” bussiness.I must say that when I discovered this site I found here all what i was looking for about Headlight Restoration and beyond.Now I actually am thinking about a lot of things more , like cars polishing and others.Really you have a great very easy to learn site. Well I’m a “new kid in town” and i have a lot of ??questions to you.My first one:
-First,you guess I finished a Headlight Restoration like this one successfully. I would like to know how long it could last without using some UV Protection Product.
-Next, I already saw that you recommended the 303 Aerospace Protectant.Is this the best product to do this or there are more of them with similar effects?.Could you throw me some lights , please?.
If I use a UV Protection product how long it would last then?.
And Finally , thanks a lot for having this site and for your help and please, forgive my english.
Juan,
I’m glad you’ve found our site to be helpful.
There’s no way to know just how long it will last because you don’t know just how much of the original UV coating is still there…if any. Also, some headlight manufacturers do a much better job than others when they’re made, which also dictates how long they will stay looking good. If I had to do this to my own personal car, I would probably apply something like 303 Aerospace protectant each time I cleaned the car just to make sure it had some protection on it. Once they get as bad as this one was though, it will eventually get cloudly again and will require another polishing. Just make sure your customer is aware of that, and assure them that clearing it up through polishing is the smartest move since it will greatly improve the amount of light that is able to show through (added safety).
Can we substitute a PC7424XP for the Rotary? Will it be strong enough to remove the sanding marks?
You should be able to…it just may take a little longer. If doing this, I’d highly recommend getting yourself some 4″ Surbuf pads to use with your Meguiar’s M105 and the PC…this combination does a great job of removing sanding marks! You’ll then want to step down in aggressiveness as necessary to further refine the finish.
Todd, fantastic informative write-up. My question is, as im sure alot of others reading this is, how to accomplish similiar results without the use of a mechanical polisher/buffer? I know I know, I should go buy a decent buffer machine but im too afraid of ruining my paint finish with one, so its good old fashioned elboy grease hand power with me. What are your thoughts? And again, thanks for taking the time to post a great write-up.
Timmy,
The answer to your question can be found in Marc Harris’ article on headlight restoration by hand.
Do we need to put a lot of elbow grease in to the sanding process or can you get results with light pressure?
Typically all you need is light, even pressure to do the job.
Dear Todd,
as always, I really enjoy reading your write ups. I do have a question or am looking for your opinion/advise. When you apply a sealant, what is the type of sealant you would typically use?
Would any of these be good as well?
Optimum Poli-Seal
Blackfire WetDiamond with polycharger
Poorboy’s World EX-P sealant or EX sealant w/ carnauba
Thank you.
William,
You could use whatever sealant that you apply to the rest of the vehicle…and any of those you have listed would be good.
Thanks,
Todd
[…] to get me away from computers and work. I have restored headlights with a method similar to this: Headlight Restoration Process I would be willing to bet it would work fine on the jammer heads as well, but just be cautious. […]
Dear todd,
I am 17 And just geting into auto detailing, I have a few headlight repair jobs lined up and i was wondering if you can replace the Menzerna Super Intensive Polish SI 1500 (PO83) used in the second step of polishing with megs 205.
Thank you for thaking the time to read this and respond and thanx for all of the write ups you do i really enjoy them.
Thanx, chad
Chad,
There are a lot of different combinations that can be used…this is just one recommendation. SIP has quite a bit more cut than 205, but if you finish down well enough in your first cut then you’d be fine. It also depends on how fine you finish it during the sanding stages. Find yourself an old headlight to practice on with the tools and chemicals that you have and you should easily be able to come up with a system that works well for you.
Hi.. thanks for the tips. Can I only use 2000 grit as it is the only available in ny country?
Dear Todd,
I recently took lamin-x vinyl lens covers off my headlights.I then noticed it left a glue like residue on the headlight.What can I try to get the glue off?
Hey Todd,
First off, thank you for all the information you have given us via this site! With that said, I wanted to know what you think of this combo for headlight restoration:
Surbuf: 105
Green: 205
Black: Menz 4500
When using the 303 Aerospace Protectant. When applied is it a one step process just put on and you are finished? Or do you apply and let dry for a period of time and then wipe off? This question is for headlight restoration.
Thank you,
Jim
Hey Jim it’s been a few months but if you are still wondering I typically apply the 303 with an applicator pad then do the other headlight go back and wipe off the first one then the second, I don’t believe you need to let haze or anything. The 303 aerospace protectant is a great product and extremely versatile.
Yes I asked a question on April 18 about 303 Aerospace Protectand. Just wondering if I could get a reply.
Thanks Jim
Don’t worry about purchasing expensive surface waxes or protectants guys. The majority of the degeneration of the headlamp lens is caused by the heat of the bulb which is behind the lens, and of coarse the obvious, which are extreme wind speeds combined with UV, rain, sand and stones that literally cook the lacquer from the inside and sand-blast the lens on the outside. After performing thousands of headlamp restorations since the polycarbonate lens was first integrated into automotive manufacturing, I have seen the results of restored lenses slowly re-deteriorate after polishing in every case no matter what waxes or liquid protectants I had applied. I am certainly not a scientist by any means but I have been an automotive paint restoration polisher for over 30 years and I know what I see from extensive experience with loyal clients. The bottom line is, when you sand and compound any paint/clearcoat or in this case the protective/lacquer coating, you are basically removing it. This means less protection from UV and heat damage, which means the coating is guaranteed to opaque again, and in even less time than when it was a new headlamp. Some of my competitors choose to cut the coating down completely which leaves a spectacular glass-like finish… but this leaves absolutely no UV, heat or impact protection. Save your pennies guys. Restore your headlamps as Todd describes, then give them a quick re-buff every spring to keep them clear. This will help remove the oxidisation and re-seal the lenses for another year of safe driving.
Thanks for the article. I have been starting a new headlight restoration biz in Houston, TX and I have been using a UV clear coat. Do you recommend the polishing over the UV sprays?
I personally don’t use orbitals / buffers, compounds or waxes at all, and these lights shown were really not that bad. In really bad cases, I start out with 400 or 500 grit paper and move up from there. Then I will clean with alcohol 91+% and apply a new clear-coat uv film. I have found that this process will last a lot longer without re-treatment, 1 to 2 years, and in some cases even 3 years if the vehicle is garage kept and not driven at night very often and does not have automatic headlights.
What would happen if I sanded in one direction with all 4 of the different grit sand paper? Do I need to go up and down with one then left and right with the next? What does it do?
Todd, I have a Flex DA polisher. The speeds on the buffer are in German (metric) for RPM’s 1-160, 2-200, 3-270 4-330, 5-400, 6-480. Can you translate U.S. RPM levels for me. Also, I did not see some of the products you used on the list of materials (2500 & 3000 grit sandpaper) I have M105 so what Menzerna product would I use SF4000 or SI1500 after applying M105. Thanks.
I’m a paintless dent removal tech primarily but I’ve done quite a few headlight restores for customers and have had great results but I really struggle to find an easy uv protector that isn’t a spray on clear coat. Since I do some restores outside, sprays can get everywhere with the wind. What do you recommend?
Thanks for the information. I was just wondering I have never done a headlight restoration before. Would you say it would be a good idea to go to a junk yard and try this out first. Or just give it a try.
I used the Rustoleum Wipe New Headlight Restore on my semi truck lights and it worked great! I had an older car in Florida and decided to do the same so I went and bought another kit. It worked well on the first headlight of my 2006 Cadillac SRX, but left a hazy, gritty mess on the other headlight. Same product, same person, same day and same car. I just can’t figure out what happened or what to do now??? Help-Steve
Todd, Thank you for the write-up! Very good info.
Best,
John @ Mobile Detailing Columbia
Hi Todd! Thank you for this tutorial I was about to purchase the Headlight Restore Kit;
https://www.detailedimage.com/DI-Packages-M29/Headlight-Resotration-Advanced-Kit-P493/
Quick question and sorry if it is a dumb question; can this be applied to tail lights aswell?
Nash – This kit works great on headlights and taillights!