
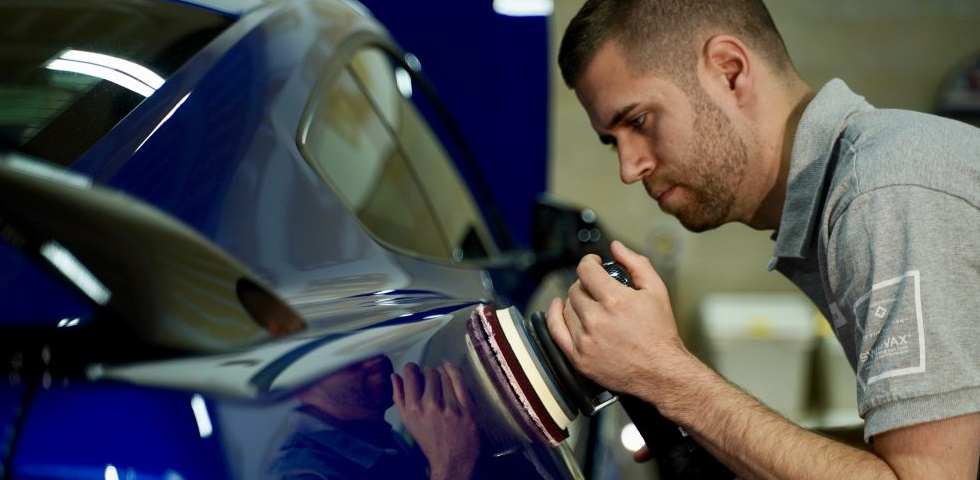


Detailing Essentials #6 starts off with a concept that completely changed the way I thought about paint polishing. Polishing residue management was a foreign idea to me until I was introduced to it at the NXT training course hosted by Kevin Brown. This concept is surrounded around the practice of continuously cleaning the pad during a polishing session. This cleaning process removes built-up residue that accumulates on the face of the pad during a polishing cycle. Clearcoat and spent polishing abrasives both clog the pad reducing the effectiveness after each cycle.
But why is this a talking point at all? Well, I’m sure we have all been at this very point. We do a test spot and dial in a combination. Then, as we move across the vehicle, the results start to change. But we didn’t change anything at all. The polish, pad, machine, arm speed, and pressure have all stayed the same. Well, the one variable that might be throwing everything off is the fact the pad is now completely clogged with paint material and old abrasives, making the pad/polish combination completely ineffective. I know I have been at this head-scratching moment many times. It’s frustrating until you realize the variables at play and how to deal with them. If there’s one sentence to read in this entire article its this one. Always clean your pad after each and every polishing cycle. This will ensure your polishing process is at peek effectiveness.
So what are some ways to clean your pad on the fly? For me, there are three main techniques to keep the pad clean during a paint polishing process. All three methods can be applied to foam, wool, and microfiber pads.
- Grab a microfiber towel and firming hold it in one hand. Place your machine in the other hand and run the towel over the face of the pad. The microfiber will pick up any polishing residue and clean the pad for the next cycle.
- Take a conditioning brush and brush out the face of the pad, this will dislodge any polishing residue. I always recommend following up with a microfiber to grab any additional residue still stuck in the pad. The brush can be extremely effective with microfiber pads with aiding in keeping the fibers straight.
- Technique number three is, in my opinion, the most effective. This method requires the use of compressed air to blow out the pad, removing any old residue.
Whichever technique you decide, the most critical concept to understand is why the pad needs to be clean in the first place. When we abrade the surface of the paint, material in the form of clearcoat (on modern vehicles) is being removed. That material has to go somewhere and inevitably lands in the pad. If this material isn’t removed periodically, then the result on the next panel will be significantly impacted.
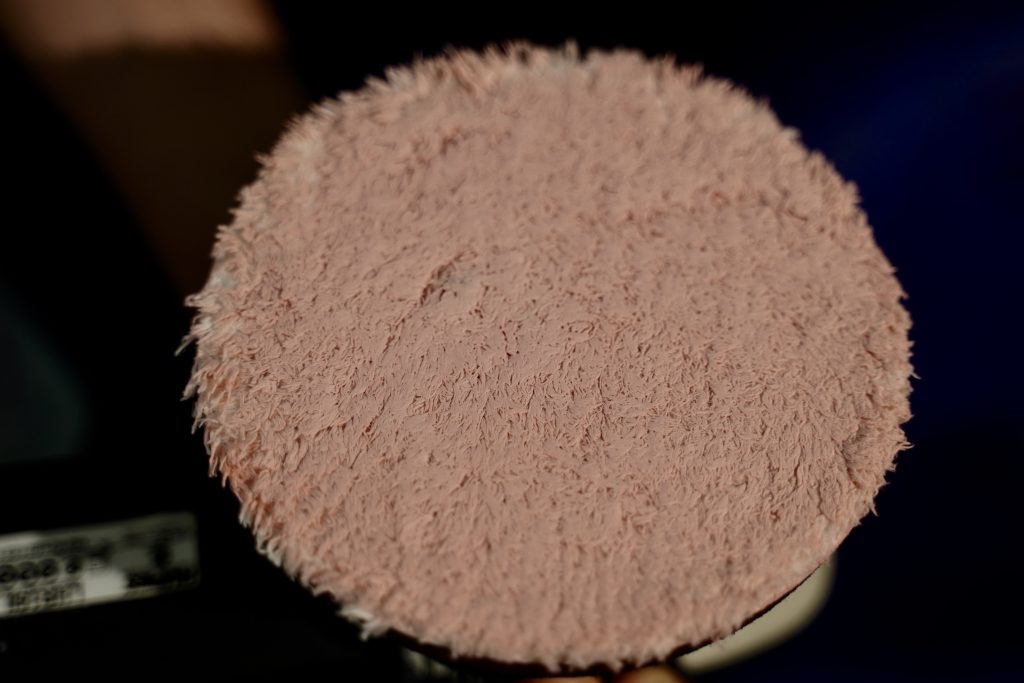
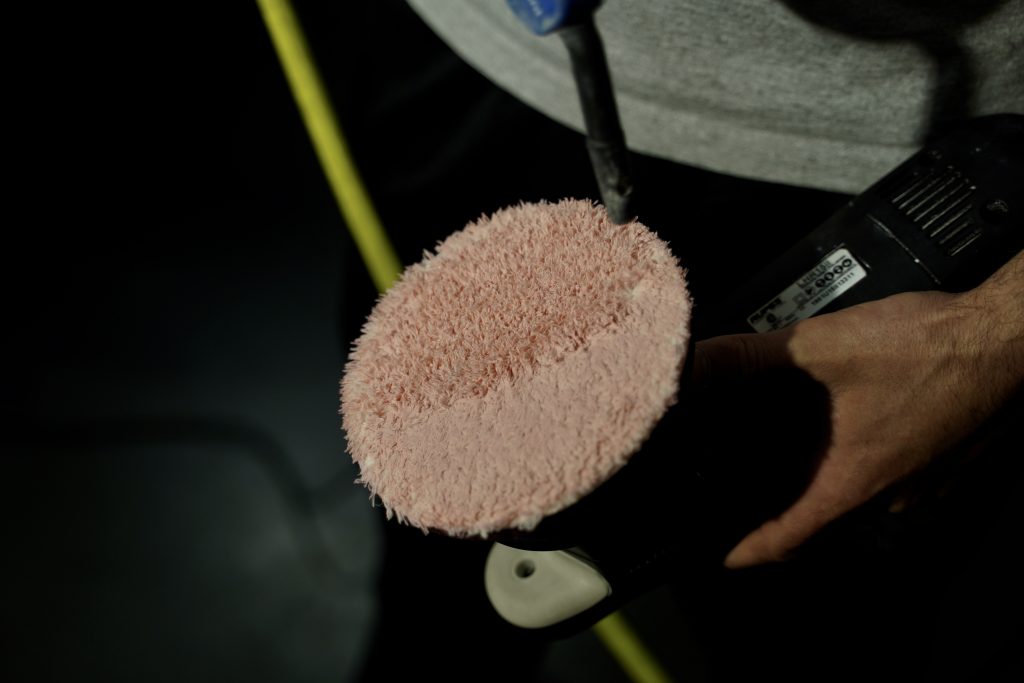
Meguiars Microfiber Cutting Disc after 1 polishing cycle. When the fibers are matted down the pad loses its cutting ability.
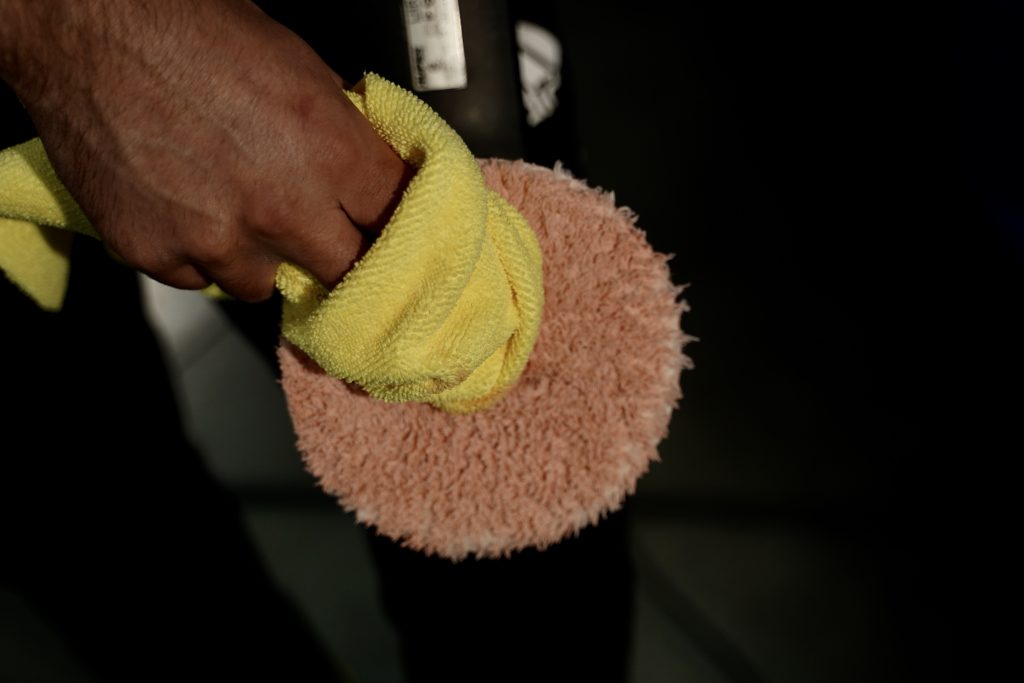
Technique 1 – microfiber towel cleaning.
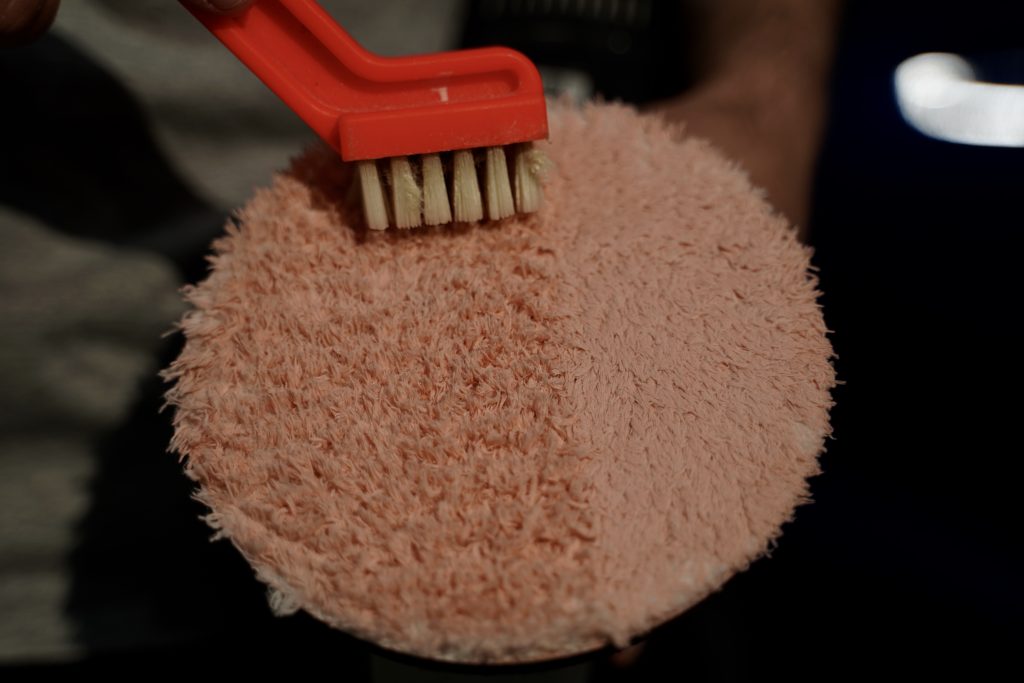
Technique 2 – brushing out the pad.
Technique 3 – Compressed air used to fluff up the fibers of the pad.

I hope these methods aid in helping you achieve a higher correction rate throughout your paint correction detail.
Related Posts
- Detailing Projects: Ferrari 488 Pista #2 Paint Correction, Clear Bra, & Ceramic Coating
- Video | Griot’s Garage G9 Orbital Initial Impressions
- Projects: 2019 Subaru WRX, Swissvax Detail
- Projects: Lotus Evora GT, Paint Correction, Clear Bra, Ceramic Coating
- Detailing Projects: Ferrari 488 Pista Paint Correction, Clear Bra, & Ceramic Coating