
Documenting your detailing work can be extremely helpful. Being able to effectively capture photos of your work allows you to demonstrate your abilities to your customers as well as any potential customers who may be looking through your website. By presenting high quality before/after images to your customers, you will be able to show them the drastic transformation their vehicle has gone through. This will help them to truly appreciate your hard work and they will have no doubt that their money was well spent.
Equipment
There are several items that help to make a quality before/after shot. First, you obviously need a quality camera. A DSLR is not necessarily a requirement, but it will definitely help produce top notch images when used properly. This means learning how to utilize manual settings and not relying on the camera’s “auto mode”.
Second, a sturdy tripod is a must. Setting your camera up on a tripod allows you to make a great before/after shot in which the photos are framed identically. This shows a true before/after demonstration and looks much more professional than hand held shots that are not identically composed.
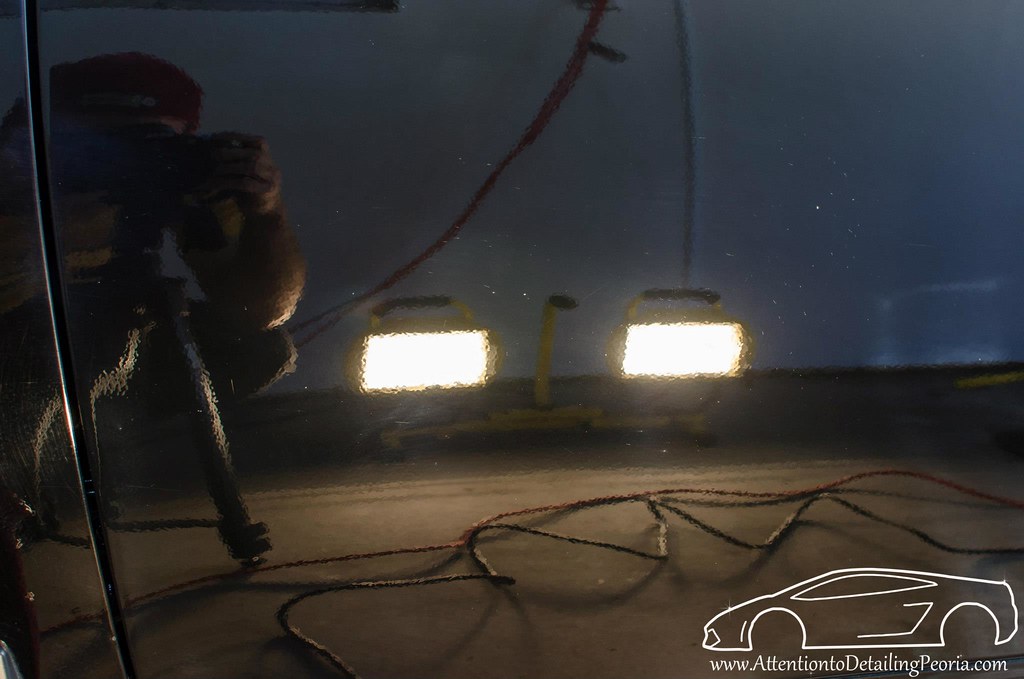
Next, you need a good light source. Since I shoot many of my before/after shots during the paint correction process, I usually use my halogen work lights as my light source. They are bright, so they easily highlight defects in paint, and they are mounted on a stand so they will be in the same exact spot for both the before and after photo. For other types of shots, ambient light may be more suitable.
An optional piece of equipment that I use very often are wireless remote triggers. These make it easier for me to capture before/after shots without having to touch the camera in between shots, therefore reducing the chance of bumping the tripod and messing up my shot. It also means I do not have to walk back to the camera each time I want to take a photo, I simply reach in my pocket and press the button on the remote and the camera will take the photo. As I said, these are certainly not needed, but are quite handy. Some photo enthusiasts may already have these for triggering flashes, but may not have considered using them for their detailing photography.
Taking the Shot
Now it is time to put all of your equipment to good use in order to properly capture the before shot and the after shot. Remember, the goal is to to have two photos that are identical to one another with the exception of the work you have done to enhance the appearance of the vehicle in between the before shot and after shot.
- It is important to place your tripod in a secure position that is out of the way of where you will be working so you will not accidentally bump it. If applicable, your lighting should also be placed in a manner that it will not need to be moved while you are working.
- Focus your camera on the intended subject and then lock the focus so it will not change between the two shots.
- Take a ‘test shot’ to determine if your exposure settings are correct. It is best to use manual exposure mode so you can be certain the exposure settings will not change between the before and after shots.
- Capture your before shot
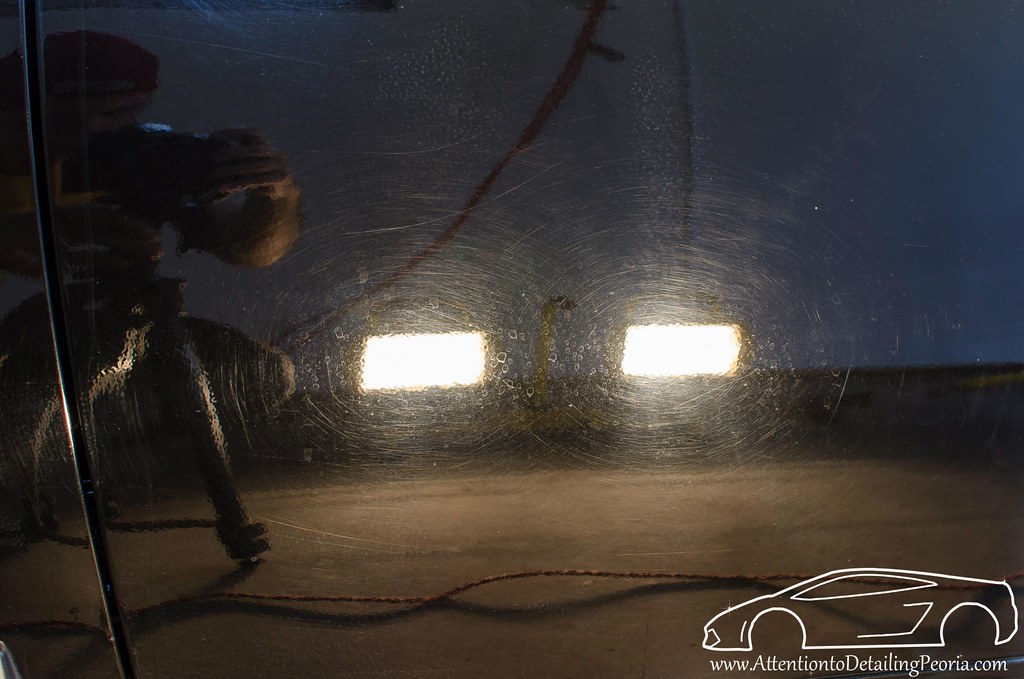
Notice the camera on the tripod and the light source placed out of the way, but in a stationary location that will be identical in the following after shot.

- Complete detailing work on area being photographed
- Capture the after shot
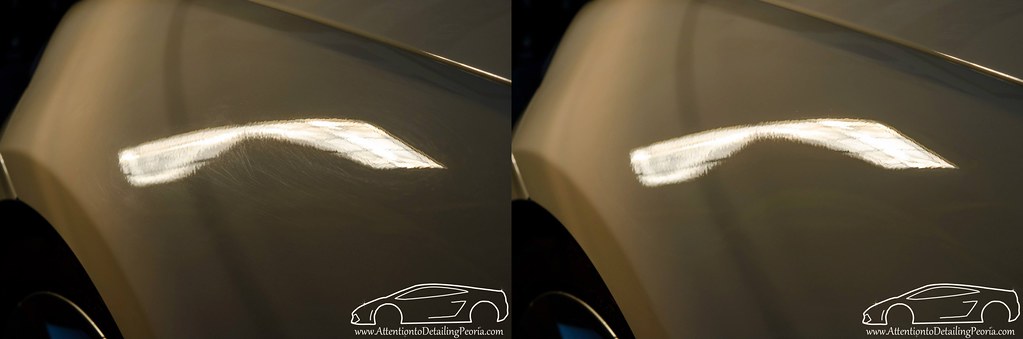
The composition and exposure of this image is a nearly identical to the previous photo which allows the viewer to focus on the dramatic change that has taken place as a result of the compounding step that was performed after the first photo was taken. (For those wondering, this area was compounded with Menzerna FG400 on an Orange Light Cutting Pad via the Rupes LHR21ES. It was later refined with Menzerna SF4500.)
Other Examples of Before/After Shots
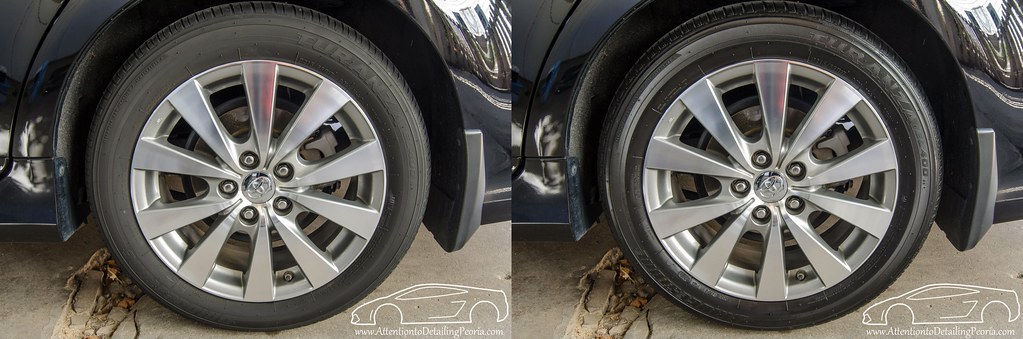
- Polishing a painted panel or section (featuring Menzerna PF2500 on an Orange LC Pad via Rupes Bigfoot LHR21ES)

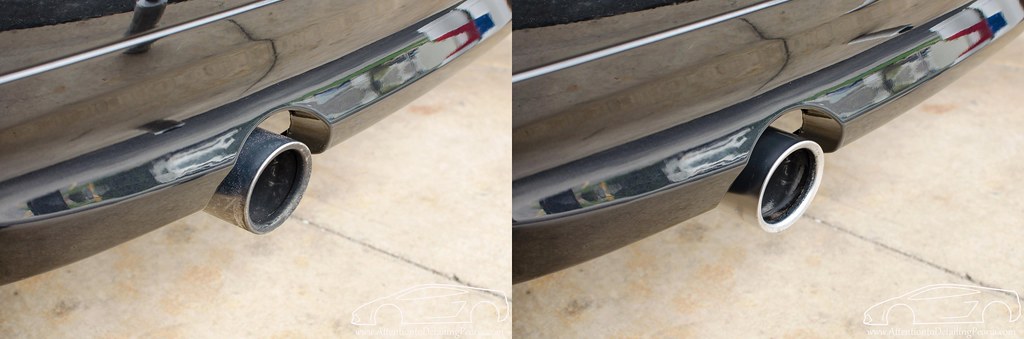
- Polishing exhaust tips (featuring Chemical Guys Metal Polish + Protection)

- Applying tire dressing (featuring 2 coats of Optimum Opti-Bond Tire Gel)
Displaying quality before and after photos will truly help you show off the hard work you put into a job. If you are a DIYer who simply enjoys working on your own cars and maybe the occasional family member or friend, these photos might help justify the entire weekend you spent working to your other friends who think you’re a little crazy.
If you are a professional, these types of photos are always great to show your client after you have finished working on their vehicle. It really helps them understand the amount of time and effort you spent on their car, and it is an easy way to really show the dramatic difference that you made. Also, these photos are great to post on your website or Facebook page to help potential customers understand the type of work you do.
For more photography tips be sure to check out my other article: How to Capture the 50/50 Shot
As always, thanks for reading!