

Fro anyone that really knows me, they know I hate to stand around doing nothing, and that is especially true when it comes to detailing since it’s my income generator. However, there are some detailing products out there that require a little bit of time to just sit there to do their job properly. When I first started detailing, this was absolutely painful to me, so I had to figure out how to be doing something while products had time to work.
Wheel and rim cleaners just so happen to be one of those products that usually require time to sit on the rim in order to work properly, and they usually recommend only doing one wheel at a time so the product doesn’t have TOO much time to sit and cause etching in your rim.
Below is my process using Meguiar’s Wheel Brightener D140 and Meguiar’s All Purpose Cleaner Plus D103 to get your rims, tires and wheel wells clean while not having to sit there watching the paint dry (or the Wheel Brightener work).
What You Will Need:
1). Meguiar’s Wheel Brightener D140 diluted 4-1 (four parts water, one part product or about 7 ounces product and 25 ounces water if you are filling a 32 ounce DI Accessories Trigger Spray Bottle.
2). Meguiar’s All Purpose Cleaner Plus D103 diluted 10-1 (about 4 ounces product and 28 ounces water if you are filling a DI Accessories Trigger Spray Bottle.
3). A 5 Gallon bucket such as DI Accessories White Bucket with Handle
4). Your favorite car wash soap such as Chemical Guys Citrus Wash diluted appropriately.
5). An assortment of brushes including but not limited to DI Accessories E-Z Detail Brush full size and mini size.
6). A few (4-6) DI Microfiber All Purpose Towels
Before you get started, be sure to read the instruction on any wheel cleaner you are using. Some are more harsh than others and can cause serious damage to some types of rims. If you are concerned, you can dilute the Meguiar’s Wheel Brightener D140 down as low as 8-1 if your rims are relatively clean.
Another concern is to make sure you always clean your rims when they are cool. Never clean your rims with any soap or chemicals right after driving the car. The rims, rotors and brake pads generate a lot of heat, and will cause harsh effects in some cases.
Finally, some types of brake pads can be damaged by the use of some cleaners. Always do your research into these aspects before starting any cleaning and detailing project
The most important aspect in order to perform this process is preparation, so make sure that everything is ready to go before you start anything. Fill up your bucket with the car wash soap and put your brushes and 2 microfiber towels in the bucket and make sure your products are properly mixed in their bottles.
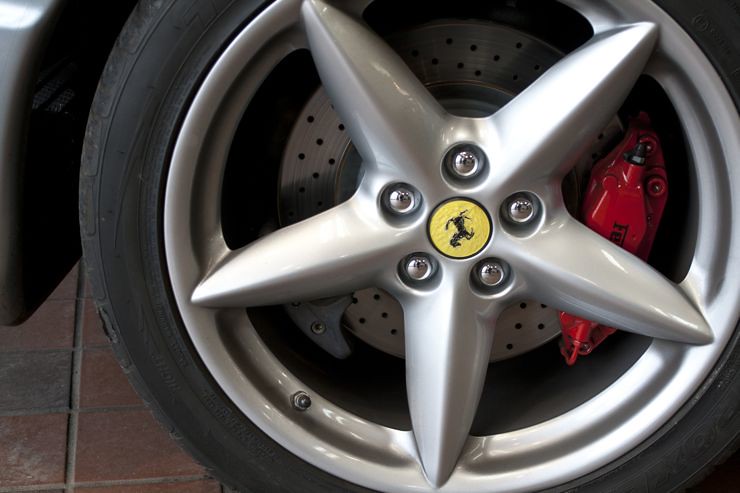
Here is our rim before any work

Now, it’s time to get to work. I usually like to start with the rear driver wheel and work clockwise around the vehicle.
Step 1). Spray the Meguiar’s Wheel Brightener D140 on the rim you are working on. Make sure to get it on the face of the rim, in the holes where the lug nuts sit, and on the inside of the rim as well.
Step 2). Spray the tire and wheel well with the Meguiar’s All Purpose Cleaner Plus D103
*Note: working on the first wheel/rim may be the only time you need to wait a bit before doing anything else. If I am washing the whole car, now is the time where I would wash inside the gas cap.
Step 3). Take a small horse hair brush or even a toothbrush and agitate the cleaner inside the lug nut area. I always do this first because this area usually gets neglected and I want the wheel cleaner I am using to be at full strength when I do this part. Every time you use a brush, you are putting the car wash soap and water on the rim and therefore diluting the cleaner.
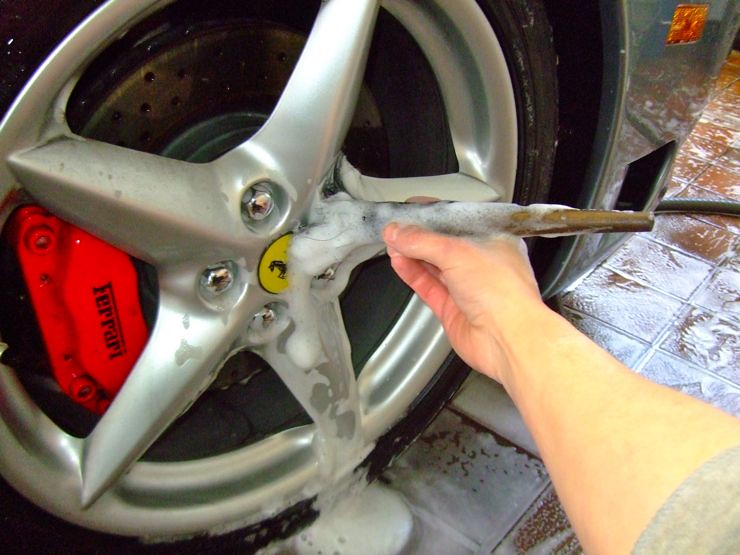
Step 4). Using your full size DI Accessories E-Z Detail Brush and your wet microfiber towel, agitate the rim cleaner on the inside of the rim. Use the brush first to get a majority of the brake dust off, and then go in with your microfiber towel to get to the parts of the rim the brush can’t get to. (Mainly behind the spokes). Make sure you are rinsing your brush and mircofiber towel as necessary.
Step 5). Using a regular scrub brush, scrub the tires and wheel well to loosen up the dirt and grim.
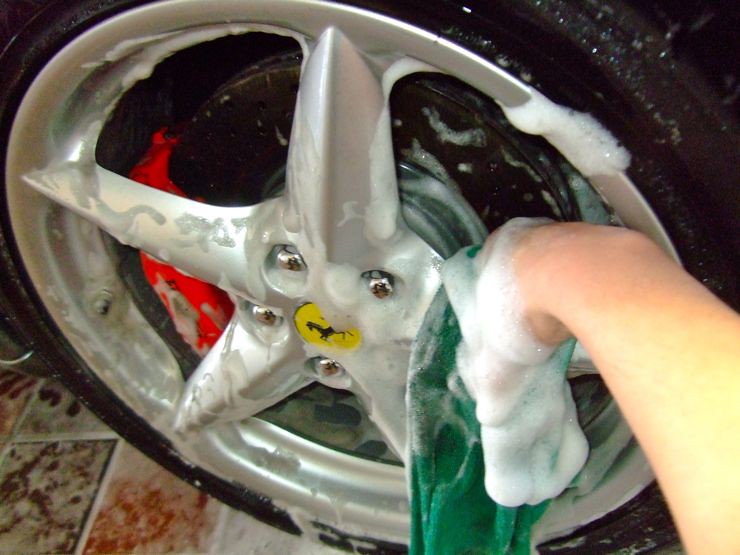
Step 6). Using your microfiber towel, clean the face of the rim and get into any areas of the rim you couldn’t get to with your brushes.

Now, one rim, tire and wheel well are clean and ready to be hosed off, BUT before you do that, go and spray the Meguiar’s Wheel Brightener D140 first and Meguiar’s All Purpose Cleaner Plus D103 second on the next rim you are going to work on. This will give the product some time to sit and do it’s job before you start scrubbing. Once you have done this, go back and hose off the one rim. If the nozzle you are using has a “Fan” setting on it, I like to use it because I can hit the entire wheel well and it gives me some extra pressure. Get all the cleaner off your rim, tire and wheel well, and I also like to spray the rotor and brake pad area until the water runs clear. Pick up your bucket and walk over to the rim with the cleaners on it and start the process over again until you have done all 4 rims tires and wheel wells on your vehicle.
If you are just cleaning your rims, take one of the remaining microfiber towels to dry off the tire and rims. For dressing your tires and adding some shine and protection to your rims, check out DI’s great selection of wheel care products here.
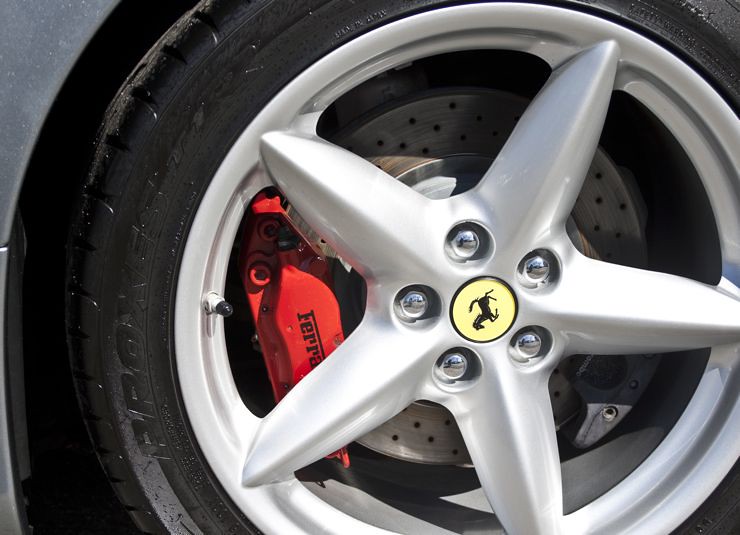
Our rim after it has been detailed and dressed:


Buy Products From This Article
Purchase the products used in this article individually or in one convenient package here!