
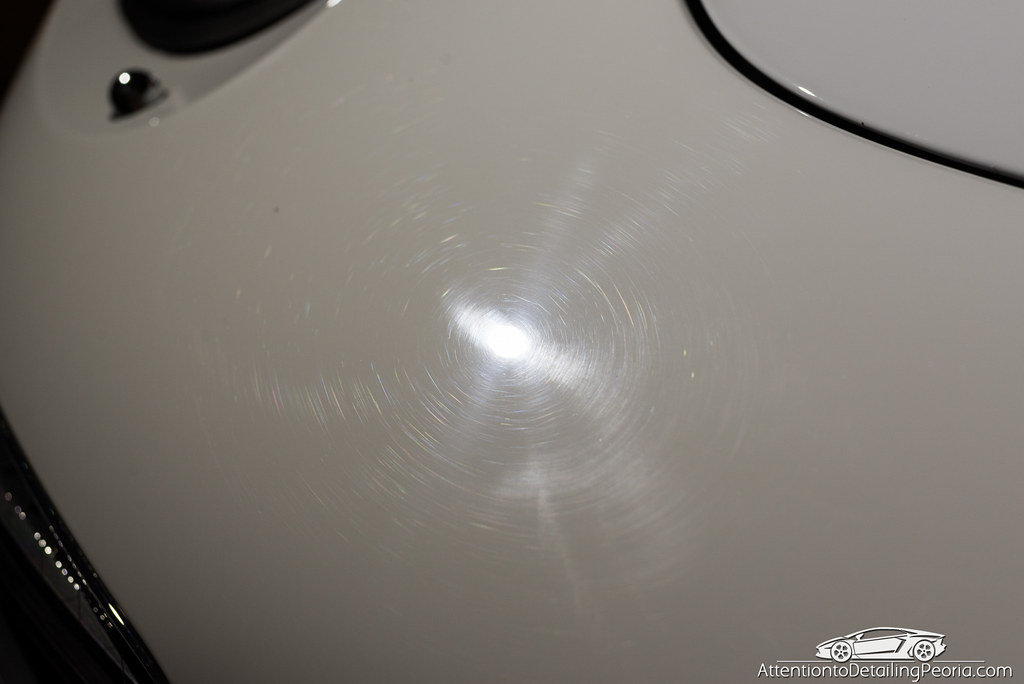
Being able to properly inspect the paint you are working on is an extremely important part of your job as a detailer. If you’re performing a paint correction procedure on a vehicle without proper lighting, chances are your results will not be at the level they could be by using appropriate lighting. Identifying defects on darker paint is often quite easy as any direct light will highlight the swirls and scratches in the paint, but what do you do with light colored vehicles?

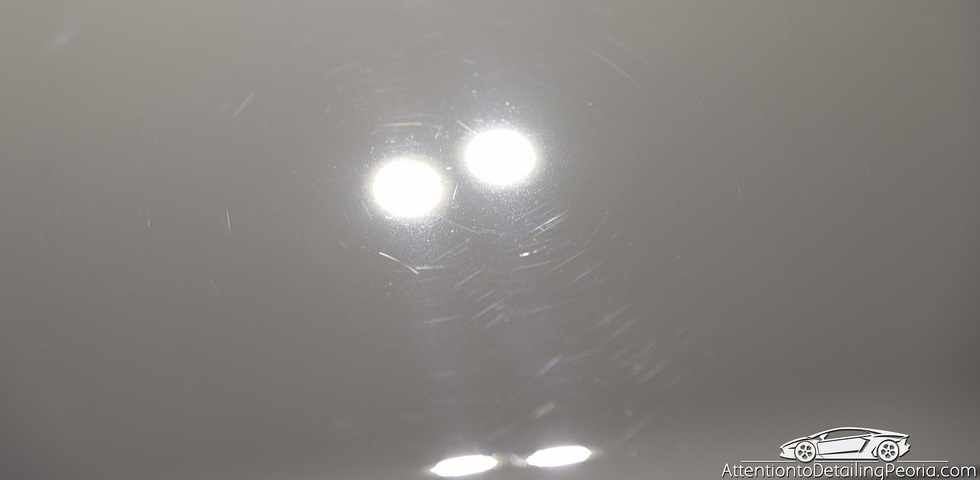
Using bright sunlight or high output inspection lights on lighter paint can be overwhelming to your eyes. The bright paint may appear washed out, like in the image below, which makes it very difficult to spot any of the defects you were expecting to see with your lights.
Light colored paint combined with bright ambient lights (overhead lighting) and even brighter inspection lighting (spot lights) creates an area that is simply too bright to see any detail. For me, the solution to inspecting and working on light colored paint is simple… turn off the lights! All of them except the inspection lights that is.
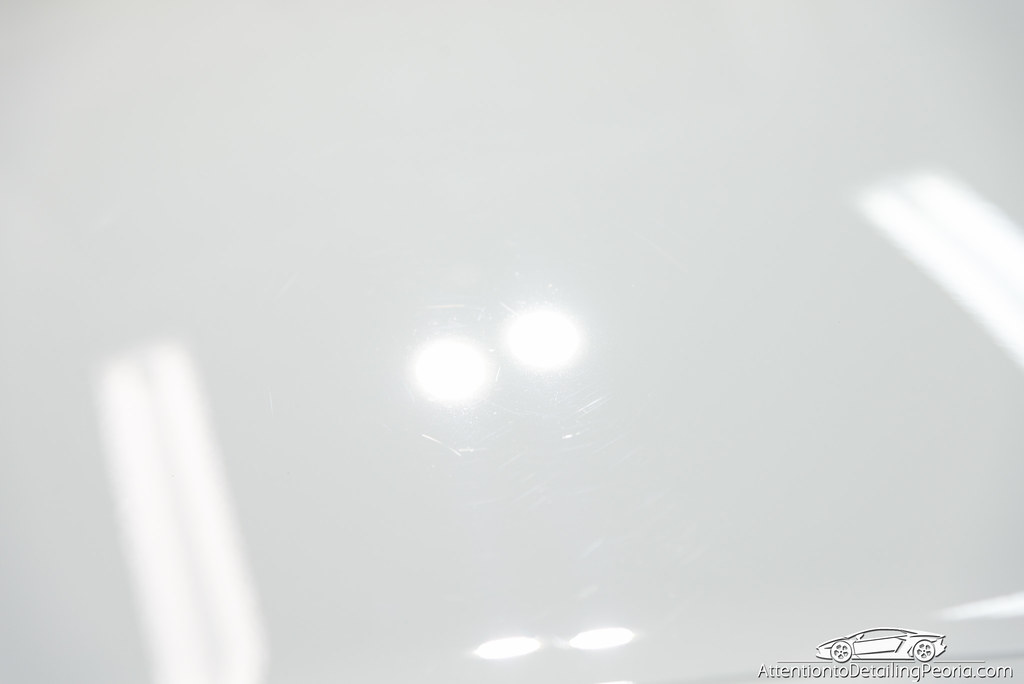
The following photo was taken with the exact same camera exposure settings and location as the previous image in this article, however the defects are more easily detected in this photo because I lowered the ambient light by turning off all of the overhead fluorescent lights and allowed the only real source of light to come from my inspection lights.
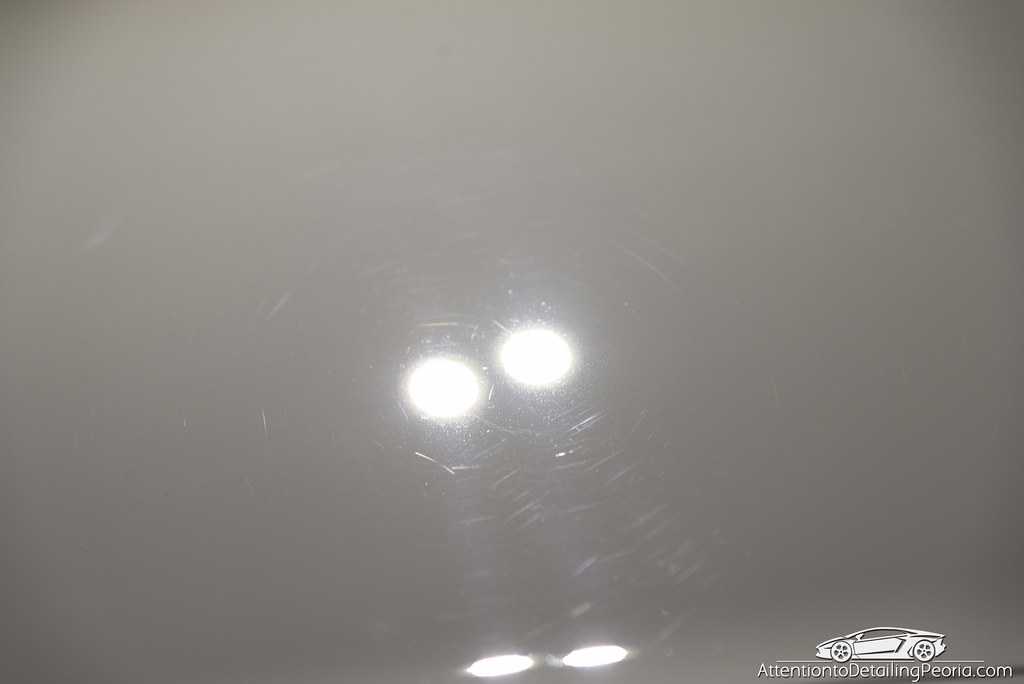
I will work in a completely dark room with just my inspection lights focused on the panel that I am working on. By reducing the ambient light to nearly zero, your inspection lighting no longer makes the paint so bright to the point where you cannot focus on it without straining your eyes.
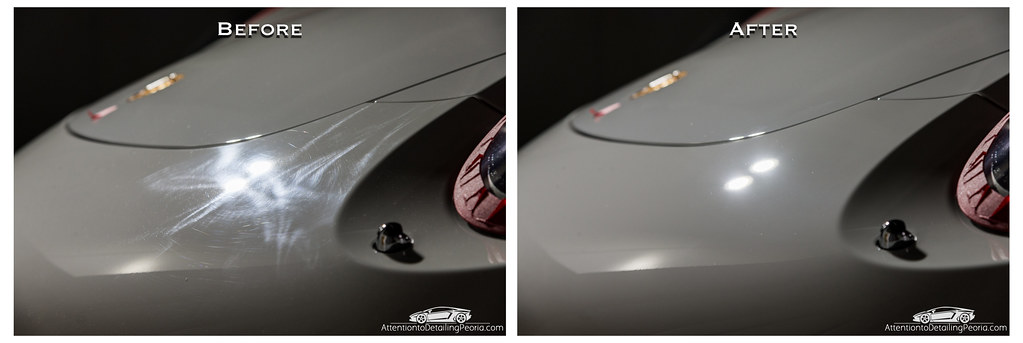

Hopefully this quick tip will help you to easily improve your correction results with light colored vehicles.
Related Posts
- Using Handheld Lights for Paint Inspection: Brinkmann LED vs. Xenon
- 2014 BMW 750 LI: Removing Dealership Holograms
- 1999 Porsche 996: Paint Correction and 22ple HPC Coating
- 2016 BMW M4: Paint Correction Detail & 22ple Mistico Elemento Application
- 2015 Range Rover: Paint Correction and Gtechniq Crystal Serum Light Application