
I’m going to try something a little different in this post just to mix it up and to get as much reader participation as possible. You’ve been following all of our blog posts on here for the past year, and I know that a lot of you have gained a tremendous amount of knowledge in the process. Well, now’s the time to test some of that knowledge!
I want everybody to put themselves in the shoes of the detailer (in this case…me), and make the evaluation of this Ferrari 612 Scaglietti. I’ll provide you with the same information that I have available to me, and I want you to come up with a gameplan and write it out in the comment box below. Sound simple enough? OK then, let’s take a look at this beast.
The Details:
This is a 4 year old pre-owned vehicle, and the new owner just took delivery of it about a week and a half ago. It was shipped to Ohio from a dealership in Texas. There are 9,000 miles on the clock, so it has been driven a bit. Ferrari paint is typically hard on newer models.
The inspection on the vehicle was done in a parking garage using a Brinkmann LED light. You walked around the car with the new owner, you allowed him to see what the Brinkmann revealed (heavy swirls!), and discussed some options. The owner didn’t want to go for a full correction job at this point, but he did want to address some of the swirls and add a layer of protection. The two of you agreed on a budget that would allow you 8 hours worth of work (full correction on a black Ferrari would typically take 15-20 hours), and the plan was to get the exterior looking as good as possible within that time budget. The interior didn’t need to be touched, so you’re able to focus your entire time on the outside.
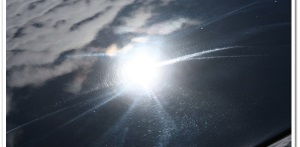
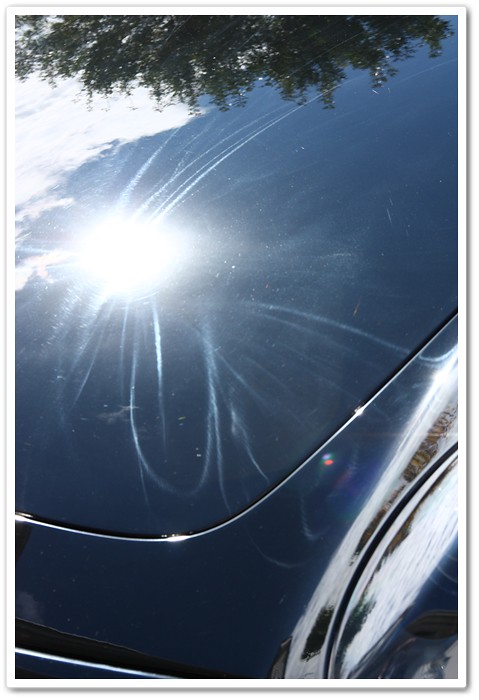
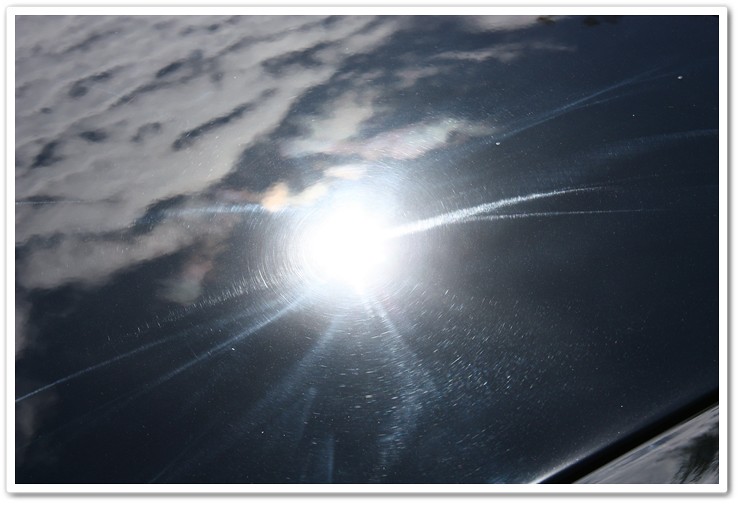
The owner hands you the keys (that’s the fun part!), and you drive it back to your garage / shop to work on it. Once you get it out in the sunshine, you notice that the heavy swirls you were seeing in the inspection light are actually severe holograms from a very poor dealership “detail department” prep job! There are wool marks everywhere on the car, the holograms are hideous, and you only have 8 hours to make this car look better. Armed with the knowledge that this car just came from the dealership, you know that they’ve used heavy filling glazes that haven’t worn off yet, so when you strip the car during the wash process you know that the condition is actually going to be worse than it even looks right now.


I’ll give you a hint that may help you determine a good course of action. Black cars can get a light polish, and they can get a heavy polish (compound followed by fine polishing), but you typically can’t give them a one-step medium-level polish because you risk holograms.
You have 8 hours, a black car, heavy wool-induced holograms, and a desire to get the vehicle looking as best as you can for the customer. What is your approach given what you have to work with?
So I need your help! Please give me some ideas on what approach should be taken on this car given the parameters we have to work within. What combination(s) would you try and what would your goals be?
I’m not asking for you to write a book, but just give me some suggestions on what you might do to get this black car with heavy holograms looking as best as you could in only 8 hours. Remember, the customer is not expecting the car to look like new…he understands that level of correction is at a much higher rate.
After I get enough replies and participation, I’ll come back in and edit this article to include the processes and products that I used, along with some photos of the car completely finished. Let’s see who comes up with the plan that is closest to what it actually took.
Let the games begin…
Update: Final Process and Results Revealed!
We’ve had some great responses, and some of you actually came close to the final process that was used on this 612 Scaglietti! Thanks to all of you who participated.
Some said that we should call the customer back and say that it couldn’t be done and we’d have to do a full-correction, and some said that a two-step process couldn’t be done in 8 hours. In this case, the owner of the car was completely aware of what we were dealing with, and he knew that we wouldn’t achieve anywhere close to a full-correction. At first he simply wanted it cleaned up and a layer of protection added to it, but when I showed him the level of defects in the Brinkmann, he decided that a mid-level polish would be more appropriate. The key here is to always communicate with the customer and discuss options. As long as you’ve clearly discussed levels of expectations for the particular detail being performed, then everything should go smoothly. Make it clear that a full correction to remove 90+% of the defects will require 15-20 hours, and an 8 hour budget will clean up perhaps 50% and significantly increase the gloss and depth of color.
Somebody else made a comment about trying to achieve a higher level of correction on such a fine car, and it would be hard to stop at the 8 hours. This level of correction is a difficult one because it’s less than perfect, yet it has our name stamped on it! Somebody else could look at it, see that there are defects remaining, and draw an incorrect conclusion that we didn’t do a good job. We can’t get ourselves caught up in that trap however because we are performing a service based on a budget and a level of detail that was agreed upon. And while we should always maximize the time / budget to make the car look as good as we possibly can, we can’t be in the business of donating full-correction jobs for mid-level prices…otherwise we won’t be in business for long.
I see a car like this as a challenge because it gives me the opportunity really impress the customer. If I say that I can get a 50% correction rate in 8 hours, and I deliver more than I promise, then I’ve just created a loyal customer.
After I looked at my options with this car and the time I had to work with, I knew a few things for sure. (A) 8 hours is not enough time for a full and proper two-step correction, especially on a large black car like this one. (B) A one-step polish can easily be done in this time, but since it’s a black car I couldn’t go very aggressive with it and I would definitely limit myself to a 50% correction.
Knowing that the customer is expecting just a 50% correction rate, and the fact that the areas of the car that you can clearly see in direct sunlight look horrible (hood, top of fenders, top part of doors, trunk lid, top of bumpers), I decided to take a hybrid approach to maximize the results.
The first step was to do a few test sections to see how the paint would react. I said before that most modern Ferrari paints are pretty hard, and don’t correct very easily. This is also a lesson in why it’s always important to test out how polishes and compounds are working on that particular car, on that particular day. During my test sections, I found the paint on this 612 to correct much easier than any other modern Ferrari I’ve worked on (and there’s been a lot of them!). With this knowledge, I knew that I could blow the customer away with the results as opposed to making it better than expected.
My first test was with Meguiar’s M205 on a black pad while using the Porter Cable. I found this to get rid of at least 50% of the defects, and it took care of the holograms as well. Perfect! Now I have one piece of the puzzle ready. The next step was to see how quickly and effectively I could do some major correction. I put a Surbuf pad on the PC and grabbed for Meguiar’s M105. After a quick spot, I smiled when I saw that it got rid of just about every single defect with the exception of any deeper scratches. The marring that was left over by the Surbuf/105 combo would need some finessing, so I grabbed my Makita rotary with a black pad and Menzerna 106FA. This combo has more cutting power for a finishing step than does M205/PC, and it produces an amazing finish. After a quick test with it over the previously compounded section, I did several IPA wipedowns to make sure the polish wasn’t filling, and found the finish to be just about perfect. I mean…about 98% defect free! I checked it with my halogens, my Brinkmann, and in the sunshine just to make sure.
Now that I have my winning combination in place, the plan was to apply a hybrid approach to the car to maximize the results for the customer. For the areas where you can easily see a direct sunshine reflection (hood, top of fenders, trunk lid, top portion of doors, etc), I would use the PC / M105 / Surbuf followed by Makita / 106FA / black combination to get as close to a perfect finish as possible. For the lower areas where you can’t see a direct reflection, I would use the one-step procedure of a PC / M205 / black to achieve a 50+% rate of correction (the level of correction that the customer is expecting the entire car to be). You might be wondering why I chose the PC/205 route on the lower parts instead of the Makita/106 like I’m finishing the top portions with. That’s simple…because the PC/205 option is much, much quicker! I could take more time perfecting the top portions, and then quickly polish the lower areas.
When the car was finished (in 8 hours!), it looked absolutely stunning…especially considering how bad it was when I started. Sure, the lower portions were only 50%, but that’s the level that the customer was expecting, and it’s very difficult to even see those parts of the car. When you looked at the areas where I did a multi-step procedure (where everybody looks…the hood, the trunk lid, etc) however, the car looked almost brand new. If somebody was paying for a full correction job, a hybrid procedure like this one would be unacceptable. If they’re paying for a full correction, then that means the lower parts too! But if somebody is buying a mid-level detail, why not make the important parts look as good as you can if time allows? Don’t get stuck in the mindset of either a one-step, or a two-step procedure.
When I delivered the car to my client (driving it back to him on a sunny day sure was nice!), he was stunned at how good the car looked. It far surpassed his level of expectations, I avoided the drama of calling him up asking for more time/money, and I only worked on it for 8 hours. Everybody wins…
A few days later I received this email from him:
Hi Todd
I LOVE the finish on the car. I only got to drive it once, since I left to Miami for this weekend, and not back until Tuesday. The car has got a lot of attention, and I think it looks incredible.
Thank you again for such an incredible job…I LOVE the car!!
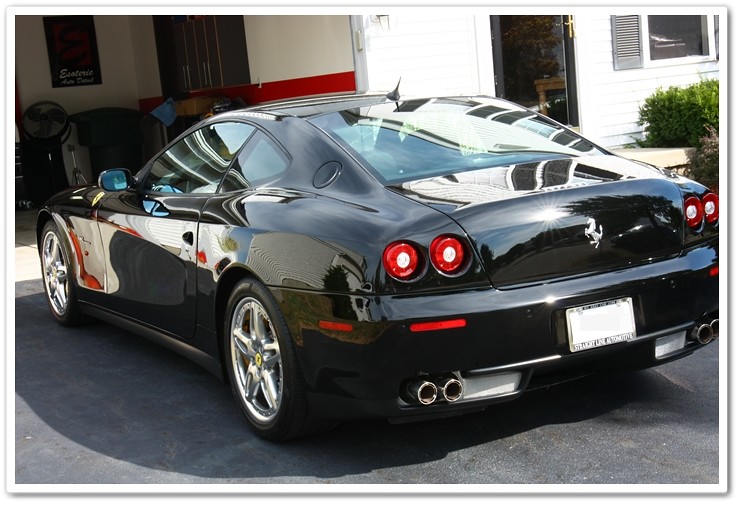
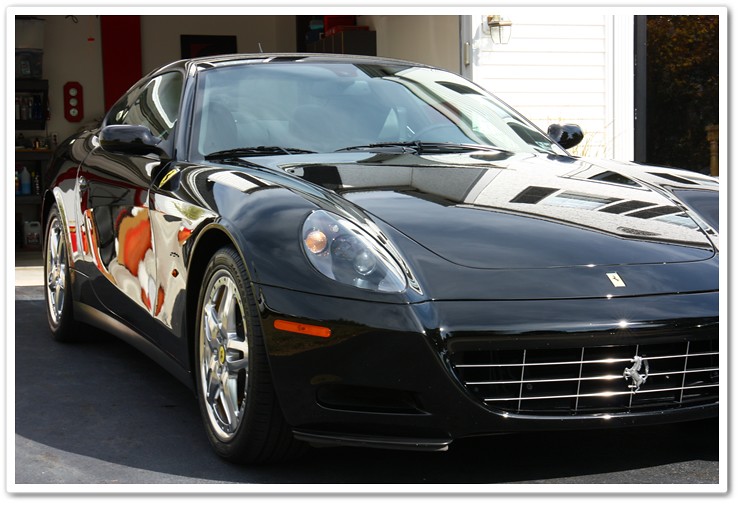
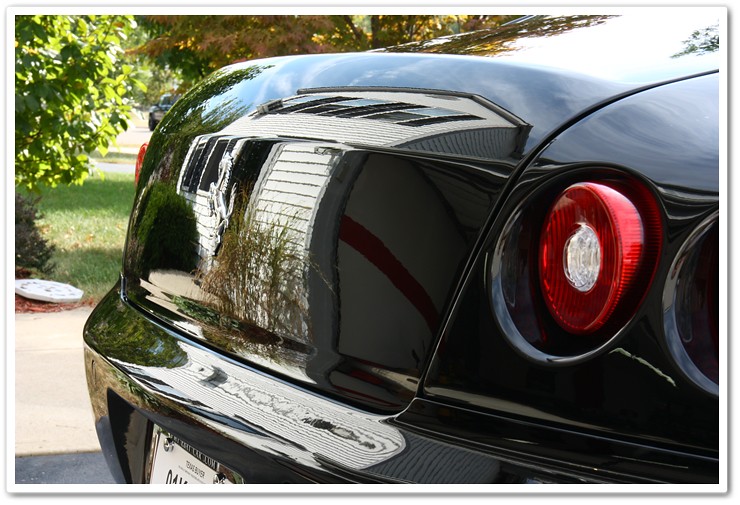
Thanks again to everybody who participated in this exercise, and I hope you picked up a few things on how to approach more challenging situations like this. Here are some photos of the car when I was finished.
There were some hazy clouds in the sky preventing a pure direct sun shot, but I think you can get a good idea of the clarity of the hood…scroll back up and compare it to the “before” shot!
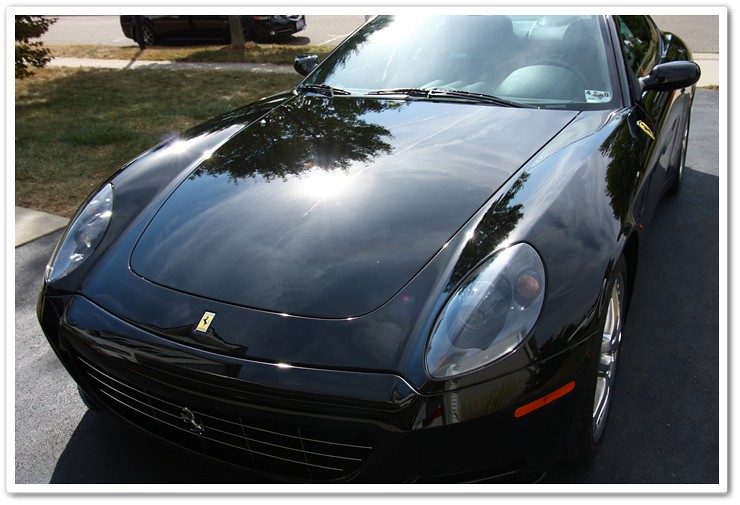
Swirls and holograms are gone!


Thanks again everybody! If you have any additional questions or comments, please let me know.