
Ferrari 458 Italia Paint Correction v2.0 by Todd Cooperider
by Todd CooperiderWhen I published the first Ferrari 458 Italia paint correction article back in June, it quickly became the most popular article that we’ve created here on the Detailed Image Ask A Pro Blog. Everybody loves supercars, and the new models like the 458 always receive a tremendous amount of publicity. For all of the technical specifications on this beast, please refer back to my previous article.
The owner of this particular 458 contacted me as a direct result of the first one that I worked on and wrote about. The article was published one evening, and the very next morning I already had emails from a handful of people with 458’s on order. They wanted to set appointments for paint correction details before even taking delivery of their new cars. Some of them would be shipping their new 458’s to me from around the country, while others like this owner would hire me to travel to them. So we set a tentative appointment for me to make the 6 hour drive up to New York when his new car arrived.
For those of you who have been following my work on Ferrari’s, you’re well aware of the documented issues with the paint from the factory. And for those who are new to these articles (thanks for stopping by…and welcome to the blog!), Ferrari and many other high end manufacturers ship their vehicles with less than stellar paint conditions. By reading through the details below, and looking at the corresponding images, you’ll get a better idea of what I’m referring to.
No worries however, because that’s where the highline professional detailers take over. We’ve been referred to as paint doctors, paint whisperers, and everything in between. Whatever you choose to call us however, you can be confident that we can fix most (if not all) of the problems in the paint, and that the finish of your prized possession will be brought to a level of gloss and clarity that you never imagined that would be possible!
OK then, on to the detail…
The first part of the process is to assess the damages and current condition of the paint to develop an approach that will give us the needed correction while preserving as much of the clear coat as possible. Paint correction involves removing a very fine layer of clear coat, and leveling the surface to produce a high level of reflectivity.
Once I washed the 458 and prepped the finish for polishing, I was able to thoroughly inspect the paint to see what kind of condition it was in. As expected, I found many of the exact same problems as I did on the first 458. Not only did I find the same issues, but they were localized in the same areas of the car as well. This is a good indicator that there are process breakdowns happening in the making of these cars, and that the attempts to “fix” the problems are being handled by people that are not skilled at the fine art of paint correction.
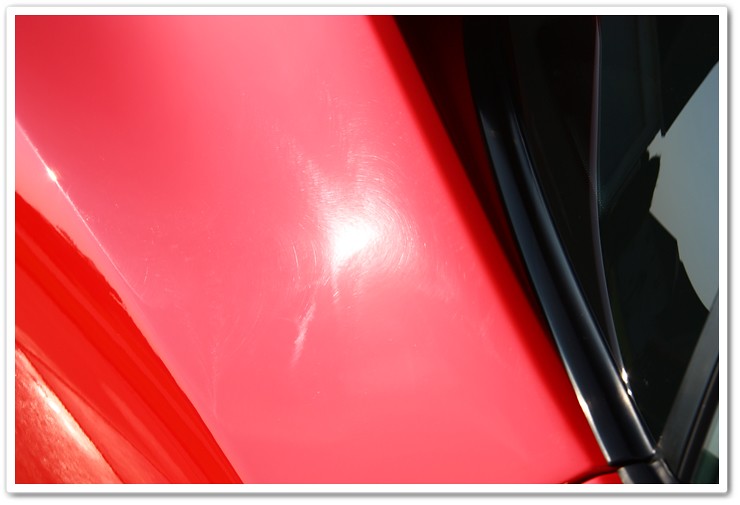
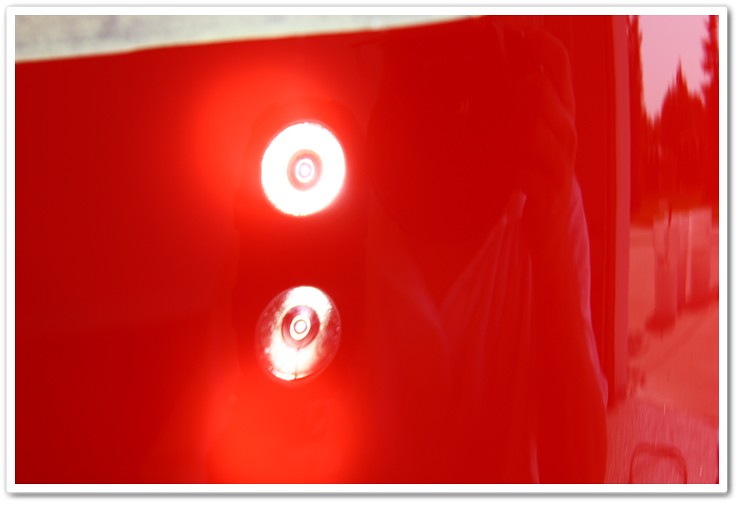
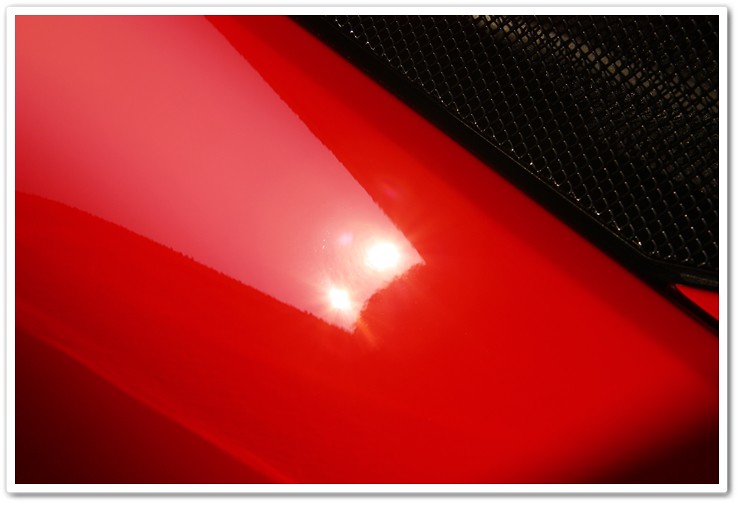
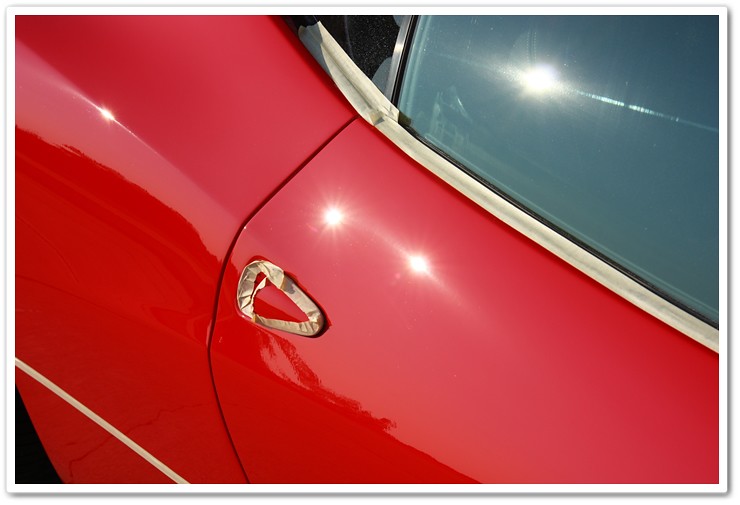
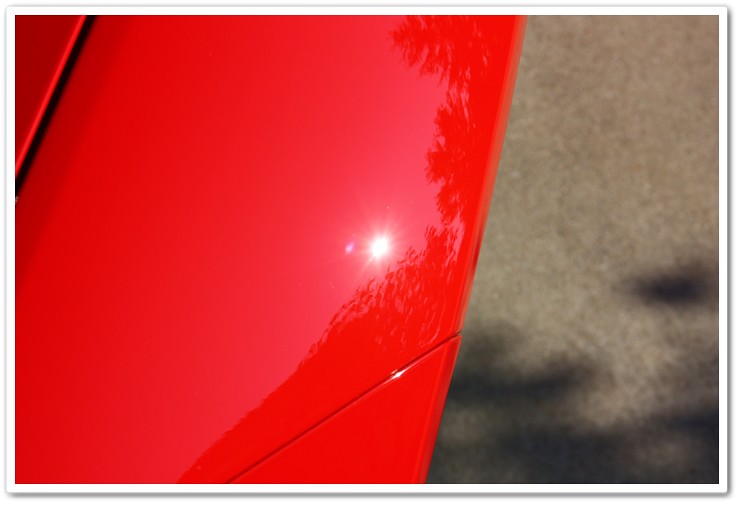
In this photo, you can see the holograms (buffer trails) in the light reflection. This is caused by improper use of a rotary polisher. Somebody either used too aggressive of a pad, improper speeds, too fast arm movement, not properly breaking down the polishes, or a combination of these technical failures. You’ve probably seen a lot of dark colored vehicles in particular out there with holograms / buffer trails after they’ve been worked on by unqualified technicians.
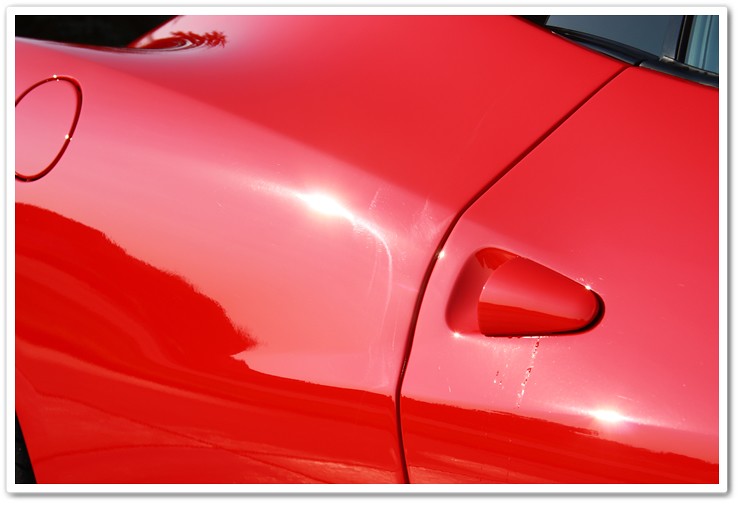
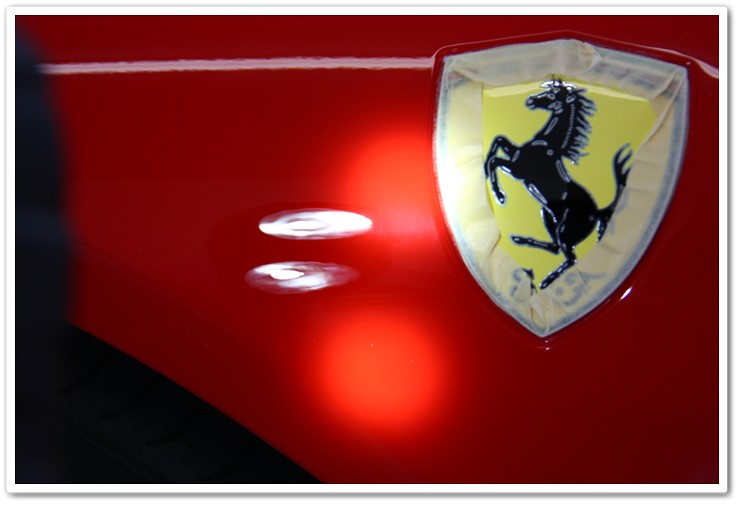
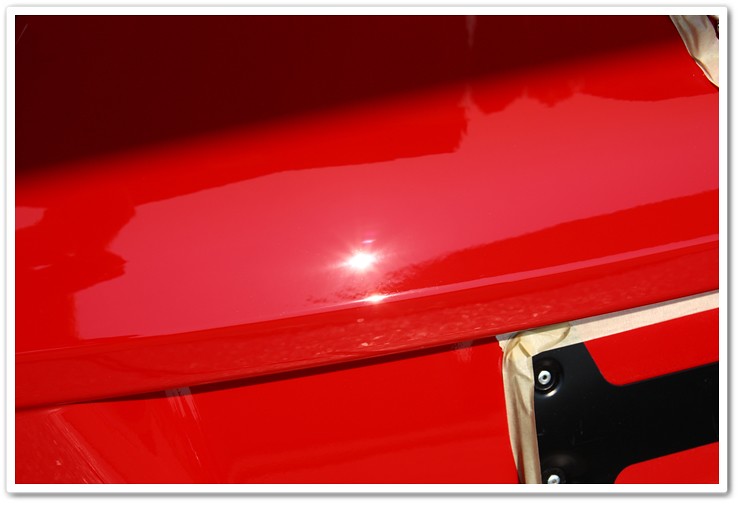
Look at the trails just to the right of the sunlight reflection in this shot.

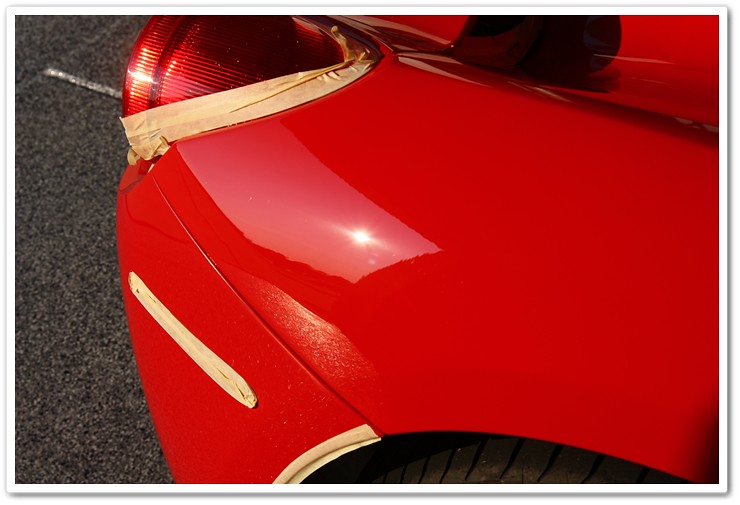
Light reflections in paint aren’t supposed to look like this! Step outside and look at your car in the sun. If it looks like this, then give me a call! 🙂
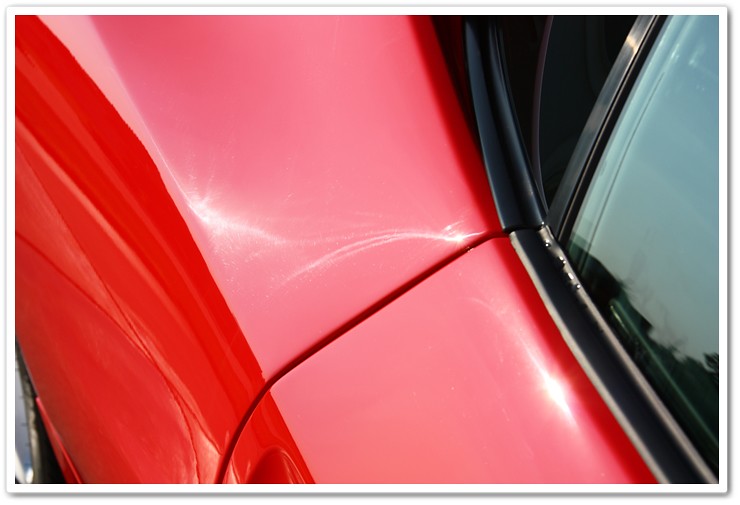
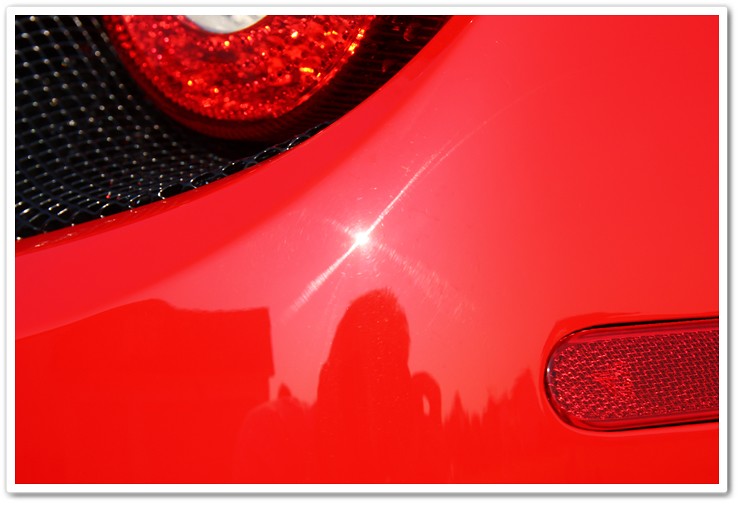
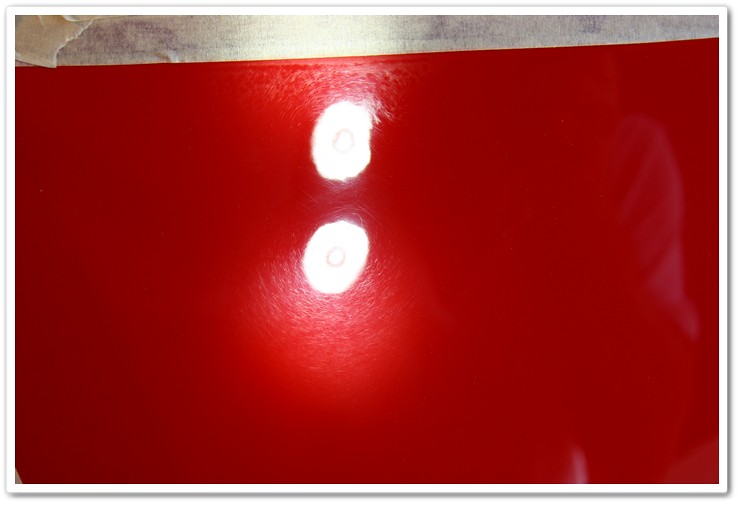
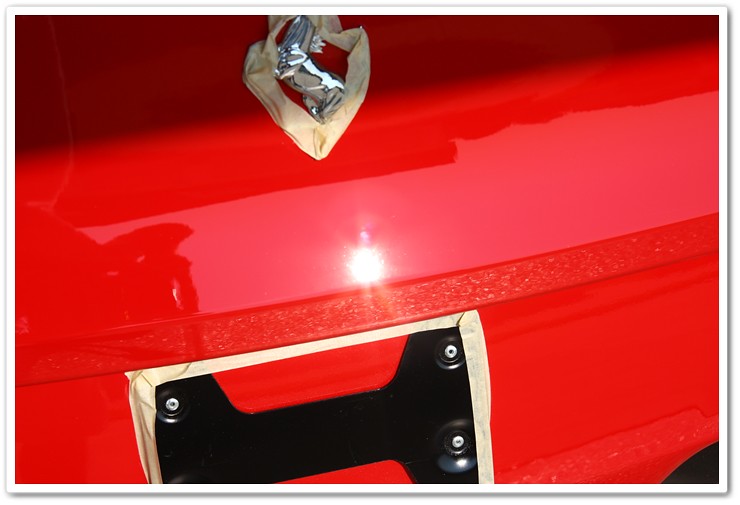
This is a really bad area here. If I were to crop in on this shot, you would see that these are “pigtails” caused by wetsanding on a dual-action sander. This shows that they either didn’t finish it down with a fine enough grade of sandpaper, or that they didn’t properly polish it out afterwards (or both). On the 458’s, you will find a lot of sanding pigtails on the front and rear bumpers.

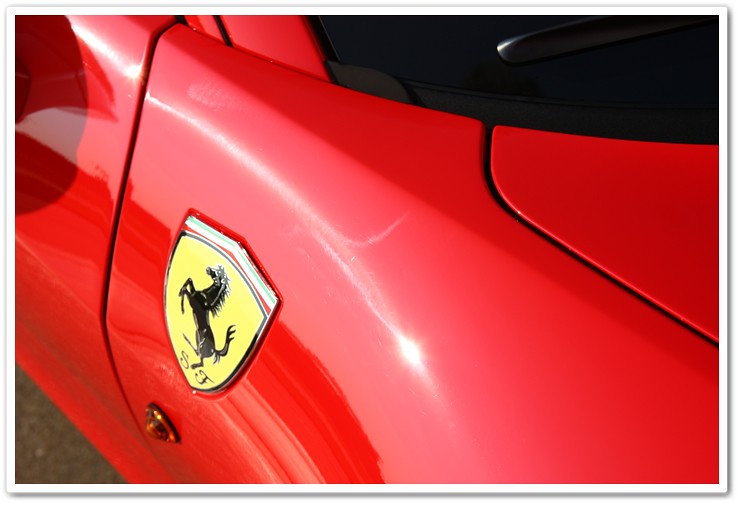
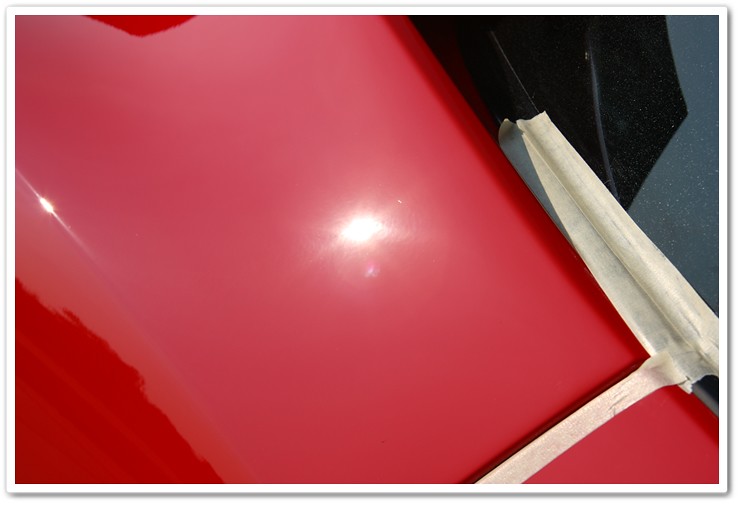
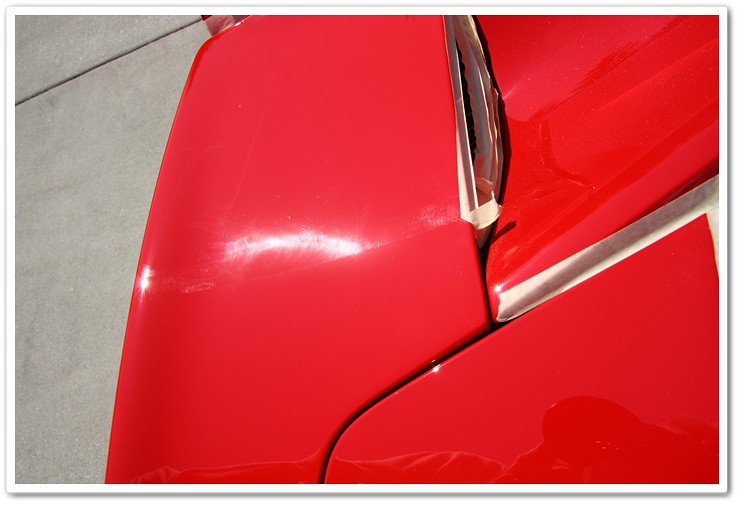
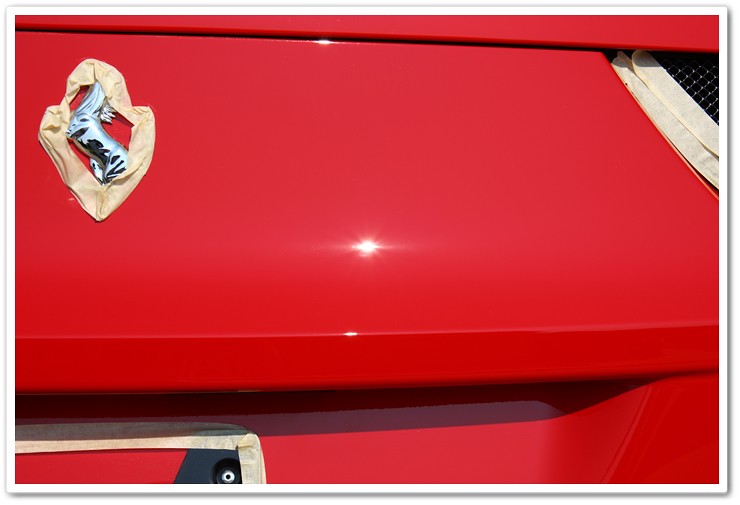
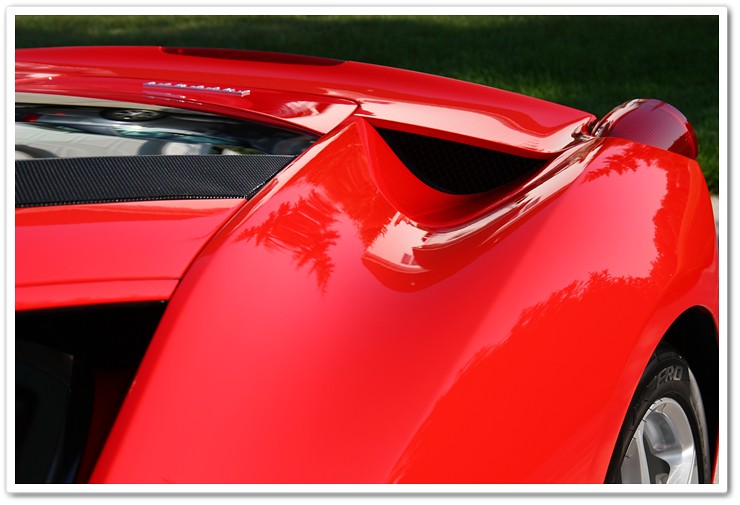
This is also a really bad area, and a challenging one to fix because of the concave shape. Based on what I’ve seen with these cars, the factory is using some old-school (very large) wool pads and they simply can’t finish it down. These are some of the worst areas on the 458, and require a variety of (smaller) pad sizes and lots of patience to get them right.
By now you should have a pretty good idea of how the paint looked on this $260K exotic beauty! There were holograms, sanding marks, long and deep scratches, and even a burned edge (buffing went all the way through the clear coat and to the color coat). It was scheduled for 2 long days at the Esoteric Spa, so I needed to get busy to bring out the true beauty that it deserved.
Compounding:
The first step in this process was to perform some heavy compounding to get rid of the deeper defects. For this step I chose to use my Porter Cable 7424XP Dual-Action polisher teamed up with the Surbuf pad and Meguiar’s M105 Ultra-Cut Compound.
Just after compounding alone, the finish looked tremendous by comparison. The slight haze that was leftover would be cleaned up in the finish polishing stage. The Surbuf / M105 took the finish from this:
To this!
Now let’s move on to some other problem areas of the car. There were several spots where somebody decided that sanding needed to be done, but then they failed to polish it out afterwards! Yes…this is how it came from the factory.
These spots required the Makita rotary teamed up with a 4″ Cyan Hydro-Tech pad and Meguiar’s M105 compound to fix the sanding marks. This shot is immediately after compounding (sorry for the blurry photo).
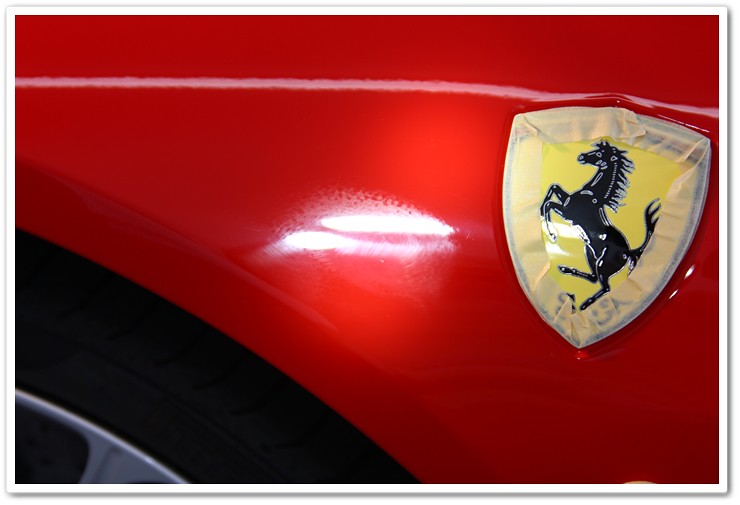
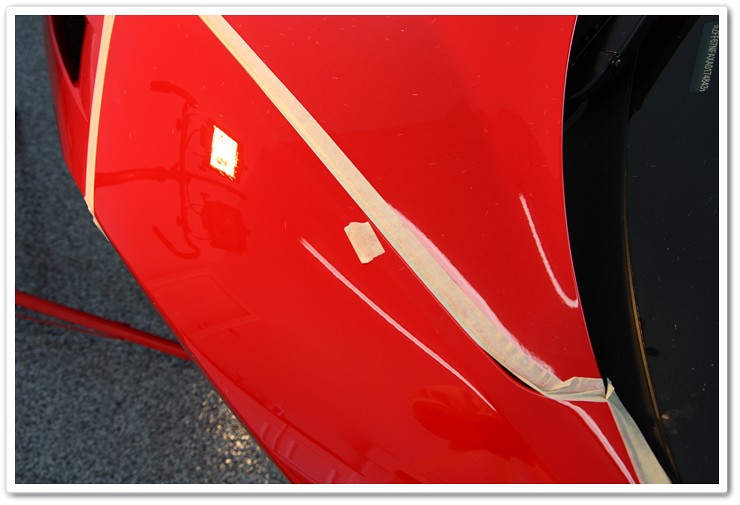
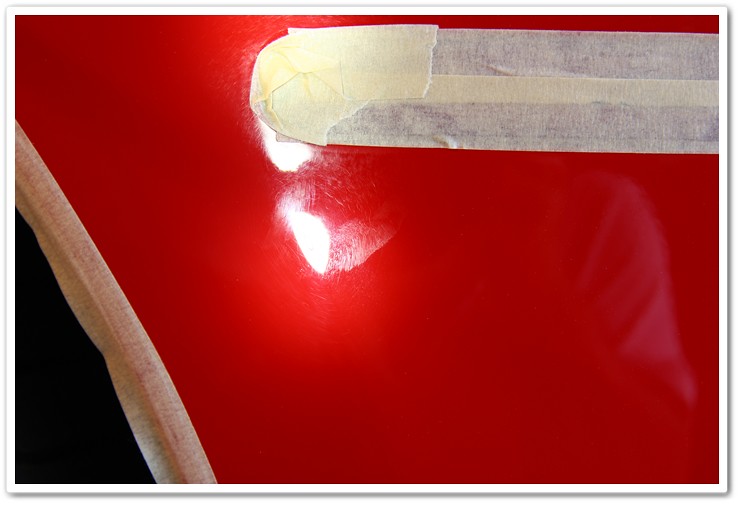
For the burned edge that I found, I simply taped over it (small piece of tape in the photo) and was very careful in that area knowing that the thickness of the clear had been compromised.
This is a good one…heavy sanding pigtails! This is on the rear bumper, just below the side marker light.
After compounding:
More problems on the rear bumper:
After compounding:

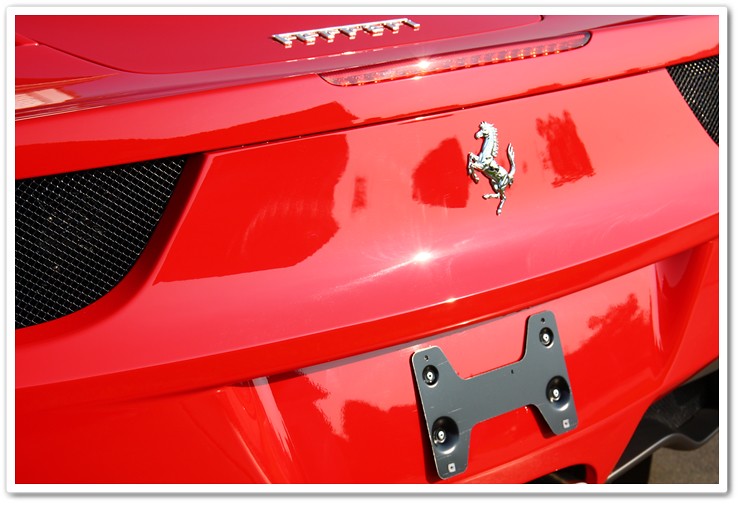
I tried to get a 50/50 shot here on the back end of the car to show before and after compounding. You can see the top half of the photo (in the sun reflection) where it has not been polished and you still see all of the swirls and defects. Just below the reflection you should be able to detect a line where I had it taped off…you shouldn’t notice any defects on the bottom half. The entire back end (bumper, rear deck lid) took me about 4 hours alone to work on between compounding and finish polishing!
At this point day 1 is complete, and I finished all of my compounding after about 10 hours worth of work. At the end of the work day the owner of the car took me out for dinner and we had a great time talking about cars and business. I really enjoy getting to know my clients!
Finish Polishing:
For day 2, I started with my finishing polish process using the Makita rotary, a black finishing pad, and Menzerna 106FA polish. I did a few test sections, thoroughly wiped down the surface with Isopropyl Alcohol to remove any polishing oils and ensure that I had a true, defect-free finish, and snapped some shots to show everybody how it now looked. Not only did it totally remove any haze left over from the compounding stage, but it brought out a tremendous amount of gloss and clarity in the paint.
Any specs you see at this point is just lint from the microfiber towel…the finish is defect-free.

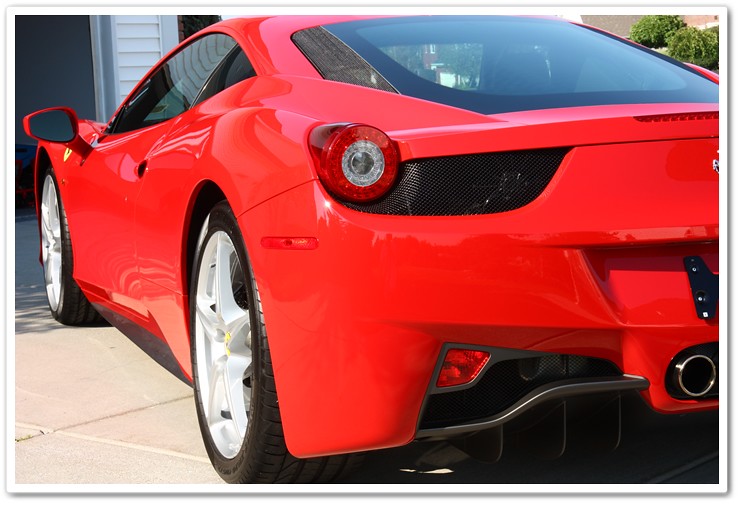
Like I said previously, the back-end of the car took a tremendous amount of time, and was polished exclusively with 4″ spot pads because of the tight areas. When it was finished however, the holograms were gone, the sanding marks were leveled, and the gloss and clarity of the paint went through a huge transformation!
That’s a money shot right there!
Finishing Details:
Once all of the compounding and finish polishing stages were done, it was time to put on several hours of finishing touches to get the beautiful 458 Italia ready for final photos. All of the polishing dust needed to be cleaned out of every crack and crevice, the engine was detailed, exhaust tips polished, wheels and wheel wells treated, glass cleaned, interior cleaned and dressed, and a final coat of a developmental sealant was applied. The car looked absolutely stunning when it was complete…as it should have been when delivered from the factory.
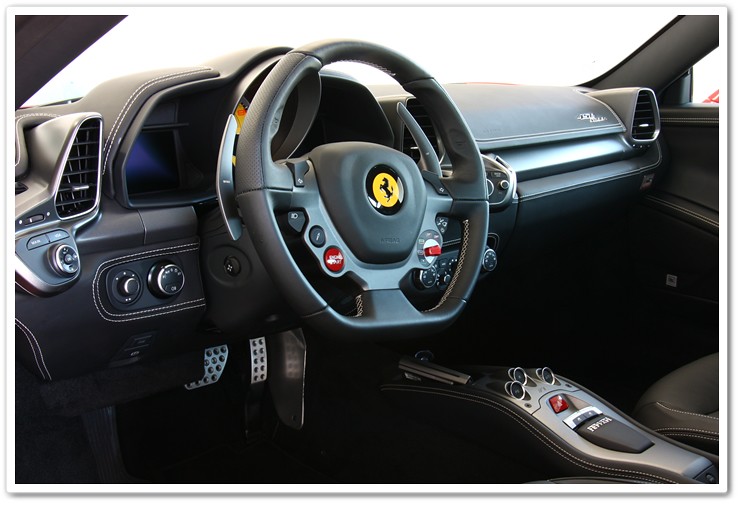
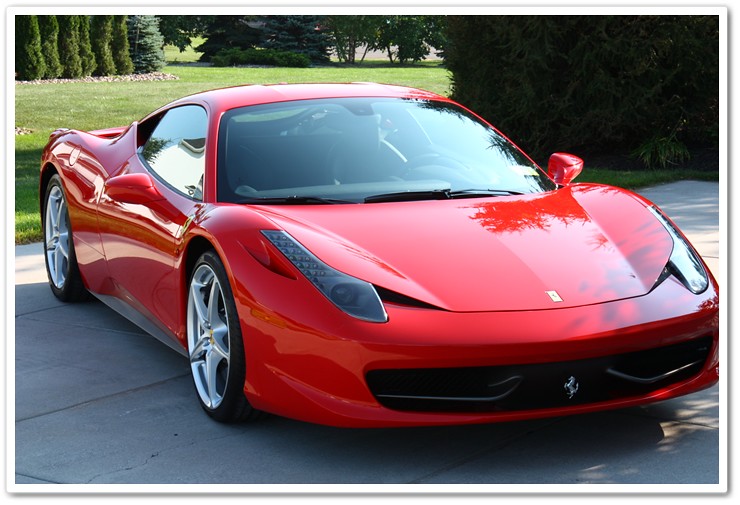
Ferrari 458 Italia in pictures:
While designed with performance first in mind, the interiors of the Italia are top-notch and rival luxury cars in their fit and finish, material choices, and amenities.
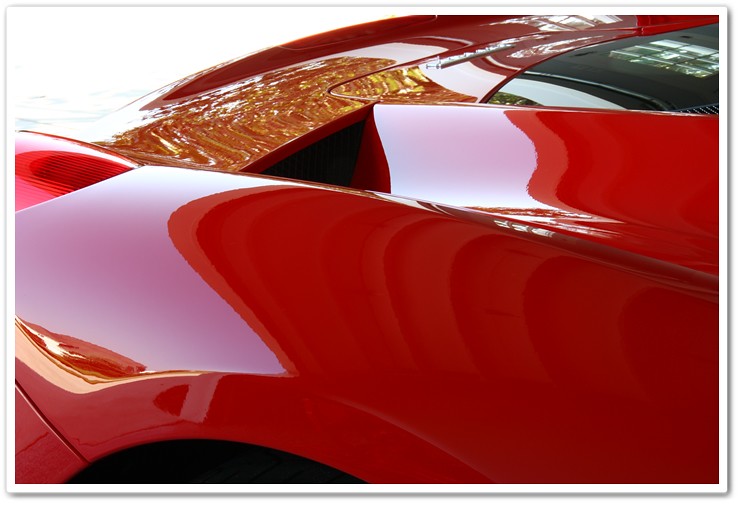
Just like a fine sculpture…

This was an area in particular of the 458 where the owner was floored by the increase in gloss we were able to achieve.

And speaking of gloss…
I just like the moody feel to this shot.
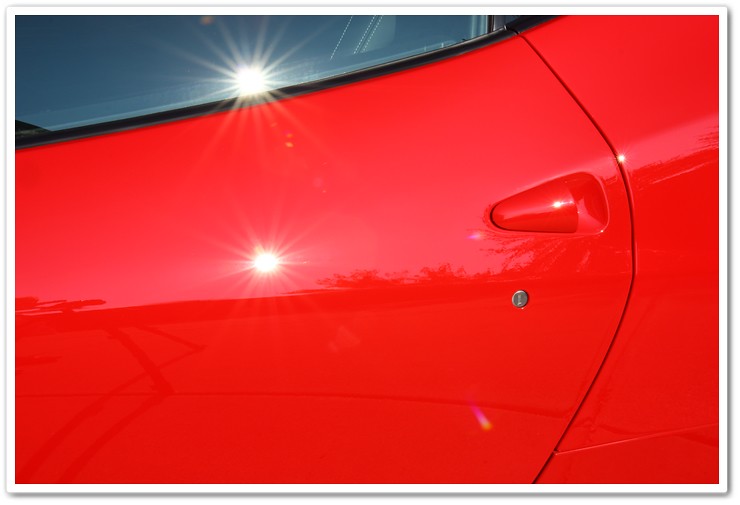
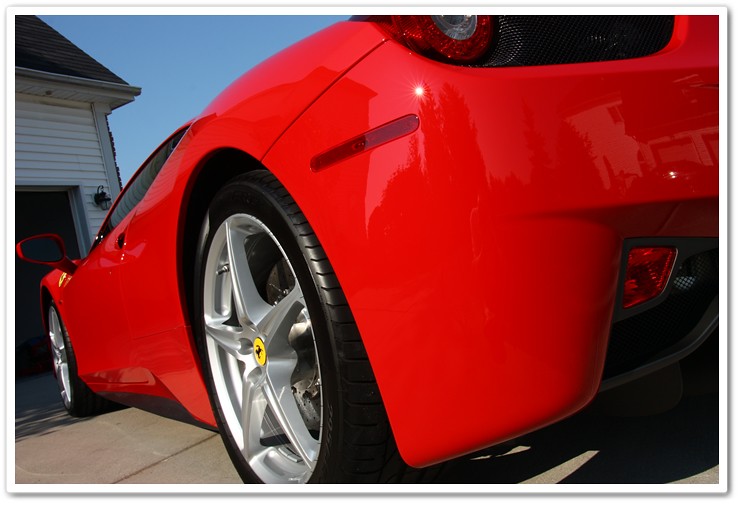
The light of truth shows the true, defect-free condition of this Rosso Corsa paint.
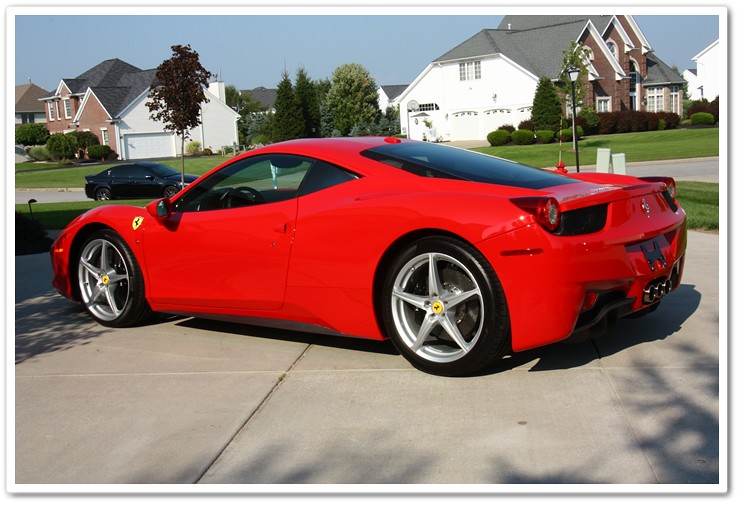
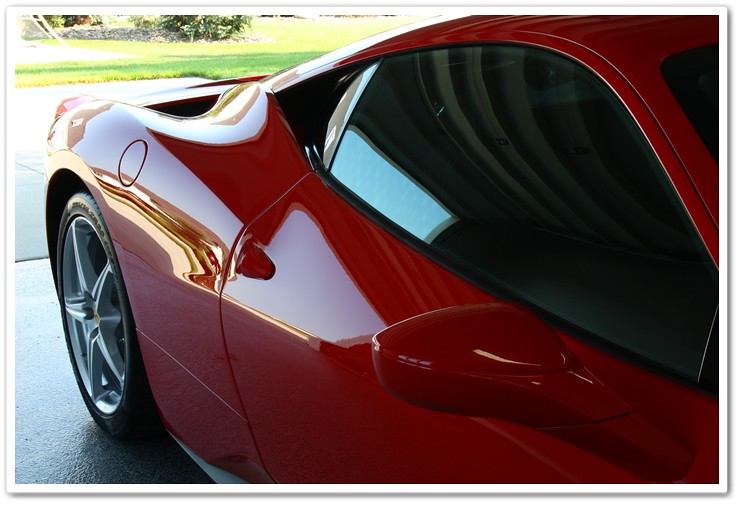
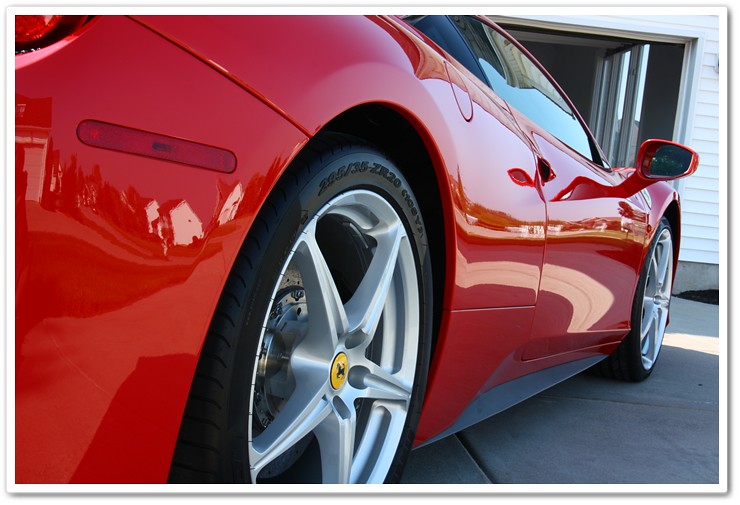
I just love the lines on these cars.


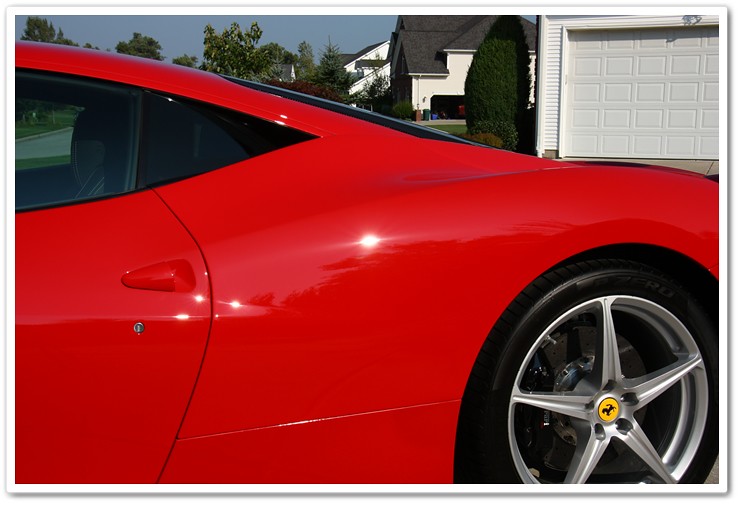
A few more sun shots to show the true condition of the paint now that it has been properly leveled.

From this photo you can get a better idea of the curvature, and how it can create challenges to polish.
And finally…
A few words from the owner of the car:
Obviously I’m going to say how great the car looked, how big the transformation was, etc…it’s my work, so I’m a bit biased! I wanted to take a different approach on this one however and give the owner of the vehicle an opportunity to provide some feedback and let you hear it from the customer’s perspective.
Quite frankly, I never heard of Todd Cooperider before. But I’ve been on the f-chat board for years and caught the post about the first 458 being detailed. After reading the post and seeing the before & after photos, I was amazed at the quality of Todd’s work. But reading the article made me wonder how bad condition the paint on my 458 was going to be. I figured I would reach out to Todd just in case I needed his help. I hoped and prayed my 458 would be in top condition. After the car arrived, and the initial amazement wore off, I began to take a long look at the paint condition. It needed help. Badly. The paint had tons of swirl marks. It was extremely hazy. And worse, there were some substantial scratches. Quite frankly, Ferrari makes an incredible car but they really need to address this problem. I contacted Todd again and said “Hey – you need to get up to Buffalo ASAP”. It was the best decision I could’ve made. Todd is a pro. This guy has a passion for what he does. The car just looks incredible. It’s a night and day difference. The hazy look is gone. The swirl marks gone. And the paint finally has the deep & clear look that a car of this caliber deserves. I could’ve taken the car to a local shop and saved a lot of money, but it never crossed my mind. I wanted the best and Todd spent two full days busting his butt to get my car in the condition I wanted. I would use Todd again in a heartbeat – and more importantly, I would recommend him to anyone who doesn’t want to trust their car to a kid making just above minimum wage who has no idea what they’re doing. That’s the difference. Thanks again Todd!
If you have any additional questions or comments you’d like to make, please post them in the comment box below.
Thanks!
Related Posts
- Full Detail and Paint Correction: Ferrari 458 Italia by Todd Cooperider of Esoteric Auto Detail
- Ferrari F40: 60 Hour Restorative Detail by Todd Cooperider and Craig Reed
- Full Detail: Ferrari Challenge Stradale in Rosso Scuderia
- Ferrari 458 Nero Daytona Full Detail
- Paint Correction Detail: 2009 Porsche Carrera S


I am completely astonished by the fact that this car was released from the factory looking as bad as it did!
You’ve got to be kidding me! A car that cost a quarter of a million bucks comes with swirls and scratches? I would have been livid, to say the least!
Rob, thats nothing, you should see some of the cars that are damaged coming off the boats and repaired at the shop on the docks before they even get to the dealership
That said, it goes without saying that you did an amazing job of transforming this Todd.
I’m curious about the “developmental sealant” that you used!
Thank you Rob, and sorry, but I am not at liberty to comment any further on that one (that sounded good…I should run for public office!).
This is reallyan amazing job once again! I also don’t understand how they can deliver a Ferrari with such bad paint defects. Dontyou think they should cover the cost of detailing when the quality is so bad?
Tod in your experience are some colours more prone to this than others? And would you see these problems on a white car ( non metallic)?
Edmondo,
Thank you. Unfortunately I don’t have an answer for that debate. Some Ferrari owners accept the fact that their strength is in their engines, chassis, and peformance and not in the paint, while others get quite upset about it. Within the Ferrari world it’s definitely a polarizing topic.
One color is not more prone to it than others, but it’s definitely going to be more noticeable on darker colors than the lighter ones. They’ll still be present on a white car, but just more difficult to see.
Todd,
I have 458 on order, it should arrive this winter. I think I know the answer to this question but as you know there are no stupid questions when it comes to dealing with Ferrari factory paint.
I am getting 3M clear bra put on the car, including half way up the hood, front bumper, mirrors, etc. My guess is that I should bring the car to you first and then after it is paint corrected have the 3M clear bra done afterward. Do you recommend anyone to do the 3M job and do you concur with the timing of these steps?
While it’s best to have the paint completely corrected prior to installation of clear bra, it doesn’t have to be. The car in this article had the clear bra installed before I could get there simply because the owner didn’t want to drive it without the protection. If you have it done before, then you’ll know that the paint is in very good condition underneath, and should you decide to have it removed later down the road, you’ll know that it’s in great shape.
I’ll get in touch with you directly to discuss the clear bra installation and paint correction schedules.
Thanks,
Todd
Always delivering the top notch work we expect to see from you Todd! 😉
So how many hours did you spend staring at all those beautiful lines? Did you walk up and give the car a big hug? I know I would have! 🙂
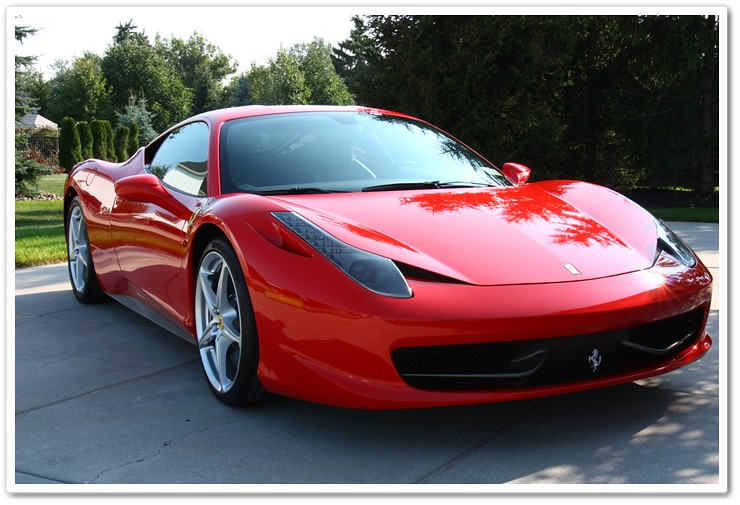
This is definitely one of the sexiest cars Ferrari has ever put out! The front end looks like a venomous snake flaunting it’s fangs as it’s about to strike!
It really is a shame though to see these $260k cars coming from the factory with paint that looks worse than most $15k cars. Ferrari are you listening???
Cheers Todd,
Rasky
Just saw this and WOW. It truely is a shame Ferrari allows this to happen. Good thing there are pros like Todd that know how to remedy this but it should be done prior to the vehicles being delivered. Excellent work and thanks for the write-up Todd!
Thanks Mo! It’s also amazing how many appointments I have set up with (future) 458 owners all over the country. It’s pretty apparent that all of them are coming in the same way, so they’re just scheduling the work in advance for me to bring them up to the level of finish that these fine cars deserve.
It must be true. I have an apt. tom. with my first 458 and its black. I’m excited to see what it has in store for me. I wish I had a better camera setup. Your photos are great!
A night and day difference!!!
Todd
Based on your blogs, what will be your absolute favorite sealant:
1-) Blackfire
2-) Menzerna Power Lock
3-) Optimum Opti-Seal
Regards,
Art
Art,
Well, I use Blackfire Wet Diamond the most, so I guess you could call that one my favorite…for now!