

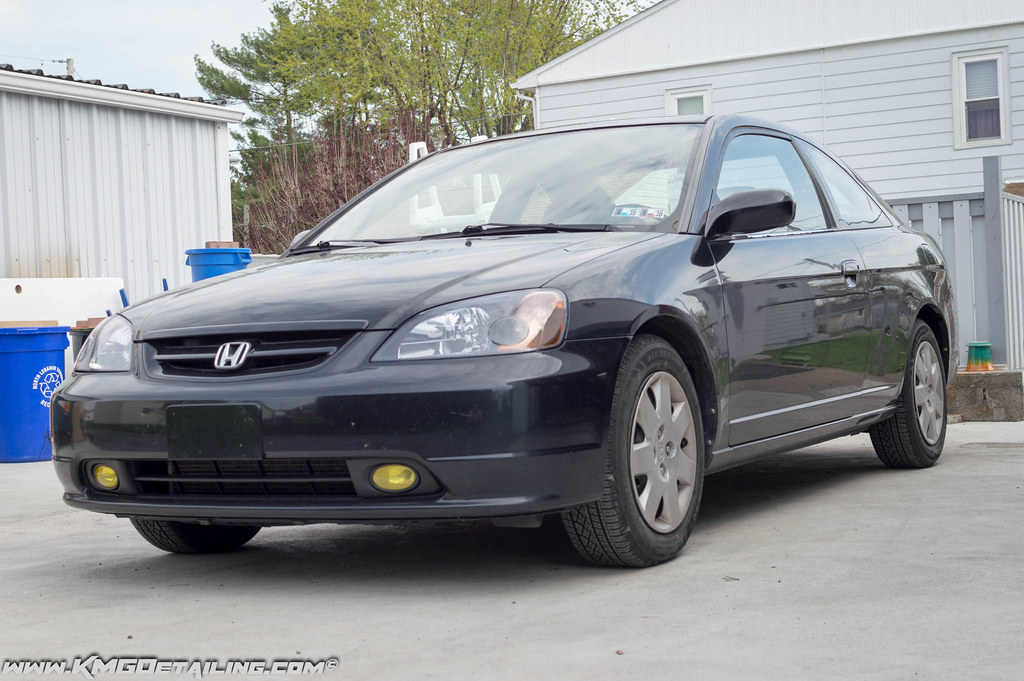
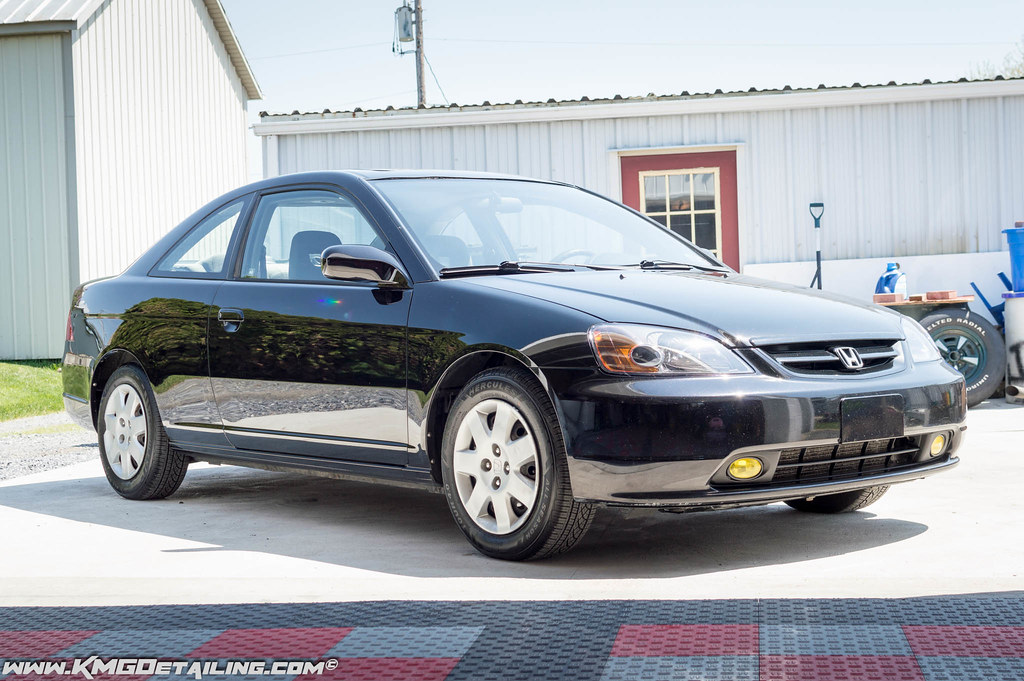
We all love looking at photos of expensive high-priced exotics, but it is the everyday cheap commuter car that most of us drive on a daily basis. You do not need to spend a ton of money to drive a car that looks great or that you can be proud to own. I recently had the pleasure of helping a client with their 2001 Honda Civic Ex. The car was purchased out of a junkyard with over 180,000 miles on it. While the interior was in excellent condition given the age of the car, the exterior was in need of some serious attention. Nearly every section of the car’s exterior contained various surface defects.

To start the process the car was thoroughly washed using a strong shampoo to strip and fully clean the surface of the vehicle. My process consists of a strong pre-soak with my DI Foam Lance, consisting of 5-oz. of Chemical Guys Citrus Wash and 1-oz. of Meguiar’s Super Degreaser. Once applied it is left to dwell for a few minutes while I prepare for the 2-bucket method wash that will follow.
Following the 2-bucket method wash I begin the chemical decontamination of the surface using products such as CarPro’s Iron X and Tar X to further clean the surface of contaminates not removed during the initial wash process. After a thorough rinse of the chemicals from the previous step, the vehicle is washed one last time. For this wash I used a Nanoskin Autoscrub Fine Wash Mitt, which replaces the need to clay bar the vehicle saving a significant amount of time. With a nice clean surface at this point, this is when you will visually inspect the surface of the vehicle for any additional surface defects that might have been previously hidden by glazes or fillers.
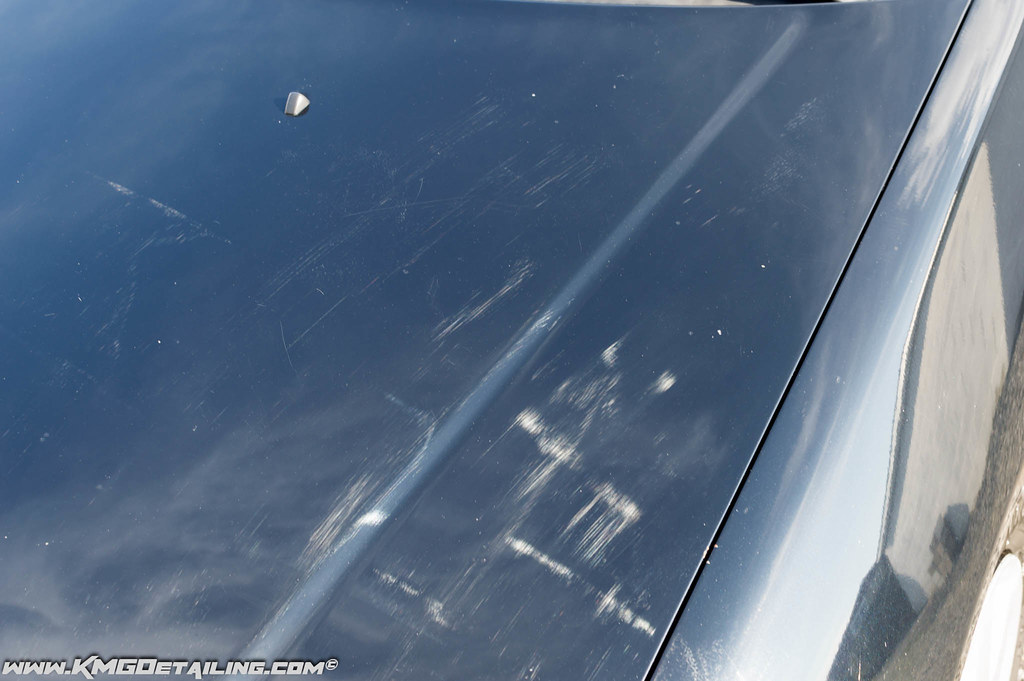
This picture shows the top of the hood at the driver side fender which had quite a bit of damage to it.
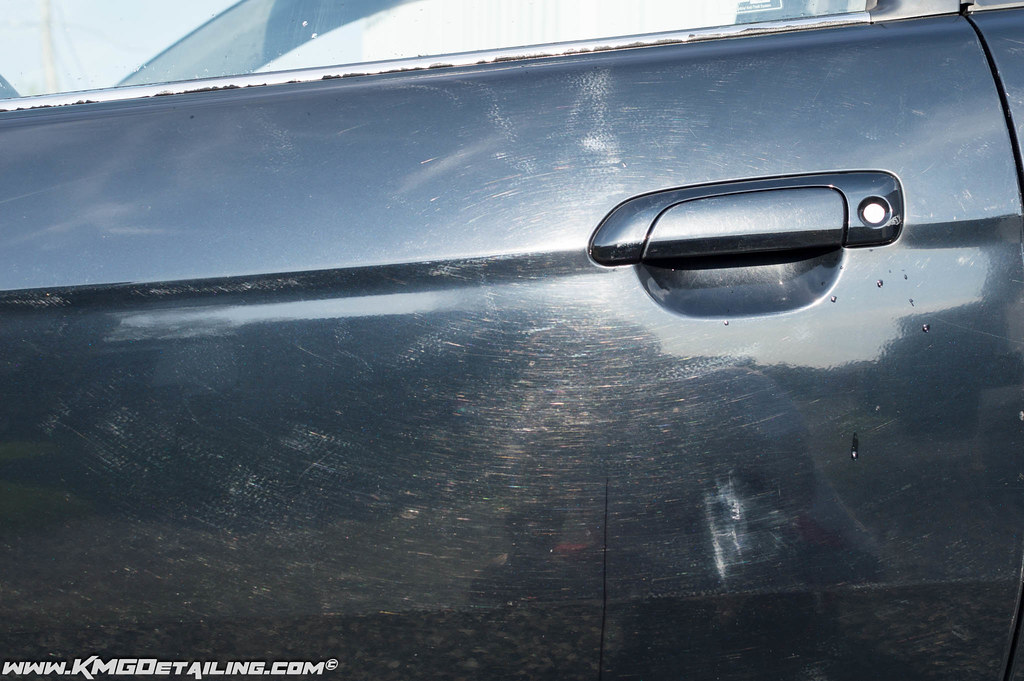
This is the driver side door which was very heavily swirled and had quite a few random intermittent deep scratches (RIDS).
At this point the vehicle can be pulled into the garage and the trim is taped off. I am now able to determine which pad and polish/compound combination I will use for my test spot. On this car I used the passenger front fender as it was in very poor shape. I simply split the passenger front fender in half with a piece of tape for my test spot. Using my Rupes LHR 15ES , a 5.5″ Meguiar’s Microfiber Cutting Pad with a cutting compound with 5-6 section passes on one half of the fender.

This picture shows the side of the fender once taped off to start my test spot. Notice how heavily swirled and scratched the fender is.

This picture shows the exact same area after being compounded. Prior to being compounded you could barely even tell the paint had a metallic flake to it.
And a picture after being fully compounded, which was a drastic improvement from what it started as. There were still quite a few RIDS left in the finish that were not going to be chased.
This process removed a large amount of the surface defects that were hiding a lot of the metallic and pearl qualities of the paint color. After finishing the compounding process, the paint was further refined using Carpro Reflect on a Lake Country Blue Fine Finishing Pad to remove the marring caused during the compounding process and further improve the gloss and clarity of the paint. This process produced great results considering the age and condition of the car prior to starting it. CarPro Eraser Intensive Oil and Polish Cleaner was used to wipe down the exterior of the car and prepare the surface for the paint coating that will be applied. The coating was applied to all painted surfaces, along with all the exterior trim before being pulled out in the sun to cure.
While I enjoy working on newer and high end cars, it is always enjoyable to take a car that has very little value and drastically increase its value after I am finished refining it!
Buy Products From This Article
Purchase the products used in this article individually or in one convenient package here!