
Ferrari 360 Heavy Etching Removal
by Brian GuyA new client of mine had taken purchase of a black on black Ferrari 360! The pictures he saw prior to purchase made the car look great. After taking delivery of the 360, it was a different story however. A major issue was at hand with deep etching to the paint surface and some typical black car scratches and swirls. The client has great experience and knowledge of correcting cars. He enjoys detailing his cars and had many of the right tools, lighting etc. However, this issue was beyond basic correction repair.
Allow me to fill you in. After some pre-detail talking and some additional history of this car we found out that, the car was purchased from the New Jersey area where it had sat outdoors for “give or take,” 3 years. Then shipped to Orlando, Florida. The 360 had obviously suffered under some harsh conditions. From 4 to 6 feet away under the direct sun, you would never be able to tell the etching exists. But getting up close to the car or under the florescent lights of a garage, they became more relevant. This much etching is caused mostly from neglect and lack of protection. How it could have possibly gotten this way? It could be from sitting under trees, hard water, acid rain, bird droppings, poor maintenance and UV rays from the sun cooking all these elements into the paint.
The only way to re-level the paint is to wet sand it down. My plan on this car is to bring the paint down to a safe level and leaving enough room for future details. The owner would like to track the car and drive it hard. If this was going to be a show piece or garage queen, we could have adjusted for more correction. However this car will be driving daily and get a lot of use. So I have to keep in mind that it’s a black car and it will need to be polished (corrected) sometime again in its life. I’m not one for sanding a car down and then hearing it needs to be re-sprayed a year or two down the road. This would cause an extreme lose of value to the car and I’m sure a hefty fee (It’s a Ferrari, not a golf cart) if it had to be re-painted. So in this detail I achieved about a 90% correction and improvement to the paint surface as far as the etching is concerned. Overall, it was a hundred percent improvement.
Tool Recommendations:
Some of the tools I used can be found here at Detailed Image. Allow me to provide you with these links. Rupes Bigfoot Random Orbital, | Porter Cable 7424, | Meguiar’s 6″ 1500 sanding disc, | Meguiar’s 6″ 3000 sanding disc, | Meguiar’s 3″ 1000 sanding disc, | Meguiar’s 3″ 3000 sanding disc, | Interface Foam backing, 3″ and 6″ (a must have) | Meguiar’s Cutting disc’s, M101, M105 to name a few….
Prep work:
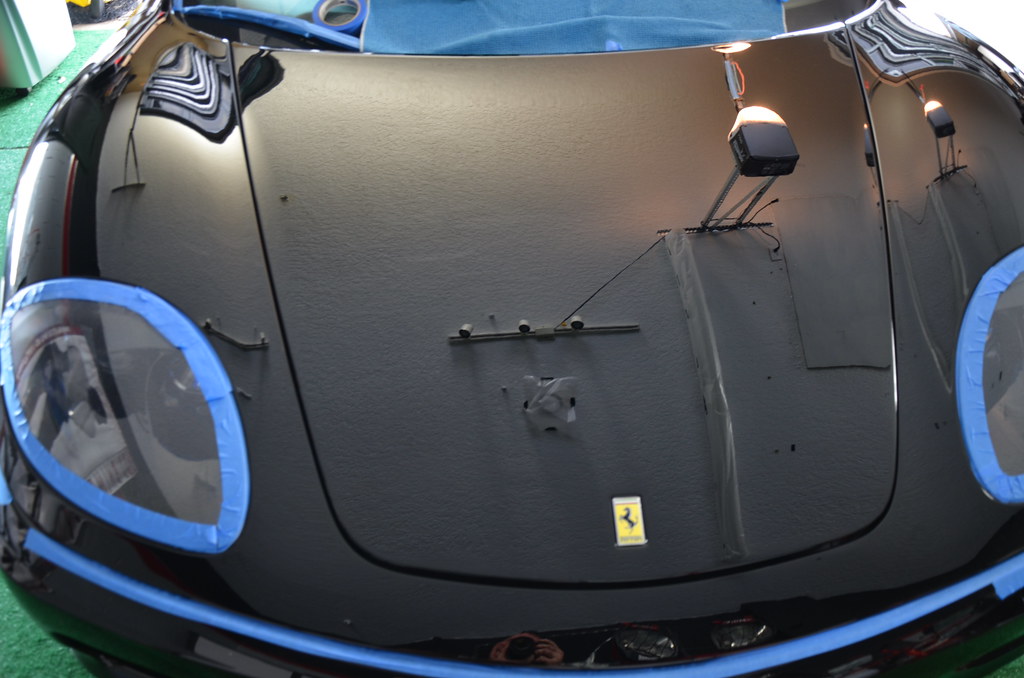
On day one of getting started, I began with removing a very old clear film that was in desperate need of being replaced. Then the wash and decontamination of the car took place. This was no easy task with the clear film being so old and very much embedded to the top coat. That could be a whole other article… so lets move on. With the paint now completely clean along with a full IPA wipe down, we can now see the paint for what it really is. It was very uneven, had heavy etching and even some bird droppings on this black Ferrari F360.
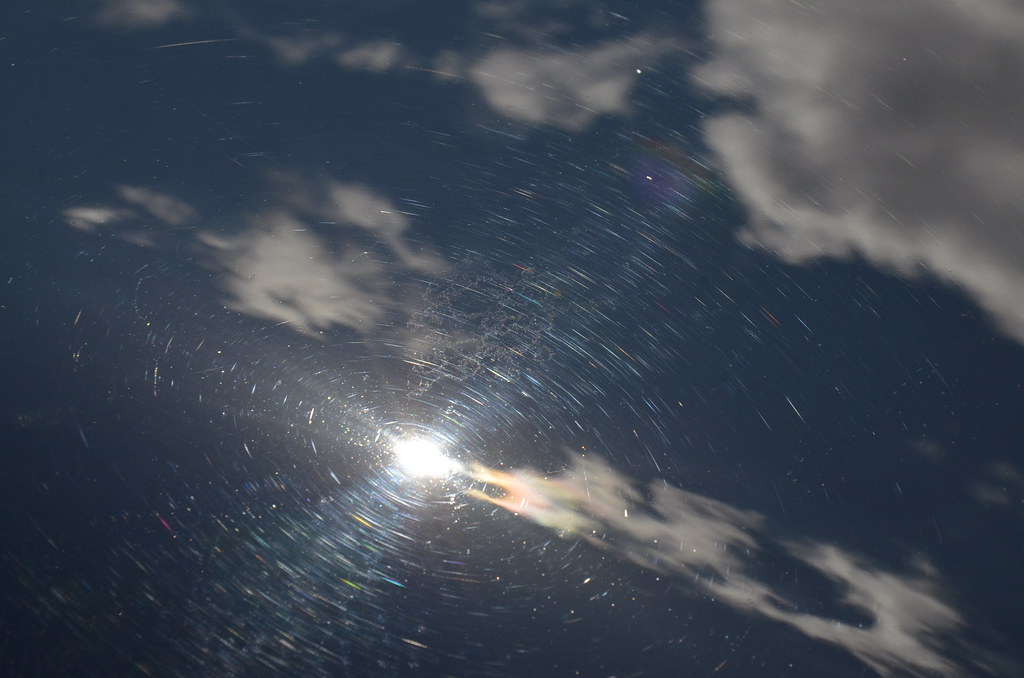
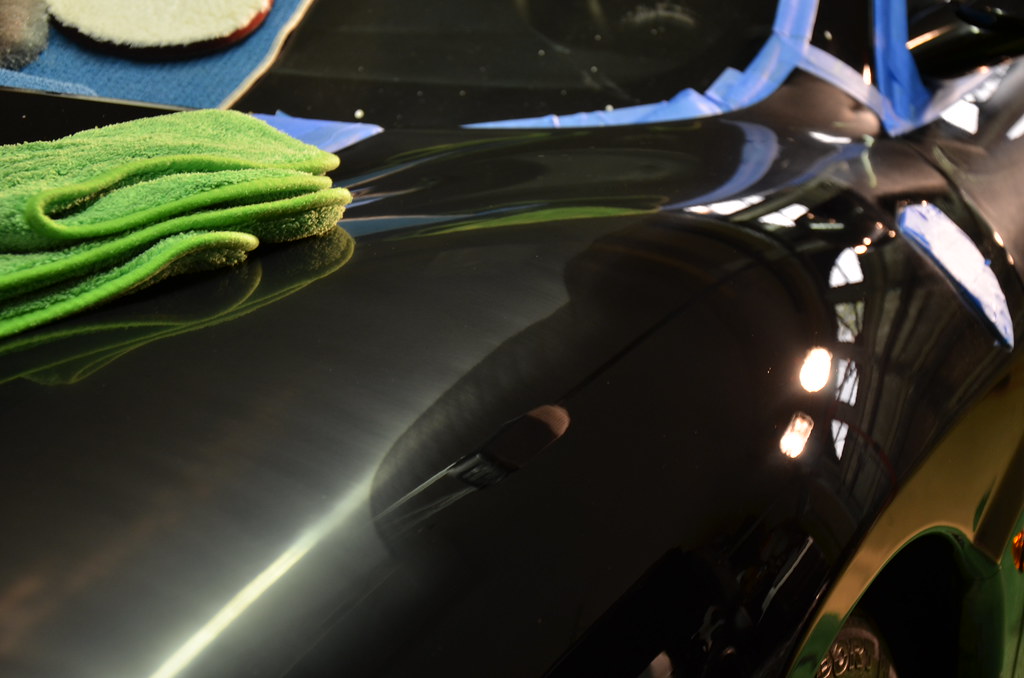
Here are two pictures of how the car looked under the sun and the first picture having a zoomed in area of problem.
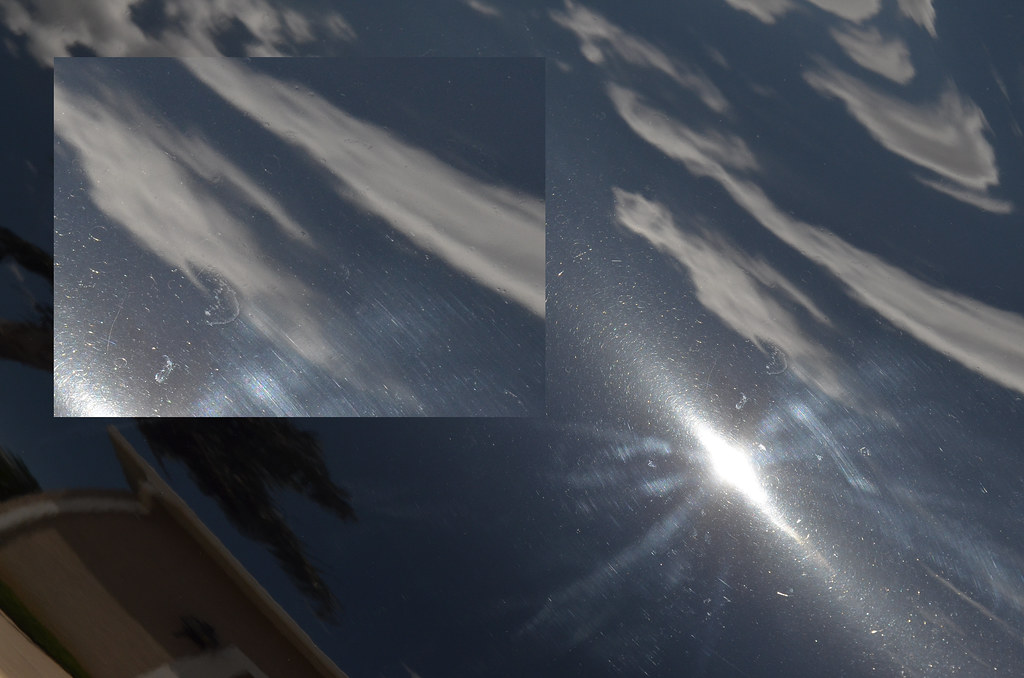
Etching from Bird Dropping (below)
Below:
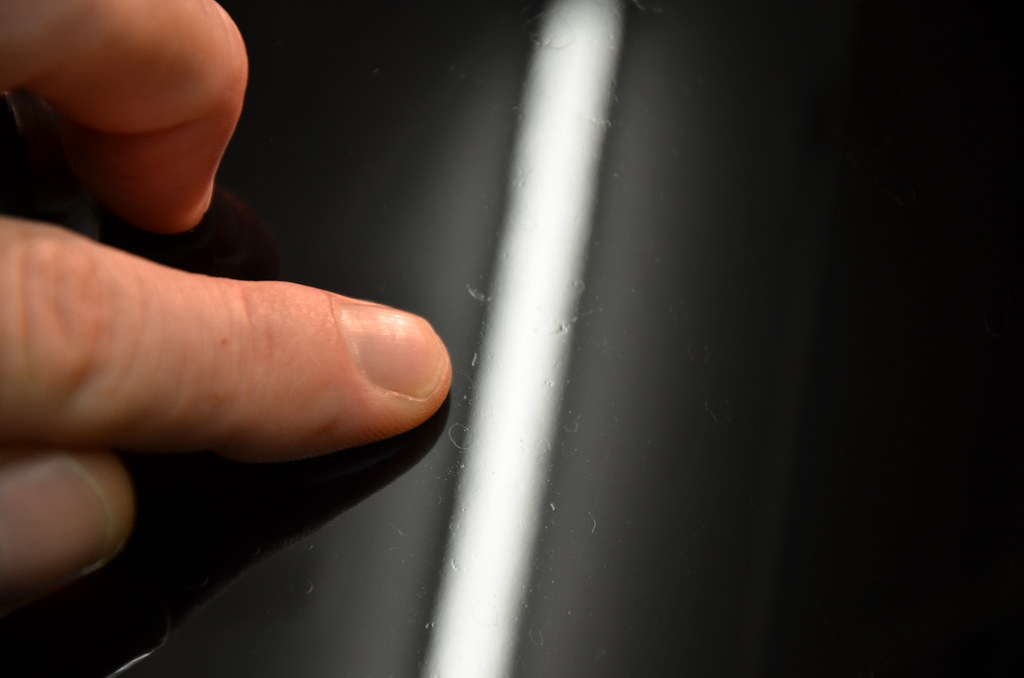
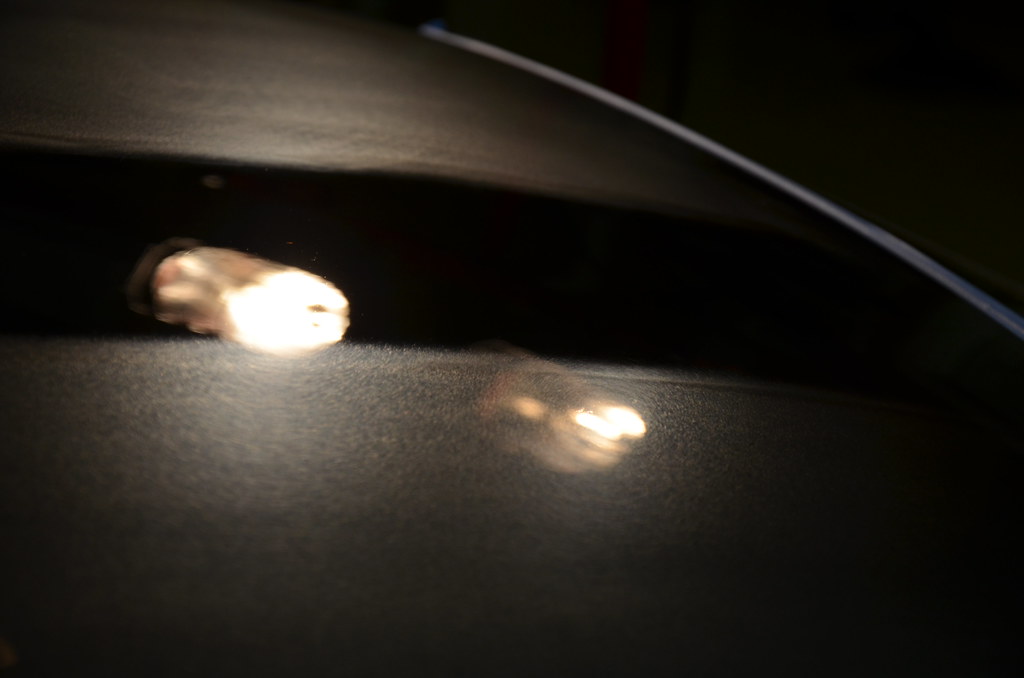
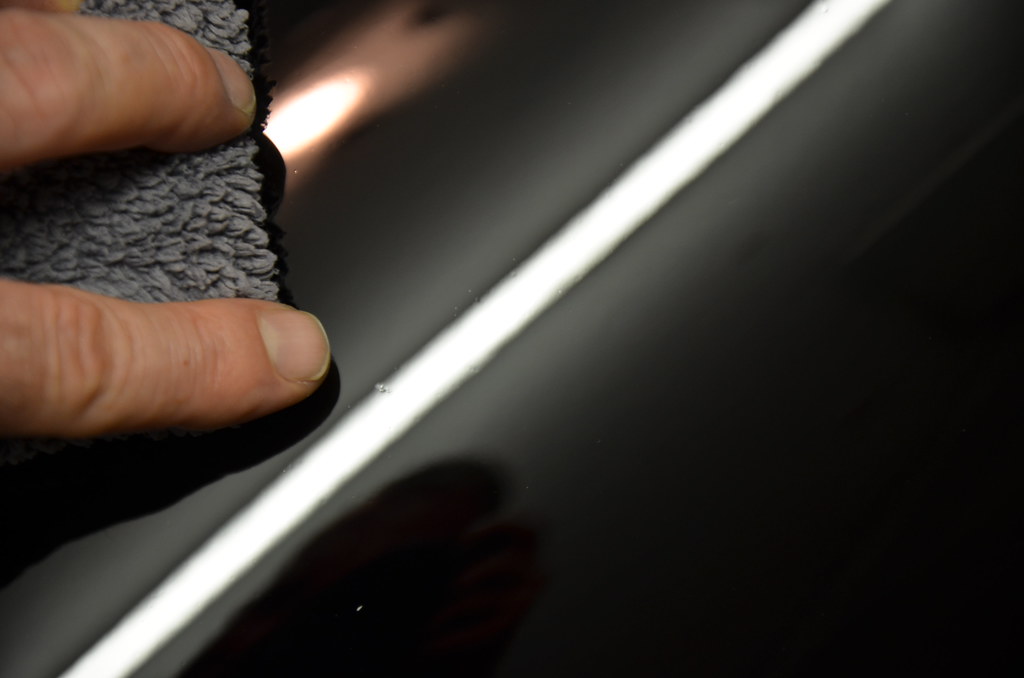
With the car indoors and under florescent lights we can see some of the minor etching. Nothing too serious and not extremely deep in the picture below. Pretty much just some surface blemishes.
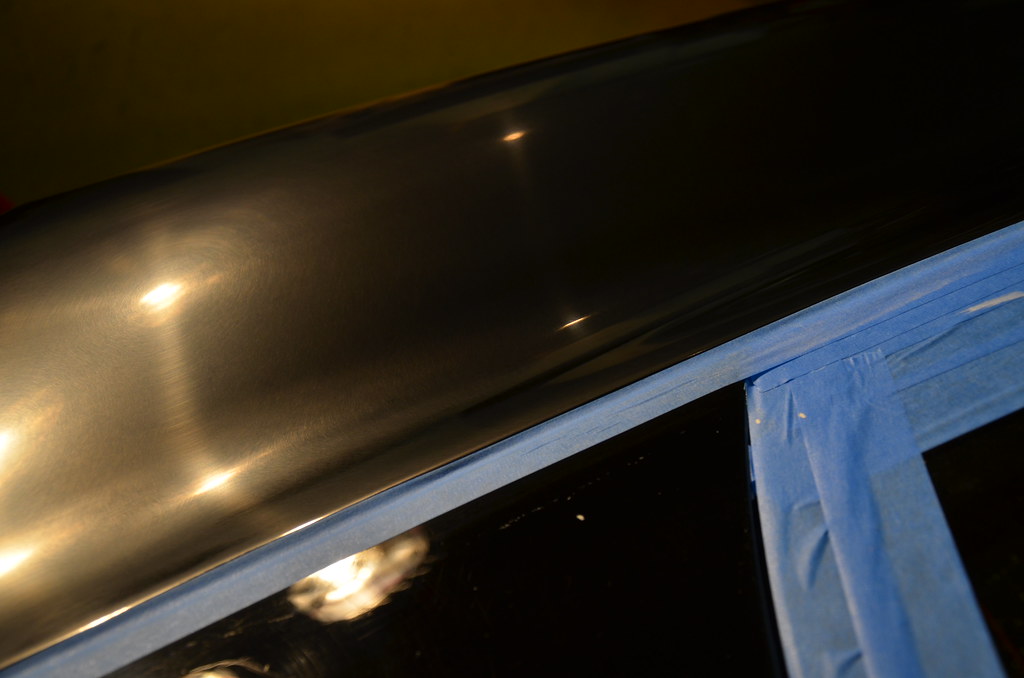
Below:
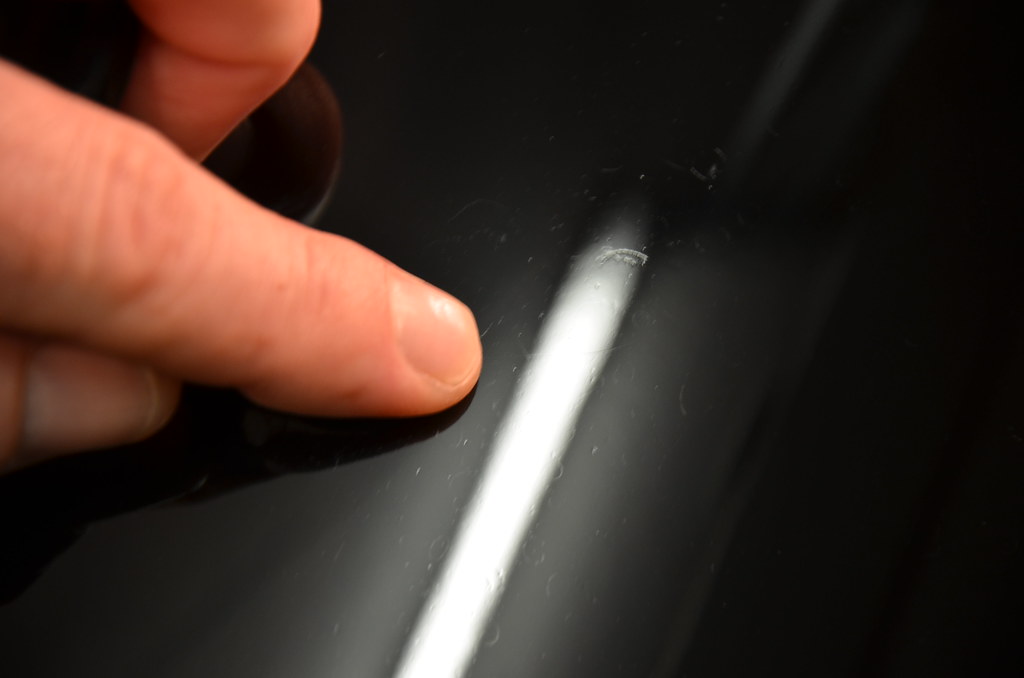
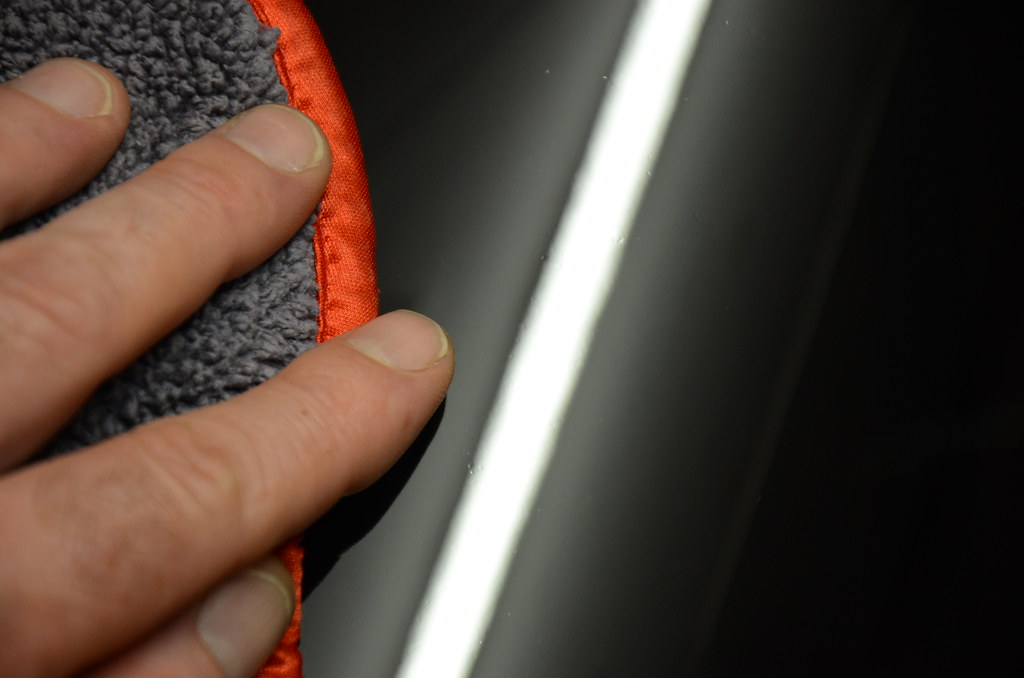
Moving the camera angle up just a small tad, we can see depth of etching in the top coat. It really didn’t take much movement of the camera. One inch to the next these deep crevasses could be found.
I got ready for sanding by getting a bucket of water and pre-soaking the sanding discs. I allow them to soak for at least 15 min before use.
Below:
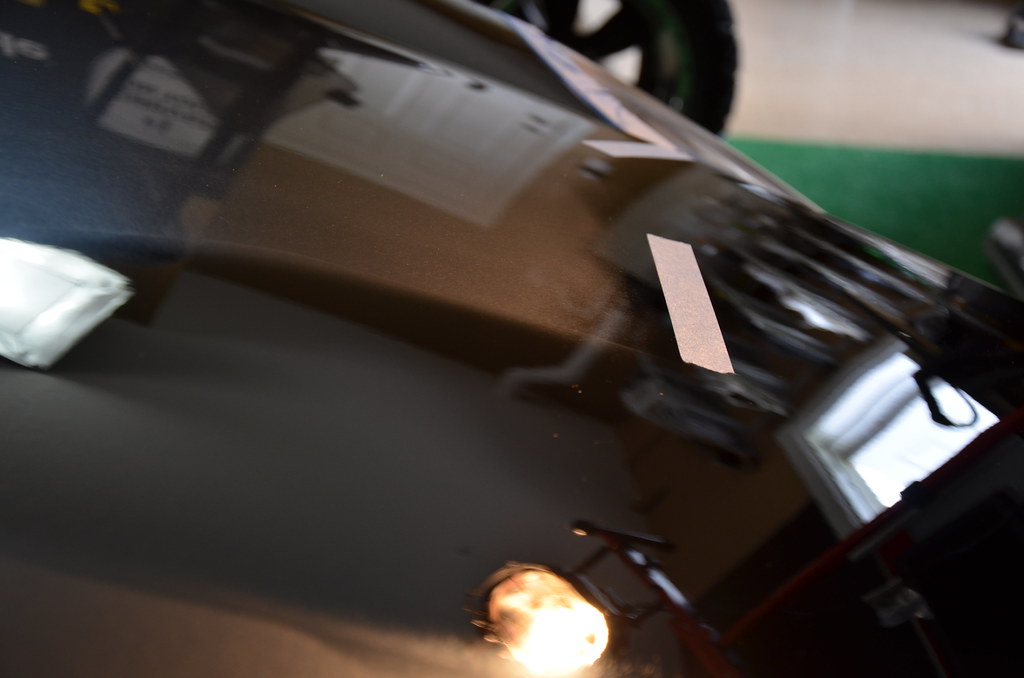
In this picture below I took a test pass with 3000 grit to see what could be achieved with the least amount of sanding. 3000 grit sand paper will only braes the surface. (Not enough grit to make a difference) However, I was also getting myself ready to feel this paint out and get in the rhythm of sanding.
I was keeping in mind that I would also have to compound after sanding. The compounding will also cut, “some” in the re leveling process.
Here is a picture of the bonnet after a “test pass” with Meg’s 3000 grit sanding disc.

Below:
My test spot after buffing back out…. Didn’t even touch it.
Mostly what I was expecting, but better safe than sorry. It was time to get busy on this paint!

Below:
I had taken Meg’s 1500 grit over the whole hood followed by 3000 grit. Between each pass I would measure several spots on the hood to see where I could apply a bit more pressure on my next pass. It was a really intense detail that required complete focus.
In the picture below I was starting to get to a point of comfort and getting a better idea of how far I was going to go with this detail.
50/50
Below:
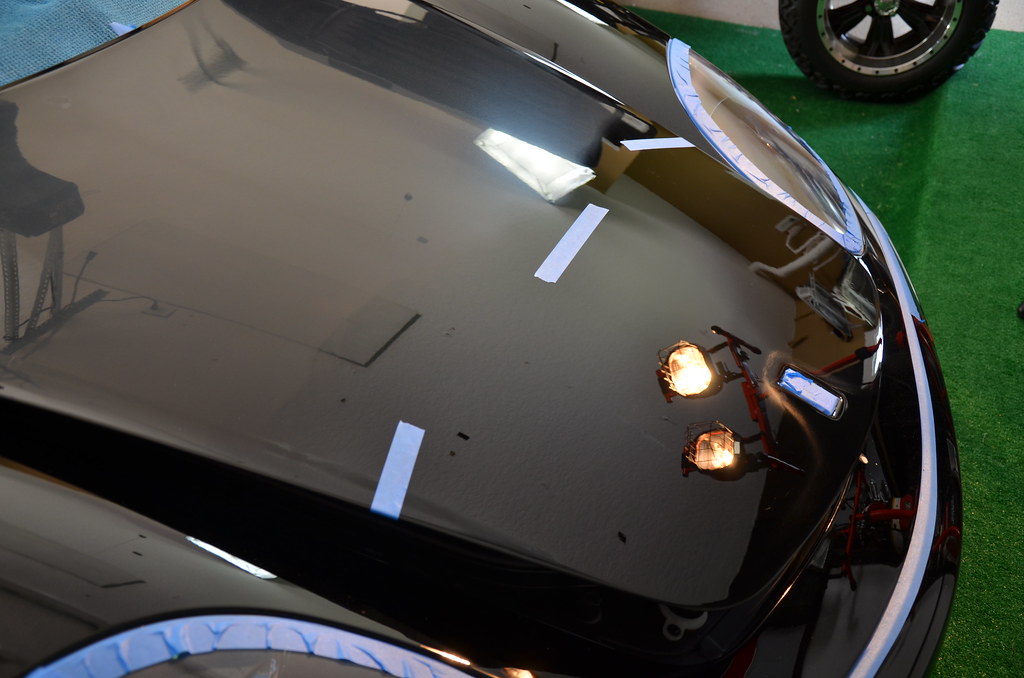
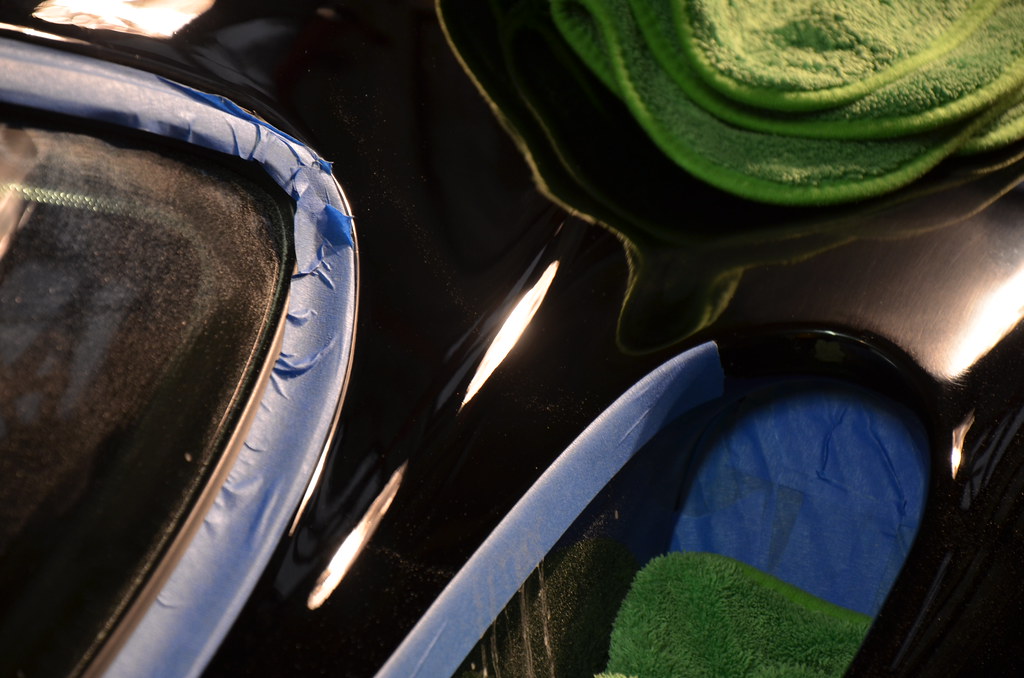
The hood I had propped up to stay away from the edges of the two front fenders. After wet sanding and correcting I had a few areas that needed more finesse. I marked off with 3M masking tape some areas that I could go at with 3″ disc.
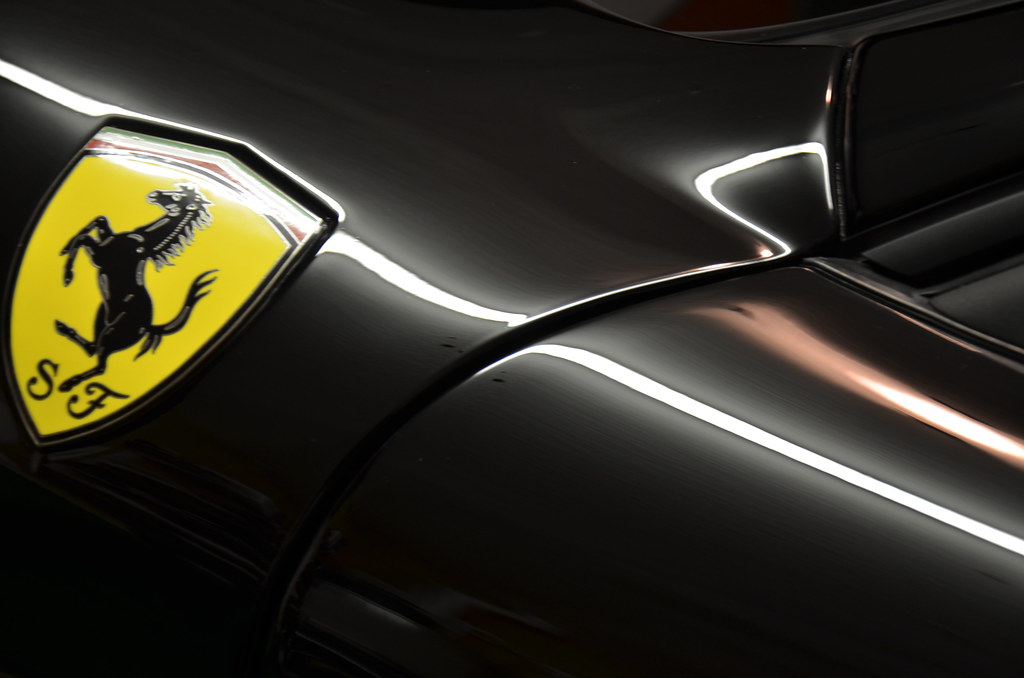
The taped out spots in the picture below are there to help me work out the line that was embedded (caused) from the old clear film. A inch or two above the imaginary lines I made was sanded a little bit more to get rid of that line. Also around the emblem needed to be handled more with 3″ disc’s. One spot at the very top of the bonnet, right along the edge, needed to be completely covered to avoid a disaster according to the paint readings. I didn’t grab as many pictures as I probably should have in this detail due to the fact I was in high focus mode….
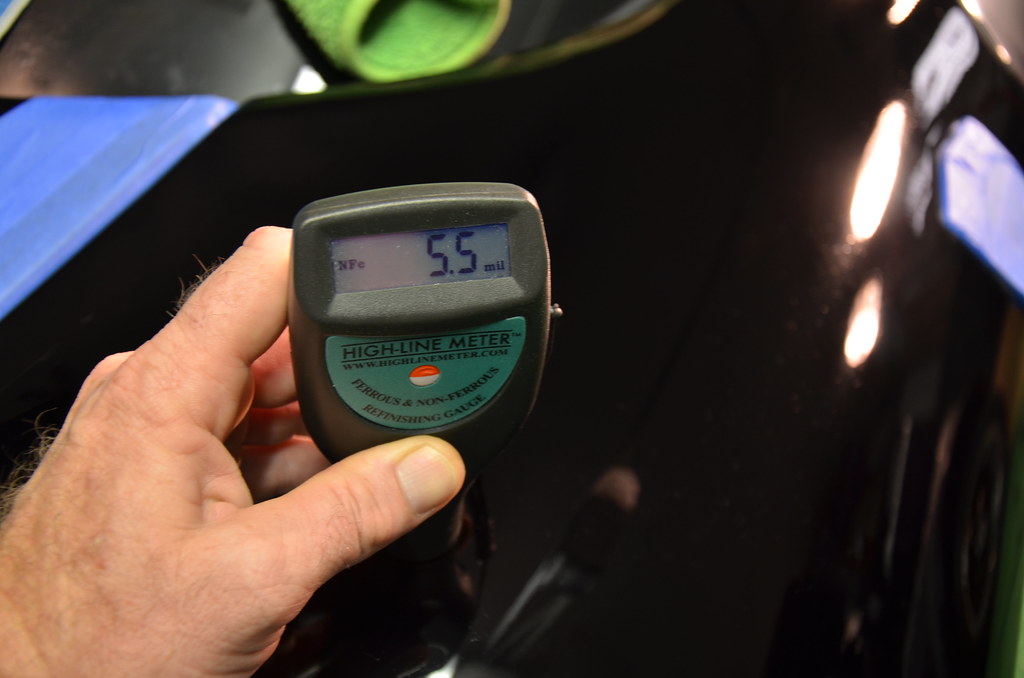
Paint Meters:
I couldn’t have done this detail without them and here was a low spot prior to sanding. One inch in any direction and we were reading 6+ Lowest spot from the door jam reading was 4.5…… pins and needles……
The Results:
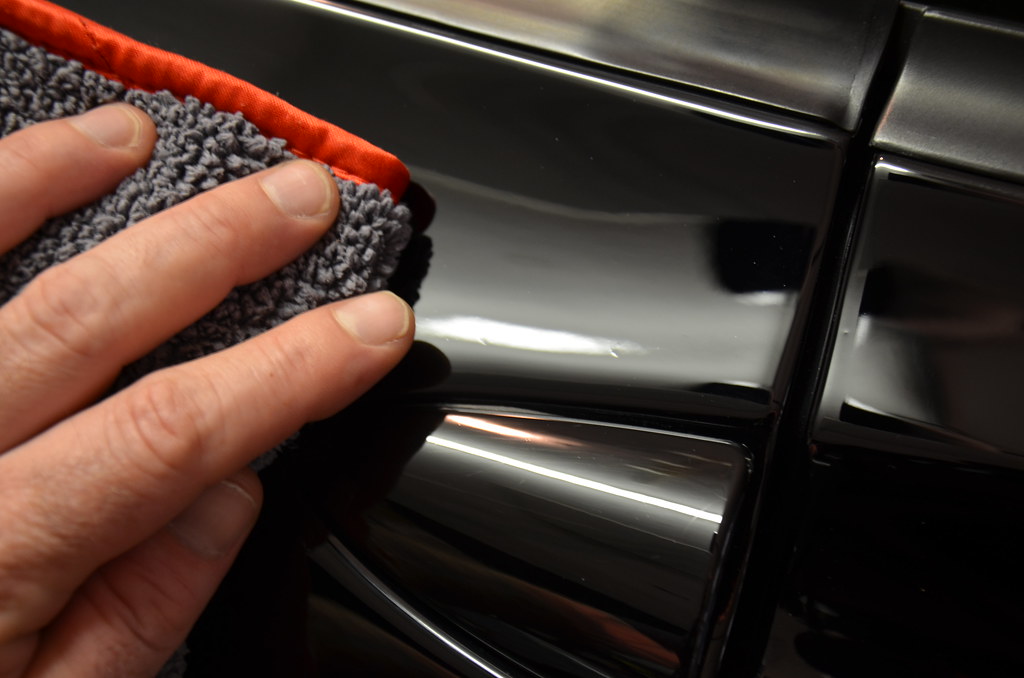
As I mentioned above we came out of this detail with about a 90% correction and 100% improvement. The car has enough paint to live through another correction for future sake. Maintaining the value of the car for still having it’s factory paint and adding confidence to still be able to drive it daily!
No fluff in this detail! To perfectly level this paint would have been extremely dangerous for this client’s car and his and his wife’s lead foot! The regular maintenance for the car in the condition that it was corrected will make for “just that,” regular maintenance. If I were to have completely leveled this car to 100% defect free you may as well stick it up on a shelf, have wine with friends and just look at it. But don’t touch. The paint meter would confirm that.
Overall I was really happy with the detail. I struggled in a lot of areas knowing that it was as good as it’s going to get. I would have loved for it to be perfect and I saw it that way in my head prior to the detail. But, the car is still track safe and was actually out running around Sebring Race Track 2 days after the detail! I tended to the vehicle one more time immediately after its track session and all is good!
The pictures below are really close up and show some of the very small spots left behind.
Thank you for reading and viewing this detail! If you have any questions, please don’t hesitate to ask.
Buy Products From This Article
Purchase the products used in this article individually or in one convenient package here!


Just one word is needed to describe such a great job: WOW.
Bob
Thank You Bob! Very Appreciated!
Brian
What would you consider low paint readings? My 2013 Merc. SLK350 has readings around 90-100 micrometers throughout. Is it bad to sand any part of the car based on these readings? The Ferrari looks awesome, BTW!!
Amay,
Each paint will be different… manufacturer etc. Anything around 85 or below in microns would be complete danger zone. the area’s your measuring at 90, I would be cautious around if wet sanding. Pretty much, you’d be good to go though!
Thank You very much
Brian
WOW nice job.
What camera are you using to take this pictures?
Art Fano, Thank You!
I use a Nikon D7000. I don’t recall what lens I was using though… It was either 18-105 or 50ml?
Brian, amazing results. That detail really brought out the depth and beautiful color of that paint. You didn’t touch a ton onthe polishing process you chose to use to achieve these results after the wet sanding. Maybe you did and I skipped over it but would you care to share?
Thanks for your time,
Dan.
Looking back at the old things here and i have to say that you really did an amazing work on the Porsche !
After sanding, what compound/polish/pad combo did you go with?
I currently have a 2015 Lexus NX300h that has etching in the paint. I don’t really want to wet sand the paint. Any alternatives?
Tim, this was a while ago… you’ll have to forgive me that I don’t recall exactly. I’m pretty sure I used Meg’s 101 and 105 for the compounding steps after sanding. Most likely used with Meg’s cutting disc’s. I’m sure a little wool on the rotary as well.
For your Lexus I would absolutely try to avoid sanding. The paint types here are way different, Your Lexus will not have that much paint to play with.
https://www.detailedimage.com/Ask-a-Pro/lexus-is250-paint-correction/
Have a look at the link above. Yours will fall along the same lines. Keep us posted if this helps.