
The term “Wheels Off” conjures images of great despair in many drivers as it is the slang used when a vehicle is out of control and off the track while still moving, crashing inevitable if not by the chance of obstacles being not in the way. But it can also conjure images of gleaming, extremely clean wheels and fender wells. This is the term used by enthusiasts as the solution when you want, err need, to clean those areas of the wheel that can’t be easily seen.
Once the wheels are off a vehicle you gain easy access to a plethora of components and cool stuff to clean and polish under the fenders, not to mention, of course, the backsides of the wheels. Wheels Off typically involves a lot of preparation, a good amount of space, and hours of cleaning per corner of the vehicle, but will result in wheels and wheel wells that look factory new.
This is something you can do while the vehicle is in storage, or at a shop where it may spend a day or two in the air on a hoist. For those of us who need to run a second set of wheels and tires for the colder seasons, having the seasonal wheels off the car is the prefect chance to get them nice and clean, layer some paint or metal protection, and touch up any issues from the previous season, and you will have a few months to get them done.
This is Part One of a multi-series, AutoLavish Detailing of Michigan will discuss equipment necessary to suspend a vehicle in the air and taking off wheels while protecting their finish from damage.

Now, the disclaimer: Changing a tire is something every driver should know how to do. We are assuming you are competent enough to do this, and you know what you are doing and are comfortable doing it. If you have any doubt, contact a professional. People die from their cars falling on or near them every year. We know a good enthusiast-forum member who died recently from his car falling on him. Do not be a statistic, take care and do things right, or do not do them at all. Your life depends on it!
Tools and Equipment Needed:
Jack, Jack Stands, Wheel Chocks
Standard safety equipment for using a jack to raise the vehicle. Quality is important. “A $10 jack-stand for a $10 head.” Don’t cheapen out on safety items. Get the best jack-stands, jack, and chocks you possibly can. They will last a lifetime.
Torque wrench.
Use a torque wrench set to the apply the appropiate force to your lug nuts based on numbers from your owner’s manual or dealer technical manual. Make sure you have enough clearance to move the wrench around the wheel without risk of hitting the wheel edge or the fender’s edge with the wrench or your hand. Use an extension if you need to, but remember that extensions can skew your torque readings lower as they twist between the wrench and socket. Torque wrenches that are stored for any amount of time at anything other than their lowest setting will loose calibration. Dropping a wrench or exceeding its torque “click” will also diminish how real the torque reading is. Variations from small incidents may only be around a percent or two (not significant), but you do not want to exceed the torque specs too much or come up short either. Doing so would risk your wheels of falling off from having loose lugs, or from over-tightening as they fatigue and break off suddenly. Take care of your tools: use them, store them, and clean them properly.


Socket Set
Needed in the size that fits your lug nuts. Special sockets can be purchased that have plastic surroundings which help prevent damage to your wheel’s finish, but a similar result can be given if using tape. We’ll show both.
Recommended equipment that you may want to invest in:
Breaker-bar
Allows better leverage (torque) to be applied to “break” loose the lug nut. A very long wrench or an extension to fit over a standard wrench fits this roll nicely. Do not use your torque wrench in reverse, this too can break the torque wrench or alter the calibration.
Drill, impact or electric
Allows the lug nuts to be taken off and put back on much quicker.
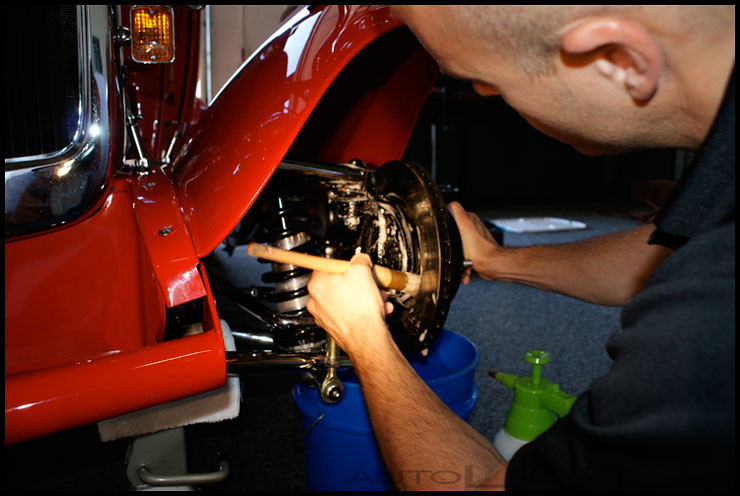
Here you can see an electric drill with a socket drive attachment, torque wrench, breaker bar with extension and socket, and an extension with a protective wheel socket all ready to go. Laying out supplies will allow you to ensure you have everything needed prior to getting started.

Now that you have all of your needed supplies, make sure they are all clean. The steel might be clean, but dirty handles will turn your hands (and thus wheels) black with grime. Clean the wrench and handle using a product like Meguiar’s Super Degreaser. Put on nitrile or latex gloves, spray the product (diluted 4:1) on a rag and wipe on, or spray liberally and brush. A wipe with a junk MF towel moist with Meg’s Super Degreaser will easily clean most tools. Do the wrench, extension, sockets, etc. Do all the other tools you will be using as well while you are at it and then rinse them off. Caution, last time I started cleaning my tools I spent 4 hours in the garage, not on the car. 🙂
Protecting Your Wheels From Damage During Removal
To keep your wheels looking better for longer, avoid banging hard materials against their finish. Though this seems obvious, many people don’t seem to realize how a standard metal socket can do damage to the finish which affects not only the aesthetics, but and value of the wheels as well. There are two simple options to this problem: buy car specific socket made to carefully remove your lug nuts without causing damage to your wheels, or line the socket with tape which then will be your “buffer on a budget.”
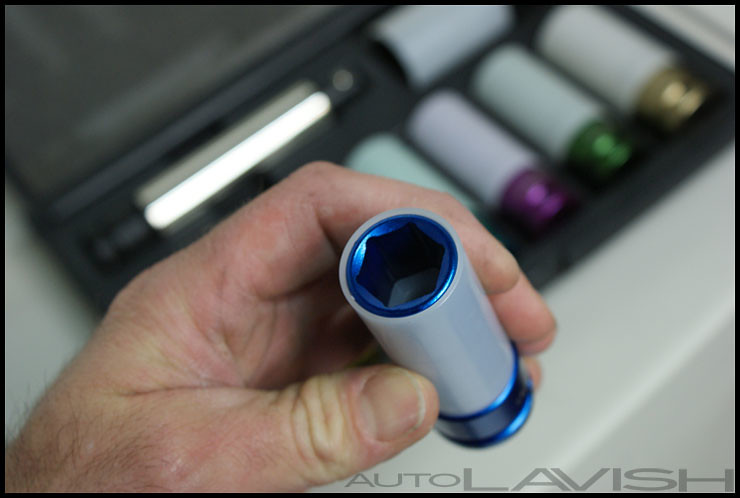
Because of the variety of vehicle we worked on, we invested in a car specific socket set. The following picture shows our new sockets for wheels which have a housing made of plastic. This thin plastic layer is designed to be a sacrificial barrier. They also have a plastic insert to protect the stud ends.

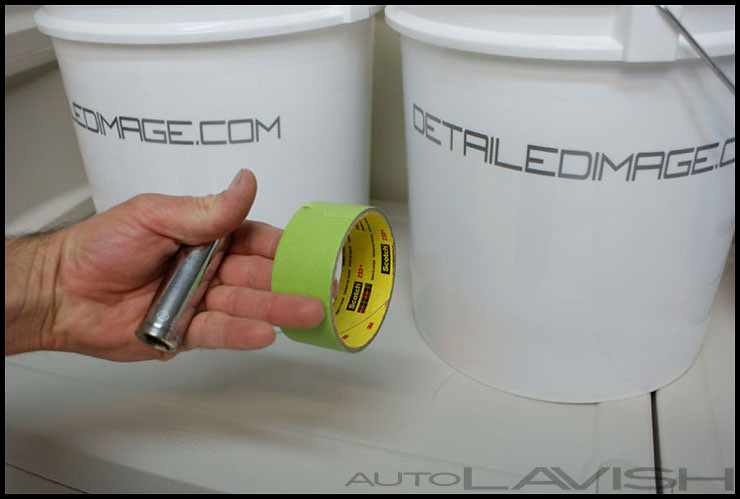
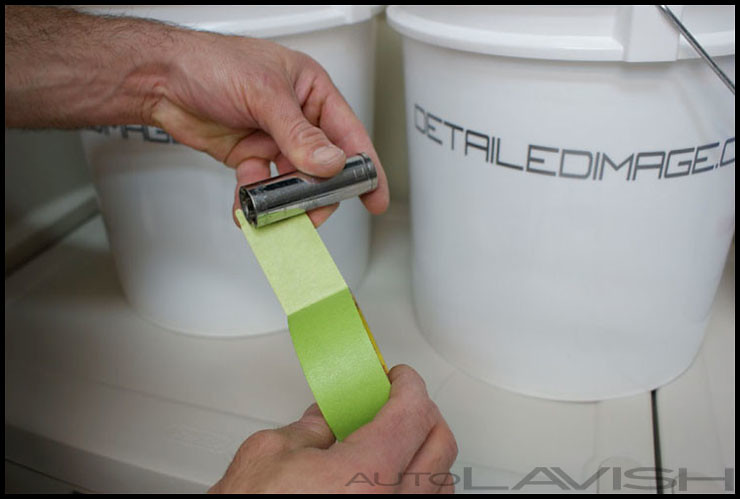
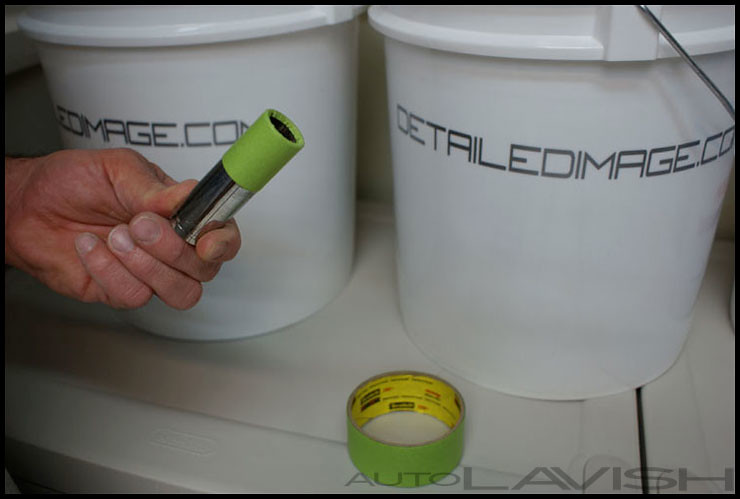
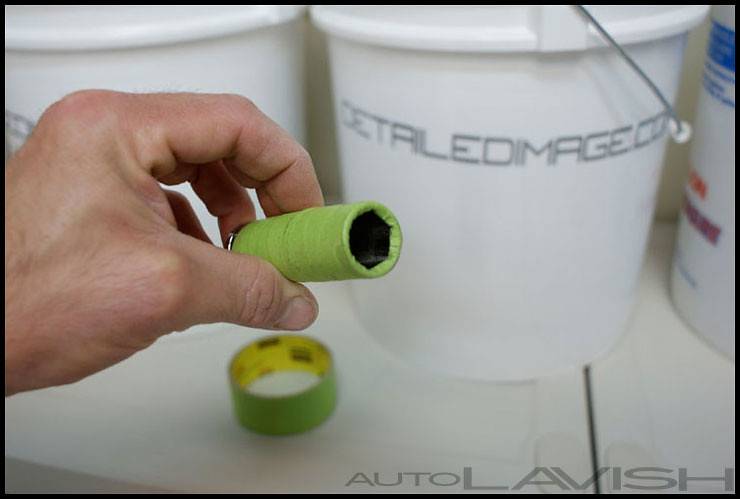
The other (much cheaper) option is to use tape. The cost effectiveness is worth it for those that will only take their wheels off less than a handful of times per year. It is not fool proof, but every little bit helps. I also find it makes it easier to hold the socket with dirty or wet hands which is a big plus in control of such a little projectile. Start with some thicker tape and a very clean socket:

First, go around the top end very evenly. Extend the tape beyond the edge as you will fold in the excess to help protect the top edge, but not too much or the tape will interfere with the socket going over the lug:
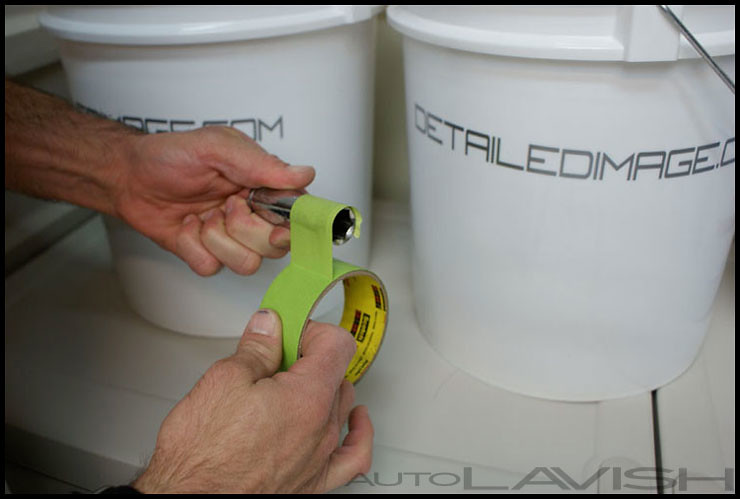
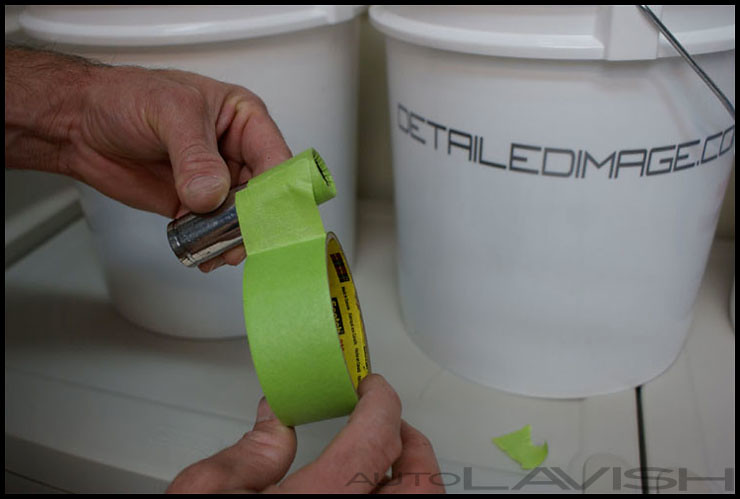
Go ahead and flip the tape over the edge like so:
Next, go over the rest of the socket. To do this, you will have to run the tape at an angle. How much you cover or how even does not really matter as long as the tip of the socket, taped up first, is even. But be weary of how much room you have to fit the socket into the wheel. Some wheels are very tight, and will not take more than a layer or two of tape before binding. You want the socket to spin freely and without contacting the wheel as much as possible.
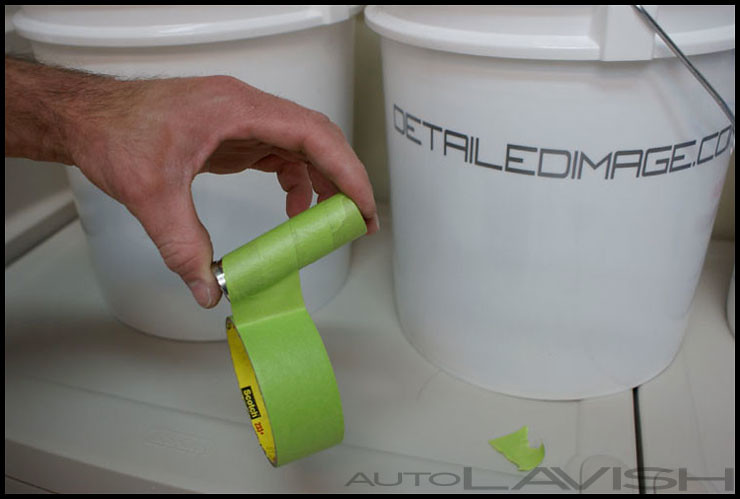
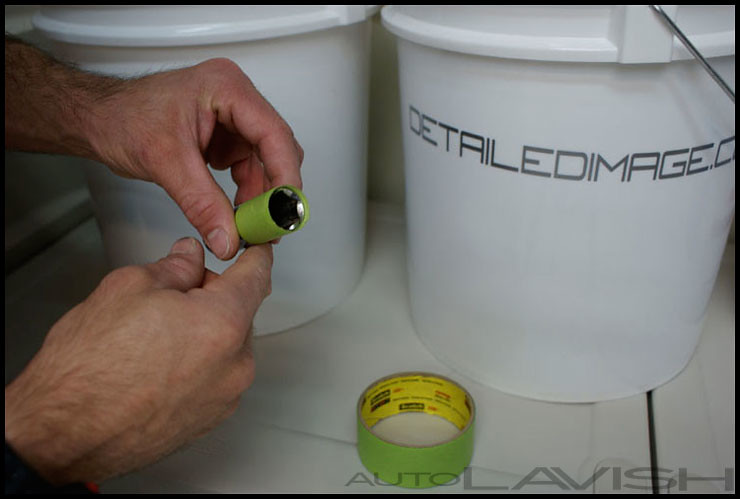
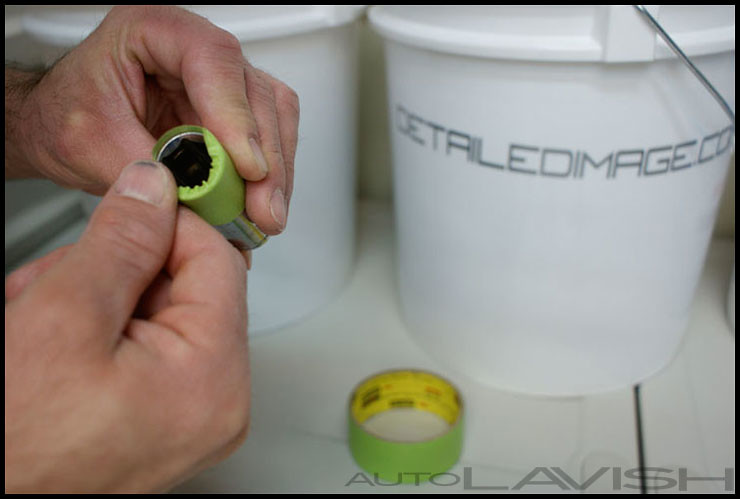
All done!
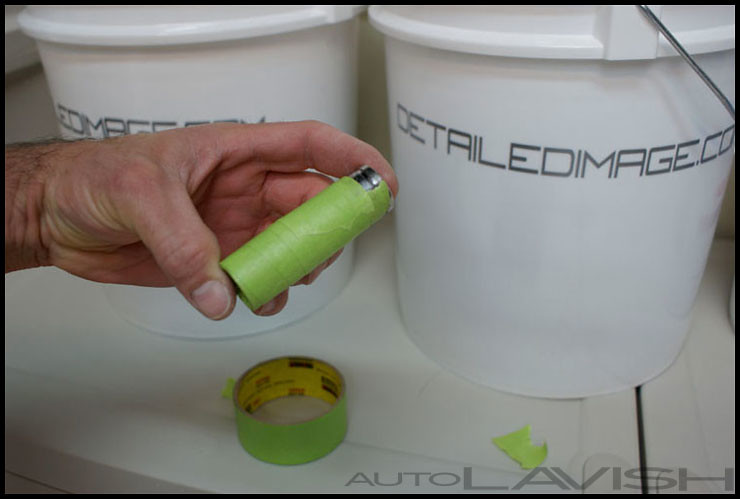
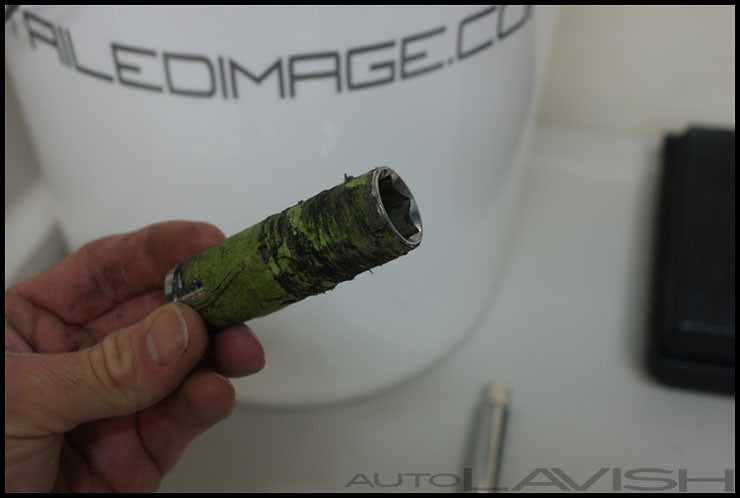
As stated, this trick works great for the cost. Here is this same socket after a year of living in a traveling tool box and removing wheels dozens of times. Beat up, yes, but still has tape on it! Of course the time to replace the tape was a few wheels ago 😉
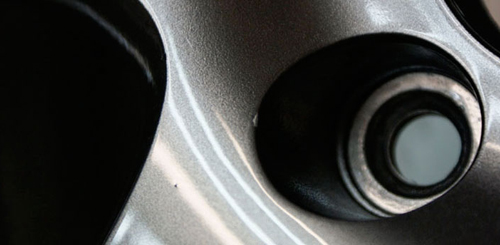
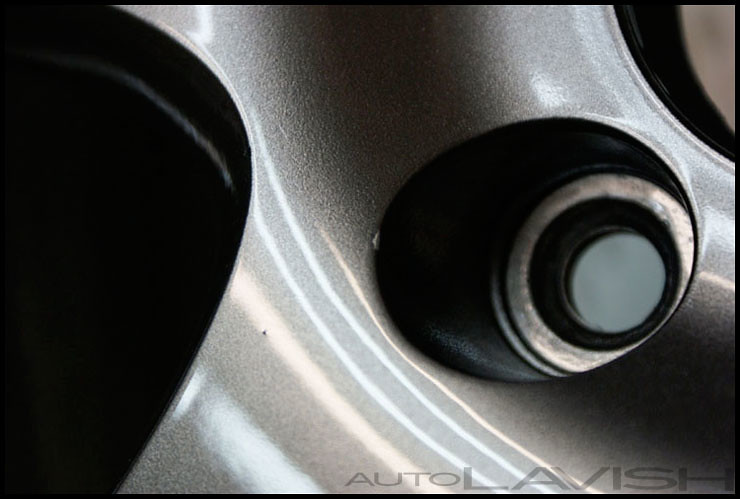
Not everyone may appreciate going through such efforts to care for their wheels, but doing so will help to avoid nicks and scratches around the lug nut housing on the wheel like is found in the following pictures:

In “Wheel Off” Part 2, we’ll discuss lifting and suspending your car in the air safely and properly.