

Cquartz UK is a product that I have grown to love over the past year or so. This budget friendly coating provides an excellent layer of protection, while also enhancing gloss and producing an amazing final touch to your perfectly polished vehicle. In this article, I will walk you through the basic application steps for the Cquartz UK Edition Ceramic Paint Coating. For a review of this coating take a look at my previously published article here.
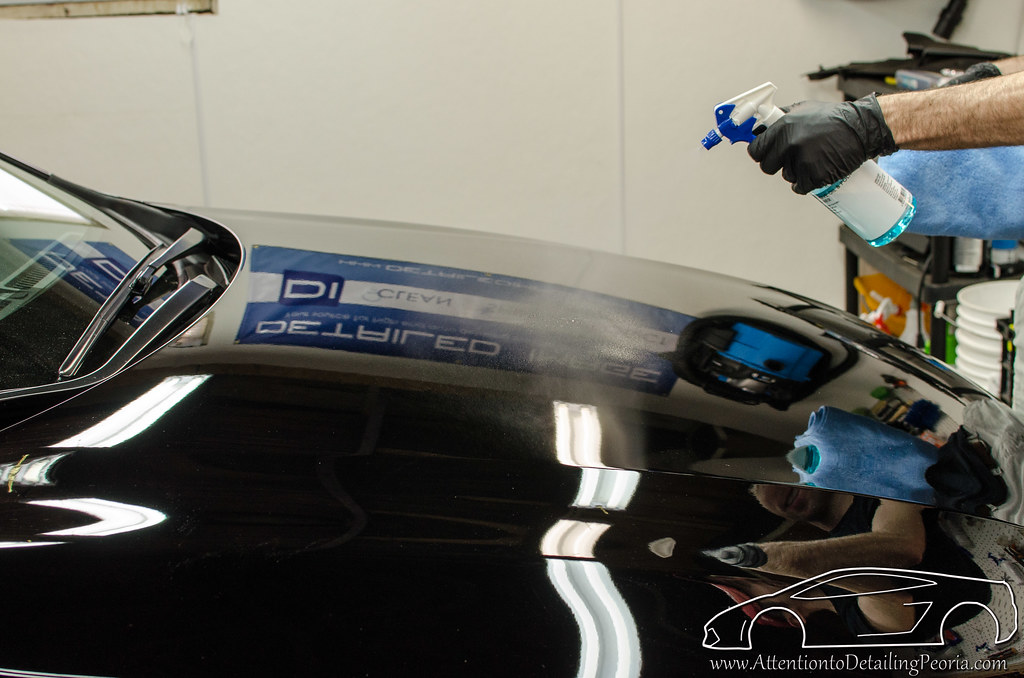
Before you begin installing the coating, it is important that you have followed the appropriate steps to clean and prep the surface. The paint should be thoroughly washed, decontaminated, and it is a great idea to perform any necessary paint correction or polishing steps. Once this is completed, the surface should be wiped down with CarPro Eraser to eliminate any residual polishing oils or residue.
Simply mist Eraser onto a small section of paint as shown below.

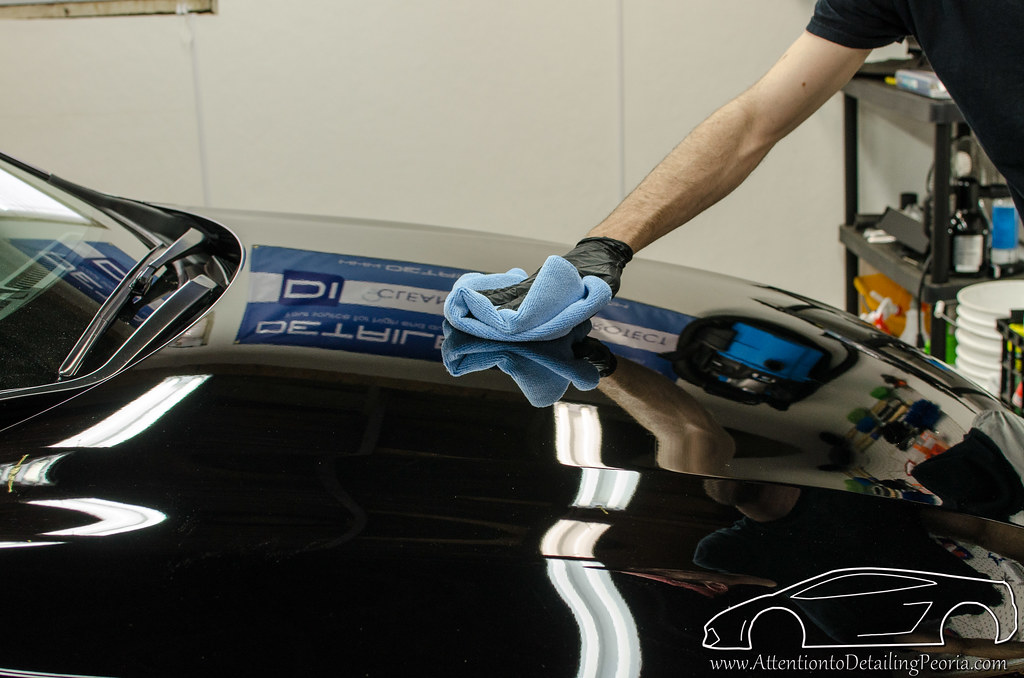
Next, carefully wipe the product on the surface. You do not need to “scrub” the surface. Use light pressure to reduce the risk of marring your nicely polished paint.

Finally, flip to a clean, dry section of your towel (or use a 2nd towel) to dry the area. You may repeat the Eraser wipe down process multiple times if you feel it is necessary.
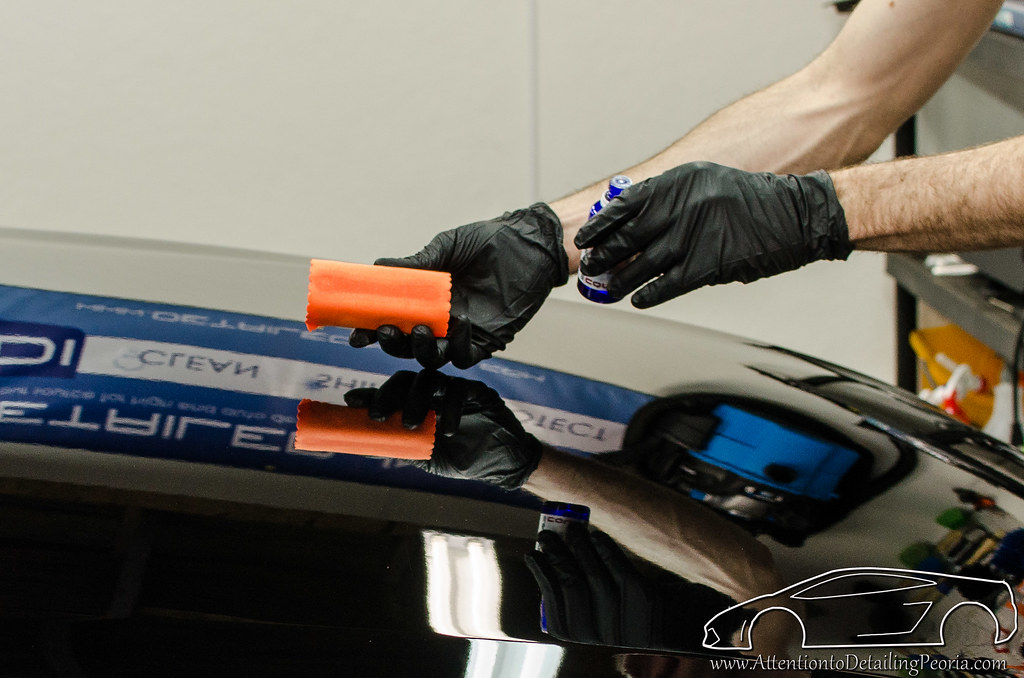
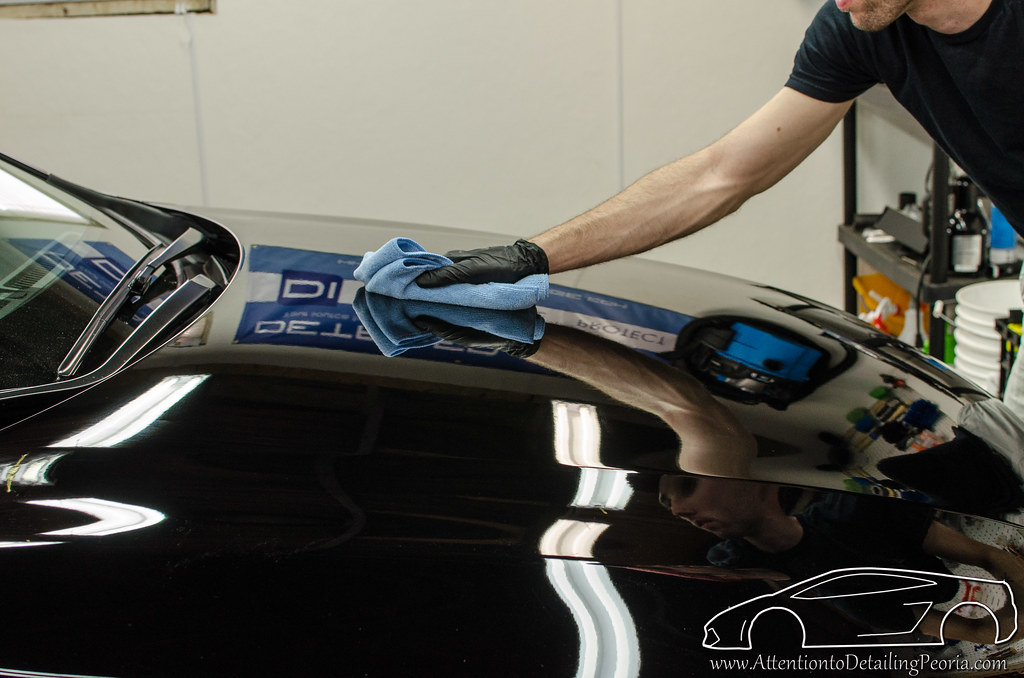
Once you are certain the paint is completely clean, you may begin applying the coating. First, shake the bottle and then open the cap slowly. Next, wrap the small suede microfiber cloth around the applicator block and apply a line of product down the middle of the applicator as shown below.
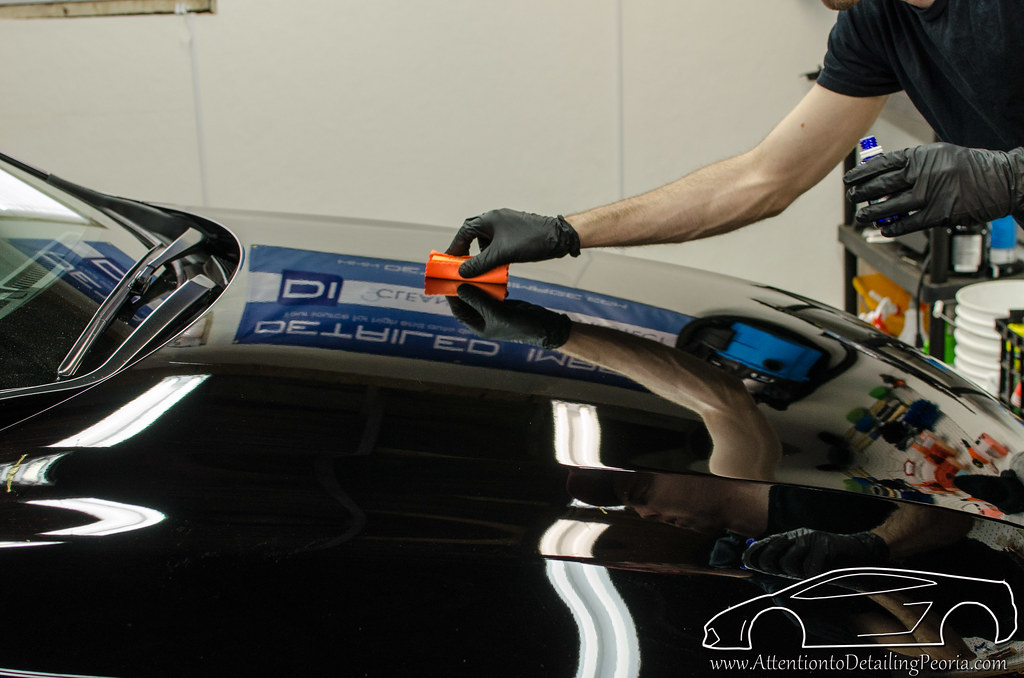
Using quick strokes, spread the coating across the surface. I prefer to utilize a cross hatch pattern (side to side strokes, then up and down strokes) to ensure even coverage. When the coating no longer spreads, you need to apply more product to your applicator and continue to work. Depending on the temperature and humidity where you are working, you may be able to work with entire panels at a time, or you may need to work in smaller sections.
Pay attention to your ambient conditions, if you are working in a cooler environment (<60F) you may need to leave the product to set on the surface for a short period of time or you may proceed with wiping the excess coating away right away. The coating should wipe away cleanly and easily. If it feels “grabby” or is difficult to wipe away then you have probably waited too long before removing. Remember, there is no perfect recipe for application and removal time, the instructions are a good starting point, but it is always wise to do a couple of test spots to determine what works best for you that particular day. You may find your particular environment requires more or less time than what is recommended on the label.
Remember to flip the suede applicator cloth over after working on a panels or two, and switch to a new cloth when needed to avoid streaking. As a reference, I typically use 4-5 applicator cloths per car (more for larger vehicles). You may notice that if you do not continue to switch to a fresh applicator, the coating may leave behind streaks. You should also remember to continue flipping to a fresh side of your towel when wiping away excess coating, and use a new towel when your current towel no longer wipes the product away cleanly. It is important to note that the applicator cloths and towels used to remove the coating should be discarded after applying the coating as the residual product will harden the applicator cloth and could harden your microfiber towels as well.
After the entire vehicle has been coated, you should avoid any rain or water for a minimum of 1 hour, and if the vehicle should get wet within the first 24 hours, it should be carefully dried because the coating will be more vulnerable to water spots within the first 24 hours after initial application.
If you are fortunate enough to be working on a sunny day, I highly recommend pulling the vehicle out into direct sunlight after you have applied the coating. First, carefully look for any high spots. If you notice some areas that you did not completely wipe away, pull the vehicle back inside to eliminate the high spots. Now you can leave the car in direct sunlight to ‘bake’ the surface. This will accelerate the curing process. Allow the vehicle to sit in the sun for as long as possible. After an hour, apply CarPro Reload to the vehicle’s surface to help protect the coating while it continues to cure (allow vehicle to cool prior to Reload application if you have left it in the sun).
When you are finished, you will be left with an incredibly glossy and very well protected vehicle!


Application Summary & Tips
- Ensure surface is properly prepped
- Apply coating to small (2’x2′) test spot to determine if wipe on, wipe off or if coating needs to set before wiping
- Apply coating using quick strokes
- Flip applicator cloth after 1-2 panels, and switch to new cloth after using both sides (very important!!)
- Inspect panel with LED to ensure there is no smearing or streaking
- If possible, allow vehicle to ‘bake’ in sun after application
- Wipe vehicle with Reload after a minimum of 1 hour after application
- Avoid standing water on vehicle for at least 24 hours
Buy Products From This Article
Purchase the products used in this article individually or in one convenient package here!