
This is the first part of a four-part article series by James Melfi of Auto Nuvo. In this series, James takes a beautiful jet black Porsche 918 Spyder and performs various detailing steps. Everything from inspection, washing, drying, polishing and even clear bra installation will be covered! To view all of the articles in this series click here.
The Porsche 918 Spyder is an 887 horsepower hybrid–that felt weird to say. This vehicle really is the culmination of automotive engineering, bringing together advances derived from fuel efficient vehicles and basically saying, “Well, how can we make this car even faster using that technology?”
This project totaled over 7 days and around 50 hours culminating to our Ultimate New Car Preparation Package. This package brings together paint correction, paint protection film and ceramic coatings to take surface protection to a different level.
Inspection
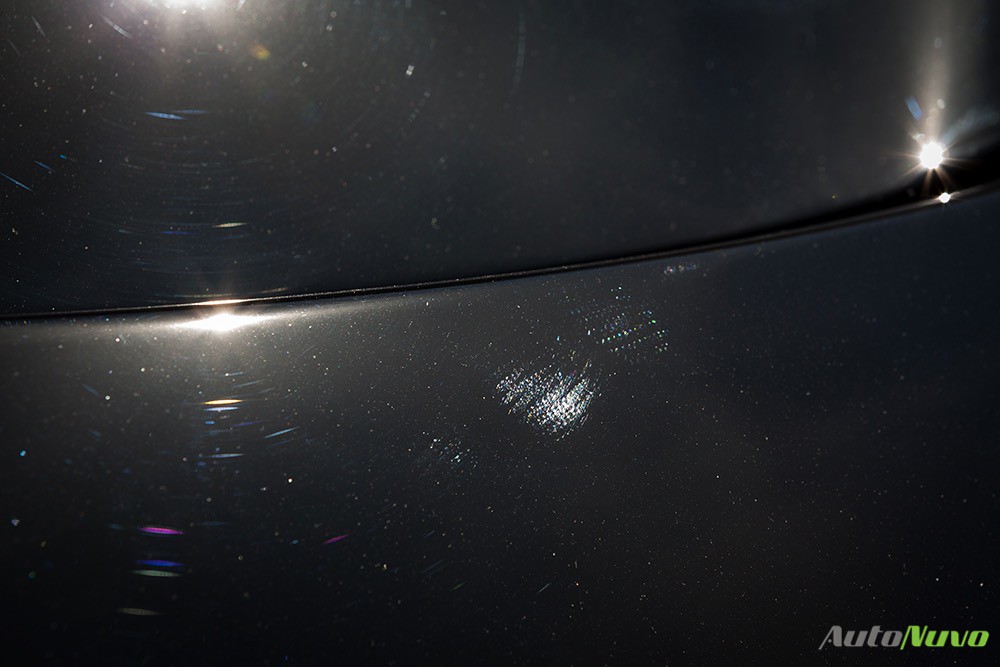
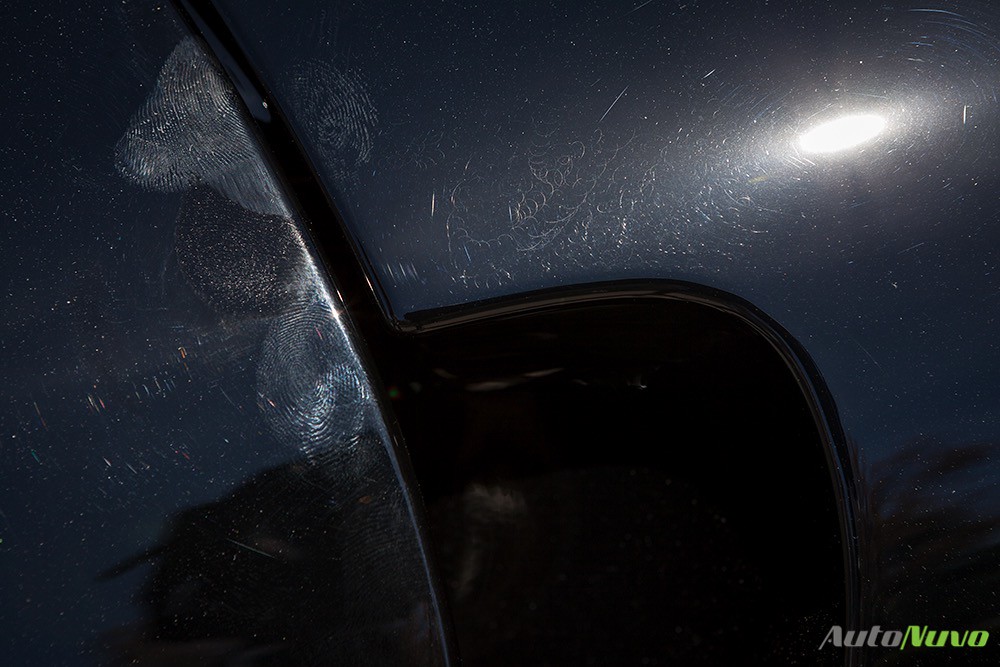
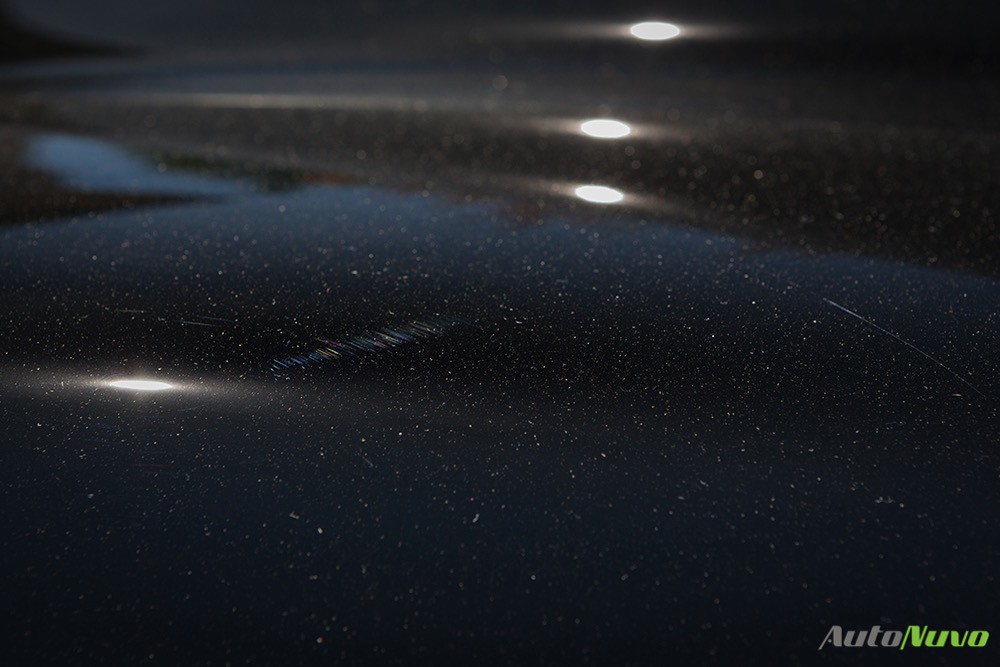
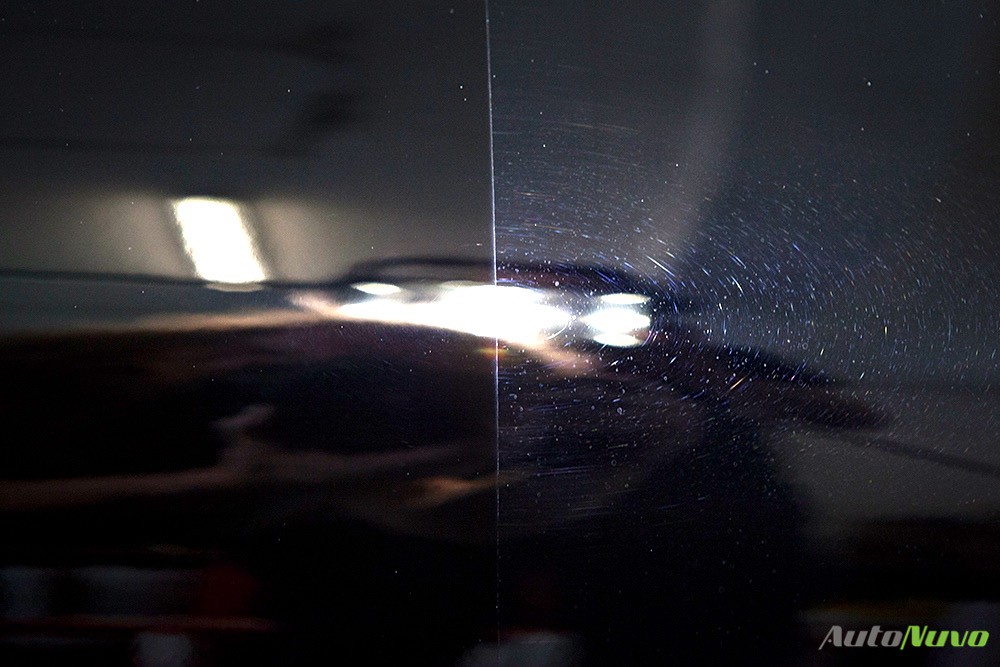
When we got the call to inspect a brand new, just delivered, jet black Porsche 918, you can expect that we were a little excited. When we arrived at our clients home early the first day we pulled out all the toys to thoroughly inspect the paintwork and determine what it required to achieve the ultimate finish. We first inspected the paint with a variety of LED lights, ranging from our favorite Rupes Pen Light to our custom built 5600 lumen light stands. We grabbed our MacBook Pro and Dino-Lite Microscope to take a closer look at some areas of concern. Next we pulled the car outside to inspect it under natural sunlight, this is what we found and boy, the sun doesn’t lie.
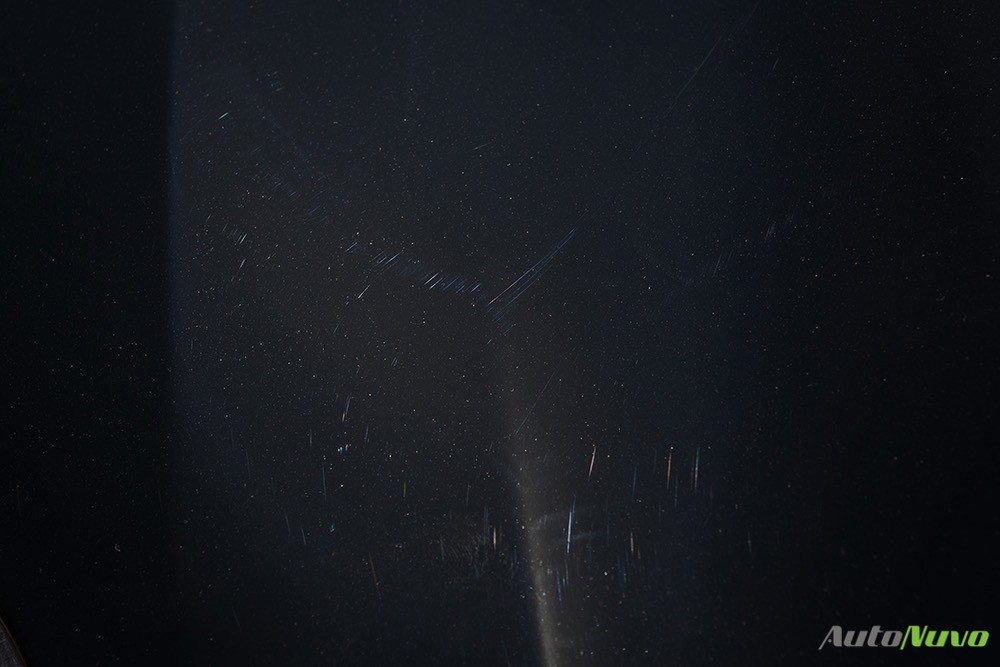

Lots of swirls marks and light scratches dulling the paintwork and taking away from the potential of the pure black paint.
Pigtails and left over sanding marks all over the finish.
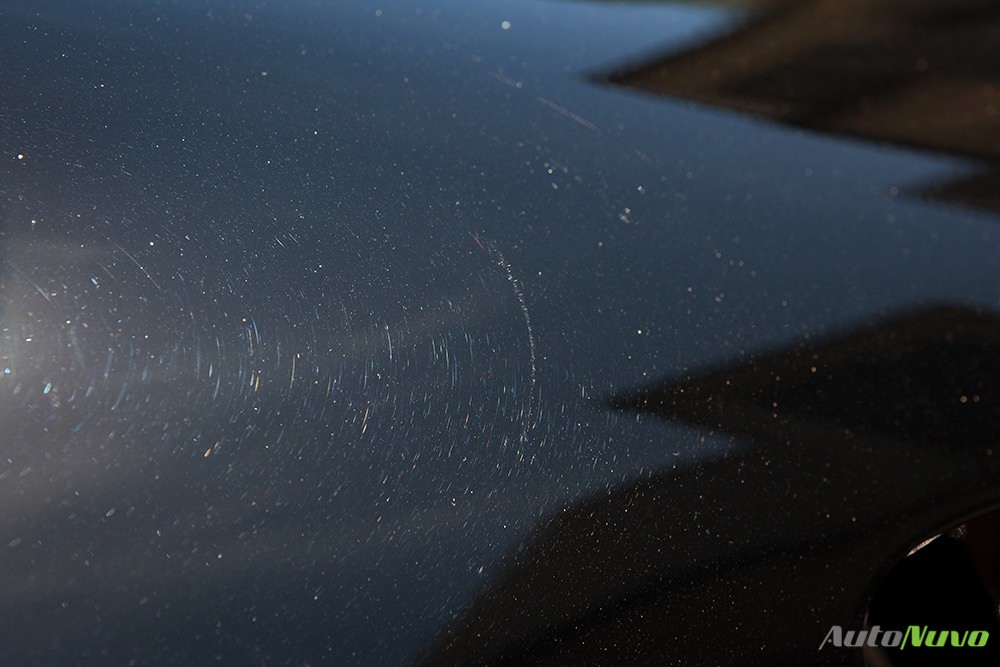
Scuff marks riddled all over the paint.

Wash Process
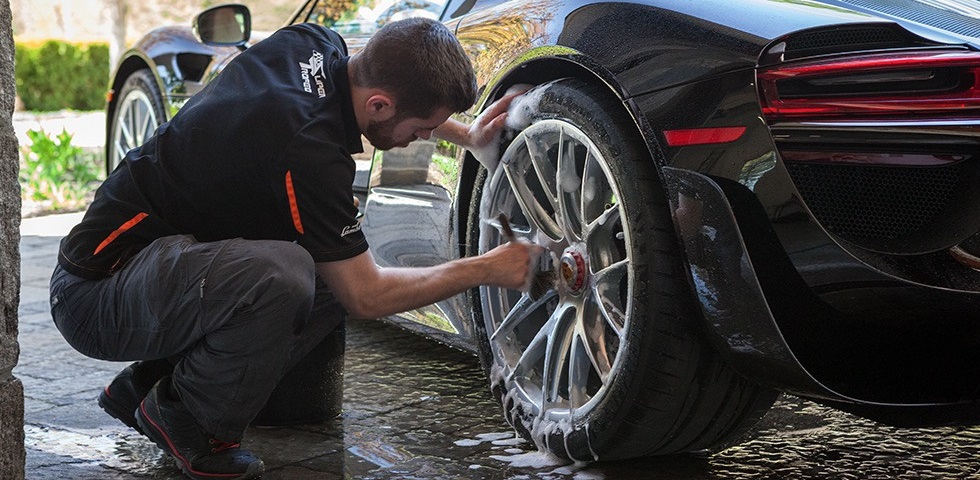
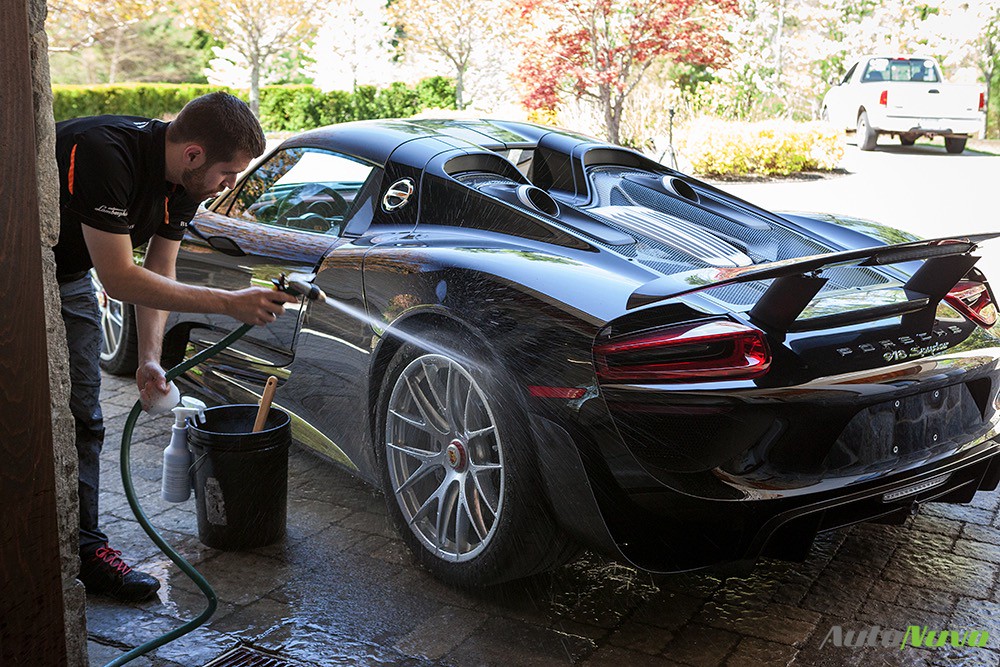
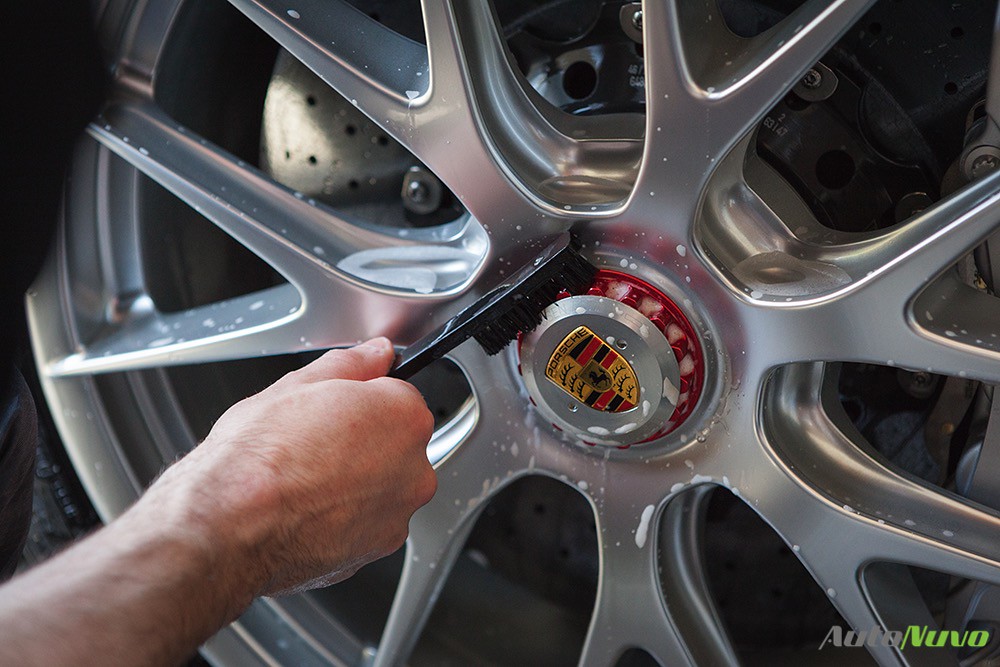
Once we finished the inspection we decided on proceeding with the wash before we made our final decision on how to approach the polishing steps. We wanted to be certain we were seeing the true finish and strip away any wax or detail spray possibly hiding some defects. We started with the magnesium wheels and carefully cleaned them with a mild citrus shampoo and a variety of wheel brushes. We made certain to clean the wheels with pH balanced cleaners in order to protect the sensitive carbon ceramic brakes. The wheel wells and tires were cleaned with Sonax Multi-Star APC at a dilution of 10-1. After the wheels, we proceeded with rinsing down the whole vehicle– removing any loose debris. We washed all the painted surfaces with Chemical Guys Citrus Wash and a few CarPro BOA orange towels to lightly strip any previous protection and cleanse the surface.

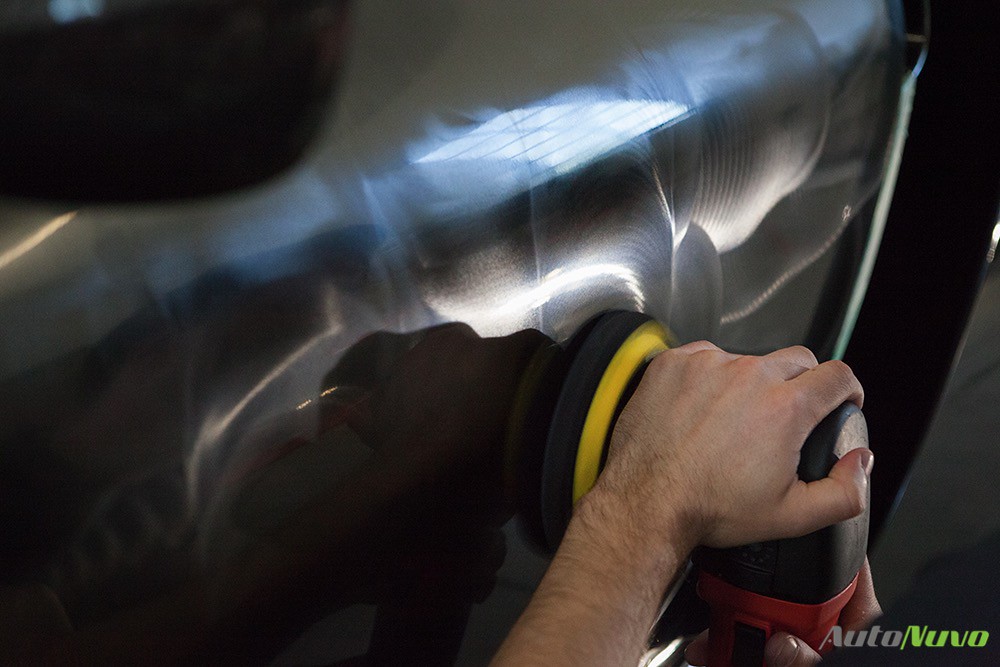
We dried the vehicle with the Metro Master Blaster Revolution and a few DI Waffle Weave Drying Towels. Once dried, we grabbed a bottle of 50/50 IPA and wiped down each panel. At this point, we had a clear picture of the extent of the damage. The client and I both agreed to conduct a multi-stage correction utilizing a light compounding step to remove the sanding marks, pig tails and light scuff marks, followed by a refining step to enhance the gloss and remove any haze left over.
Correction Process
This jet black Porsche paint was extremely soft and required a specific procedure to cut away the swirls and scratches while leaving a uniform defect to easily refine. We used Meguiar’s D300 paired with a Meguiar’s MFFD on the Rupes 21 which cut away the defects and left a uniform haze. We used our Rupes 75E Mini and Rupes LHR75 air powered tool to correct all the intricate areas. The polishing stage was the most time consuming after we quickly learned conventional finishing polishes weren’t clearing the haze left over from the compounding step. Therefore, we needed to look elsewhere and I made a call to Kevin Brown where I explained the situation. He advised to try a procedure called water polishing. I grabbed a 32 ounce spray bottle and filled it with distilled water. Then I added 12 drops of Meguiar’s M205 Finishing Polish. I know this seems crazy but trust me, it saved us hours of polishing time. I misted the polish and water solution directly on a black finishing pad and worked it in with the Griots G110 at low speed, making sure the backing plate was always rotating. This method cleared up the haze where conventional polishes had repeatedly failed.
Finishing with M205 and water.
In part 2, James will tackle the paint protection film instillation!
Buy Products From This Article
Related Posts
- Projects: Lotus Evora GT, Paint Correction, Clear Bra, Ceramic Coating
- Detailing Projects: Ferrari 488 Pista #2 Paint Correction, Clear Bra, & Ceramic Coating
- Projects: 2019 Subaru WRX, Swissvax Detail
- Detailing Projects: Ferrari 488 Pista Paint Correction, Clear Bra, & Ceramic Coating
- Projects | Porsche 918 Spyder | Track Day Maintenance (Part 4)