
This low mileage 11 year old vehicle was brought to us for some reconditioning. The paint had a considerable amount of swirls and scratches in it from years of improper maintenance. This superficial damage leads to a lack of depth in the finish, which is especially noticeable on jet black paint. After our initial consultation and inspection of the vehicle, it was agreed that a two-step paint correction process would likely be the best choice as it would enable us to remove the majority of surface defects, leaving only the deeper marks, thus drastically enhancing the clarity of the finish. We also noticed years of buildup on the insides of the wheels and brake calipers, so the owner decided to have us remove the wheels for a proper cleaning as well. After a few days of work, the end result was a car that looks quite a bit younger.
As always, the photos below will walk you through the highlights of the detailing process, and there will be a complete product overview list at the very end.
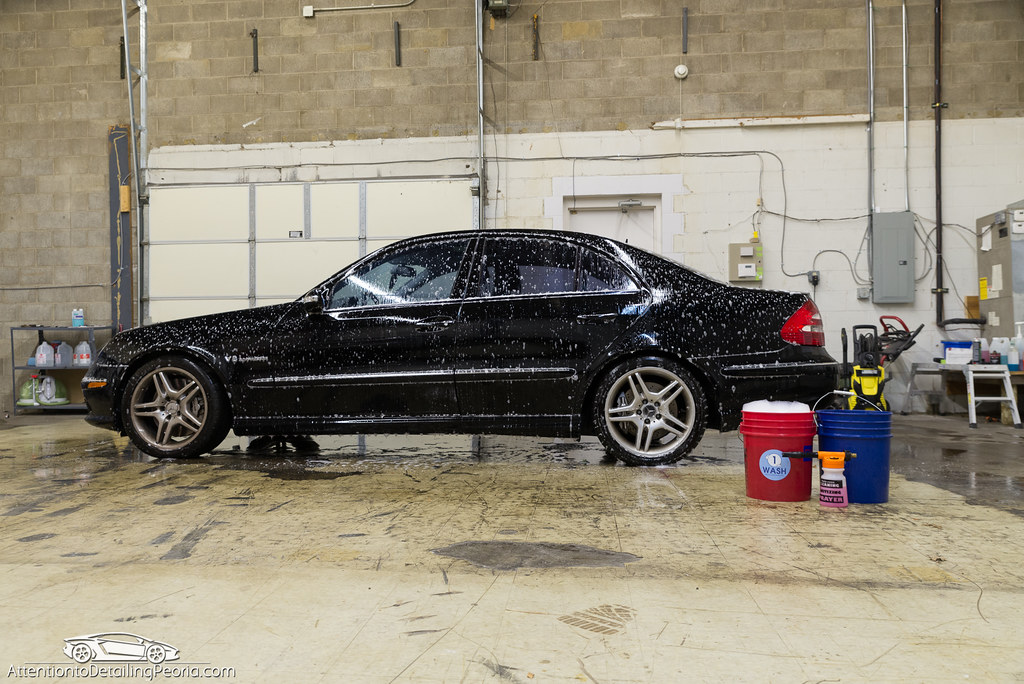
The vehicle was quite dirty when it arrived.

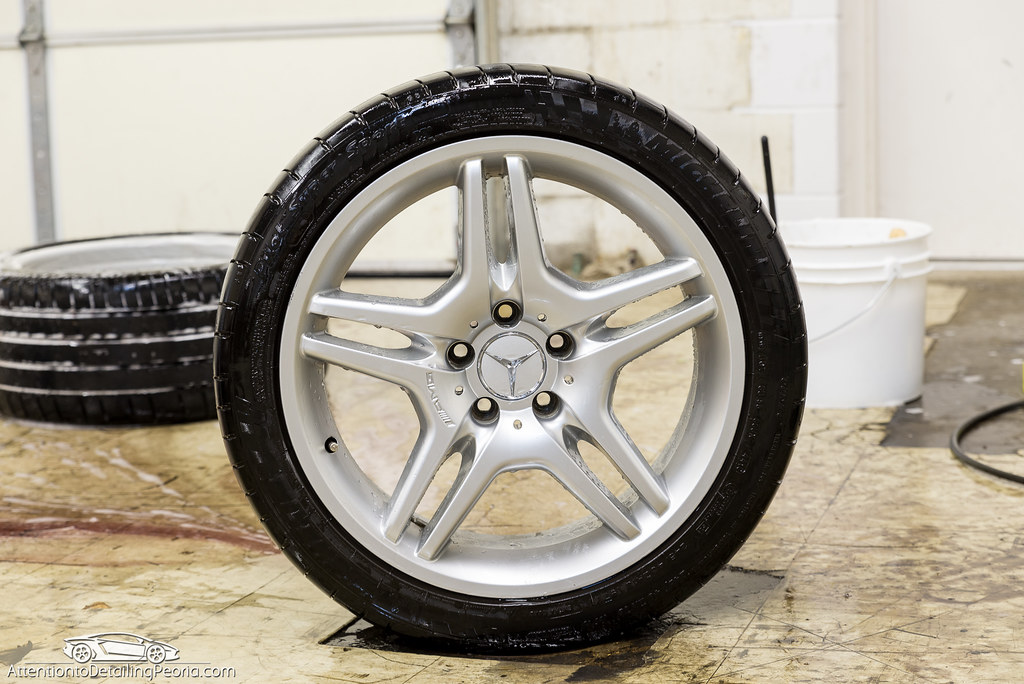
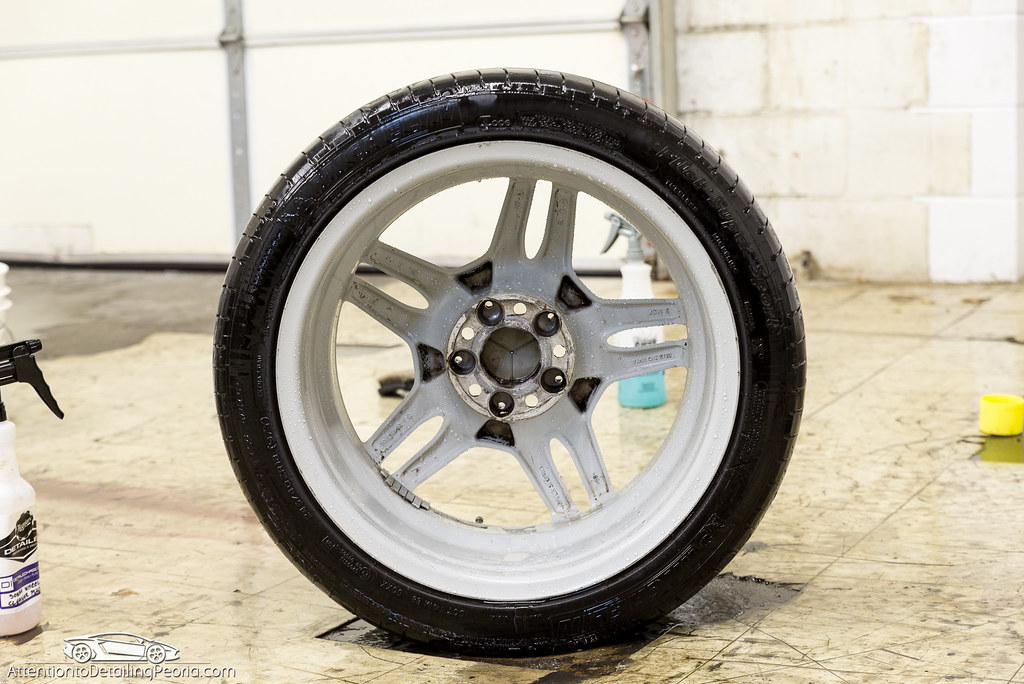
These wheels are supposed to be a hyper silver finish, yet they are grey and dull due to a large amount of road grime and brake dust.
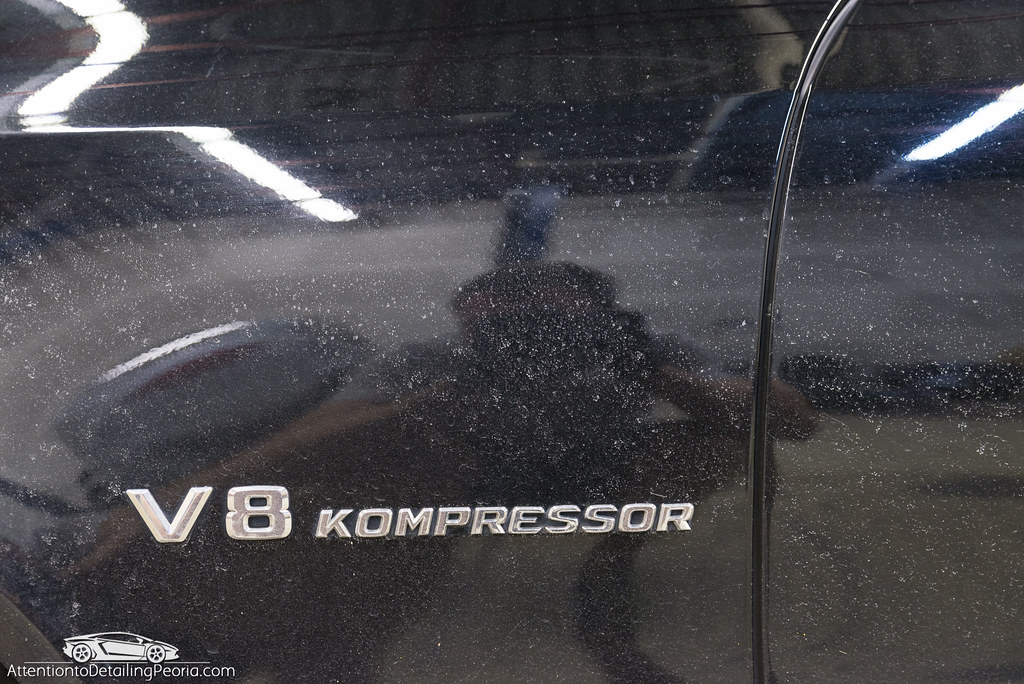
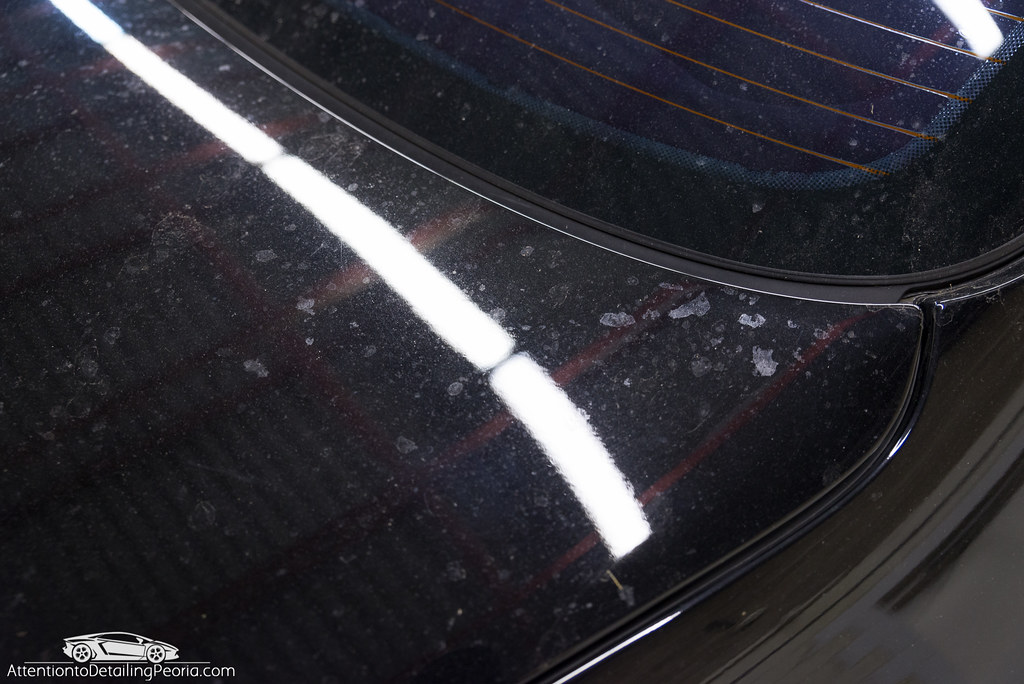
Dirt and road grime covered the painted surfaces.
Bird bombs were found on the middle of the hood, we always hope that these are fresh and have not been sitting for days at the risk of etching the paint.
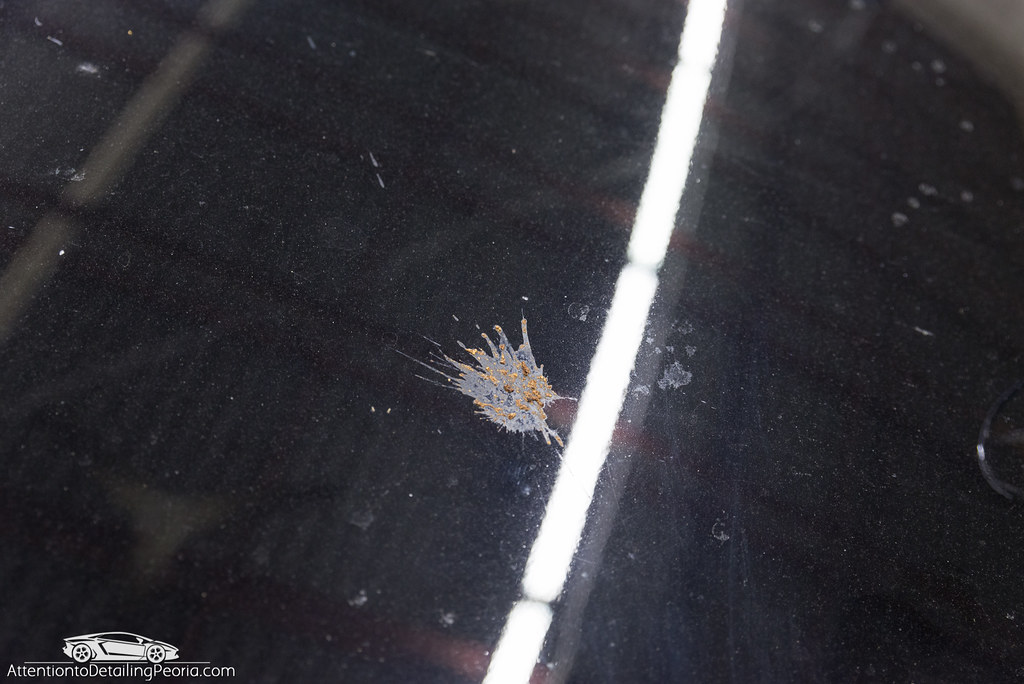
Hard water spots were present throughout, and some appeared to have been there a very long time. This is also concerning to see as the chances of etching are high.
Before I began on the paint, I popped the hood for a quick cleanup of the engine bay. Modern engine bays are so covered up and jam packed that a basic cleanup is quite a simple process in most cases. The engine was treated with a degreaser, scrubbed with various brushes, rinsed, and then blown dry. Plastic and rubber surfaces were then dressed to give it a like-new appearance.

Next I began cleaning the exterior. Since we were planning to remove the wheels from the car, I did not do any cleaning at this point and began with a thorough washing of the paint. Once all loose dirt had been removed, I began decontaminating the paint with an Iron X bath and treating the lower areas with a tar remover. After these chemicals had been allowed to work, the vehicle was rinsed thoroughly, and I made another quick lap around the car with my wash mitt to help lift any loosened particles. The vehicle was rinsed again, and then a fine grade clay bar was used to remove the remaining contaminants. Surprisingly, the clay bar did not reveal a tremendous amount of surface contamination left on the paint.
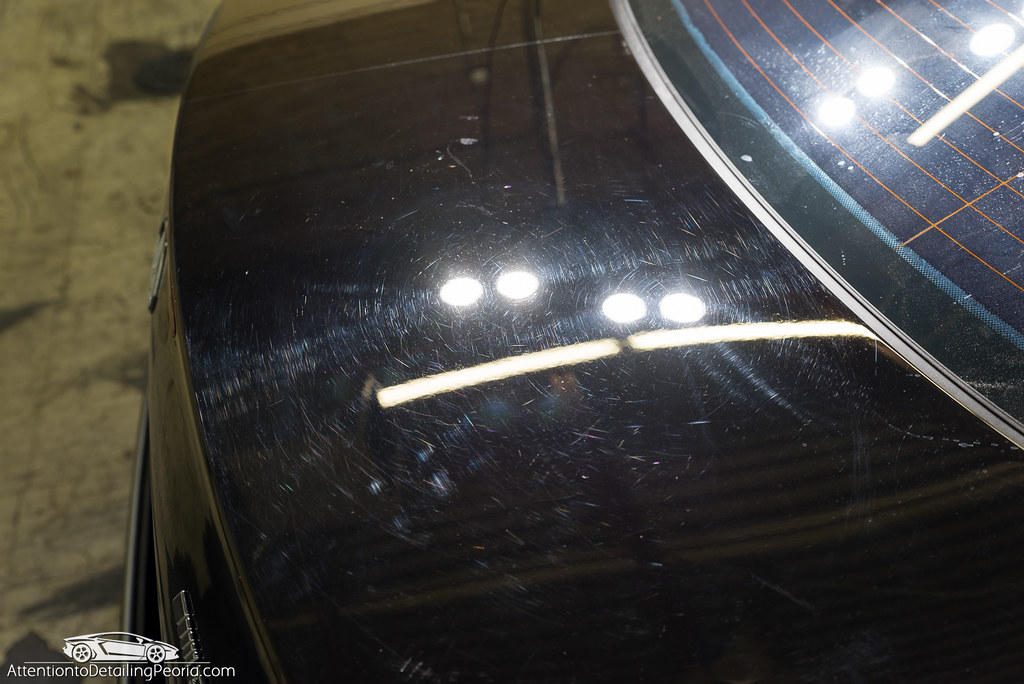
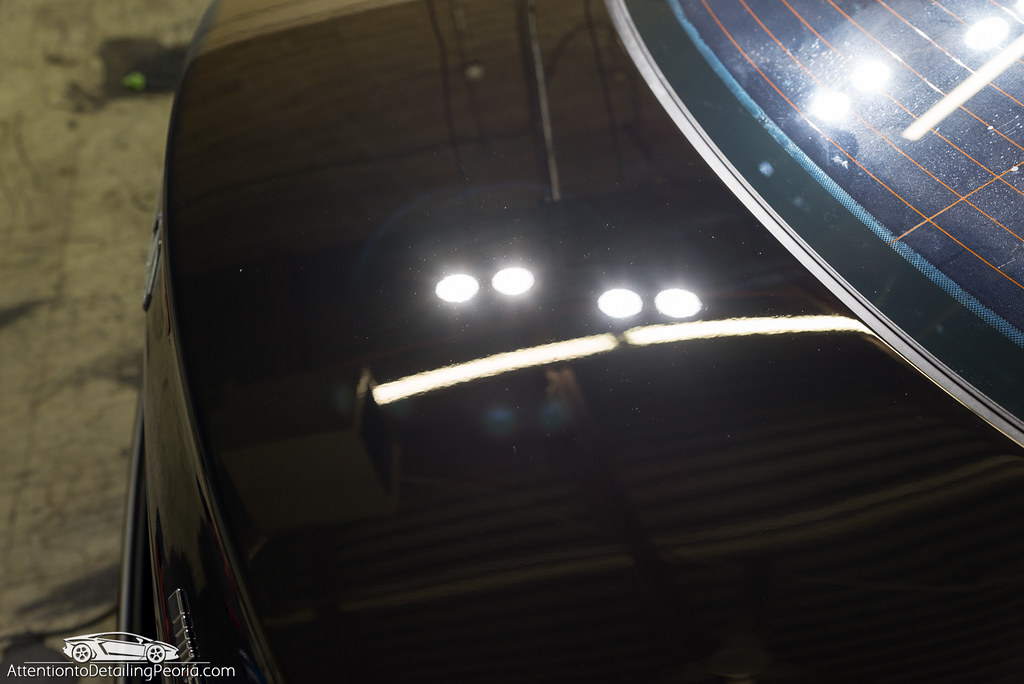
The vehicle was dried and then carefully inspected with high powered lights. There was plenty of room for improvement.
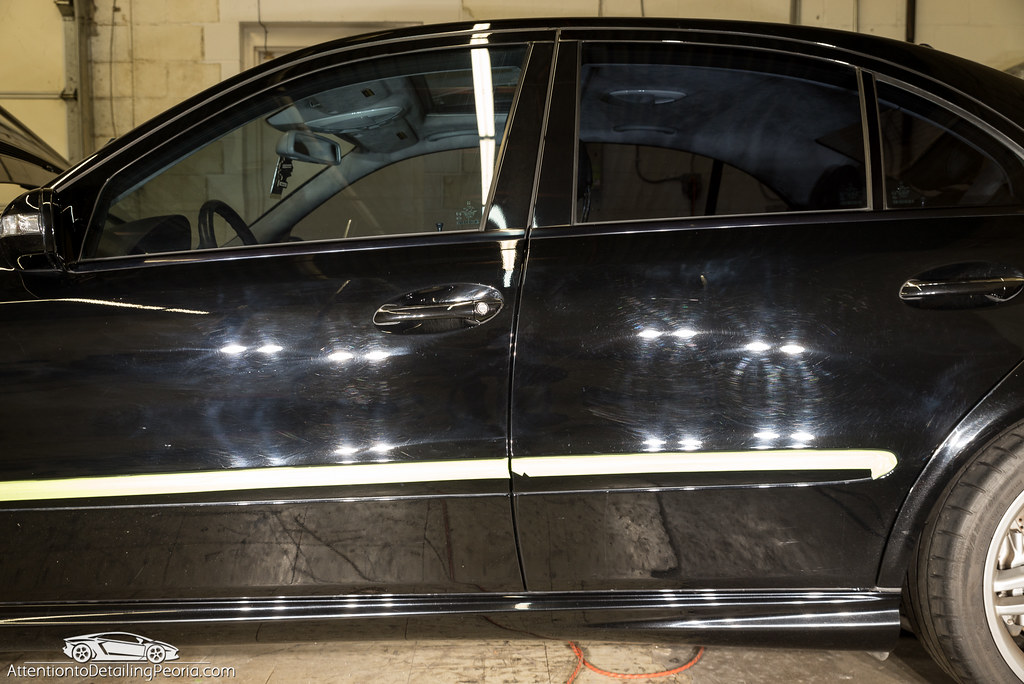
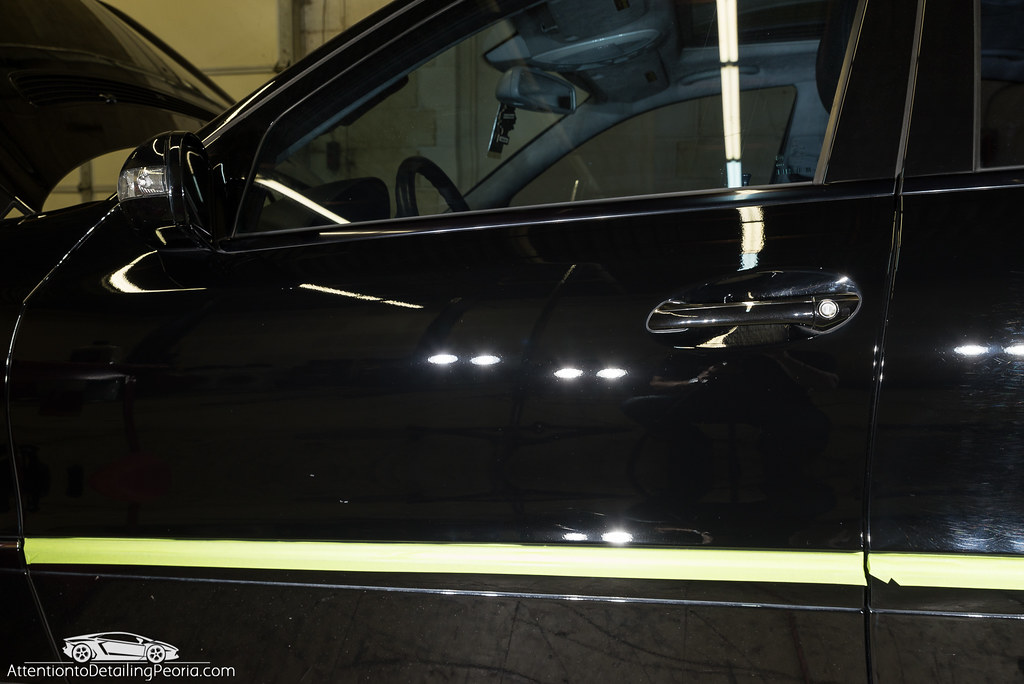
I began my test spot on the driver’s door, and ultimately found Griot’s Fast Correcting Cream on a Microfiber pad followed by CarPro Essence on a Yellow Rupes Polishing pad was a great 2 step approach which yielded a drastic transformation.
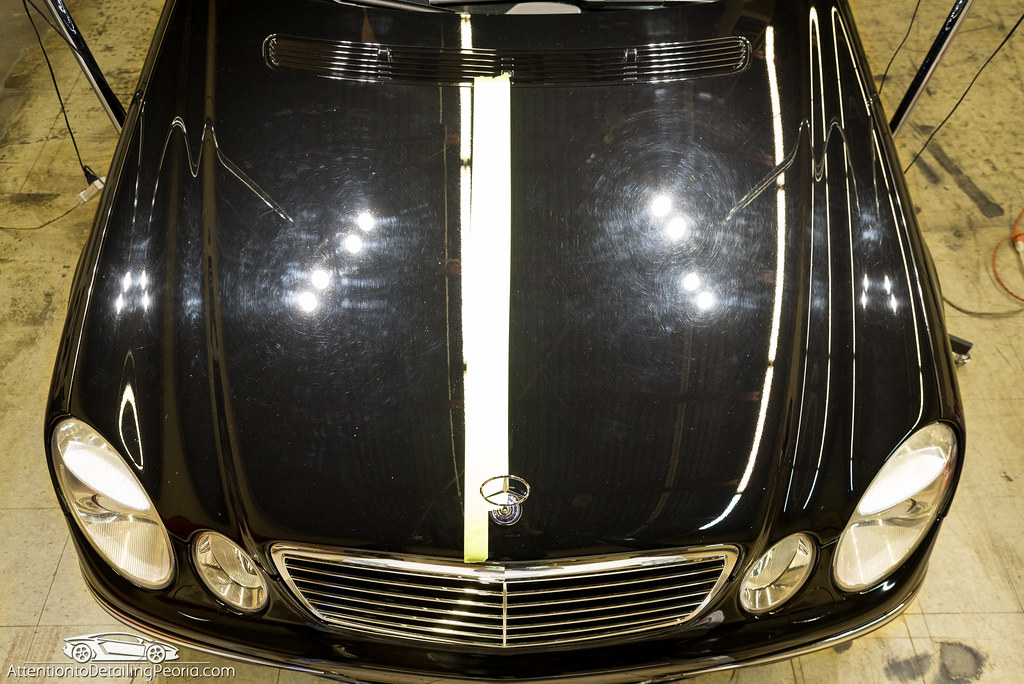
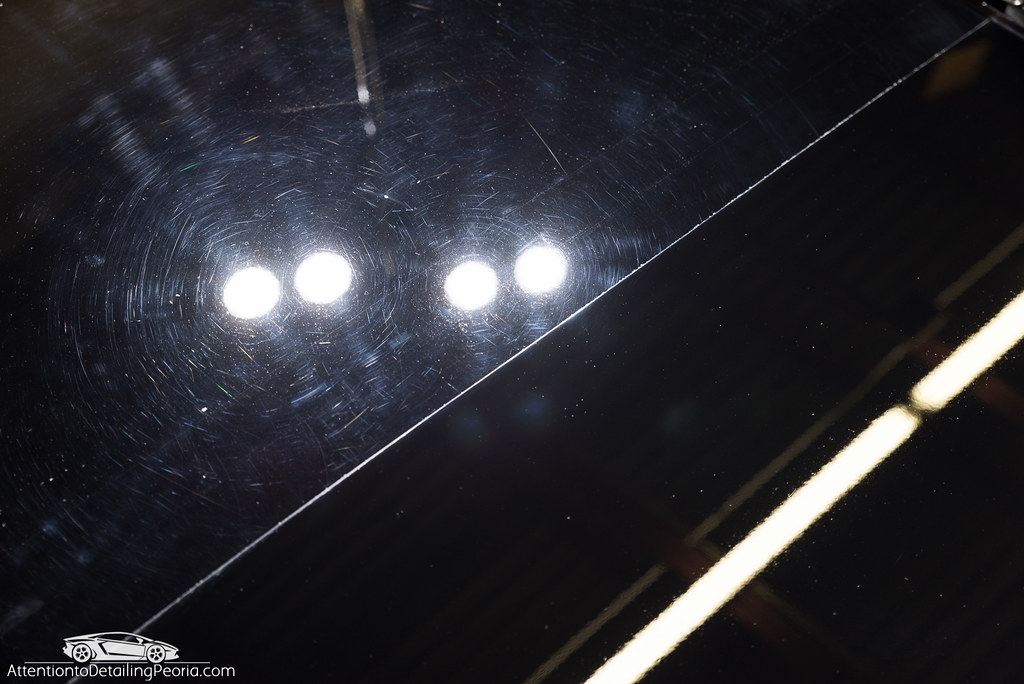
This overhead shot of the hood really shows off how dull and grey the finish looked under our inspection lights.
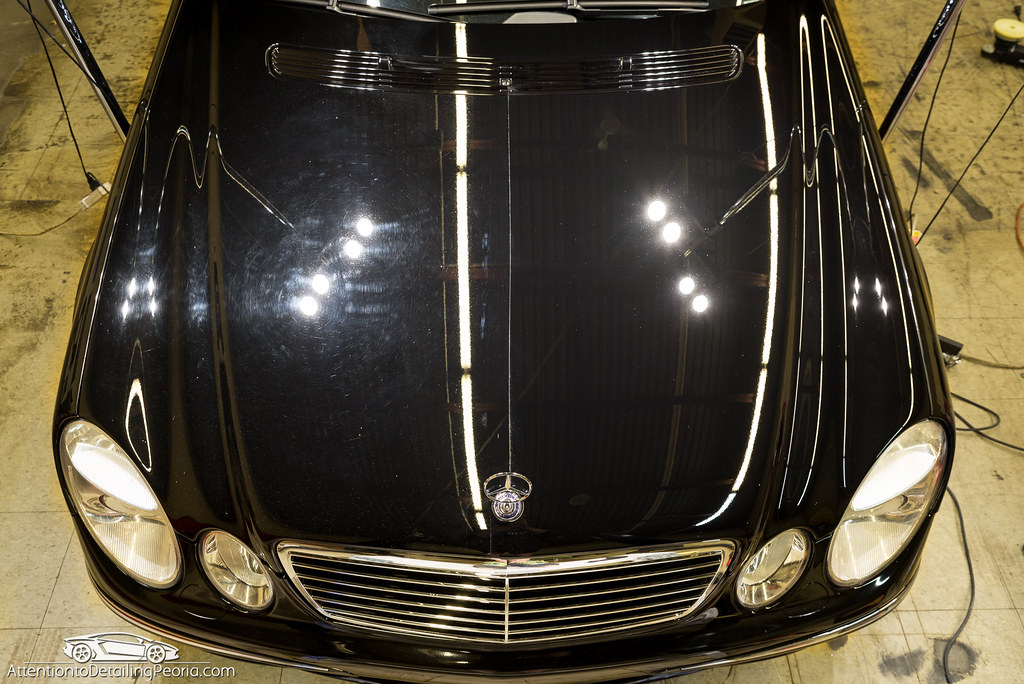
Quite a transformation. It is always satisfying to strip away years of neglect, revealing a much improved surface.
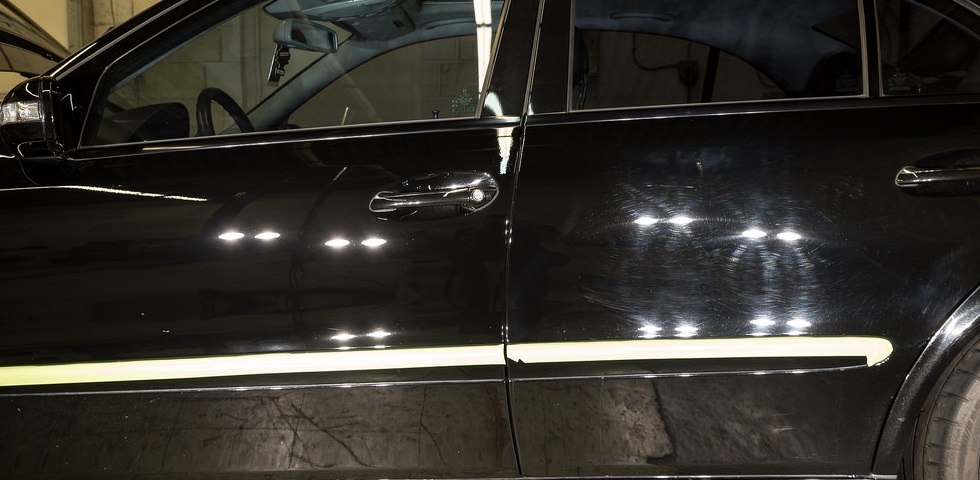
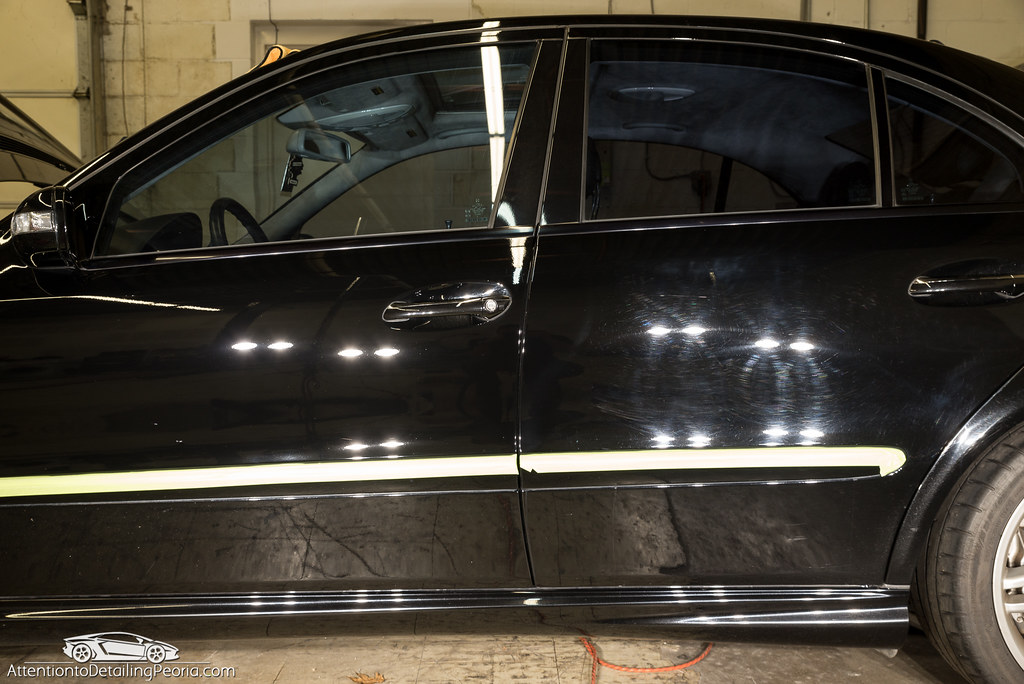
This angle really highlights the color change that was happening during the correction process. Check out how deep and black the corrected area looks in comparison to the uncorrected area.

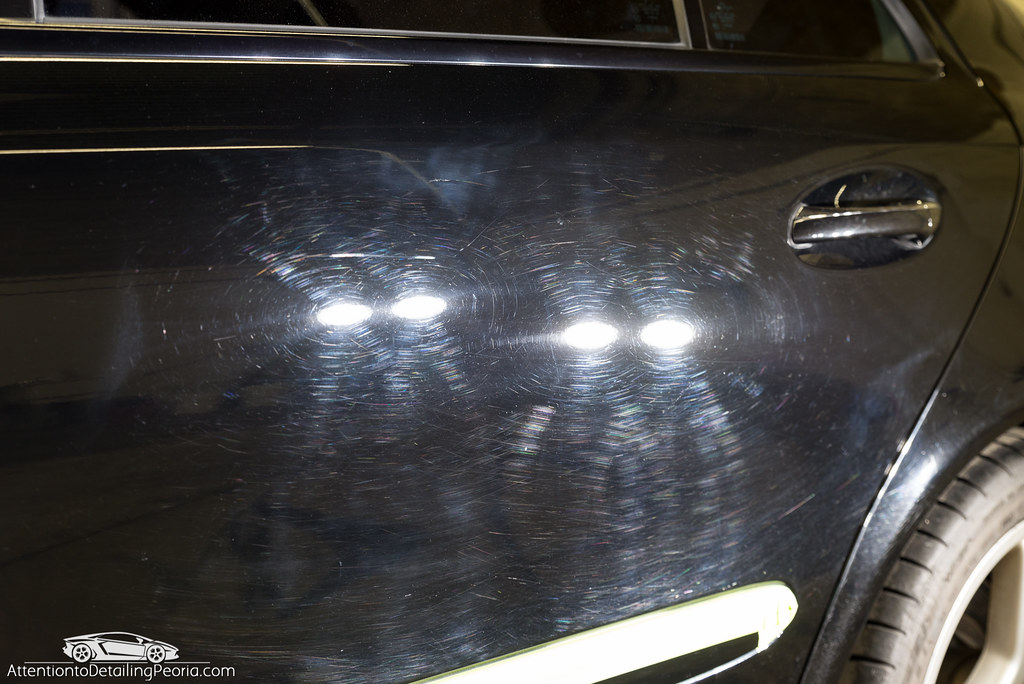
Rear door prior to correction. A tremendous amount of swirls, and some noticeable straight line scratches as well.
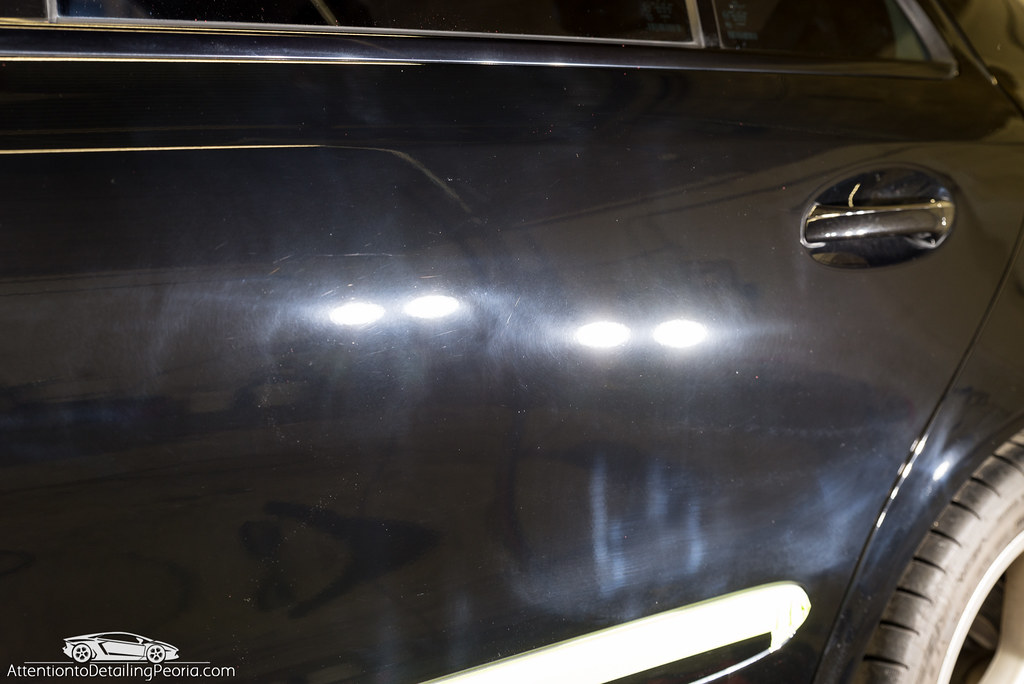
After compounding, we were left with a hazy finish. You can see that there are some heavier scratches remaining still.
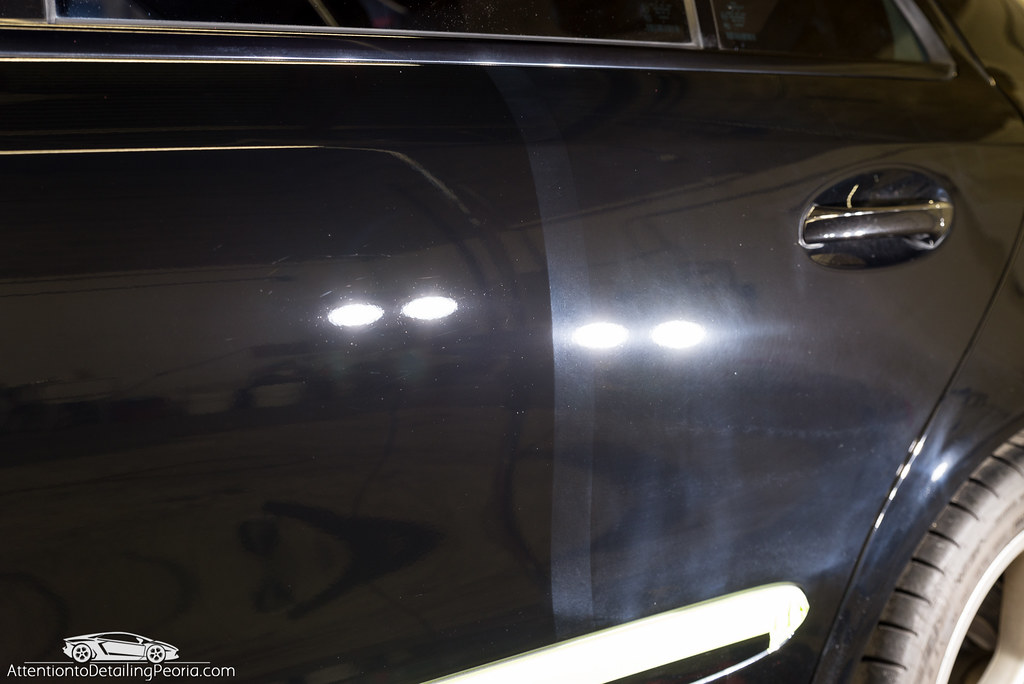
The final polishing process restores the clarity in the paint by removing the light marring. Again, notice some RIDS left in this panel. We always operate with the mindset that it is better to leave more paint for future correction work than to chase down every single defect, especially on vehicles with some age on them. If the owner demands perfection, we are happy to take the additional steps to level deeper scratches when we feel it is safe, but the majority of vehicles will benefit far more from preserving clear coat. In the end, these faint scratches will only be visible under direct lighting as seen here and will not take away from the overall gloss in the end.
Trunk prior to correction.
Trunk after correction.
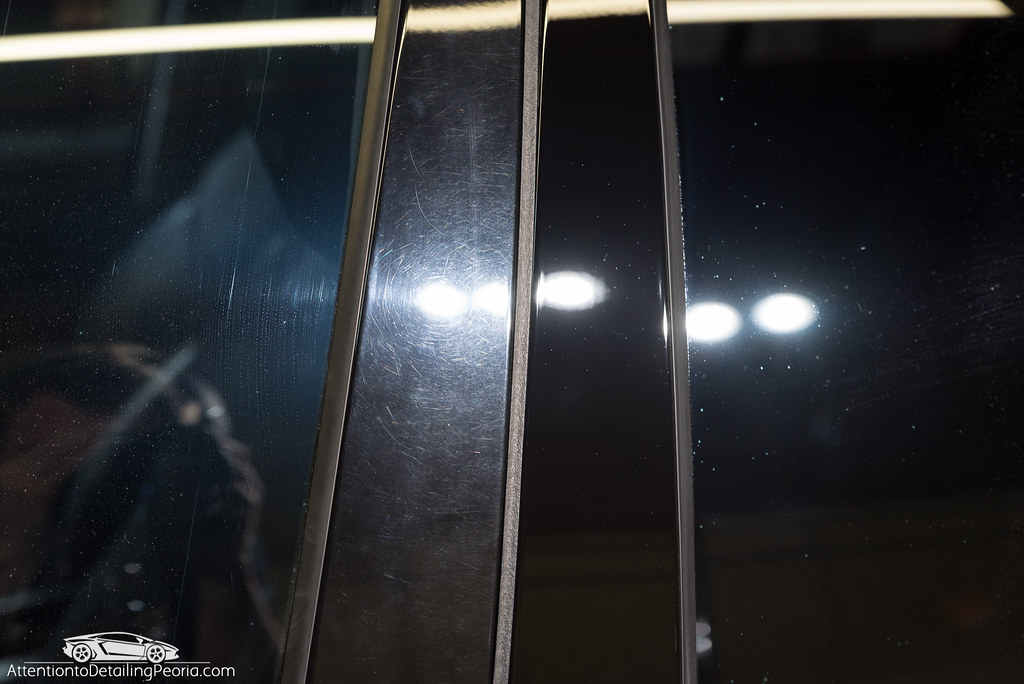
Here is a great shot of the b-pillars. This is perhaps my favorite part of correcting any car because they tend to be in the absolute worst condition, so the transformation is even better.
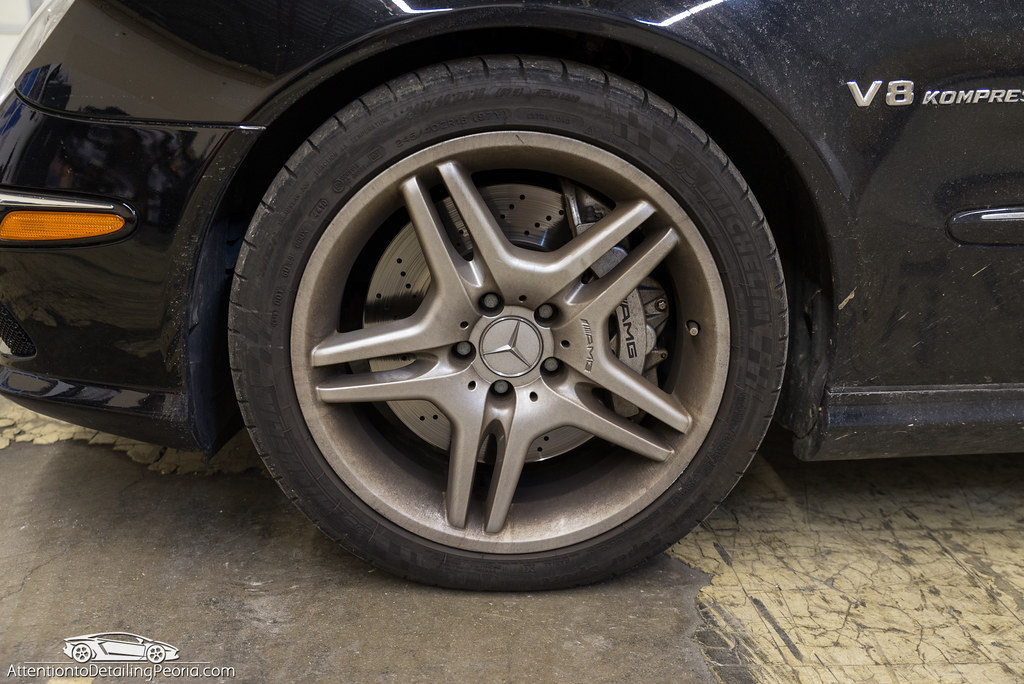
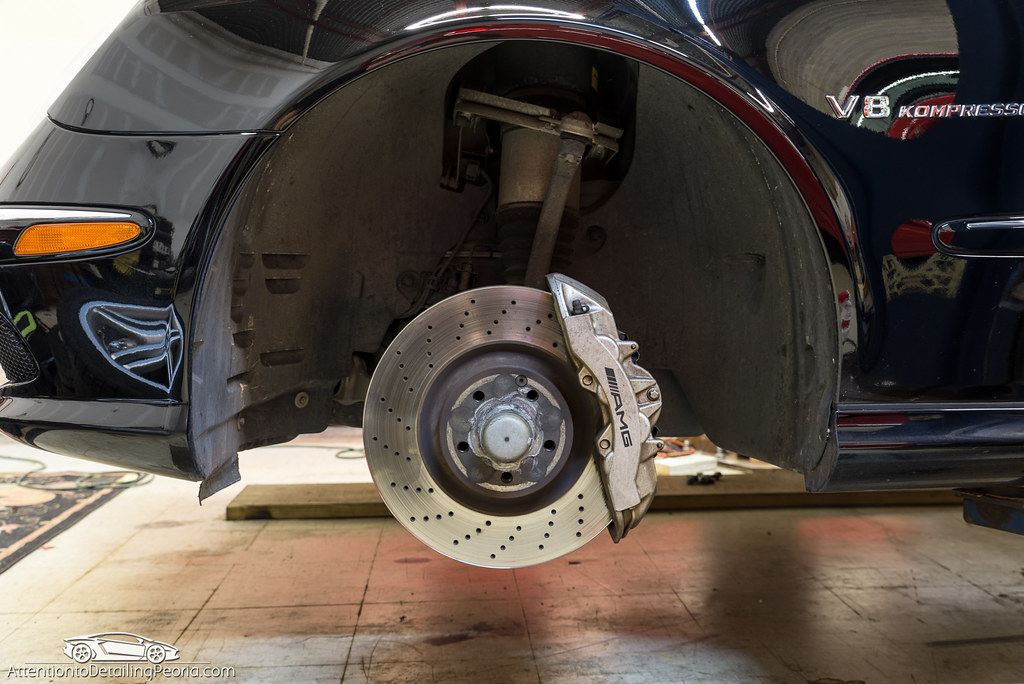
Once the paint was all polished and protected, the vehicle was put on the lift so that we could remove the wheels for cleaning. The faces had a considerable amount of build up on them.

Sonax wheel cleaner plus was used with some brushes to easily break down the grime.
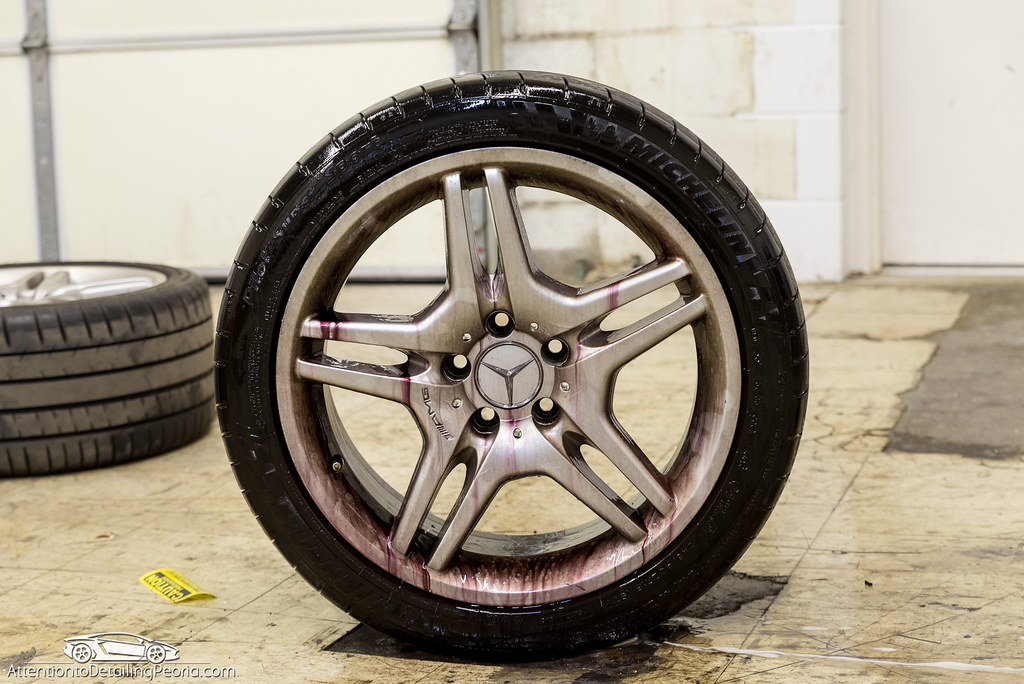
The faces cleaned up very easily. Now you can appreciate how dirty they were to begin with once the bright silver finish is revealed.
Here is a look at the barrel of one of the wheels. I am going to venture a guess and say that these barrels have never been cleaned in the 42,000 miles that have been put on this car. There was an incredibly thick layer of dirt and grime, as well as many bonded contaminants as well.
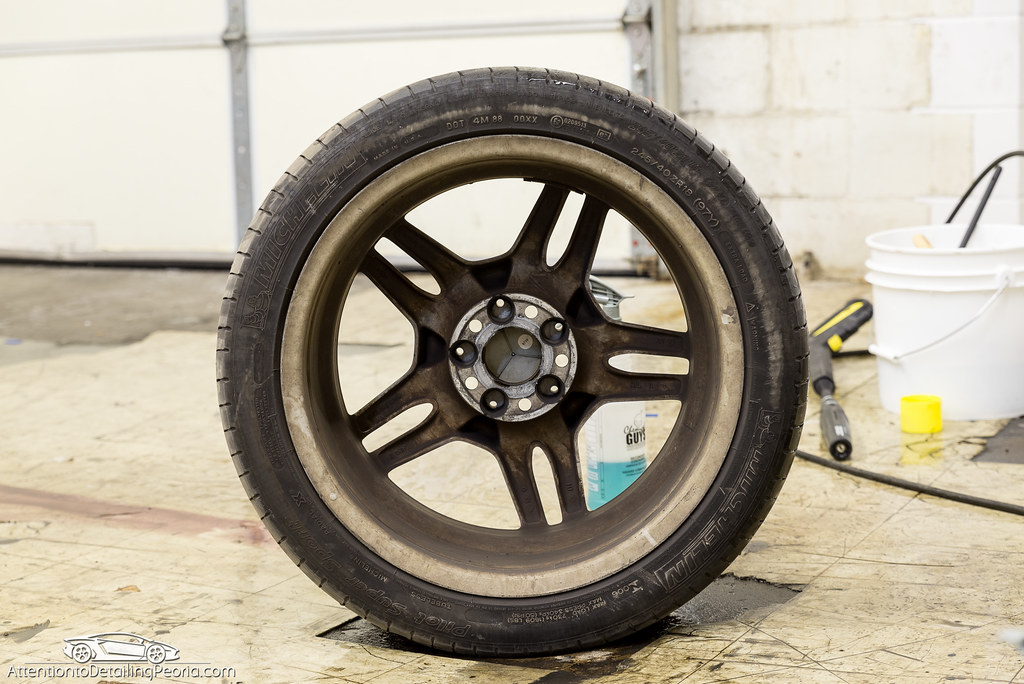
Sonax wheel cleaner plus was sprayed very liberally and left to dwell for a couple of minutes to help loosen the gunk on the surface.
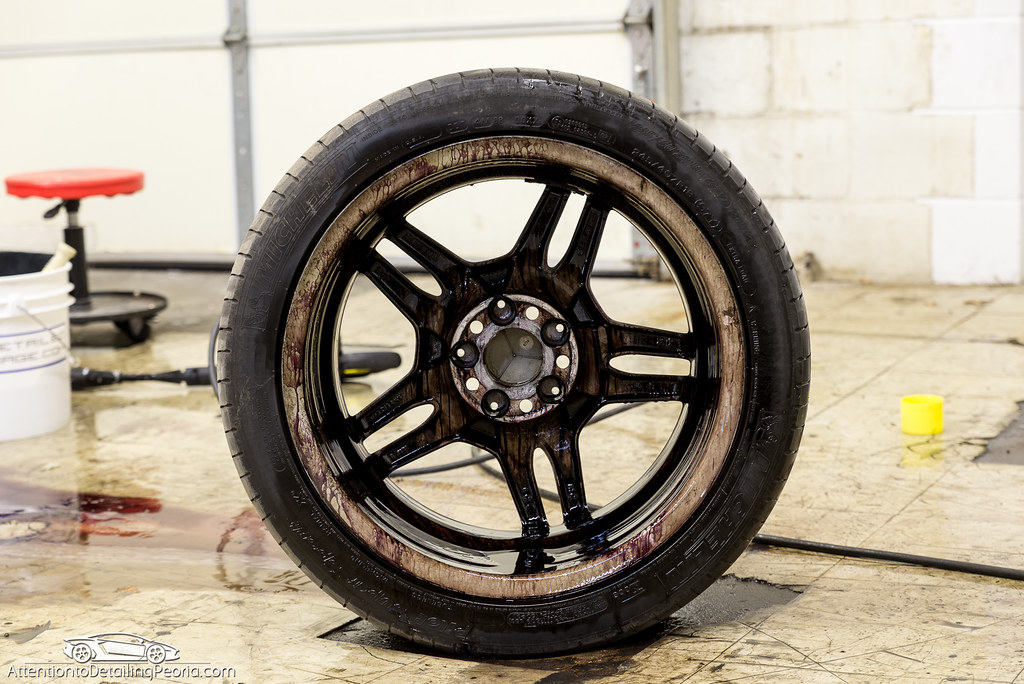
The wheel cleaner did an exceptional job at loosening the filth, allowing me to remove quite a bit of the build up with just a quick pass with a wheel brush.
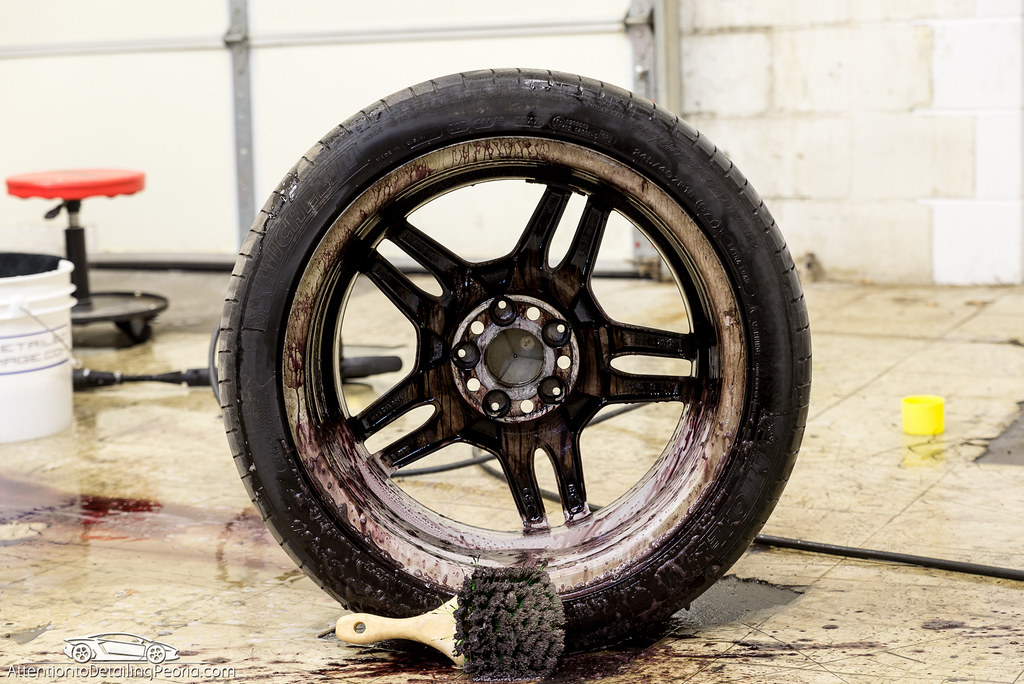
After removing as much loose dirt with my wheel brush as I could, I then turned to the help of tar remover and detailing clay to help remove as much of the remaining build up as we could.
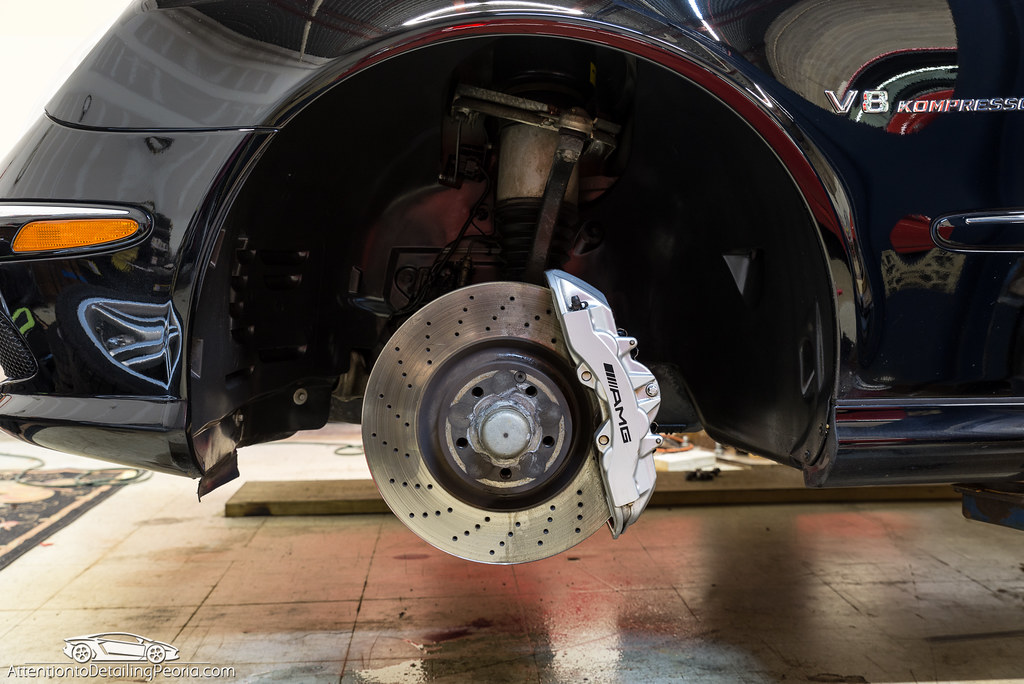
While we had the wheels off, we always take the time to clean up the calipers and wheel wells. They were quite dirty, as you might expect.
After thoroughly degreasing and scrubbing the areas, it was looking much better. The plastics were then treated with some dressing to give them a darker finish.
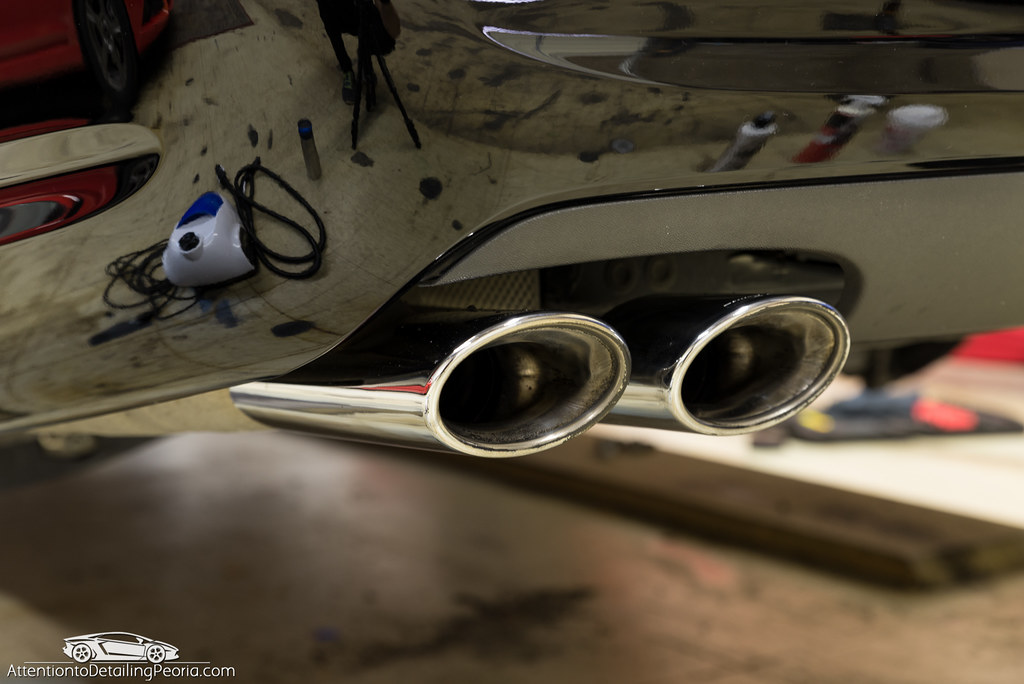
With the car still on the lift, we turned our attention to the exhaust tips. I would also be willing to bet that these have never been properly cleaned and polished due to the amount of heavy build up and pitting that was present.
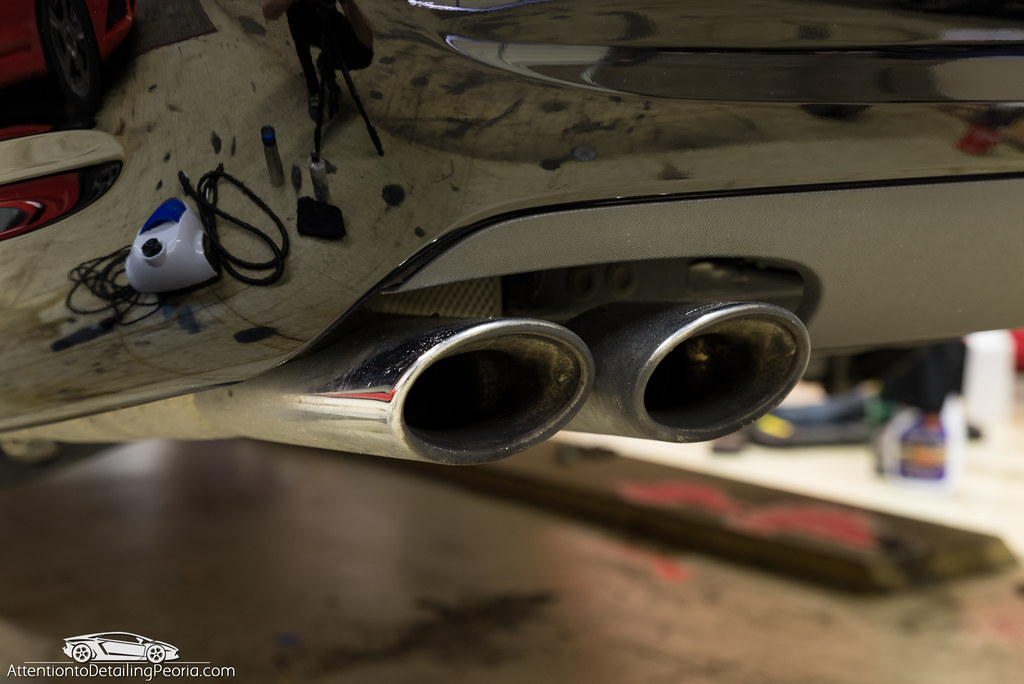
Metal polish, ultra fine steel wool, and some elbow grease created a much brighter finish on the tips.
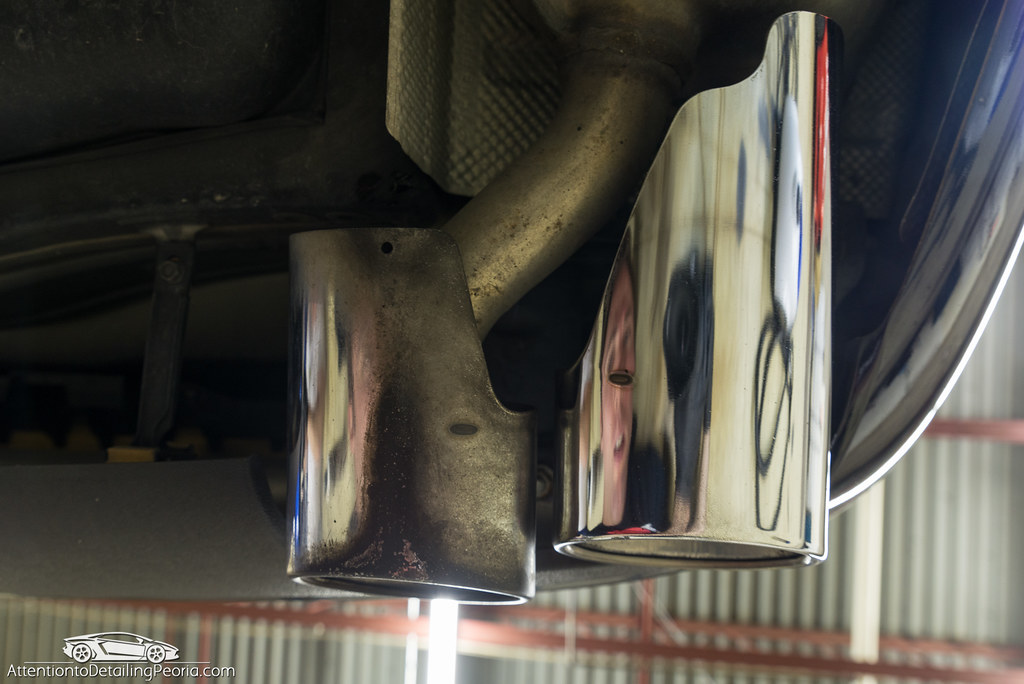
Here is a look at the underside of the tips comparing a properly polished side to a dirty side.
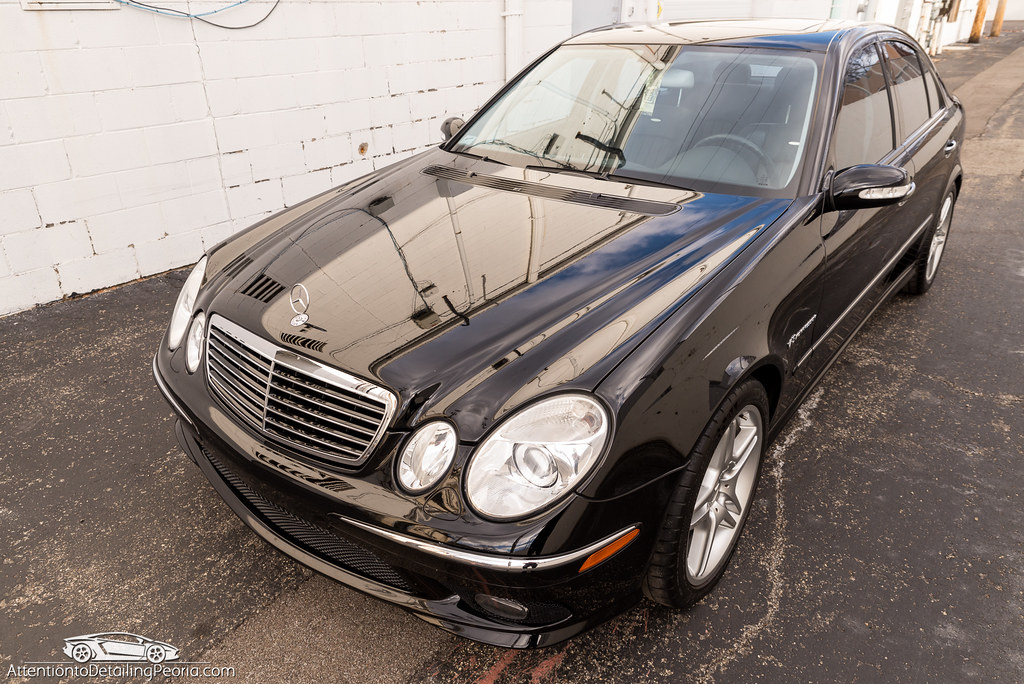
We took the time to tidy up the interior, wipe down all of the door jams, clean up the glass, and tend to any remaining small details before pulling the car outside to finally examine our work.
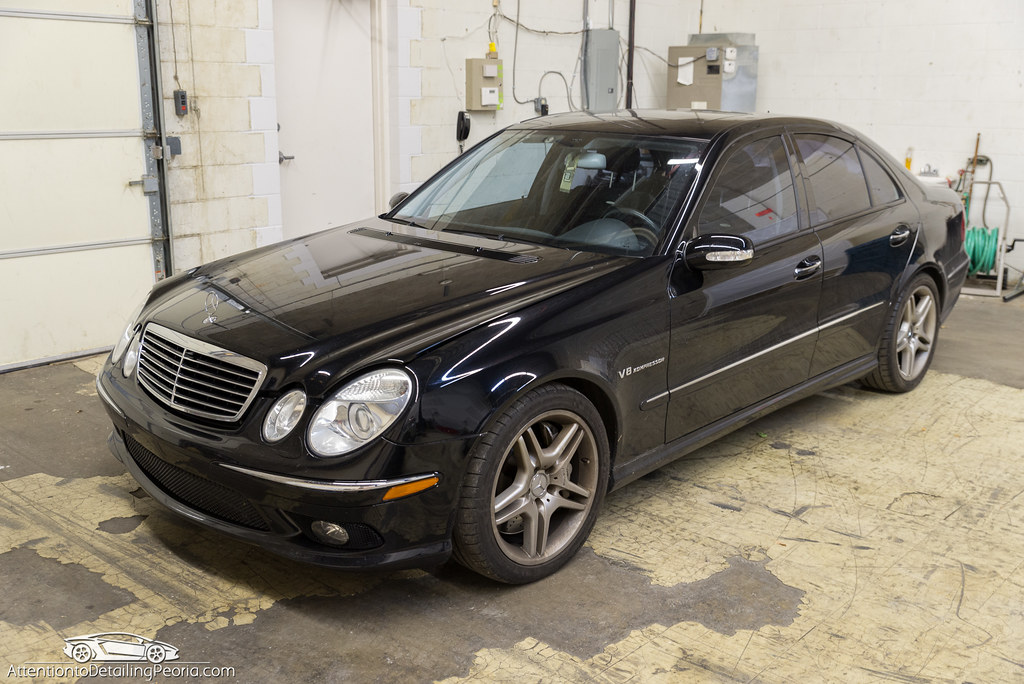
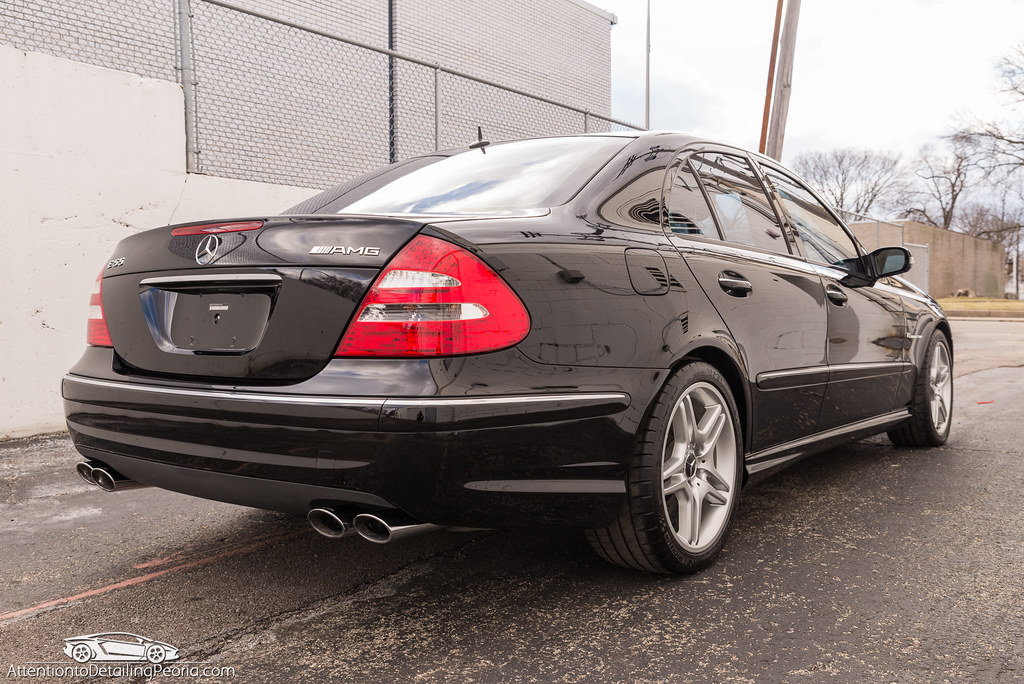
Needless to say, the car looked quite a bit better than most 11 year old vehicles out there on the road.
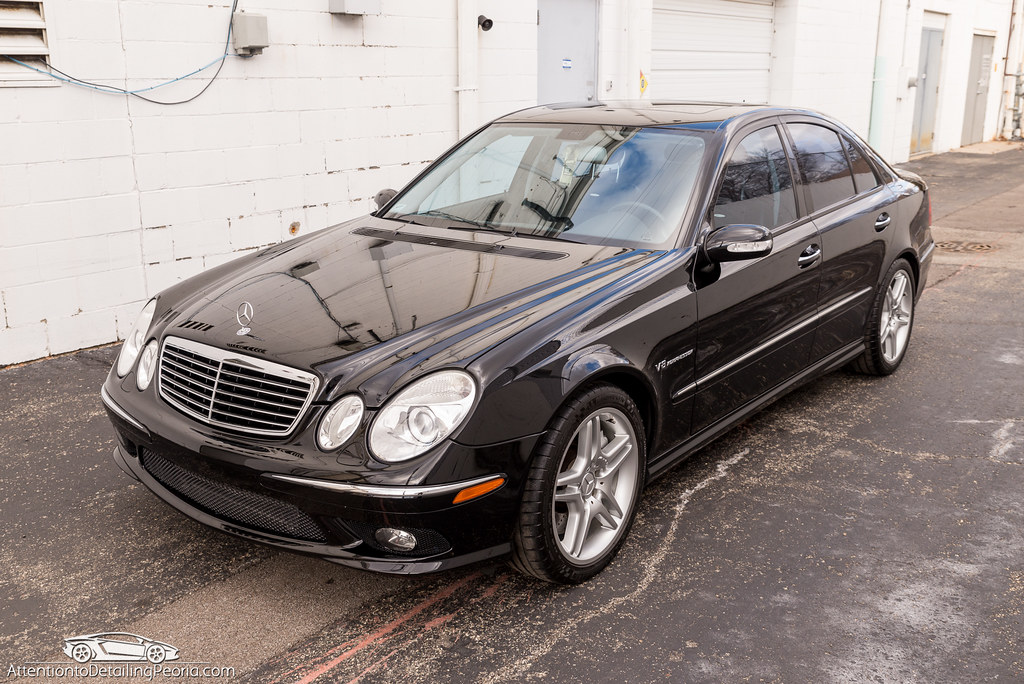
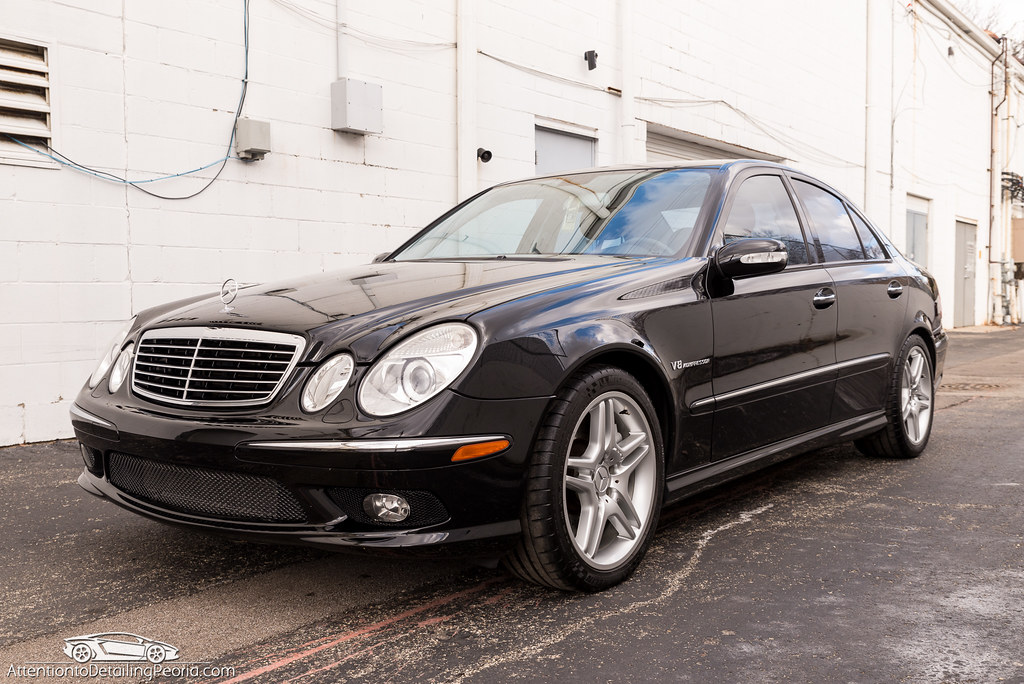
The paint was dark, and reflections were crisp.
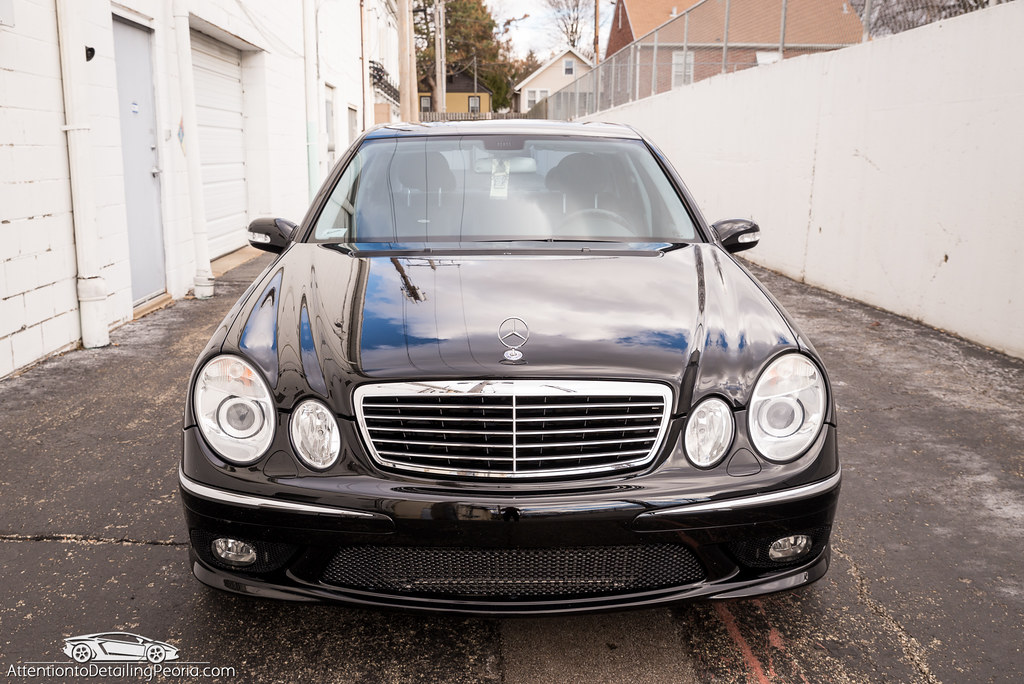
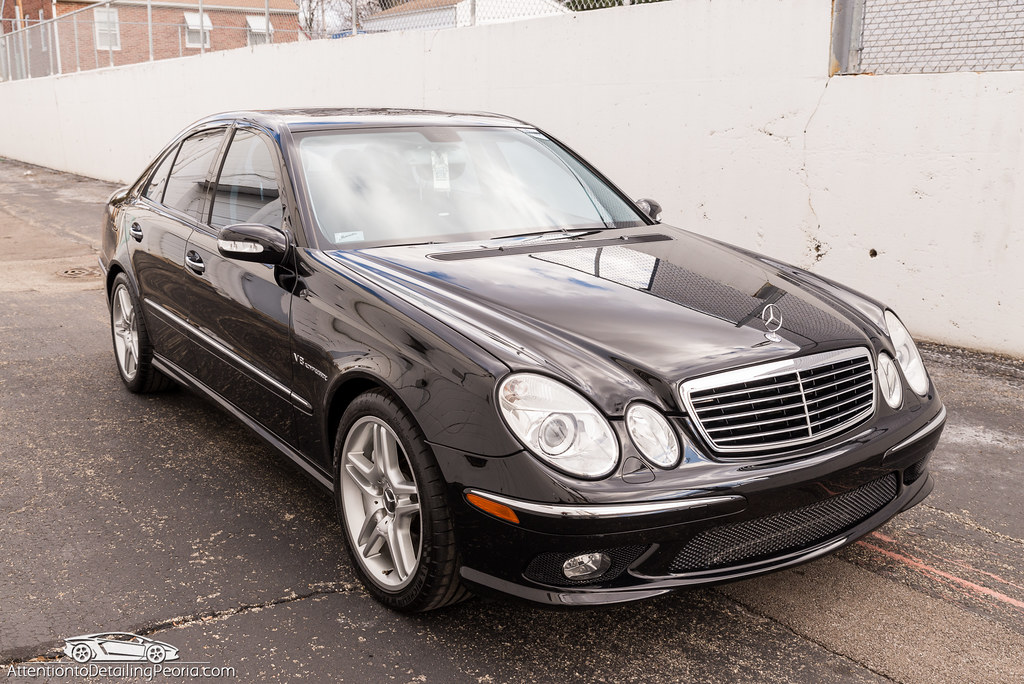
Unfortunately, we didn’t have any sunshine to show off the brilliant finish, but even in the overcast lighting, the jet black finish really popped.
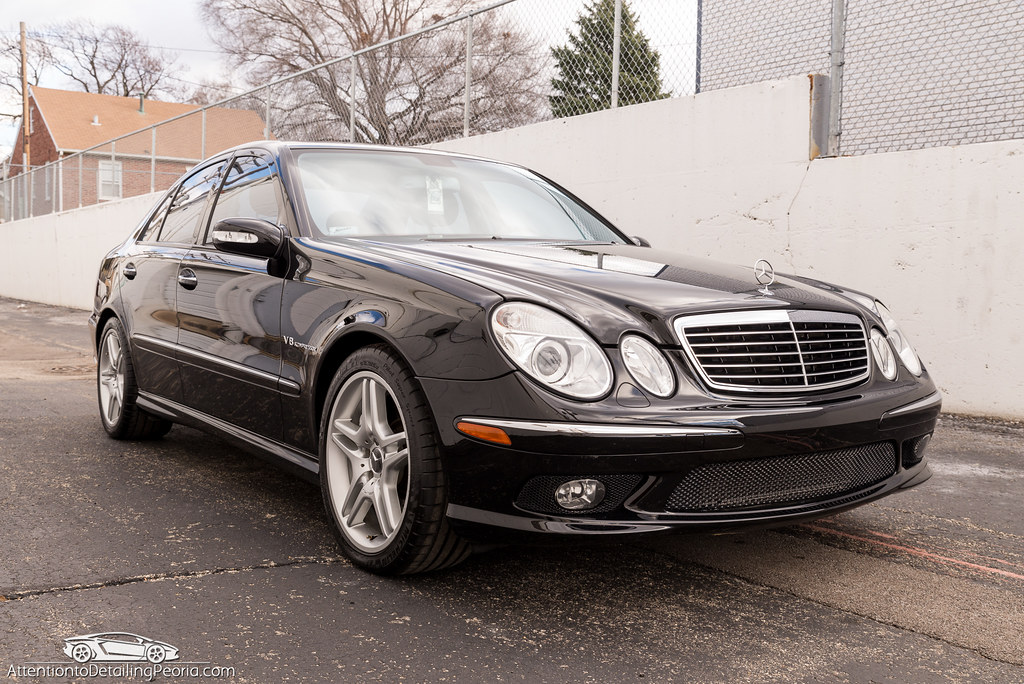
I’ve always been a fan of anything with an AMG badge on it, and this was certainly no exception. This E55 has a timeless sophisticated look to it, and it was a lot of fun bringing some life back into the appearance of this one. What a great way to wrap up our 2016.
Product Overview
Engine Cleaning: Meguiar’s D108, All Purpose Brush, EZ Detail Brush, Master Blaster, Stoner Trim Shine
Washing: CarPro Iron X Snow Soap, Gilmour Foammaster II, Buckets & Grit Guards, Microfiber Mitt, 1″ Boars Hair Brush
Drying: Griot’s Garage PFM Drying Towel, Metro Master Blaster
Paint Decontamination: CarPro Iron X, Stoner Tarminator, Fine Grade Clay, Nanoskin Glide
Paint Correction: Griot’s Garage Fast Correcting Cream, Meguiar’s Microfiber Cutting Pad, Black & Yellow Microfiber Towels
Paint Polishing: CarPro Essence, Rupes Yellow Polishing Pads, Black & Yellow Microfiber Towels
Machines Used: Rupes LHR21ES Mark II, Rupes LHR15ES Mark II, Rupes 75e, Rupes iBrid Nano
Paint Cleansing: CarPro Eraser, Double Thick Edgeless Towel
Paint Protection: GTechniq Crystal Serum Light
Tire Cleaning: Tuf Shine Tire Cleaner, Tuf Shine Tire Brush
Wheel Cleaning: Sonax Wheel Cleaner Plus, Stoner Tarminator, Clay Bar, EZ Detail Brush, Wheel Woolies, Wheel Brush
Wheel Protection: CarPro CQuartz
Tire Dressing: Gyeon Q2 Tire, Tuf Shine Applicator
Glass: Meguiar’s D120, DI Glass Towels
Metal: Chemical Guys Metal Polish, #0000 Ultra Fine Steel Wool, Black Microfiber Towel