

Grab Your Gear!
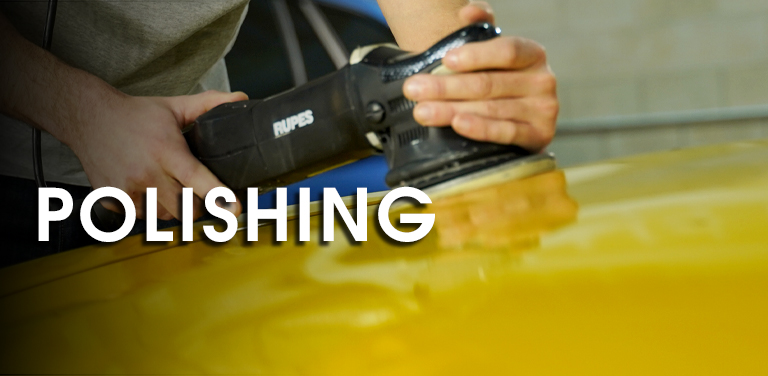
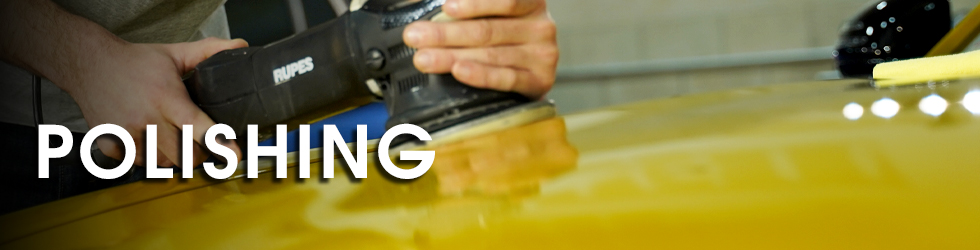
What is Polishing?
Polishing is the process of improving the clarity and depth of your vehicle’s paint by smoothing out imperfections in the clear coat to enhance the appearance. These imperfections can include swirls, light scratches, water spots, etching, oxidation and more. They are usually only microns deep, but they interrupt how light reflects off the surface, allowing you to see these imperfections, especially in direct sunlight.
Polishing is generally very effective on swirls, scratches, oxidation, water spots and light etchings. A common misconception is that polishing completely removes imperfections, especially swirls and ultra fine scratches. In reality, most of them are not fully eliminated, instead, polishing gently levels the edges of the imperfection. At the microscopic level think of each scratch or swirl as having sharp, uneven edges. These jagged edges bend and scatter light in different directions which causes a more dull reflection. This is why you see the swirl pattern or scratch when the sun or a light source hits the paint at just the right angle and you’re less likely to see it during overcast. When you polish you often smooth out the microscopic edges of the imperfections are hard to detect with the human eye. Light can now more readily pass through the clear coat and give you that more sharp and crisp reflection we all crave.
Why Should You Polish?
- Visually remove surface defects that reduce paint clarity
- It restores clarity and a smoother surface, greatly improving the gloss and overall look of any protective layer you apply in your next detailing steps.
- Polishing is usually done only as needed as over-polishing can thin the clear coat over time.
What are the Different Types of Polishing?
- Hand polishing: Can be effective for very light defects or spot work. It is slower, usually requires a lot of arm pressure and rarely matches a machine over large areas.
- Machine polishing: A polisher moves the pad around many times per second, working in the polishing particles consistently. This makes it faster, more effective and easier on your body. Polishers can readily make hundreds or thousands of oscillations per minute; trying to match that by hand is impractical.
What are the Different Polisher Movements?
- Standard Dual-Action (DA) / Random Orbital – Safe and beginner-friendly. The head will both spin and move a set distance from the center of the unit, hence the “dual-action” tag. This combo movement greatly reduces the risk of burning your paint. Good for most detailers, weekend warriors or detailers looking for their first machine.
- Long-Throw (DA) – Some DA units are 6-8 mm, but long throw units feature a larger orbit (15–21 mm). They generally offer stronger correction than a standard (smaller-throw) DA but still very safe and easy to use. It will remove defects quickly and it leaves a good finish with the right pad and polish combination.
- Forced-Rotation / Forced Random Orbital (DA) – A hybrid that adds forced rotations to the random orbit motion. This generally adds power to help you to remove more noticable imperfections that require more power. If you need to apply more pressure to the polisher for added cutting power these units will likely not bog down or stall.
- Rotary (Single-Action) – Pads spin on singular axis for maximum corrective power but you need practice for safe and effective usage. These units will not stall under pressure.
Polishing Pads – What are the Types, Sizes & How to Choose
- Foam pads: Most common. Available in finishing (very soft, minimal corrective power), polishing (soft, light to medium polishing power) and cutting (soft to firm, great for light to heavy cutting power). Choose your pad based on how much power you need.
- Microfiber pads: More cutting power than foam; great for heavy correction with less heat build-up than wool in some setups. Generally good for removing heavier defects, although there are some light microfiber pads for finishing steps.
- Wool pads: Excellent choice for strong corrective power. Can leave a light haze on the surface that is removed with a follow up finishing polish and pad.
- Pads commonly match backing plate sizes: 1″ , 2″, 3″, 4″, 5″, 6″, etc.
- Smaller pads = better for tight areas (mirrors, door edges, spoilers, front bumper).
- Larger pads = faster coverage on big panels but can be harder to fit in tight spaces or control on tight curves.
- Your polishing pad should always be the size of the backing plate, or slightly larger. For example, if your backing plate is 5″, the pad is normally listed as 5″ or 5.5″.
- Pair the power of your polishing pad, to the power of the polish you are using. For example, if you are working with a heavy corrective polish, you want to use a heavy corrective pad.
Pad Materials
Pad Sizes & Shapes
How to Choose
What are the Different Types of Polishes & How to Choose
- Purpose: Removes deeper swirls, ultra fine scratches, noticieable oxidation, and other minor surface defects.
- Cutting Power: Highest.
- Pad Pairing: Microfiber, wool, or heavy cutting foam.
- Finish Quality: Removes fine surface imperfections but may leave haze or micro-marring that needs refinement.
- When to use:
- When you can feel or clearly see the defect.
- When a lighter polish isn’t doing enough.
- When doing a multi-step correction (compound to polish).
- Purpose: Removes light surface imperfections.
- Cutting Power: Medium.
- Pad Pairing: Polishing foam or light microfiber.
- Finish Quality: Can finish very well, often good enough for daily drivers.
- When to use:
- When defects aren’t severe.
- When you only want to do one step.
- When you want a good mix of correction and a sharp reflection.
- Purpose: Remove haze after compounding or use alone for very minor paint correction.
- Cutting Power: Very light.
- Pad Pairing: Soft finishing foam.
- Finish Quality: High clarity, mirror-like finish.
- When to use:
- Second step after compounding to remove haze.
- One step for newer or well-maintained paint with minimal defects.
- Before applying wax, sealant, or coating when you want the best possible shine.
- Purpose: Balances light defect removal while leaving behind a layer of protection.
- Cutting Power: Very light to virtually none.
- Pad Pairing: Soft finishing foam.
- Finish Quality: High clarity for better reflection.
- When to use:
- After compounding or polishing
- On newer or well-maintained paint with minimal defects.
- Combining detailing steps, allowing you to refine and protect in one step, saving time and effort.
- Thoroughly wash and prep the surface. Remove dirt, road grime and iron deposits, embedded contamination, etc. Never polish a dirty panel.
- Inspect under good lighting. Identify the defects you want to remove (use direct light or a detailing light setups).
- Tape edges. Mask trim, plastic and rubber edges you don’t want to polish. This is important as some polishes can stain trim.
- Choose machine, pad and polish and perform a test spot on a less visible panel. Pour at least four 4 pea sized drops on a pad, press against the panel and polish. Inspect results in good lighting to ensure the pad and polish combination removed imperfections and finished down as expected.
- Polish in sections. Work in small sections roughly 2′ x 2′, overlap passes up and down and then left to right, keep the pad flat and move in slow, consistent passes. Don’t press too hard, the machine’s weight often suffices.
- Wipe and inspect. Remove polish residue with a clean microfiber towel and check progress in good light. If haze remains, refine with a lighter pad/polish combo.
- Finish and protect. After polishing, apply a sealant, wax, or coating to protect the newly refined finish.
- Use proper lighting (a bright, direct LED lamp) – you can’t fix what you can’t see.
- Do a test spot before committing to a pad/polish combo – this saves time and prevents surprises.
- Match orbit size to the job: long-throw = faster removal; short-throw = easier control and refinement.
- Don’t apply too much pressure. Let the machine and the product do the work; excess force increases heat and reduces polishing results
- Keep pads clean. Caked pads cut less and generate more heat. Use a pad brush or pad cleaning tool between sections and swap out pads often (cleaning them at the end). In general 4-6 pads per polishing step is recommended.
- Watch pad temperature. Overheated pads can fail quickly and greatly reduce polishing results. If a pad is getting hot or caked up polish in it, swap it out for a new pad.
- Use tape to protect the edges and sensitive trim pieces.
- Know your paint thickness. Older cars or repainted panels may have thin clear coats; be conservative and use a paint meter to be safe.
- Practice on older vehicles or scrap car parts (i.e. hood) or a lesser visible panel to gain confidence before doing a whole car.
- Modern polishers are incredibly safe and easy to use, allowing you to quickly achieve great results.
- When in doubt, step back. If results look too aggressive, switch to a gentler approach.
- Tutorial: How to Prep a Car for Polishing
- 1 Step, 2 Step, The various Types of Polishing Process
- How Much Polish Should I Use on My Pad
- Assessing Paint Condition and Deciding on a Correction Process
- Polishing Pads: How Many Should I Use?
- Do I Need To Polish A Brand New Car?
- Pad Cleaning During and After Polishing
- The 5 Key Elements to Proper and Effective Paint Polishing
- Clear Coat Preservation: Are You Polishing Too Often?
- How Do I Prime My Polishing Pad?
- Ask DI: What is the Difference Between Forced Rotation and Dual Action Polisher Movements?
- How Do I Choose the Correct Pad for a Specific Polish?
- Ask DI – What Polisher Should I Use As A Beginner?
- Read All Polishing Articles
Heavy Cut / Compound
Medium Polish / One-Step Polish
Finishing Polish / Ultra-Fine Polish
Polish with Protection / All-in-One (AIO)

