Tutorial: How to Prep a Car for Polishing
by Todd CooperiderAs detailing enthusiasts look through posts outlining a complete detail of a car, they’re always impressed with before and after photos showcasing the fine polishing skills and products being used. We as professional detailers do our best to make them as informative and educational as we can, and sometimes we even get lucky by adding a bit of humor while we’re at it to keep the readers’ attention.
Many times however, these posts can skip over some of the most important steps in the process…proper preparation of the vehicle and the paint to get it ready for the crucial polishing. If we fail to properly prepare, we may not produce the best results, or worse yet we risk damaging the vehicle. That’s what you call ready – fire – aim!
Because I want to make sure that enthusiasts and detailers alike don’t fire before they aim, I decided to put together an outline for vehicle preparation to make sure that you are getting the most out of your polishing session and achieving the best results.
I know you’re anxious to pick up your Porter Cable 7424XP, Flex, or Makita polishers for a full-blown beautification session on your car, but put it back on the work bench for now because we’ve got some very important topics to cover first. I realize that the prep stage isn’t the fun part, but don’t worry…we’ll get to polishing.
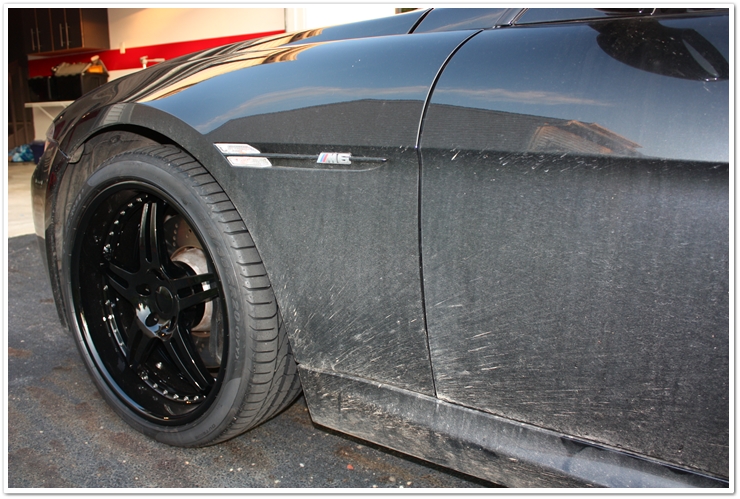
Before we can achieve this:
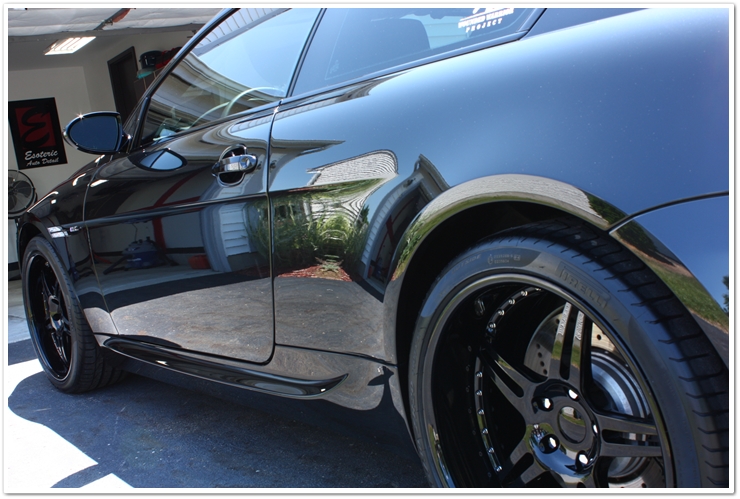
We first need to deal with the realities of this:
Washing and Decontamination
First up is the washing stage. I know this sounds obvious, but stick with me here because I’m going to try to cover some critical information why this is all important. If you haven’t already read through my washing and drying tutorial as well as my Grit Guard 2×4 method article, now would be a good time to check them out so you get a better understanding of how the process works. It’s OK, really…we’ll all stay right here and wait for you to get back.
We’re waiting, and waiting…
Alright, you’re back! Did you pick up on anything that you may have been missing before? There’s some great information in those articles, right? (meanwhile Todd strains shoulder while patting self on back).
Despite the fact that we’re getting ready to polish, we still want to use the same safe techniques as we would when doing a normal maintenance wash. There’s no reason to cause any more damage by improper washing techniques just because we’re getting ready to polish. We’re going to be spending enough time with a buffer in our hands…no need to create more.
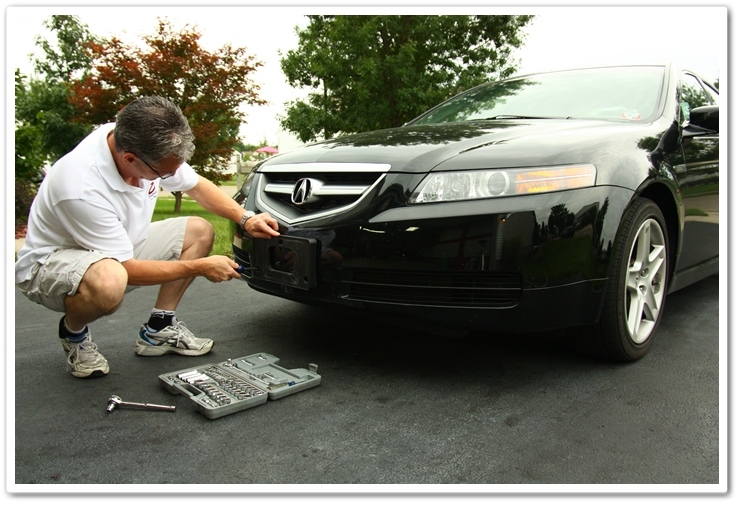
Before starting your wash, remove license plates and brackets whenever possible. First of all these are hiding places for gritty dirt, and secondly they get in the way when polishing. It only takes a few moments to remove and re-install them, but you could spend a whole lot more time taping and trying to polish around them if you don’t.
Be sure to thoroughly clean the vehicle to remove any and all dirt, debris, bugs, leaves, etc. All of this gets in the way of polishing, and if there’s any dirt or debris left on the surface, it can get caught in the pad while polishing and you could risk doing more damage than good.
Not only do we need to remove all the potentially abrasive dirt and debris from the car, but we also need to make sure that the surface is free from any previous wax, sealants, grease, tar, etc. I know that the grease and tar examples are obvious, but do you know why it’s important to remove wax and sealants before polishing? It’s because some of these products can run interference with the the polish and pad. Just think of it as a barrier that rests between the paint that you want to polish, and the polishing media itself. There are some products out there (silicones in particular) that will make the polishing process extremely difficult, if not impossible.
There are a few tools, products, and processes that will help you in your quest to completely free sealants and waxes from the paint. For your wash solution, I would recommend one of the many that offer mixing ratios specificially for this purpose. Products like Chemical Guys Citrus Wash & Clear, or their newer Citrus Wash come to mind. By mixing at these stronger ratios, the wash solution will work to break down previous waxes and sealants. You can also dial in a higher ratio on your Gilmour Foam Gun, and let it dwell on the surface for a while before washing. Once you’ve soaked the car and allowed it to dwell, do your normal wash process with your buckets also filled with a stronger ratio, and use your sheepskin wash mitt.
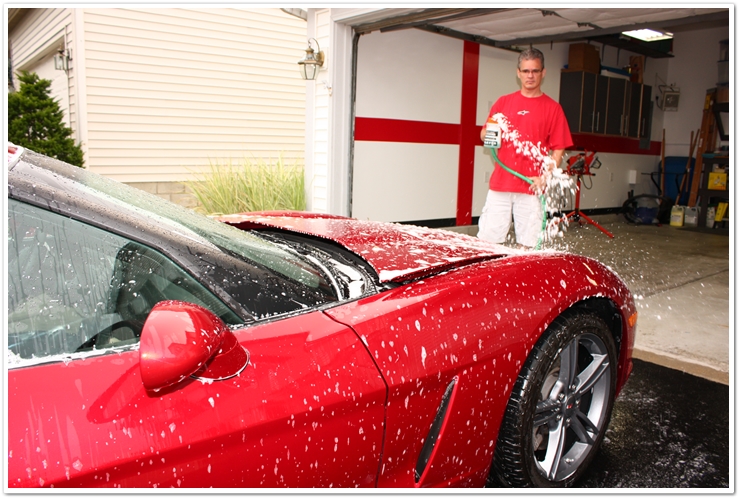
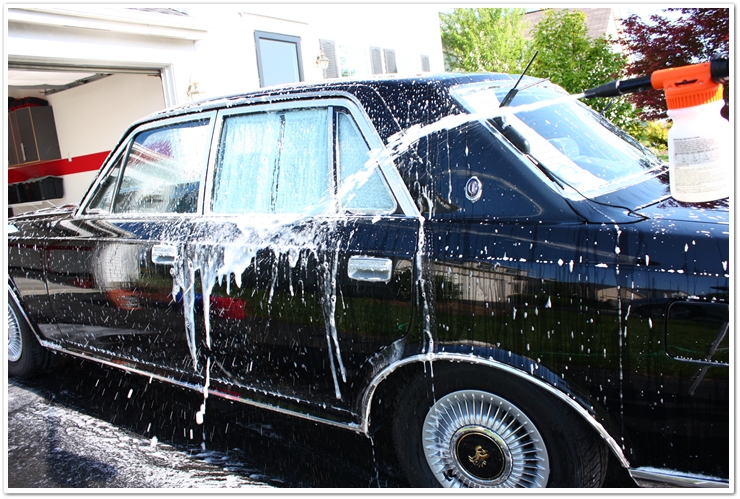
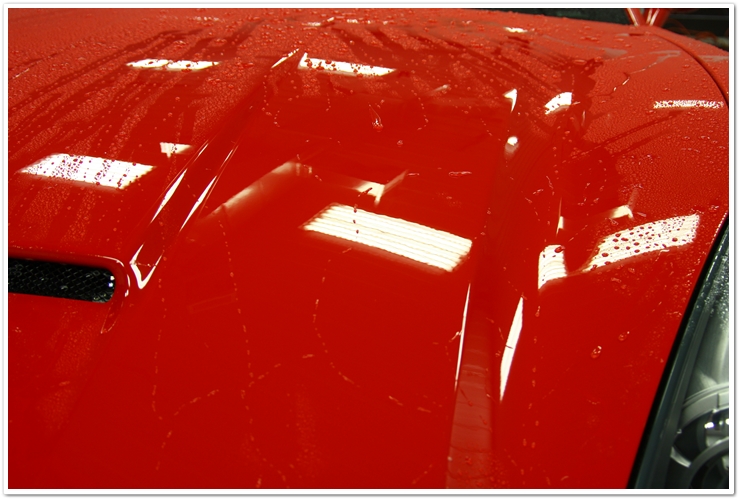
So how do you know whether the vehicle still has a good layer of a wax and/or sealant? Well the easiest way to tell is spray the surface with your hose, and see if the water beads. The tighter the beading, the better the protection is (in most cases). If there’s no beading whatsoever, then shame on you for not keeping a good layer of protection on your car. 🙂
If you look at this picture, you’ll notice how the water is beading nicely, indicating a coat of wax or sealant on the surface that needs to come off.

Another good product for this application is P21S Total Auto Wash. The way I use it to strip wax is to put it in a spray bottle full strength, and pre-soak the area I’m getting ready to wash. As for dwell time, I’ll typically spray all of the horizontal surfaces first, then wash those areas, then spray down one side of the car then wash it, and so on until I’m finished with the entire car.
Caution: Be careful when applying any APC to either painted surfaces, or exterior trim (rubber, plastic, metal) pieces. Despite the fact that many products like TAW are usully very safe, there are still variables out there that could cause irreparable staining. Be especially careful around older vehicles. Always follow the manufacturer’s instructions. When in doubt, simply go from a strong wash to claying to be safe.
In this photo, I sprayed a small section with P21S TAW, let it sit for a few moments, and then washed off that area with a strong solution of CG Wash & Clear. After I rinsed it off, you can see that the water is still beading in the areas that weren’t washed, but the area that I did spray and wash is completely free from wax (no beading).
Claying
Now that we have the car squeaky clean and free from waxes and sealants, it’s time to move on to the next stage of paint decontamination which is claying. If you’re read through my tutorial on how to use a clay bar (another shameless plug of a previous article!), you understand how clay works to remove all of the embedded contaminants from the surface. This is all the stuff that sticks to your paint, but won’t come off in the normal washing process. While I’m washing the vehicle I’ll typically run my hands across the paint in a variety of areas to check for a gritty feeling. This will give me a good indication of how much claying will be required.
The claying process is very important, and it needs to be done with care as well. If your clay gets abrasive debris caught in it, and you’re not regularly kneading the clay to expose a fresh surface, then you can potentially scratch the surface pretty badly. If you follow my tutorial however, you should be good to go.
Use a fresh clay bar (fine grade clay is all that is needed most of the time), and a good quality clay lube like Dodo Juice Born Slippy to ensure a clean surface completely free of potentially abrasive contaminants prior to polishing.

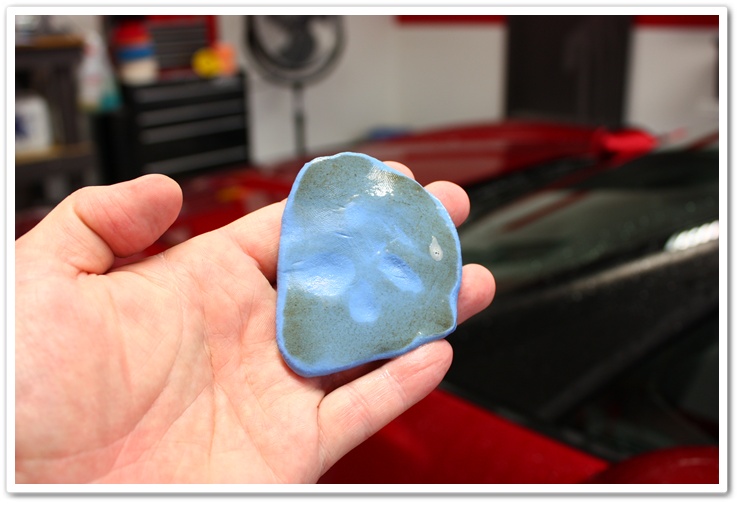
This photo will give you an idea of the level of contaminants that the claying process can remove.
If the finish of the car required a lot of claying, or if you used a quick detailer as a clay lube which left a “slick” surface, then I would recommend washing the vehicle one more time to remove any of the residue. At the very least, wipe down each panel with isopropyl alcohol.
Taping
OK, now we’re ready for polishing right? Well actually no, we are not. We prepped the surface by thoroughly cleaning and claying it; now we need to tape it to protect delicate materials and edges that could potentially get damaged if they come in contact with the buffer (especially if we’re using a rotary).
When we’re looking at places to tape, we want to protect sharp items that could get caught by the buffer pad (emblems), rubber that could get damaged or stained (window seals), places where uneven body panels/seams meet, or simply items that stick out and can easily get hit by a buffer (door handles, underneath sides of mirrors, etc).
For most of the work I do I use 3/4″ tape, and 1/4″ for the edge of protective film (3M Clear Bra or Venture Shield). Just make sure that the surfaces are completely dry because the tape will come off and leave the area unprotected.
Here are a few examples of areas that require taping prior to polishing:
Vinyl graphics that are on top of the clear coat
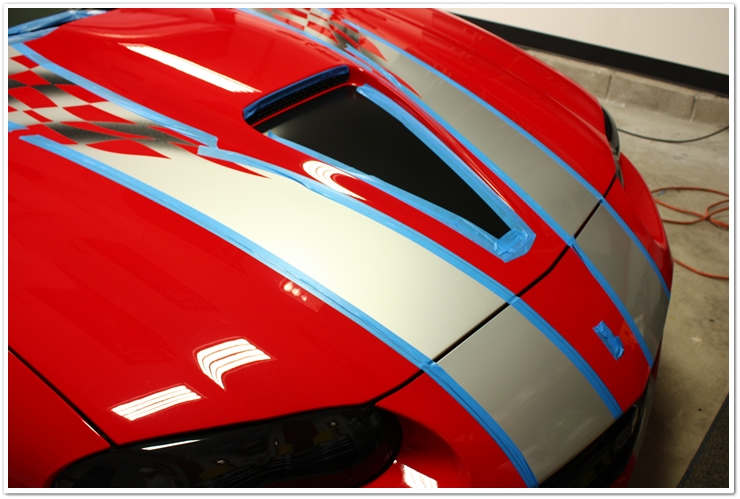
Rubber window and door seals
Protruding edges (the entire edge would get taped here. I only have it partially taped for photo purposes)
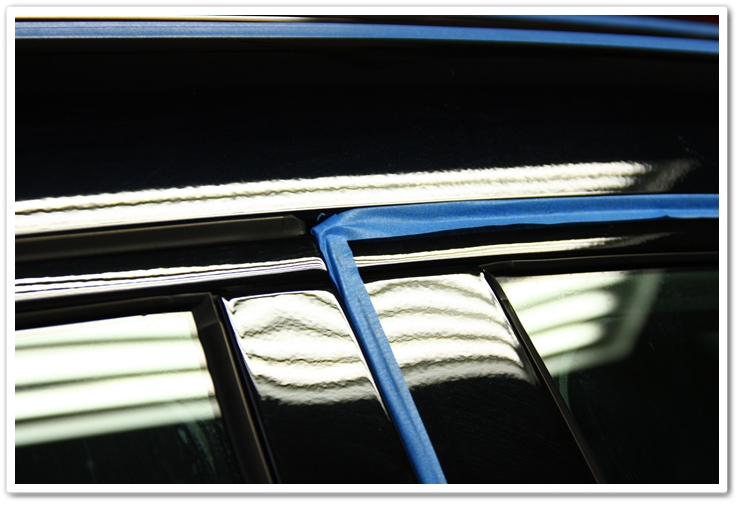
On this photo, I am protecting a rubber window trim, window felt (vertical tape), and you can also see where I have a vertical surface protected for when I’m polishing the horizontal edge just below it.

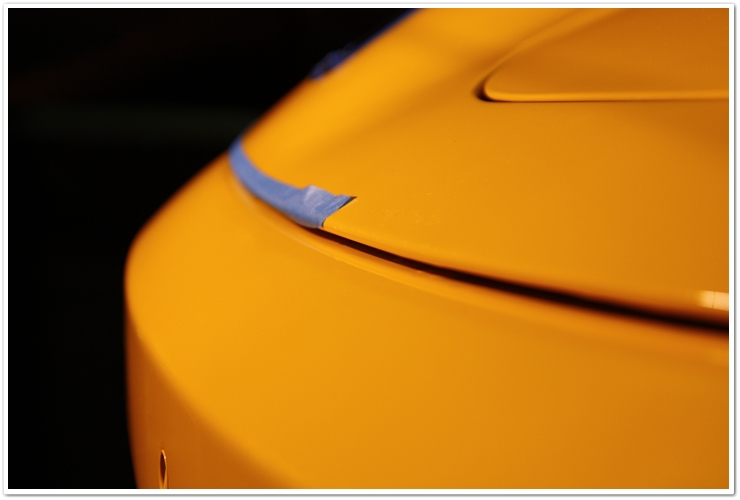
And on this one, there is a small seam that I have taped up with 1/4″ tape just to prevent a buildup of polish. A little bit of tape can prevent a lot of cleanup afterwards! We’ve all seen cars with compound caked in the seams, and I can say that it’s no fun to clean up after it’s hardened.
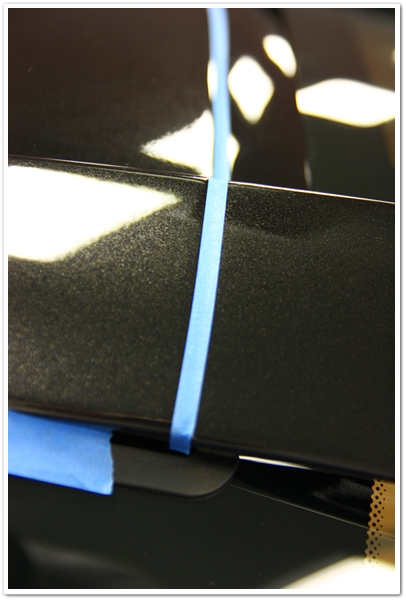
Taping is all about common sense really. If you think that there’s even a slight possibility that a part of the car could easily be damaged or stained, then tape it off.
Well we’ve gone through a lot of information, so let’s do a quick review of what we need to do to prep a car for polishing:
- Thoroughly wash the car using a strong ratio of wash solution to help strip any previous waxes and/or sealants. A clean, wax/sealant-free finish is required to get the most out of our polishing session.
- Clay the surface of the car to remove any embedded contaminants that doesn’t come off with normal washing.
- Tape up all rubber trim, uneven seams, protruding parts (door handles), emblems, and any other part of the car that could potentially get stained by polish or damaged by a buffer.
For convenience, I have put together a couple of Pre-Polish Prep Kits that include all the essentials required to get your vehicle ready for the polishing stage.
Now that we’ve accomplished all of these steps, we’re ready to start polishing to bring the finish to a whole new level. Unfortunately however, that needs to wait for another article. Stay tuned…

Buy Products From This Article
Purchase the products used in this article individually or in one convenient package here!


Hi Todd,
I have a question. If I clay the whole car wouldn’t that already strip off the wax and sealant?
Thank You!
Paul
Paul,
Possibly, but it’s not a guarantee. Since you have to wash the vehicle prior to claying anyways, I find it’s good to just use a little more product (wash solution) and/or add a secondary product (P21S TAW) to ensure you’re getting a truly clean surface that is free of wax and/or sealants prior to claying.
If nothing else, it’s good to have peace of mind knowing that you’ve taken the extra step to fully prepare the surface for polishing.
Thanks,
Todd
Nice article Todd. I have a question.
Would products similar to Megs D101 All-Purpose Cleaner remove wax and sealants?
I like to use it to remove polish residues/oils right before applying the LSP, but just now after reading your article I came to realize I may be able to use it to remove LSP’s.
Thanks!
Enrique,
P21S TAW is an all-purpose cleaner, so there are other APC’s out there that would work in a very similar fashion. The one thing you need to be careful of though is that some can be pretty strong, and can stain the paint or trim of used in too strong of a ratio. If I were going to use a Meguiars product for this, I think the D103 All Purpose Cleaner Plus is more suited for this application than is the D101. I would probably try a 10:1 ratio at first and see how that goes. Or you can add some of it into your Gilmour Foam Gun with your wash solution too.
Thanks,
Todd
I have seen some people use a bit of degreaser in the wash solution as well when using a foam gun to aid in the stripping of the paint! One problem which can arise is the drying of said chemical on the paint if washed outside in the sun, or if it dries on the car. I have to assume APC is similar (having never tried it) so just be careful when trying this approach! Its much more aggressive than car wash solution drying on the paint during a wash! However, I would think that a chemical guys wash and clear wash, follow by an IPA wipe down would ensure the surface is free and clear of all silicone/waxes on the paint!
Todd, one of the first things I learned about washing my car way back when was NOT to use dish soap. I was wondering whether in this situation, where we’re trying to remove the old wax and sealant, if dish soap might be a “budget” option?
Jeff,
It could be, but I wouldn’t make a habit out of it on your own personal car…
Thanks,
Todd
Excellent article Todd.
Question:
I was preparing the vehicle for a polish session and followed the steps you provided here as well as those from your previous article entitled: How-to-properly-wash-and-dry-a-car.
In order to remove my old waxes and sealants I also strengthened the ratio of my CG Citrus Wash as well as a nice spray down of P21S Total Auto Wash. And just like in the photo shown above on the red vehicle, there was no beading when I was hosing down the vehicle, hence the removal of old waxes and sealants.
Now since I was short on time, I decided to dry the vehicle with some Optimum Detailing Spray and call it the evening.
The next morning it was raining and when I was driving my car, I noticed something it wasn’t doing the night before:
IT WAS BEADING AGAIN.
The only conclusion I can come to Todd is that there must be some wax and/or sealant properties in the detailing spray formula as that was the only product I used after the TAW application.
What do you think? If that’s the case, then maybe when I intend on doing a full polish session next time, should I omit using any detailing spray when drying the vehicle?
All the best.
David,
Thank you.
What you’re running into is the polymers in the quick detailer. I will only use this during the drying process for a normal maintenance wash, not for a prep-wash. You should be able to do another wipedown with Isopropyl Alcohol and be good to go.
So to answer your question, do not use a quick detailer during the drying stage when you’re going to be polishing.
I hope this helps.
Thanks,
Todd
Todd I have learned a lot here. I do have some worries about claying an older car? I recently bought a un-restored ’72 Volkswagon Super Beetle. It’s in great shape and the forest green paint is good, but it’s oxidized. Any recommendations on prepping a older car, especially one without the benefit of a luxury car paint job. I feel a good polish (post-prep) would really bring the existing finish to life. Thanks! I have bookmarked your tutorial for use on the rest of the family fleet!
Tracy,
Those old Super Beetles are very cool cars indeed.
No need to worry about claying the older paint…just treat it like you would a modern car. With a good claying and then polishing, I’m sure you’ll be able to remove the oxidation and make it sparkle once again. Just keep an eye out for chips / cracks in the paint, or any edges where there may be small rust bubbles, and be sure to tape these up accordingly when polishing.
Let us know how it goes.
Thanks,
Todd
I’m soaking all this excellent and new information up like a sponge, only just came into contact with this site and your threads today thanks to another car perfectionist mate, both rookies but always keen to get the best know in the detailing of our cars.
First it was the F40 resto then onto this, but before I could continue had to take a step back and read up what I thought was a straight foward task of simply washing and drying a car before prep, how uninformed I was, and damage I was unaware I was doing.
Been itching to get at my car all weekend but sickness has prevented this unfortunately, though giving me the time to sit and read, feeling quite confident and informed now to approach the task ahead.
Thanks
Joshua,
Thanks for the compliments, and welcome to what we consider to be the definitive source for detailing technical information anywhere. All of us detailer / authors put a tremendous amount of effort into our technical articles to make sure that all of our readers are gaining proper knowledge on the art of detailing. On forums, you need to sort through a million posts and have to figure out who actually knows what they’re talking about. On the Detailed Image Ask A Pro blog however, the authors have been selected for their knowledge, and you can be confident that you’re getting the proper advice.
Hopefully you get to feeling better soon so that you can get out there and give your car(s) the proper treatment that they deserve!
Todd,
Very informative read just as your other articles which I have been following for over 6 months now. I have a very peculiar problem which may or may not be something which you see in your region. I live in New Delhi, India and if you have any idea of the conditions here then you will know that they test every ounce of what your car paint can take – harsh summer and winters (42 C high to 2 C in winters), rains and dust storms mix it with road tar, flying debries, small stones etc.
The other problem is that I live in an apartment which implies that I do not have the luxury of washing my car with a hose. The condition of the car, more or less, is similar to the M6 which is the pic 2 in your article – if not everyday .. every other day. I end up washing my car at times either just with water using sponge/soft cloth or with some gentle car wash mix using the same applicators (using gentle pressure as told in your other article) depending on the time i have.
This regime has ensured that I am not able to avoid swirl marks which become more evident because of the black color of the car.
My routine is – wash car every second day either with water or car wash (armor/ meguiars) depending on how solied the car is, give it a through wash every weekend using multiple buckets of water (trying to avoid the grit from previous washes), then wax the car (currently using Midnight fire). I have not been able to source a paint sealant as yet.
So the questions is – what am i doing wrong? is there something I should especially do or change to ensure the car retains its shine and gloss for a longer time while avoiding swirl marks given that it will be cleaned atleast every second day? Is there something which i can apply e.g. BLACKFIRE Scratch Resistant Clear Compound to reduce and inhibit fresh swirl marks? Any othe special considerations due to color and env. conditions?
Apologies for such a long list of questions – but you can understand my agony – a black car and a owner who wants it to be the best looking vehicle.
Many thanks,
Vaibhav
It sounds like you are indeed faced with a very challenging environment to keep your car looking its absolute best. If you’re unable to regularly use a hose and/or multiple buckets, and your car is seeing an extremely high level of dirt and abrasive buildup, and you’re washing the car that often, then it will be near impossible to completely avoid swirls. Even with the absolute best techniques and best wash/dry media, washing a heavily soiled black car that often without access to an ample amount of water to help gently float away the abrasive debris is going to ultimately end up in light swirls. If you had access to a highly durable sealant, it would help in the cleaning process, but it won’t prevent swirls. The Blackfire product you’re referring to won’t help prevent them…it’s designed for getting rid of them.
Since you know that your car is going to get even light swirls because of the conditions and the limitations you have on proper washing, you may want to consider getting yourself a buffer and a light polish so you can remove the swirls a few times per year.
Thanks for reading!
Todd
Thanks Todd, I always thought I must be doing something wrong because of which I keep getting the swirls back. I needed a small clarification –
How many times is few times a year? I ask this because, generally a swirl mark remover – a polish or compound will effectively take away a little of the clear coat applied by the car manufacturer while painting the car. I just want to be cautious on not overdoing the swirl removing process.
I have been able to source the blackfire all finish paint protectant. The idea was to remove the swirls this time, apply sealant and then apply the wax. For safety purposes apply spray wax thrid or fourth day to avoid external contaminants sticking to car paint and for easy cleaning.
Just wanted to check – is applying the spray wax/ quick detailer every third day too much given the amount of washing? Will it help?
Thanks,
Vaibhav
Todd,
Always learning from your articles and this is no different. One question: bought CG Citrus Wash & Gloss to strip sealant/wax; CG directions recommend 1oz per gallon in order to strip sealant/wax but DI articles and product information recommend 2oz/gallon.
Can you clarify the ratio of cleaner to water so as to be effective and not be wasting unnecessary product?
thanks…
Kelvin,
CG now recommends 1oz per gallon just so that people aren’t going for a heavy mixture in the direct sunshine in an area of the world where it’s a billion degrees! Provided you’re doing it in the shade, and it’s not a super-hot day, then you should be safe using 2oz/gal for stripping.
Todd,
Just wanted to pass on my thanks to all of the knowledge you freely pass on to the rest of us – your talent, skill, and dedication is truly amazing. After 10 years, and vowing to never own another black car – EVER, I am again the owner of a black car. I just couldn’t resist how good black looks when properly detailed (albeit for a short while). With your expertise and help, I think I will be able to maintain the condition of my finish without giving myself fits each time I look at my car at night under parking lot lights! Thanks again for being so generous with your time and knowledge.
Jonathan
Thanks Jonathan, and you’re quite welcome! 🙂
As always, informative article with concise and detailed steps to properly prep a car for the compounding/polish
stage. Question for you, Todd. When taping a vehicle, do you cut strips of tape from a roll, and then tape the entire vehicle at one time? If so, how many strips do you cut and where do you place it prior to taping the car? How long are the strips of tape? And lastly, do you have problems with the sticky goo left behind when removing the tape? How do you remove it? Thanks for the article and for any info you can give me about the taping process.
No, you simply apply the tape as you go and tear it off at the end…no need to cut or pre-cut tape. If using proper tape, you will have no sticky residue left behind.
Thanks,
Todd
Todd, I know this is an old article but I have been reading through all of them as time allows just for fun and realized someone on this one mentioned using a quick detailer such as Optimums which has polymers in it and left behind protection (water beading). When I clay bar a car, I usually use Optimum No Rinse (newest version) with some Optimum Instant Shine in it at a higher strength for clay lube. I know both of these products have polymers in them so will be leaving behind protection. I guess I never thought about it but what would you recommend for a clay lube? Optimum even recommends No Rinse as a clay lube when properly diluted…?
Thanks for any info and great articles! Even though some are basic knowledge that I already know, I still love reading through all of your articles and tips because it gives me ideas and shows that there are other ways of doing things that may be easier, better or quicker than the methods I use now. Keep up the great work!
I guess it depends on what you’re doing with the car afterwards. If you’re going to be polishing, then I would at least recommend a strong wash and / or an IPA wipedown after claying to remove any residue or plymers from the clay lube that you use. You could also just use a simple car wash solution in a spray bottle for your clay lube…one that doesn’t have gloss enhancers, waxes, or polymers…that way you don’t have to worry so much about leaving anything on the surface.
Todd…as always.. excellent points.
Hi bro how are you? I have a question 4 you anywhere I have a car Holden vz I use something call ultra this product have water beading but I use this product not beading at all what kind of product can do beading on my car please reply. Thanks bro…
Hi there Todd. I guess you could call me a detailing virgin. I have a black CadillacEscalade (2008). While camping last weekend, I awoke to find my truck covered with bonfire ashes. What a mess! Returning home the next day, I took her to the gentleman that washes and waxes her for me. Dropping it off, I went home to await his call. Very shortly he called, telling me he couldn’t wash the soot off completely. My question is: would using a clay bar take care of this and if so, what should I use to lube the clay bar? Like I said, I’m not experienced with clay bar at all. Appreciate any help you could give me. Thanks
thanks for all this great information!
In what order should waxes, polymers, and / or glazes be applied?
Hard paste carnuba wax, then a finishing glaze?
What about polymers?
Also, why do some protective finishes “sheet” water off, and not bead?
Thanks again
With a use of a good cleaner wax, a lot of these steps are not needed. I’ve found that a hand wax gives better shine and control without the swirl marks with a buffer.
This site is excellent!
Hi Todd! Great article!!! My question is if strong ratio of CG Citrus wash is going to strip wax/sealant off the car, how do i use it in my regular (no polish) washes? am i going to need to rewax/reseal paint every wash? Or just use a weaker ratio? Thank you!!!
Hello Todd – Have 2015 Nissan Rogue in Super Black. Live in rural Oregon with lots of airborne dust from farming – use CG EcoSmart 2 to 3 times per week to limit debris build up / wax with CG 50/50 every 3 to 5 weeks depending on weather.
Regarding polishing “a few times a year” – I have CG V-line 34,36, and 38. If I use V36 and V38 2 times per year to stay after light swirls will I “grind away” my clear coat over say 5 years? Nissan paint defect manual indicates original paint thickness should be between 3.5 and 6 mils. I’ve read that the clear coat should not be allowed to go below 1.5 mills. So, how much clear coat does a “lighter” polish remove, and will I polish away my clear coat over time?
If the only true way to find out is to buy a thickness meter do you have any recommendations for non-professionals?
Hi Todd
Your methodology already represents a quantum leap as compared to the way I usually polish my car.
I am not really overly fuzzy, also because I don’t want to invest time and money in buying and using parafernalia( read” products”) which benefit mostly the manufacturers.
I wonder if the pre-wax step is really necessary and if it rteally adds substantially to the quality of the finish.
I am also kind of averse to having a mirror on wheels if I have to spend many hours on it… Very artificial and time consuming.
Last point: I have a couple of pin head rust-spots barely visible to the naked eye, but I want to stop the progression. How should I handle them without having to buy a chemical laboratory or painting?
Thanks
Franco V.