
“Wheels Off” Part 2: Jacking Your Car Properly
by Marc Harris & Jacob BunyanThis is part 2 of our Wheels Off Series of articles. In Part One of “Wheels Off” we went over some tools and tricks to safely remove your wheels and tires. In Part Two we will go over a critical aspect of raising any vehicle: Proper procedure for jacking.
Now, the disclaimer: Changing a tire is something every driver should know how to do. We are assuming you are competent enough to do this, and you know what you are doing and are comfortable doing it. If you have any doubt, contact a professional. People die from their cars falling on or near them every year. We know a good enthusiast-forum member who died recently from his car falling on him. Do not be a statistic, take care and do things right, or do not do them at all. Your life will depend on it.
We assume, per Part One, that you have to necessary tools clean and laid out ray to use, you know how too use them, and have a proper location to work at. Level, solid ground is essential.
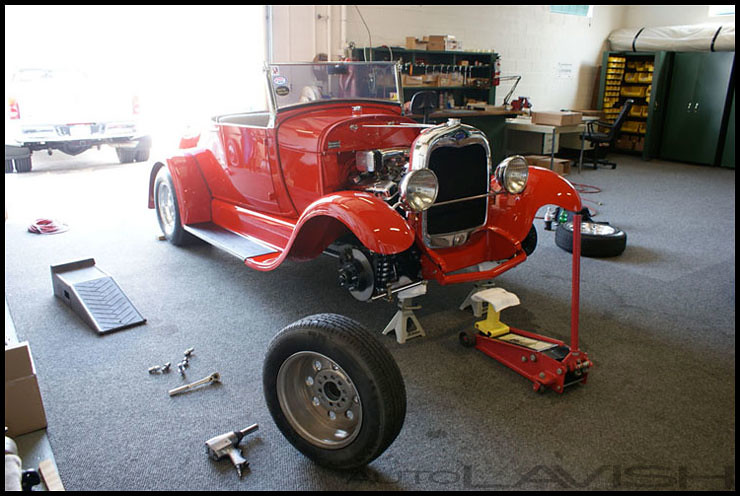
If you plan to do all 4 wheels at the same time you will need a proper way to support the vehicle, very steadily. Four Jack stands are mandatory. A good jack that can lift up the end of the vehicle is also necessary. Jacking up a car with the spare tire jack one corner at a time will result in a vehicle falling off the jack-stands. As you lift the car up, the vehicle moves from its original position, and angle of inclination. The jack stands work if and only if they are plumb and the load is also plumb to the jack-stands. Any angle and the vehicle can slide off the jack-stands.
If you have just one set of wheels and the car is your daily driver, give yourself a weekend to do it the first time. It will not take much time to do once you know your way around the car, have the tools lined up, and all the products you will need. But the first time will take a significant amount of time just in getting the car up in the air and wheels off. If these are an extra set, well… give yourself a weekend anyways 😉
Ready? First, prepare. Make sure you have everything you will need at hand, tools are clean, the vehicle is in position, each wheel is labeled if need be, and area is ready to receive the dismounted wheels.


Position the car so that you have enough space around it to work in. In my two-car garage I will drive the car in at an angle, but slightly off to one side. I leave extra room for the wheels and to move the pressure washer, hoses, and extension cords along one side. Too little room will result in the something hitting something else, maybe even the car. The floor may be wet and the risk of tripping or getting tangled increases significantly. If you find you are out of space with half the car in the air, remember how much it would hurt if the car fell on your foot, or if you were to put a good dent/scratch into a quarter panel. Lower the side and reposition the vehicle.

Remember to label the tires. Many cars today and almost all sports cars have corner-specific tires which need to be mounted in the correct direction and on the correct axle. It might be obvious if you know your tires which one goes where, but it is a good practice to label each wheel with a piece of duct tape and a permanent marker stuck around the tread as to not interfere with the washing process too much. Returning the wheels to the same place assures the owner’s tire-rotation sequence stays the same.
Ready to Lift? Now we will lift the car off the ground, safely.
Make sure you have enough ground clearance to get the jack under the vehicle easily. Many sports cars are too low for a normal jack due to front air splitters and aero enhancements. We have a set of 2×8 boards cut a few feet long with an angled edge we drive the vehicle up onto. This usually gives us enough clearance to get the “slim” jack to the front jacking point. You can add more wood, or just find ramps or other devices all over the web, at local auto parts stores, or your local Sears.
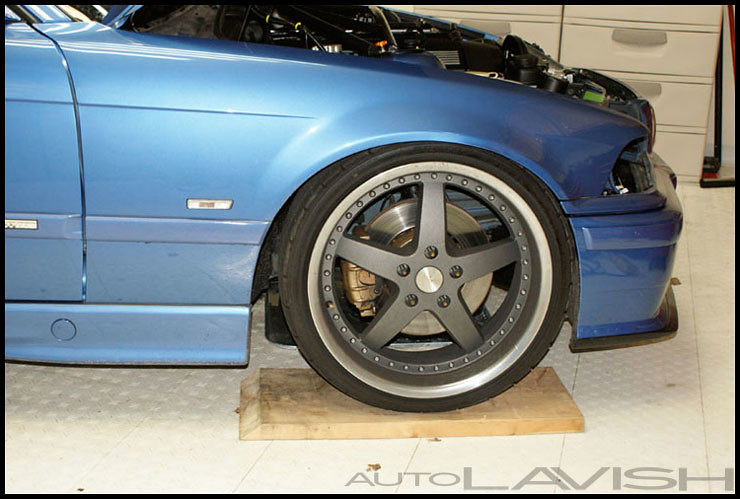
Position the jack under the front jacking point. On most cars it is somewhere in the middle of the front cradle, or engine support cross member. Your owner’s manual might say, but a shop manual surely will. Use the correct point or you will damage your car. The oil pan is not made to support multiple tons of weight, don’t use it as a jacking point!

Before pumping the jack use a breaker bar or long wrench to break the wheel lug nuts or bolts loose. Just break them free, 1/4 turn, remember the weight of the vehicle still rests upon the wheels at this point. Do this for both front wheels if you are starting with the front end.
When using a jack I like to raise the car by the ends. First the front end, typically the heaviest. Watch the body-roll as you lift the car. The car should stay relatively level. Don’t go crazy pumping like a caveman. After a pump or two I will glance over the side and inspect the wheel chokes, jack stands, and vehicle attitude. Then, a few more pumps, and another look to each side.
Now lift the vehicle until the tires are clear off the ground. They do not have to be inches above the ground, but you will have to see how low the jack stands can go and raise the car to this level. Set the jack stands to their lowest setting. Place the jack stands under the correct hoisting points on the vehicle chassis, and slowly lower the jack while watching each jack stand for good and square contact with the vehicle. The higher the vehicle rests on the jack stands the worse the angle against the jack stands, and the more probable the vehicle will fall on you while jacking up the rear half. If you are going to be working on all 4 wheels at once, go ahead and break the lugs loose on the rear and raise that half now. This way, if anything does happen where the vehicle moves too much and falls, it will land on its wheels and tires, not on its brakes or belly.
Once in the air and secure you can remove the lugs and then the wheels. We will go over removing the wheels and placing them in the next segment of this series!


Great series. Subscribed for sure.
Most cars are jackable via the pinch weld points, just behind the front wheels, and in front of the rears. A good place to look for the factory jacking points in the OEM jack storage area for the car you’re working on. Most will have a decal showing where to use the jack.
Also, floor jacks generally only have the round “jacking plate” to lift the vehicle up with. You can purchase, fairly inexpensively, pinch weld adapters for them allowing you to lift vehicles at the factory locations, with a larger floor jack.