Auto Detailing Guide - Sealant
What Do Sealants Do? (Return to Top)
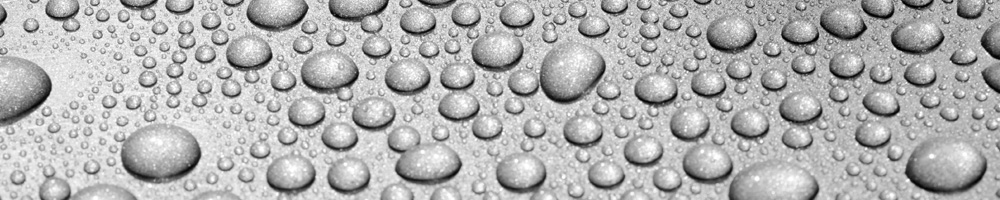
The primary purpose of a sealant is to properly protect your vehicle from the elements. Sealants are designed to bond to your paint and provide roughly 3 to 6 months of protection. This is significantly longer protection than what a carnauba wax offers, which is typically 3 to 8 weeks. The barrier of protection that sealants provide help minimize contamination from embedding in to your paint and makes maintaining your vehicle significantly easier. Another benefit of a sealant is that it will enhance the look of your paint by giving you sharper reflections and more depth and gloss.
Layering and Cure Times (Return to Top)
Applying multiple coats will increase the strength of the protection and durability of the protection. The most important thing to note is that when you want to apply more than one coat, you have to let the previous coat cure. Each sealant's cure time will vary and environmental conditions (i.e. temperature, humidity, etc.) can impact cure times. Most sealants will cure within 1 - 24 hours and the vast majority of any sealant will be cured within the first hour. If you have the time waiting 24 hours is ideal to be absolutely certain but if you are in a rush waiting a minimum of one hour should still work very well for most sealants.
How Long Do Sealants Last? (Return to Top)
In general, sealants typically last between 3 to 6 months. There are many factors that go into determining how long a sealant will last. Some of the major factors are if your car is stored in a garage or outside, how many miles are driven, the type of weather conditions your vehicle is exposed to, how well your paint was prepped prior to applying the sealant, the frequency of washing your vehicle, and type of shampoo. The key is to reapply your coat of protection before the previous coat runs out. As you maintain your vehicle, keep an eye out for how well the water beads and sheets off your paint. If water begins to pool on your paint, then chances are there is little to no protection remaining and it's advised to apply another coat of sealant. A good rule of thumb is to reapply a coat of sealant once a season (4 times a year).
How To Apply a Sealant (Return to Top)
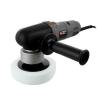
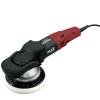
The key when applying a sealant is to stretch the product as thin and far as possible. The saying "less is more" definitely applies to any quality sealant. We do not recommend applying a sealant with a rotary buffer, but it is fine to use a random orbital or dual action buffer using a soft foam polishing pad. Hand applications also work very well and help you get in to tight spaces more effectively.
Random Orbital Polisher
- Step 1: Center your pad on the backing plate
- Step 2: Apply 2 pea sized drops of your sealant on the pad (fresh pads may require a few extra drops)
- Step 3: Visualize your working area, since you're spreading the product as far as possible, it can be as large as a panel
- Step 4: Trace your working area with the sealant on your pad with the buffer off
- Step 5: Turn the buffer on a low speed setting (1 - 3 on the Porter Cable 7424 XP) and spread the sealant evenly through the entire working area
- Step 6: Turn the speed dial of the buffer up (approximately 3 on the Porter Cable 7424 XP) and start in a corner of your working area
- Step 7: Working from one corner to the next, move the buffer at controlled pace (approximately 3" - 5" per second) using no additional pressure
- Step 8: Once you reach the opposite corner, follow the same path back to where you started, but overlap your first pass by approximately 50%
- Step 9: Continue this pattern until you have applied the sealant to your entire working area
- Step 10: Repeat this process, but this time use the opposite direction (if you were working top to bottom then bottom to top the first time around, change it to left to right and right to left overlapping movements)
- Step 11: Once the sealant is spread thinly and evenly over the paint, shut the buffer off
- Step 12: Using a clean microfiber towel, remove the sealant from the paint
- Step 13: Repeat steps 2 through 12 until the entire vehicle has the sealant applied
Product Recommendations

Forced Random Orbital Polisher
- Step 1: Center your pad on the backing plate
- Step 2: Apply 2 pea sized drops of your sealant on the pad (fresh pads may require a few extra drops)
- Step 3: Visualize your working area, since you're spreading the product as far as possible, it can be as large as a panel
- Step 4: Trace your working area with the sealant on your pad with the buffer off
- Step 5: Turn the buffer on a low speed setting and spread the sealant evenly through the entire working area
- Step 6: Turn the speed dial of the buffer up one setting and start in a corner of your working area
- Step 7: Working from one corner to the next, move the buffer at controlled pace (approximately 3" - 5" per second) using no additional pressure
- Step 8: Once you reach the opposite corner, follow the same path back to where you started, but overlap your first pass by approximately 50%
- Step 9: Continue this pattern until you have applied the sealant to your entire working area
- Step 10: Repeat this process, but this time use the opposite direction (if you were working top to bottom then bottom to top the first time around, change it to left to right and right to left overlapping movements)
- Step 11: Once the sealant is spread thinly and evenly over the paint, shut the buffer off
- Step 12: Using a clean microfiber towel, remove the sealant from the paint
- Step 13: Repeat steps 2 through 12 until the entire vehicle has the sealant applied
Product Recommendations
Hand Application
- Step 1: Dispense about 2 pea sized drops in the center of the foam hand applicator pad
- Step 2: Outline your working area, since you're spreading the product as far as possible, it can be as large as a panel
- Step 3: Gently spread the sealant as thinly and evenly in your working area
- Step 4: Using light pressure spread the sealant on the paint using overlapping circular motions
- Step 5: Wait 10 - 20 minutes then use a clean microfiber towel to remove the excess sealant
- Step 6: Repeat steps 1 through 5 until the entire vehicle has the sealant applied
Product Recommendations
Facts and Tips (Return to Top)
- In general, sealants last somewhere between 3 to 6 months
- When applying a sealant, it's best to spread it as thin as possible
- In general, you should give each coat of sealant at least 1 hour to cure and bond to the paint
- Sealants can be layered to increase the depth and gloss as well as protection
- Sealants can be topped with a wax to get the best of both worlds in terms of looks and durability
Related Articles (Return to Top)
Here are a few articles related to Sealants from our Ask-a-Pro Detailer Blog:
- Layering: Waxes and Sealants
- Cure Times for Sealants and Waxes
- Product Review: 303 Touchless Sealant
- Gtechniq C2V3 Liquid Crystal Application & Instructions Video
- Product Review | CarPro Reload
- P&S Bead Maker Review: Best Last Step Product Ever?
- CarPro HydrO2: Application Tips
- What's the Best Way to Remove Old Wax / Sealant So That I Can Apply a New / Different One?
What's Next? (Return to Top)
After applying a sealant, it's best to let the coat cure for at least one hour before applying a second coat or a wax. You may opt to top your sealant with a carnauba wax to help increase the depth and gloss in the paint. Natural carnauba waxes also tend to bead water better than sealants, so maintaining your vehicle is slightly easier when it is protected by a carnauba wax.