
Protection Detailing Guide
by Reece @ DI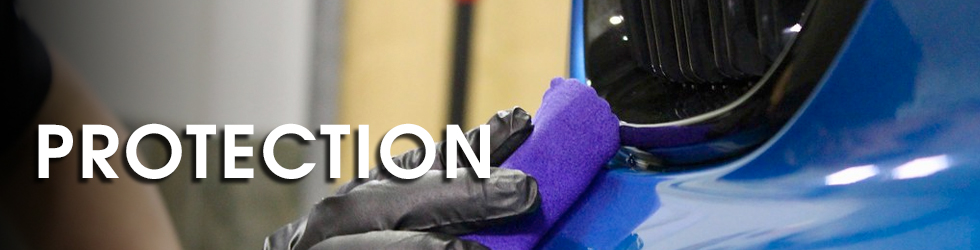
Protecting your vehicle is one of the most important steps as it preserves and enhances the surface so it looks great and maximizes its lifespan. In this section of the guide, we will break down the three most common forms of paint protection which are waxes, sealants, and ceramic coatings, explaining what they are, how they work, and how to apply each one with confidence. Whether you are just starting out or looking to refine your protection routine, this overview will give you a solid foundation to help you achieve better results in less time. Note that in this section we are referring to your exterior painted surfaces covered by a clear coat. If you are looking to protect any other areas (exterior trim, glass, wheels, etc.) please refer to those specific Detailing Guide sections.
What are Paint Coatings?
A coating is a liquid applied by hand to the clear coat that will bond with it to provide a durable layer of protection. Coatings can be made from silicon dioxide (aka silica or SiO2), ceramics, resin, graphene, titanium dioxide, quartz, flouropolymers, etc. all designed to protect the clear coat and paint from environmental damage from UV rays, dirt, chemicals, water, bugs, brake dust, etc. At the same time these coatings should add more shine and gloss to the surface while making them easier to clean in the future. A coating chemically or semi permanently adheres to the surface, providing longer lasting protection than most waxes or sealants.
While the basic application concept of “wipe on, wipe off” still applies to coatings there is more nuance to it compared to traditional sealants and waxes. Rather than applying to the entire car or large sections, waiting some period of time to haze, then removing the residue, a coating application is done panel by panel and sometimes even sections of a single panel due to its quicker flashing time and more semi-permanent nature.
A coating starts as a liquid but as it reacts with air, they quickly start drying and becoming harder, turning into the strong protective layer described above. Before the coating is fully hardened, it needs to be leveled. This is accomplished by wiping off remaining residue from the coated section after a certain amount of time has passed, using a quality microfiber towel.
This amount of time depends on the coating that you are using, but generally speaking it is anywhere from 1-3 minutes on the low end, to 5 – 10 minutes on the higher end. It is always a good idea to have a timer handy when working with a coating because you do not want a coating to dry too much before leveling. In general if you waited too long to remove a section, simply reapply more product to the same area which reactivates the coating and allows you to correct the issue. If you don’t remove the product in time and don’t perform the simple corrective step this will lead to a hazy finish which may require polishing the coated section to fully remove the badly applied coating layer.
Grab Your Gear
How do You Apply a Coating?
In short, the application of a coating includes:
- Make sure the vehicle has been cleaned with a thorough washing and that you are applying on a cool surface, out of direct sunlight. It is not necessary but adding in steps like clay bar and polishing definitely helps ensure the surface is cleaner and smoother.
- Apply a few drops to a small section of your applicator or applicator towel. Using very light pressure work the coating into the paint spreading it very thin, working in a logical pattern to cover a panel or small section thoroughly. One example is to do overlapping passes up and down and then repeat side to side. If you apply too little coating to your applicator, the app may skip when gliding across the surface. If this happens, add a drop or two more to the applicator. If the surface is super slick or never seems to dry, then you may be using a little too much product.
- After you apply to an entire section, set your timer for the desired dry time specific to the coating you are using (usually specified on the bottle or box). When your timer reaches that point, you should take a clean microfiber towel and lightly wipe away excess product, starting from the same place you first applied the coating. This will ensure the coating is applied evenly for maximum protection and aesthetics.
- Inspect your results upon completion, if you see some haze, try wiping the area again to remove it. If you still see some haze repeat Steps 2 and 3 right away.
- After the panel or section looks good continue with Steps 1-4 until the entire car is protected.
What is Layering and Cure Times?
Similar to the dry times mentioned above, cure times will vary from coating to coating. The term “dry time” refers to the coating going from liquid to a more solid state during application, at which point it needs to be leveled with a towel so it can bond to the surface and it optimizes the appearance. Leveling is simply wiping away excess coating, which leaves you with an even coating layer. “Cure time” refers to the amount of time a coating needs to fully harden and be resistant to the environment and this time starts after the coating is leveled. Most coating manufacturers require a cure time of 24 hours before the coating can be exposed to water that can potentially dry on the surface. Most also require no washing with any detergents for 4-7 days after application. Generally, coatings will fully cure anywhere from 1-4 weeks. This cure time can be accelerated by using certain lamps to speed up the curing process.
Layering is possible with most coatings, but the directions are notably different than waxes or sealants. In the case of coatings, you will usually need to apply a second layer within 30 – 60 minutes of the first layer in order to get a bond with the first layer. Reason being, once the coatings start to dry and cure, they become more and more hydrophobic and resistant to anything sticking, including consecutive layers of that same coating. If you try to apply another layer on top of a coating after a few days, it will most likely “reject” it and it would be a waste of time. Most coatings can work with two layers and some 3 or more, but it will vary depending on the manufacturer. Make sure you consult the label or manufacturer for specifics about layering.
How Long Do Coatings Last?
Coatings generally last 1-8 years, but the actual lifespan depends on proper prep, application, maintenance, garage vs outside storage, and various environmental factors. Look for independent reviews and lab testing to help establish realistic expectations compared to some manufacturer claims. Proper washing, application and care over the life of the coating, can help them reach or even exceed their stated durability. If you apply coating toppers you can reasonably expect to increase the lifespan of the coating. Overall coatings are much more durable than waxes or sealants and will need to be applied far less often.
How do You Maintain and Re-Apply a Coating?
There is nothing special when it comes to coating maintenance aside from not being able to use clay bar or polishing the surface. Clay bars have strong cleaning power and can diminish the coating. Using chemicals pH neutral, but strong cleaners (i.e. tar and iron removers) when necessary will be much better for the longevity of the coating. Most polishes will try to remove the coating so they should only be used if that is your goal. Otherwise, proper washing and drying techniques will keep the coating looking good and continuously protecting.
It is never necessary but if you want added protection and shine use a coating topper. Coating toppers can involve many different ingredients but the function is usually the same as they provide further protection with a faster application than your coating. These products are usually spray on or used in a special shampoos for exterior surfaces and will help sheet dirt, grime, water, etc. from the surface of your coating while preserving the paint coating you recently applied. If you choose to top your coating, you will still have a great base layer of protection beneath your topper since the coating will still be present, but the beading, sheeting, dirt/dust attraction, and other properties that you observe will be characteristic of whatever product you have used to top the coating. While variations of waxes and sealants might be helpful there are many coating manufacturers that don’t recommend this as they often can’t bond with the coating.
Re-application will depend on a variety of factors. You can reapply a coating to your vehicle when the original layers performance starts to fade. Signs include weaker water beading, slower sheeting, and the surface feeling less slick even after a proper wash. If a proper wash process and using a topper does not restore those properties, it is a good indication the coating has worn enough and it is time to reapply. If you find that there is any coating layer still present on the surface, some level of polishing is required prior to ensure all old layers of coating have been removed completely.
What are Sealants and Waxes?
Waxes and sealants are two traditional forms of paint protection that serve the same overall purpose of adding gloss, slickness, and protection to your clear coat and paint.
Waxes, traditionally made from carnauba harvested from the leaves of the carnauba palm tree (aka copernicia prunifera) in Brazil. Raw carnuba wax is blended with other natural and/or synthetic ingredients so they are usable for detailing purposes. Waxes are known for their deep gloss that many detailers and enthusiasts love. They enhance depth and color, but generally offer shorter durability (around 3-6 weeks).
Sealants are fully synthetic and engineered for longer lasting protection. Sealants replicate waxes but with less moisture content so they are generally more resistant to heat and the elements. They generally bond to the paint better than a wax and can last longer. While the look is slightly different from traditional wax, they are generally more durable (around 3-6 months). The shine is sometimes not quite as deep as a wax but should still look very crisp and reflective for a great shine.
While the above definitions list the general differences between waxes and sealants, it is important to check product labels or with the manufacturers if you have specific needs. While sealants generally offer longer lasting protection, waxes might protect against certain forms of contamination better, even if it is for a shorter period of time.
Grab Your Gear
How do You Apply Sealants and Waxes?
Application methods are similar for both products but there are some differences.
- Prep the surface, washing and drying thoroughly. It is not necessary but for the best results you can clay and polish beforehand. Also, make sure you are applying on a cool surface and out of direct sunlight for best results.
- Apply a thin, even layer. Use a foam or microfiber applicator and work one panel at a time. A little goes a long way, thin layers cure better and wipe off easier.
- Allow to haze. Waxes and sealants typically haze within a few minutes but some sealants may need slightly more time depending on the formula.
- Buff off gently. Use a clean microfiber towel to remove excess product and reveal the final shine.
- Note that waxes and sealants will continue to cure on average for the next 12-24 hours, so keeping them away from water (washing, rain, etc.) for this period of time is extremely important.
- During the application avoid any rubber and un-coated plastic trim. Traditional waxes and sealants can stain these areas, causing an ugly white mark. If you hit the trim just clean it as soon as possible with a light degreaser.
Both can be applied by hand but only liquid waxes and sealants can readily be applied by machine for faster and more even coverage.
Bonus: Coatings mixed with sealants can be applied by hand with a spray on, wipe off application. These formulas skip the hazing and can often be applied to all exterior surfaces (i.e. paint, glass, trim, etc.) without staining, greatly reducing application effort and time.
What is Layering and the Cure Times for Waxes and Sealants?
Layering can increase gloss and durability, but timing is key.
- Sealants: Most require 12–24 hours of cure time before adding another layer, allowing the polymers to fully bond. Adding a wax on top of a sealant is also common, this gives you the durability of synthetic protection with the warm glow of carnauba wax.
- Waxes: You can typically apply a second layer after 20–45 minutes, once the first coat is set. Additional layers deepen the look but won’t dramatically increase protection. After application, most waxes also cure for the next 12-24 hours on average.
How Long Do Waxes and Sealants Last?
Durability varies based on product quality, application, and maintenance.
- Sealants commonly last 3–6 months, and premium formulas sometimes extend beyond that.
- Waxes usually last 3–6 weeks, with some hybrid formulas, utilizing sealants, stretching to a couple of months.
Regular washing with pH-balanced soap, avoiding harsh chemicals, and occasionally boosting protection with spray waxes or sealant toppers will help maintain performance.
Pro Tips
Coatings
- Most coatings are intended to protect the paint, but there are options for wheels, glass, plastic, vinyl, leather, fabric, etc. The application process is very similar, but material specific coatings will be specially formulated for those areas and are more durable overall.
- When applying a coating, remember that leveling usually happens faster than applying. This means you need to pay attention to how much time passes between laying the coating onto the paint and when you level that specific spot. If the timing is off, some areas may cure more than others, leading to an uneven finish.
- Working in small sections is encouraged so you are not too rushed. Another way to help resolve leveling issues above is to do 2 layers of the coating and simply start from the opposite end of the panel on the second coating to try and apply as evenly as possible.
- Cure times can change based on your local environment (temperature and humidity), so perform a test spot to make sure the coating is applying properly.
- Consumer coatings were more finicky to apply when they hit the market, however, overtime application has become much easier. The cure times have suggestions, but manufacturers have formulated these products to wipe off much easier. Simply put, cure times can change slightly, but the window for easy removal and leveling has expanded drastically.
Sealants and Waxes
- In general, you should give each coat of sealant at least 1 hour to cure and bond to the paint before adding another layer.
- Sealants can be layered to increase the depth and gloss as well as protection. You can use another layer of the same sealant, or top it with a carnauba wax. 1 layer is great, but we do not recommend adding more than 2-3 for best results.
- Apply your wax as thin as possible, only a microscopic layer of wax actually bonds to your paint, excess wax is just wasted
- In general you should give each coat of wax 1 to 24 hours cure time
- Just like sealants, waxes can be layered for additional protection.
- Always apply the more durable form of protection first. For example, you should apply a sealant first as they can last 3-6 months. If you applied a wax first, then topped with a sealant, the sealant that generally lasts longer will only last for as long as the wax later underneath.
Related Articles
- The Benefits of a Paint Coating
- Coating Application: How To Reduce Marring
- Maintaining Your Paint Coating
- Gtechniq: How to Prepare Paint for a Ceramic Coating
- The Truth Behind Wild Coating Claims
- Nano Coatings: When to Replace & How to Recoat
- Ask DI: Can I Apply Ceramic Paint Coating to Trim?
- What Coating Should I Buy?
- Layering Coatings: How Much is too Much?
- Professional Coating Application Techniques
- Glass Surfaces: Should I Apply a Glass Specific Coating or Paint Coating?
- Ask DI: What is the Best Microfiber Towel for Coating Applications?
- Why Ceramic Coatings Require Regular Wash Cycles
- Read All Coating Articles


