Auto Detailing Guide - Coatings

What Are Semi-Permanent Paint Coatings? (Return to Top)
While the idea of "wipe on, wipe off" still applies, the application process of coatings differs quite a bit from both sealants and waxes. Rather than applying to the entire car, waiting some period of time to cure, then removing the residue, a coating application is done panel by panel and sometimes even sections of a single panel due to its quick drying time.
A coating starts as a liquid that is poured onto an applicator and applied to a section of the paint. Coatings react with air quickly and start drying and becoming harder, turning into the resistant layer described above. Before the coating is fully hardened, it needs to be leveled. This is accomplished by wiping off remaining residue from the coated section after a certain amount of time has passed, using a quality microfiber towel.
This amount of time depends on the coating that you're using, but generally speaking it's anywhere from 1 - 3 minutes on the low end, 5 - 10 minutes for some "medium" drying coatings and then 15 - 20+ minutes for slower coatings. It's always a good idea to have a timer handy when working with a coating because you do not want a coating to dry too much before leveling. This will lead to a hazy finish which will at the very least require quite a bit of elbow grease to fix and at worst may require polishing the coated section to fully remove the badly applied coating layer.
How To Apply a Coating (Return to Top)
In short, the application of a coating includes:
- Step 1: Make sure the vehicle has been thoroughly cleaned, which ideally includes a wash, iron remover, decontamination pad/towel or clay bar. Polishing before hand is also a must to ensure the surface is clean, smooth and looking it's best.
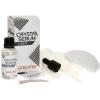
- Step 2: Apply a few drops to a small section of your applicator or applicator towel. Using very light pressure work the coating into the paint spreading it very thin, working in a logical pattern to cover a panel or small section.
- Step 3: When your timer reaches the point you should start leveling take a clean microfiber towel and lightly wipe away excess product, starting from the same place you first applied the coating. This will ensure the coating is applied evenly and level for maximum protection and aesthetics.
- Step 4: Inspect your results upon completion, if you see some haze, try wiping the area again to remove it. If you still see some haze repeat Steps 2 and 3 right away.
- Step 5: After the panel or section looks good continue with Steps 1 - 4 until the entire car is protected.
Product Recommendations
Layering and Cure Times (Return to Top)
Similar to the dry times mentioned above, cure times will vary from coating to coating. By "dry time" I'm referring to the coating going from liquid to a more solid state during application, at which point it needs to be leveled with a towel for a proper bond and good looks. "Cure time" refers to the amount of time a coating needs to fully harden and be resistant to the environment and this time starts after the coating is leveled. Most coating manufacturers require a cure time of 24 hours before the coating can be exposed to water that can potentially dry on the surface. Most also require no washing with any detergents for 4 - 7 days after application. Generally, coatings will fully cure anywhere from 1 - 4 weeks. This cure time can be accelerated by using certain lamps to speed up the curing process.
Layering is possible with most coatings, but again, very different than when using waxes or sealants. In the case of coatings, you will usually need to apply a second layer within 30 - 60 minutes of the first layer in order to get a bond with the first layer. Reason being, once the coatings start to dry and cure, they become more and more hydrophobic and resistant to anything sticking, including consecutive layers of that same coating. If you try to apply another layer on top of a coating after a few days, it will simply "reject" it and it would be a waste of time. Most coatings can work with two layers and some 3 - 5 or more, but it will vary depending on the manufacturer. Make sure you consult the label or manufacturer for specifics about layering.
How Long Do Coatings Last? (Return to Top)
As mentioned in the first paragraph, coatings generally last 1 - 3+ years. This means that a coating will be reapplied much less frequently than waxes or sealants, but that doesn't mean that you can't apply a wax or sealant on top of the coating. It's actually encouraged so as to provide even more protection and protect the coating investment. Due to a coating application requiring polishing prior, you'll want to reapply a coating at a point where it's starting to diminish due to age or when the paint starts looking a bit swirled and it's time again for polishing. This will vary depending on maintenance done to the coated vehicle.
Maintenance and Re-Application (Return to Top)
There is nothing special when it comes to coating maintenance aside from not being able to use clay bar. Clay bars have strong cleaning power and can diminish the coating to some extent. Using chemicals such as IronX and TarX when necessary will be much better for the longevity of the coating. Otherwise, proper washing and drying techniques will keep the coating looking good and continuously protecting.
Re-application will depend on the look of the car, strength of the coating after a certain time and personal preference. As mentioned above, some level of polishing is required prior to applying a coating. This should be done either when the coating is on its last legs or if the paint condition is not to your liking anymore. If polishing to remove defects, keep in mind that some coatings can withstand a fine polishing, which means that you may be able to remove some swirl marks without fully removing the coating. At this point you need to decide whether you want to do a more involved polishing and re-apply the coating or if you simply want to stay on top of it with a wax or sealant every few months until the coating gives way and needs to be applied again.
Product Recommendations
Facts and Tips (Return to Top)
- Similar to waxes and sealants, there are numerous coatings available. Most coatings are intended to protect the paint, but there are also options for wheels, glass, plastic, vinyl, leather, fabric, etc. Generally speaking, the application process is very similar for all coatings and for all areas of the car. Obviously you want to heed the manufacturer's instructions because a mistake in coating application can be costly in terms of both time and money.
- Coatings can be seen as a sacrificial layer to help preserve the paint on a vehicle. As we mentioned above, at some point you will need to polish the car again and reapply the coating. We hope that at this time, all or most the required polishing is being done within the coating layer, thus preserving the clear coat as much as possible. Since the coating adds a measurable layer of protection to the paint surface, this layer can absorb a lot of swirl marks, stains, etching, etc. and help keep the clear coat practically new.
- During application, it's important to keep in mind that the leveling process is usually quicker than the application process. This means that you need to be mindful of the time frame between application and leveling on a certain section of the paint, otherwise you may end up with an uneven layer of the coating. Quick example: assume applying a coating that needs to dry for 2 minutes before leveling to a fender left to right. Also assume the fender size takes exactly 2 minutes to cover. So we're at 0:00 at the start, 1:00 at the middle and 2:00 at the end of that fender. (In this example we'll ignore the 5-10 seconds to put down the applicator and pick up the leveling towel and assume a second person is doing the leveling as soon as 1st person finishes application). We must make sure we're at 2:00 at start, 3:00 in middle and 4:00 at the end of that fender. This ensures that each section has dried to roughly the 2 minute mark. If you level too quickly, you may end up with a more durable thicker layer of coating at the start of the panel, but thinner at the end.
- Working in small sections is encouraged so you're not too rushed. Another way to help resolve leveling issues above is to do 2 layers of the coating and simply start from the opposite end of the panel on the second coating to try and apply as evenly as possible.
Related Articles (Return to Top)
Here are a few articles related to Coatings from our Ask-a-Pro Detailer Blog:
- The Benefits of a Paint Coating
- Coating Application: How To Reduce Marring
- Maintaining Your Paint Coating
- CarPro Cquartz UK Edition: Application Process
- Harley Davidson Detail | 22PLE VM1 and VR1 Coating
- Gtechniq: How to Prepare Paint for a Ceramic Coating
- The Truth Behind Wild Coating Claims
- Nano Coatings: When to Replace & How to Recoat
- What Coating Should I Buy?
- Layering Coatings: How Much is too Much?
- Initial Impressions & Application: Gtechniq Crystal Serum Light (CSL)
- Professional Coating Application Techniques
Related Videos (Return to Top)
Ask-a-Pro Blog author James Melfi demonstrates how to apply a paint coating.

