
Flex 3401 VRG Brush Replacement
by Ivan RajicHere’s a quick, but hopefully informative article for the Flex XC 3401 VRG users. After about 3-3.5 years of fairly heavy use, my 3401 finally stopped. It has stopped before only once and that was when the cord was damaged from all the work I put it through, but this time it just “died”. I figured it was the brushes, but before ordering new ones I got some from another one of our 3401 polishers just to make sure. While doing so, I figured I would take some detailed photos and write a sort of DIY article on how to replace these brushes quickly and easily, so I’ll mainly let the photos below do the talking/typing.
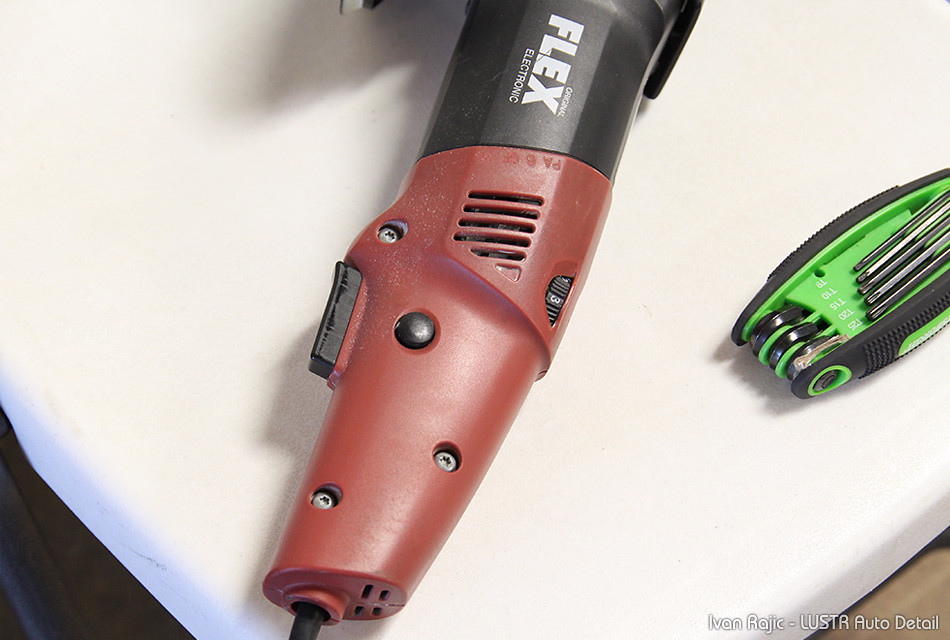
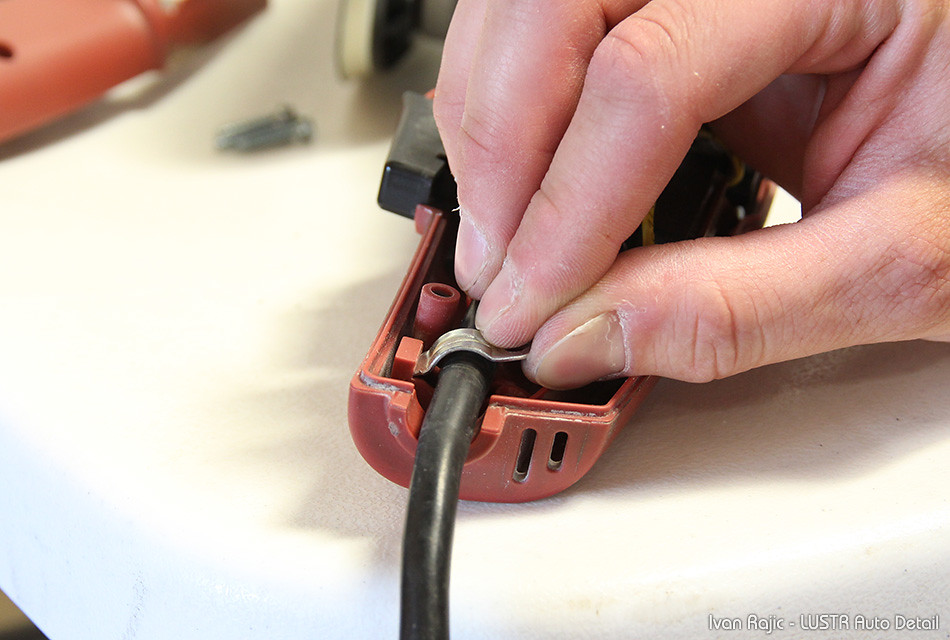
Please NOTE: This is one of my older 3401 polishers and you may notice the rubber piece that should be at the end of the cord by the machine is missing. This piece is there to prevent the cord from flexing and bending too much, but again, since this is an old machine, that piece was ripped during one of the times I went to cut the cord due to damage from bending (an article of it’s own that will be done sometime soon). In short, there is normally a small rubber piece surrounding the cord where it meets the red plastic of the machine, but it’s not really relevant for this article. Onto the instructions…
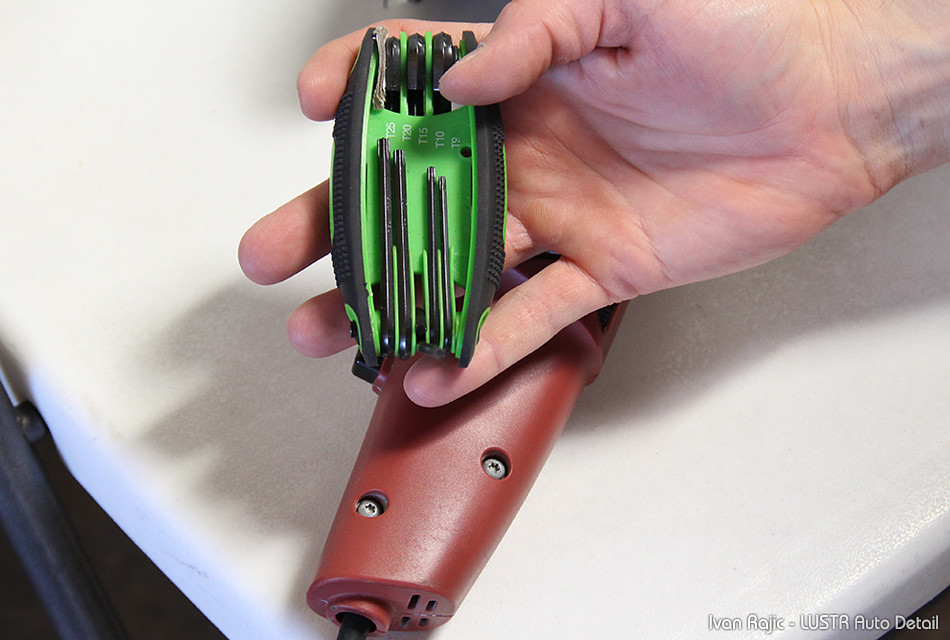
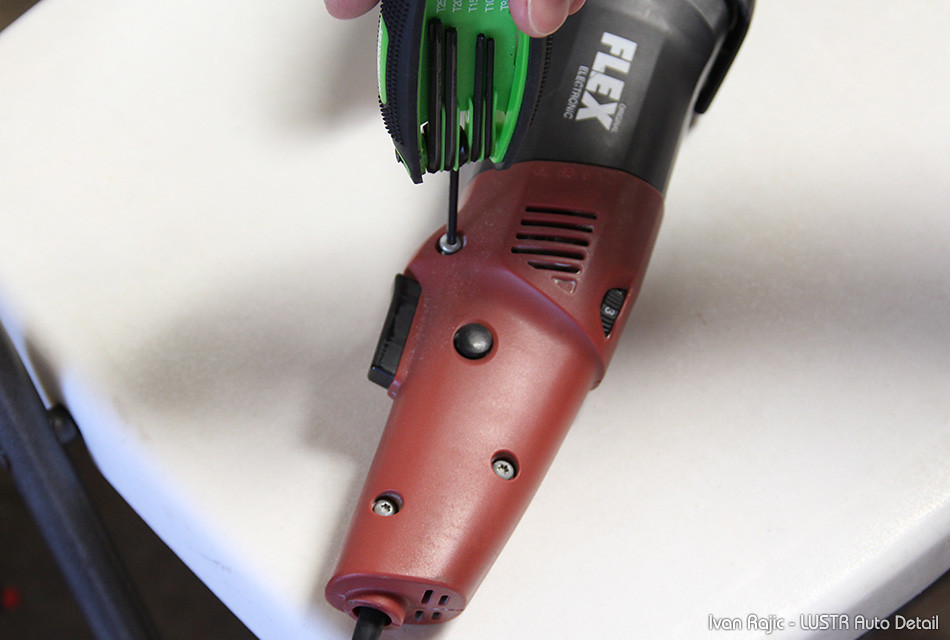
On the left side of the polisher you’ll see three torx screws.
These are removed with a T15 bit or screwdriver.
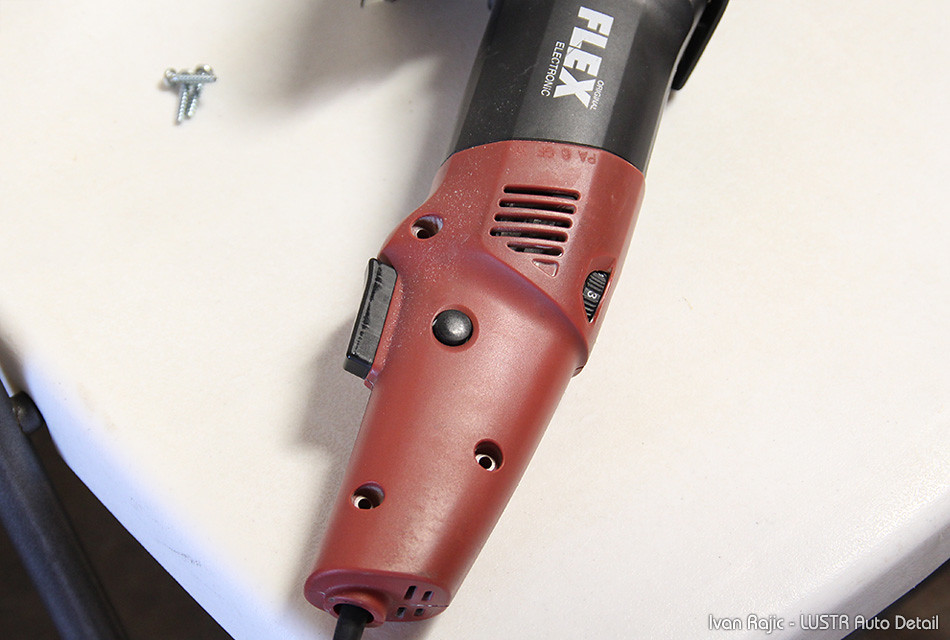
Once all three are out, simply grab that upper plastic cover and lift from the bottom (near the trigger).
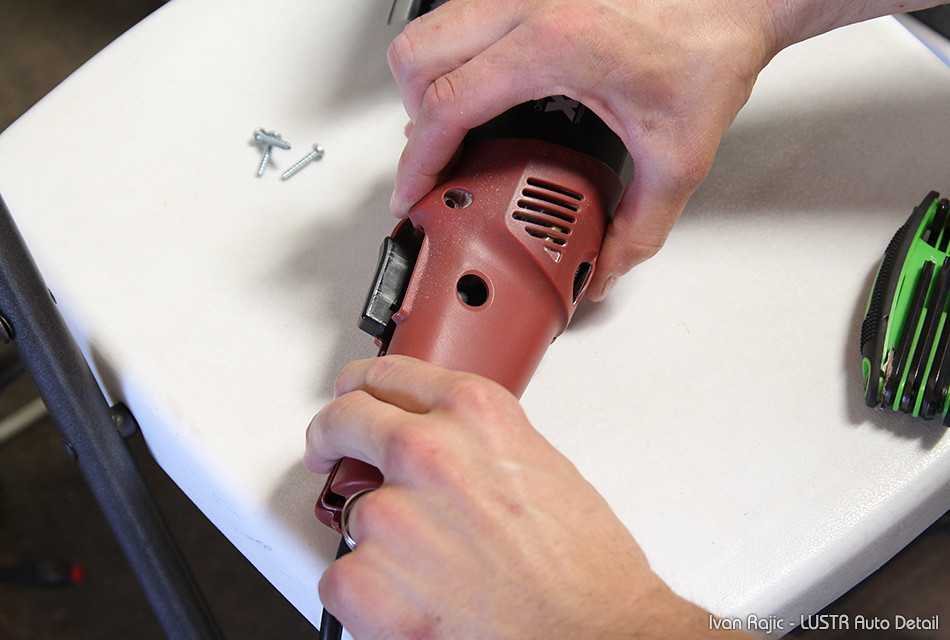
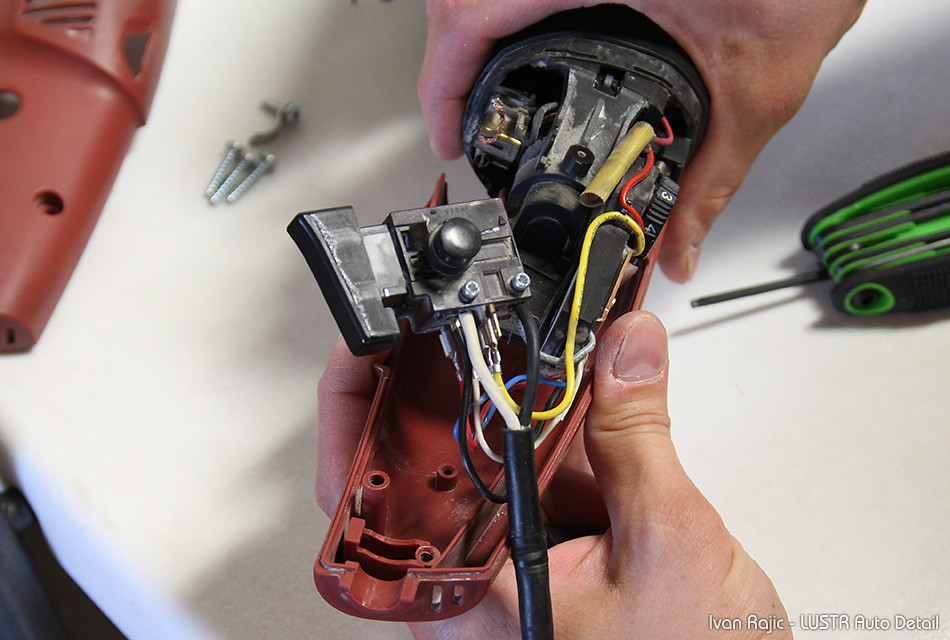
It comes off easily, revealing the trigger assembly and some of the other internal components.
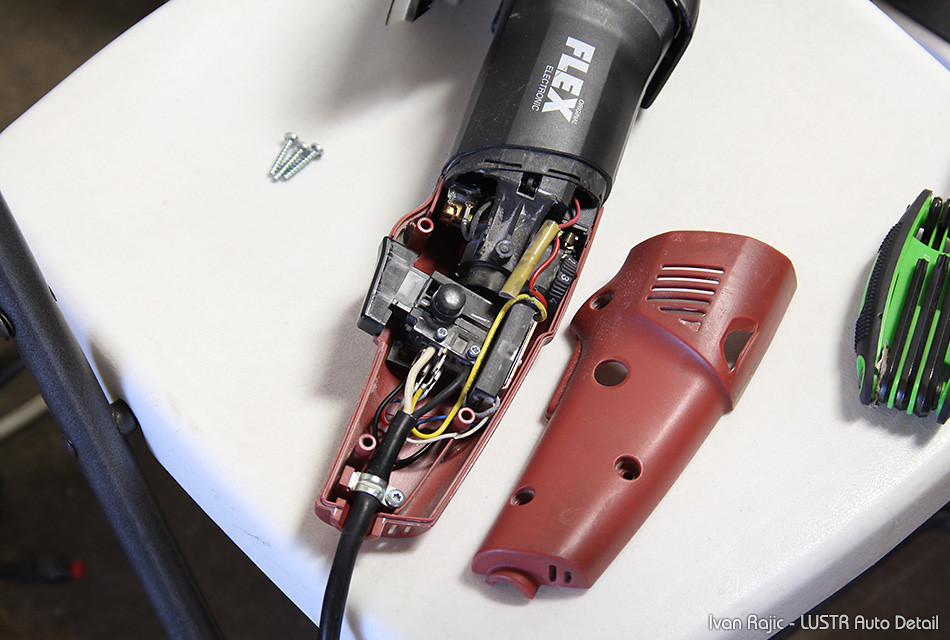
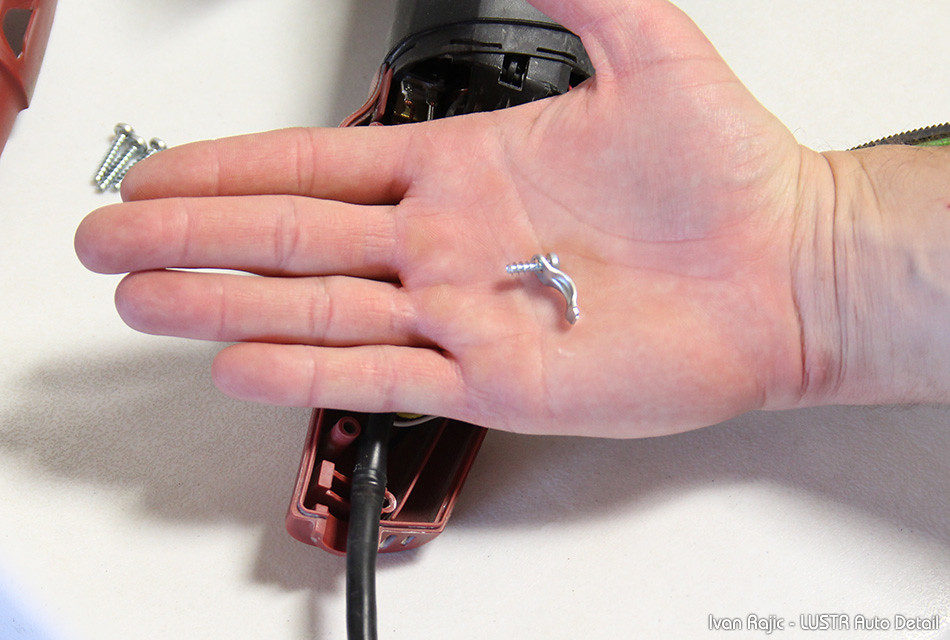
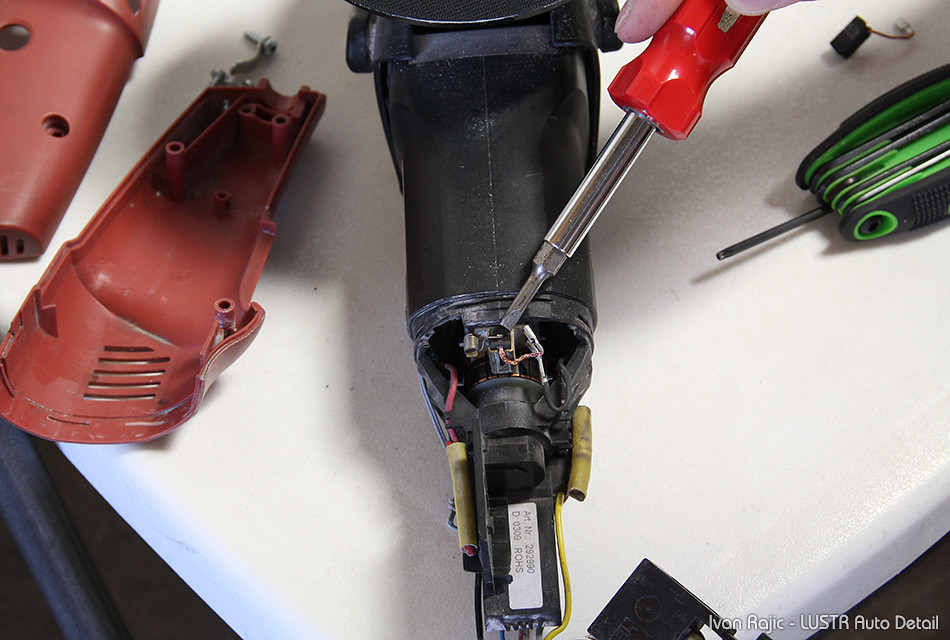
Next you will remove the little metal clamp that holds down the cord from moving around. On a typical 3401, after removing this clamp you will simply lift the rubber piece out of the red plastic cover as it fits right in.

Imagine that rubber piece just in front of my index finger (yes I am making way too big of a deal with this invisible rubber piece!).
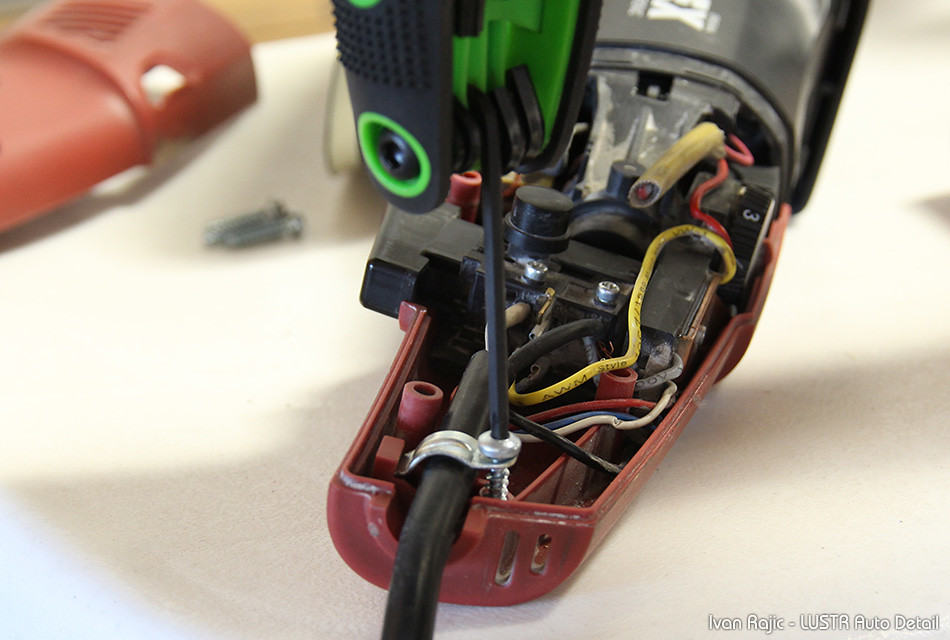
After lifting the trigger assembly up with the cord, simply pull off the right cover (now on the bottom of the photo) and set the polisher to sit on the backing plate.
Here is the polisher sitting on the backing plate and we see the first brush on the top, just in front of the speed adjustment wheel.
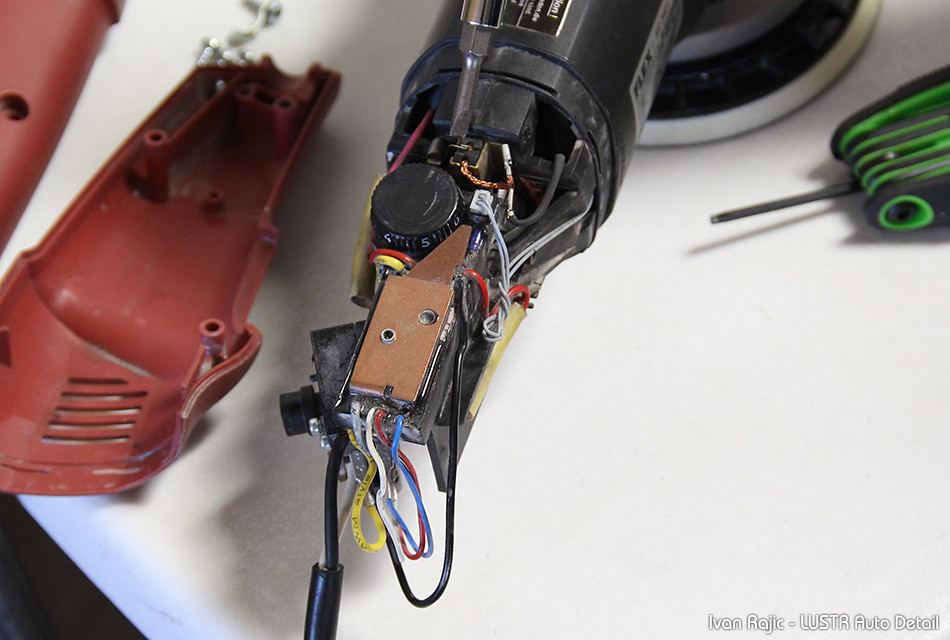
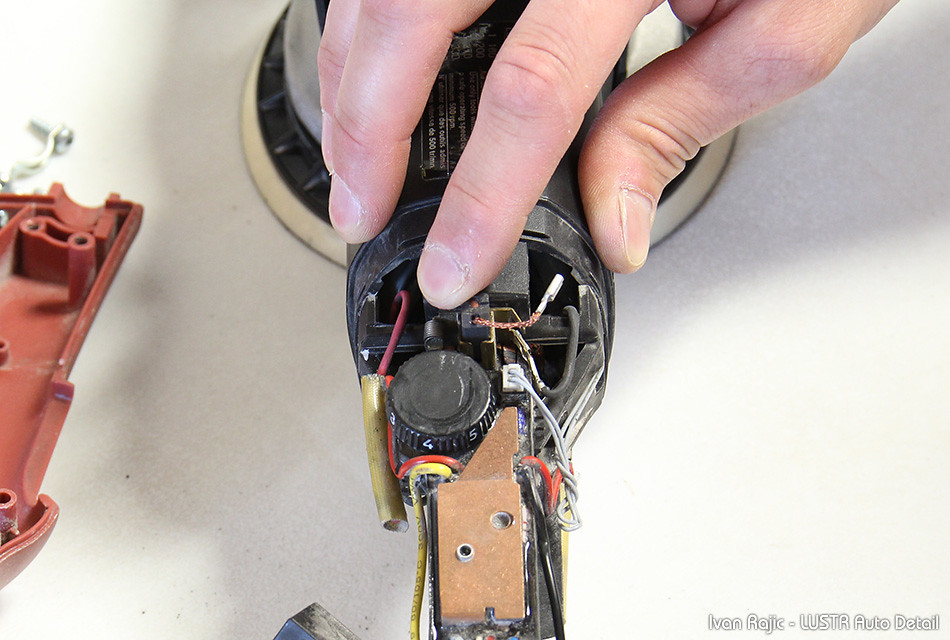
To remove the brush, first push aside the little spring that’s pushing down on the brush. It’s not a strong spring and won’t fly off, so simply pulling up on it with a screw driver and lifting it aside (toward the back of the polisher) will free up the top brush.

Next simply slide off the connector that’s to the right of the brush (I use a screw driver to push it off as it makes it easier).
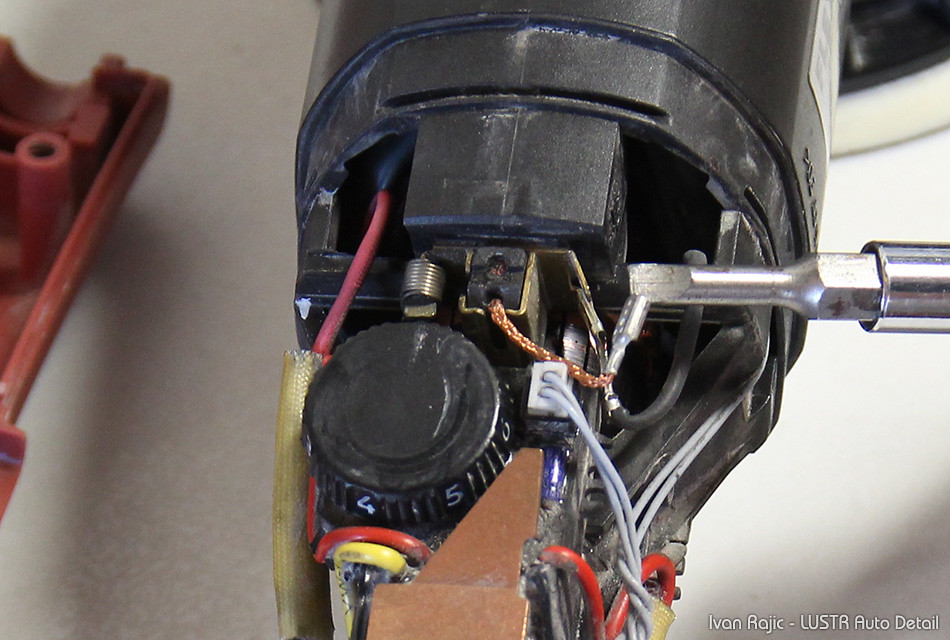
And simply lift out the brush.
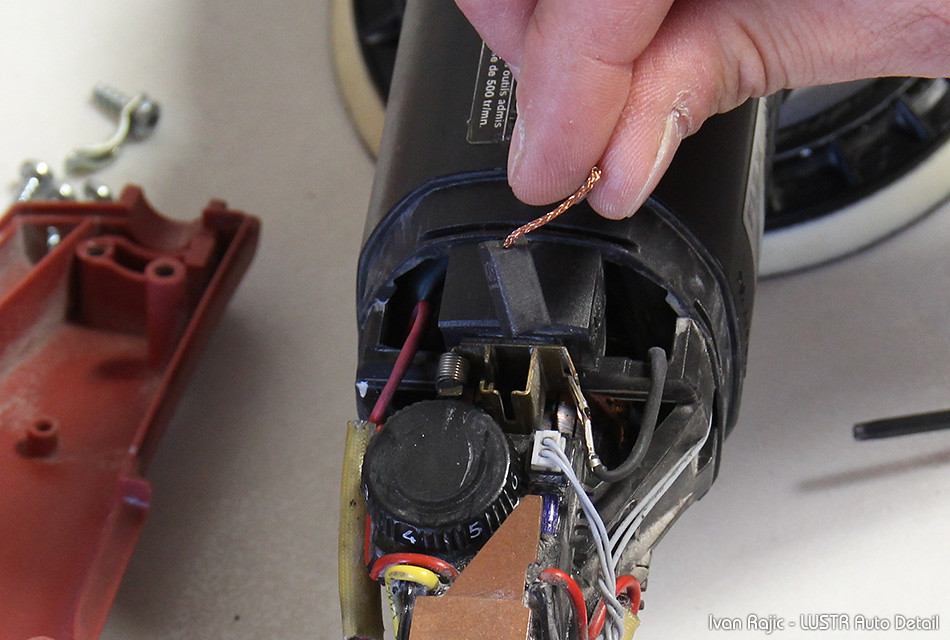
The second one is on the bottom, simply opposite the one we just discussed. Same process as above to remove it.
Pop in the new brushes, connect the wire to the right of it. Remember to put the spring back onto the brush so it pushes it down.
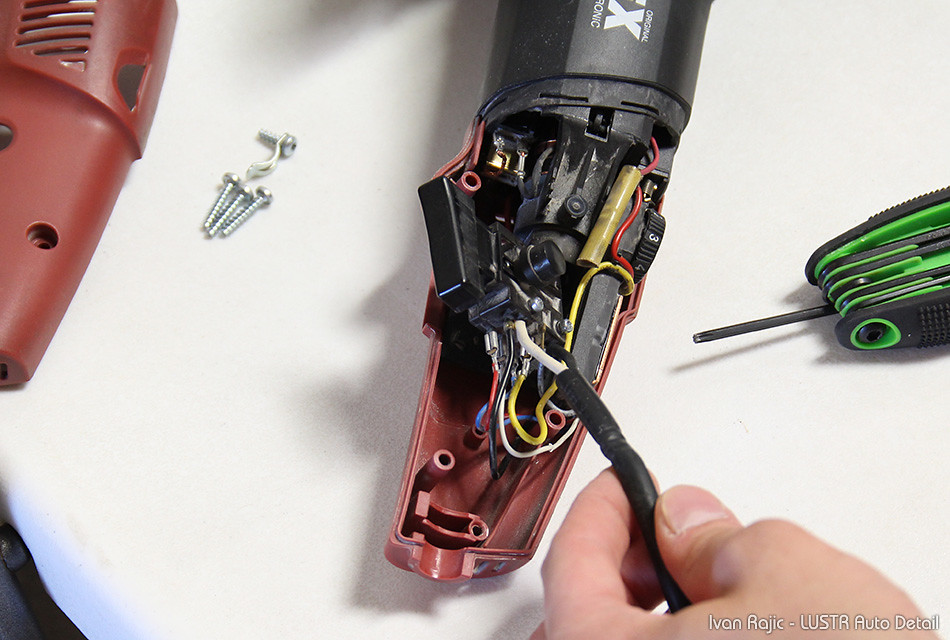
Next, as is said most of the time, installation is reverse of removal. Start with the right plastic cover. Once it’s on, you’ll see the black piece into which the trigger fits.
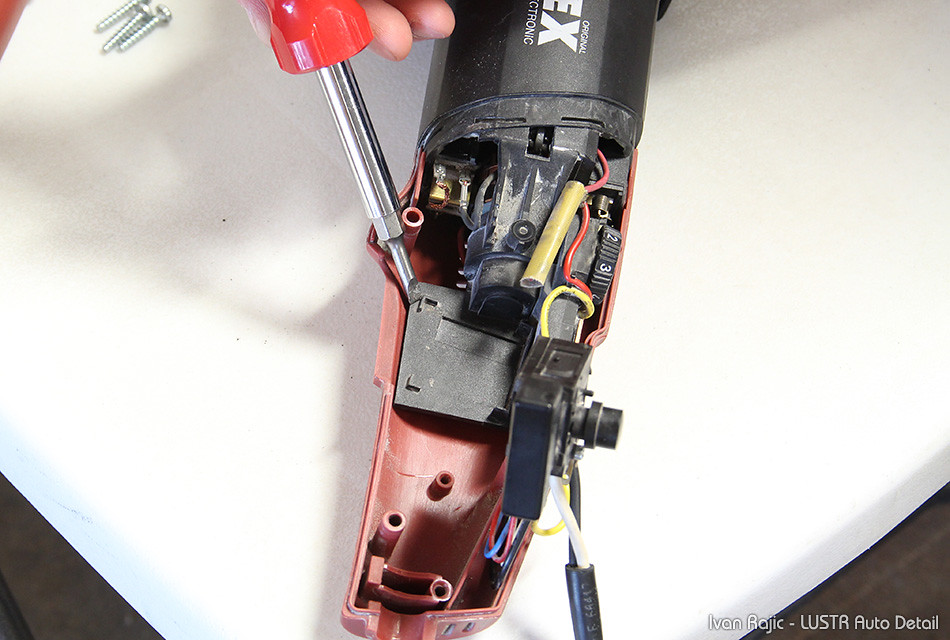
Place the trigger inside so it fits perfectly (this photo already shows the next step, which is the cord clamp already on).
Once the trigger is set in its place, stick the cord clamp into the little recess just below the cord.
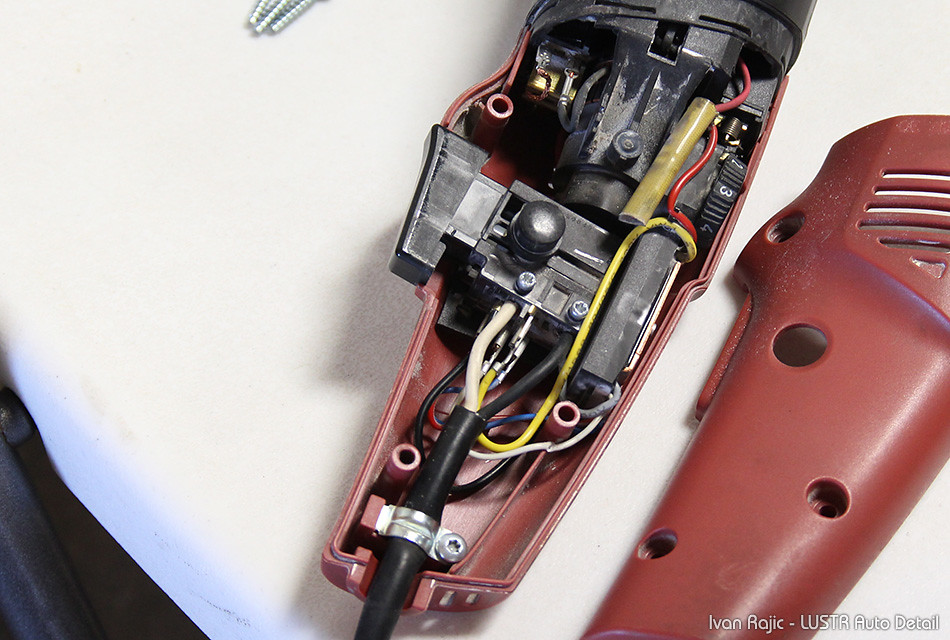
Then screw it in to tightly clamp the cord (make sure to pull the cord a bit “into” the polisher so the wires are loose inside before fully clamping the cord).
Lastly, simply put back the left cover, starting with the little clip at the top, just above the speed adjustment wheel.

Simple as that! Should be a quick 5-10 minute job to replace these and I hope that these photos help those who will be doing it sometime in the future. I would highly suggest cleaning out the machine as much as possible once it’s open as well. As I mentioned before, I will soon post another article regarding the Flex 3401, this time about the cord replacement or fix when it starts showing age and wires start fraying. This will cause it to intermittently turn off while working, but the fix is another easy 10 minute job without the need to buy a new cord!


excelente!!!! thanks for this help
Hi Ivan,
I was happy to see a write up on how to remove and install a new AC cord for a PowerTool. I in fact do this to a lot of my power tools to either A: make them longer…. B:increase the wire gauge (AWG) size to eliminate any chance of a voltage drop. If said tool is something like a 12amp shopvac or a HS rotary polisher drawing 10 to 15(!) Amps or some kind of power tool that requires a good 20′ to 25′ that finding the nearest electrical supply house and picking up some quality 12 AWG gauge (rubber sheathed) cable will do world’s of good for the tool. When you increase the wire size, the circumference, measured in kcmill or MCM (depending on how old you is) goes up and you reduce the amount of resistance…… so think of it as drinking a soda through a thin straw vs. a McDonald’s type straw where you can suck the whole thing down in 10 seconds…..(now I’m thirsty)…. A voltage drop occurs when you start getting into the 50 to 100 foot range and starve the tool of its food ie: Amperage. What’s happening is, the tool is trying to draw x amount amps from its source and there is just not enough voltage to push the amps through the thin, resistant cable. If this does happen…… Either be prepared to buy a new polisher, put out the fire you just created from melting the cable or even worse call your electrician and ask him about getting a new service installed $$$$!
So for everyone reading hears some sound advice: go out now and get yourself a solid, quality non-Harbor freight extension cord. If you can’t afford the 12 AWG gauge cable…BORROW MONEY!
Sorry for the never ending story, but seriously if you’re not confident with electrical work DONT EVEN THINK ABOUT THINKING ABOUT MESSING AROUND!!! PM me, call another electrician and throw a coat of wax on your car, sit and wait for them to come.
Sorry Ivan, I forgot the reason why I commented in the first place. The item you need to order for that Flex polisher is called a strain relief. If you can find one that has a pivoting ball, even better. This will work. Home Depot also carries a kit for the Skilsaw.
Good luck man !
http://www.ereplacementparts.com/bosch-3915-0601475039-inch-slide-miter-saw-parts-c-128_1090_3085.html
Great info and input Jonathan, some of that will surely be addressed in my article on cord replacement.
Ivan,
Great article. How often should these brushes be replaced? Where can they be purchased? I remember having to replaces brushes on my RC motors back in the day.
Don
Thanks Don. Brushes can be purchased from Flex part suppliers but they are pricy. Since we have 4 3401 machines and replace brushes more than an average user would, I found a cheaper local option. I purchased a few brushes same size along with some cables with a female spade connector. After a quick cut and solder, I had quite a few brushes for about $4/each and a 2-5 minute time investment on each, rather than paying the $11-12/brush pricing online. I’d probably still recommend the Flex brushes if you’re a weekend detailer and don’t need them more than every few years, but what I did is surely an option that you can do at your own risk.
Thank you Ivan for the information. I am every now and again detailer. 🙂 It is so funny that I didn’t realize it had brushes, so thank you for this article.
Don
thanks man good post i alway wonder how to change brushes
My Flex 3401 is about 4 years old and just started intermittently turning off. It will work sometimes if it’s upside down, but as soon as it’s turned back it shuts off. I was researching how to fix it and found your great article.
Do you have advice or another write up about how to fix the cord?
Thank you!
Todd, unfortunately I don’t have that article yet but it is on the “to do” list. In the meantime, you can follow this guide to remove the cover and the rear screw holding down the cord, then you would simply unscrew the 2 screws on the trigger assembly and pull out the wires that go into the trigger assembly from the cord. You can then either cut about 6-8″ of the cord, expose the wires again and insert into the same holes in the trigger, OR get a longer extension cord and use that instead. Obviously do all of this with the machine unplugged. Plug in to test before reassembly, but keep away from any electrical components of course.
I purchased a Flex 3401 about 4 years ago just to detail my Corvette. I only use the Flex about twice a year and probably put about 10 hours on it each session – so I probably have about 80-100 hours total on mine. Tonight, I was using it on the side of my car on the 6 setting and the 6″ plastic backing plate (Lake County Plate Kit) melted from the heat at the attachment screw and shattered the plate (i.e. the plate and pad came loose from the flex right at the screw) – 2nd time I have had one of these backing plates fail. However, this time when this happened and I immediately released the trigger, the Flex Screw/Shaft kept turning at a very slow speed – so slow that at first I thought it was just naturally slowing to a stop. Not so. It just kept running, but very slow RPM. I double-checked the trigger and trigger lock and they were released and pressing the trigger did nothing. I finally had to unplug the Flex to get its to shut off. After letting it fully cool off, now when I plug it in, it is just dead. Could this be the brushes or is it toast?
Thanks for any help as this unit was not cheap (and had not been abused).
Hi John,
Unfortunately that issues sounds like it’s way out of my league as I’ve never had anything close to that happen to our machines. We’ve used the 3401 hard (we have 4 total) and never had an issue, however we’ve never used the Lake Country backing plates, just the Flex (mainly larger) plates. Only one after MANY years of constant use has delaminated, but it did so slowly and was easily noticed when it started coming apart near the center.
Wish I could be of more help.
Ivan,
Thanks for the response. I just sent it off today to a Service Center in Plano, TX to get checked out.
FYI – Don’t send anything to American Tool and Fastener in Plano Texas to get repaired! They are listed as my closest Warranty Repair Facility. I called ahead of time to confer that they could work on this, so I sent them my unit on November 16th, paid the $35 shipping to get it there, have made 5 long distance calls to them since then and still no estimate or ETA! They did say today that they were guessing about $217.71, but could not tell me what was wrong or give me a firm estimate and they NEVER call back.
I cannot believe that Flex would approve this as a Warranty Station!
UPDATE: I finally got through to the actual Tech that would be repairing this unit and he seemed very knowledgeable and reassuring. Looks like the total will be more like $150 for a new switch and speed control swap.
Just like the other user that mentioned this, I always wondered what I would do when the time came that I would need new brushes. How to obtain them, how to install them, how much it would cost. As always, you guys do a superb job of looking out for us. It’s the reason that I do business with Detailed Image before anyone else. Thanks Ivan.
My 3401 stopped working last weekend after 8-9 years of moderate home use. I thought the issue was the power cord, but that turned out not to be the case. Should I consider ordering the brush assy before I just purchase another?
What I’m asking is are the brushes more than likely the culprit of the failure? Obviously dropping 12.00 is worth it before buying new. I was just wondering if any other parts in the trigger assy could cause the failure.
Ron, I would take it apart or have a qualified person do it for you. You’ll pretty easily see if the armature is damaged (one of ours was very worn due to bad brushes running for a while) or if it’s just the brushes. Usually it will be the brushes as not much else can go wrong with the trigger assy unless it’s simply not running. Please keep in mind I’m not expert with fixing these buffers, just know a few simple things that you can do as preventative maintenance as well as quick fix so as not to encounter a huge repair.
Ivan, I appreciate your response. Well I just installed a new OEM power cord and both brush assemblies. The unit is still dead. Looks like there are only three other components to replace at this time. Item 54 (Electronic module) item 55 (trigger/switch assy) and item 26 (armature assy). All three will cost 230.00, shipping not included. Looks like I better lick my wounds on this and just buy another and use this one for spare parts.
http://www.ereplacementparts.com/flex-xc3401vrg-orbital-polisher-parts-c-8876_8957_8958.html
great information I want to thank you – I have the same problem with my 3401, I brought the brushes
now I can replace them and get my baby back up working , I have also a 3403 with the same problem I try looking for replacement brushes for my 3403 can’t find any so my question is can the 3401 replacement brushes be use for the 3403
danaandrewingram@Gmail.com