Auto Detailing Guide - Glaze
What Does Glaze Do? (Return to Top)
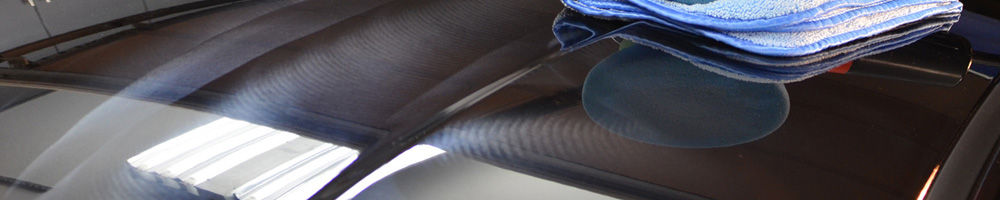
A glaze is often an optional step of the detailing process, but when used correctly can help add an additional layer of gloss and depth to the paint. Glazes are essentially polishes that leave behind oils, kaolin clay or some other substance that is designed to increase the depth and gloss while being able to mask or hide some minor imperfections in the paint. Glazes are great products to use right before a car show as it can help increase the depth and gloss, especially on lighter colored vehicles where this is often hard to accomplish. One of the downsides of using a glaze is that it may reduce a sealant or waxes ability to bond to the paint with it's maximum potential. The sealant and wax will still protect very well, it just may not last quite as long as it would if it was used on the bare paint.
Many people's expectations are often too high when it comes to a glaze filling in minor imperfections. If your car is filled with swirls and scratches, you are much better off investing in a polish to remove the marks, which is also a permanent fix, the results from a glaze are temporary. Your car should be washed, clayed, and polished prior to using a glaze for optimal results.
Product Recommendations
Do I Need To Apply Glaze? (Return to Top)
It's never absolutely necessary to apply a glaze so it can be done as little as you would like or as much as you would like. For best results we recommend applying a glaze during a full detail, therefore it would be after washing, clay and polishing and before your sealant and/or wax. At a minimum make sure the vehicle has been freshly washed, apply the glaze and lastly apply the sealant and/or wax of your choice.
How To Apply a Glaze (Return to Top)
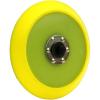
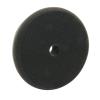
When using a buffer to apply a glaze, we recommend using a black finishing pad.
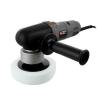
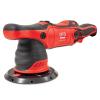
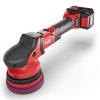
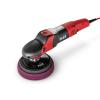
Random Orbital Polisher
- Step 1: Center your black pad on the backing plate
- Step 2: Apply 3 pea sized drops of glaze in a triangular pattern towards the outer edge of the pad
- Step 3: Visualize your working area, something between 18" x 18" and 24" x 24"
- Step 4: Trace your working area with the glaze on your pad with the buffer off
- Step 5: Turn the buffer on a low speed setting (1 - 3 on the Porter Cable 7424 XP) and spread the glaze evenly through the entire working area
- Step 6: Turn the speed dial of the buffer up (approximately 4 on the Porter Cable 7424 XP) and start in a corner of your working area
- Step 7: Begin to apply a light amount of pressure (approximately 5 lbs) on the head of the buffer
- Step 8: Working from one corner to the next, move the buffer at controlled pace (approximately 3" - 5" per second)
- Step 9: Once you reach the opposite corner, follow the same path back to where you started, but overlap your first pass by approximately 50%
- Step 10: Continue this pattern until you have applied the glaze to your entire working area
- Step 11: Repeat this process, but this time use the opposite direction (if you were working top to bottom then bottom to top the first time around, change it to left to right and right to left overlapping movements)
- Step 12: Once the glaze is worked into the paint, shut the buffer off
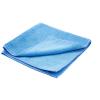
- Step 13: Using a clean microfiber towel, remove the glaze from the paint
- Step 14: Repeat steps 2 through 13 until the entire vehicle has the glaze applied
Product Recommendations
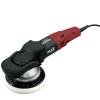
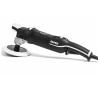
Forced Random Orbital Polisher
- Step 1: Center your black pad on the backing plate
- Step 2: Apply 3 pea sized drops of glaze in a triangular pattern towards the outer edge of the pad
- Step 3: Visualize your working area, something between 18" x 18" and 24" x 24"
- Step 4: Trace your working area with the glaze on your pad with the buffer off
- Step 5: Set the buffer to your desired work speed (usually between 2 - 3 is recommended for the Flex XC 3401 VRG)
- Step 6: Using the variable speed trigger, spread the product around your working area at a low speed
- Step 7: Begin to apply a light amount of pressure (approximately 5 lbs) on the head of the buffer
- Step 8: Working from one corner to the next, move the buffer at controlled pace (approximately 5" per second)
- Step 9: Once you reach the opposite corner, follow the same path back to where you started, but overlap your first pass by approximately 50%
- Step 10: Continue this pattern until you have applied the glaze to your entire working area
- Step 11: Repeat this process, but this time use the opposite direction (if you were working top to bottom then bottom to top the first time around, change it to left to right and right to left overlapping movements)
- Step 12: Once the glaze is worked into the paint, shut the buffer off
- Step 13: Using a clean microfiber towel, remove the glaze from the paint
- Step 14: Repeat steps 2 through 13 until the entire vehicle has the glaze applied
Product Recommendations

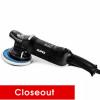
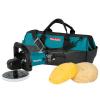
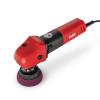
Rotary Buffer
- Step 1: Attach the appropriate backing plate to the buffer
- Step 2: Center your black pad on the backing plate
- Step 3: Apply 3 pea sized drops of polish in a triangular pattern towards the outer edge of the pad
- Step 4: Visualize your working area, somewhere between 18" x 18" and 24" x 24"
- Step 5: Trace your working area with the polish on your pad with the buffer off
- Step 6: Turn the buffer on the lowest speed setting and spread the glaze evenly through the working area
- Step 7: Turn the speed dial of the buffer up to a comfortable working speed (between 700 - 900 RPMs is common)
- Step 8: Very little to no added pressure when applying the glaze
- Step 9: Working from one corner to the next, move the buffer at a pace of 5" - 6" per second while making sure you always keep the buffer moving
- Step 10: Once you reach the opposite corner, follow the same path back to where you started, but overlap your first pass by approximately 50%
- Step 11: Continue this pattern until you have polished your entire working area
- Step 12: Polish the area again, but this time use the opposite direction (if you were working top to bottom then bottom to top the first time around, change it to left to right and right to left overlapping movements)
- Step 13: Once the glaze is worked into the paint, shut the buffer off
- Step 14: Using a clean microfiber towel, remove the excess glaze from the paint
- Step 15: Repeat steps 3 through 14 until the entire vehicle has the glaze applied
Product Recommendations
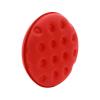
Hand Application
- Step 1: Dispense about 2 pea sized drops in the center of the foam hand applicator pad
- Step 2: Outline your 18" x 18" working area
- Step 3: Gently spread the glaze thinly and evenly in your working area
- Step 4: Using light pressure work the glaze into the paint using overlapping circular motions
- Step 5: Wait 2 - 5 minutes then use a clean microfiber towel to remove the excess glaze
- Step 6: Repeat steps 1 through 5 until the entire vehicle has the glaze applied
Product Recommendations

Facts and Tips (Return to Top)
- Glazes can help increase the depth and gloss in the paint
- The filling of light imperfections is only temporary and will return over time
- Do not expect a glaze to fill in too many imperfections, only the slightest imperfection can be masked
- Glazes typically cannot be layered, so only one coat is necessary for maximum results
Related Articles (Return to Top)
Here are a few articles related to Glazes from our Ask-a-Pro Detailer Blog:
- When to Glaze and When to Compound Polish Away Defects
- Learn Something New, Don't Read The Instructions
- 36 Hour Paint Correction Detail Rolls Royce Phantom
- Todd Cooperiders Top 10 Favorite Detailing Products
- 1966 Corvette Stingray Paint Correction Detail
- Product Guide and Review: Klasse High Gloss Sealant Glaze KSG
- 5 Car Detailing Products for Advanced Users
- DJ Mayo Studios: 350z Paint Correction
- Product Review: Chemical Guys Blacklight
What's Next? (Return to Top)
After applying the glaze to your paint, the next step is to protect the exterior paint. This can be done with a sealant or wax or a combination of both. If you want to apply both apply the sealant first and layer the wax on after.