
Gyeon quartz Leather Care: Product Breakdown and How-To
by Jeff McEachranThis article is written by Jeff McEachran, National Brand Manager for Gyeon quartz USA and owner of Denver Auto Shield.
You mean we aren’t going to talk about shiny paint and coatings? Nope, not this time. Let’s dig into some interior topics and go over the Gyeon quartz set of leather products, because there are quite a few. Typical to most Gyeon products or product segments, the leather products are well thought out and a complete solution for any leather cleaning and protection duties.
SEMA 2018 ushered in the split from Q²M LeatherCleaner to the Mild and Strong versions of the cleaner. We also saw the foam pumps for the cleaners as well as the cool little Q²M LeatherBrush. We also have the complete Leather Sets, which is a great all-inclusive option to get everything you’d need to clean and protect your leather. Let’s go through each step in the leather process, touch on the individual products that would be used, and they’ll we’ll go over the sets and what they include. Each product is available as a stand-alone outside of the set as well.
Lets quickly go over what is included in each Leather Set.
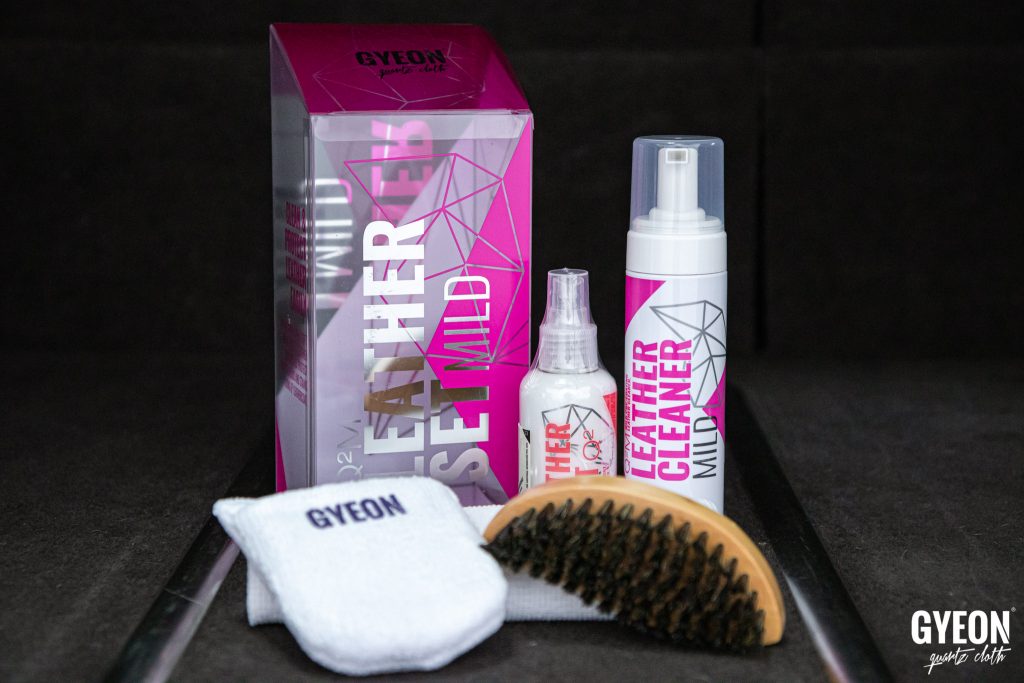
Gyeon quartz Q²M LeatherSet Mild
Q²M LeatherCleaner Mild 200 ml / Q² LeatherCoat 120 ml / Q²M LeatherBrush / Q²M MF Applicator / Microfiber
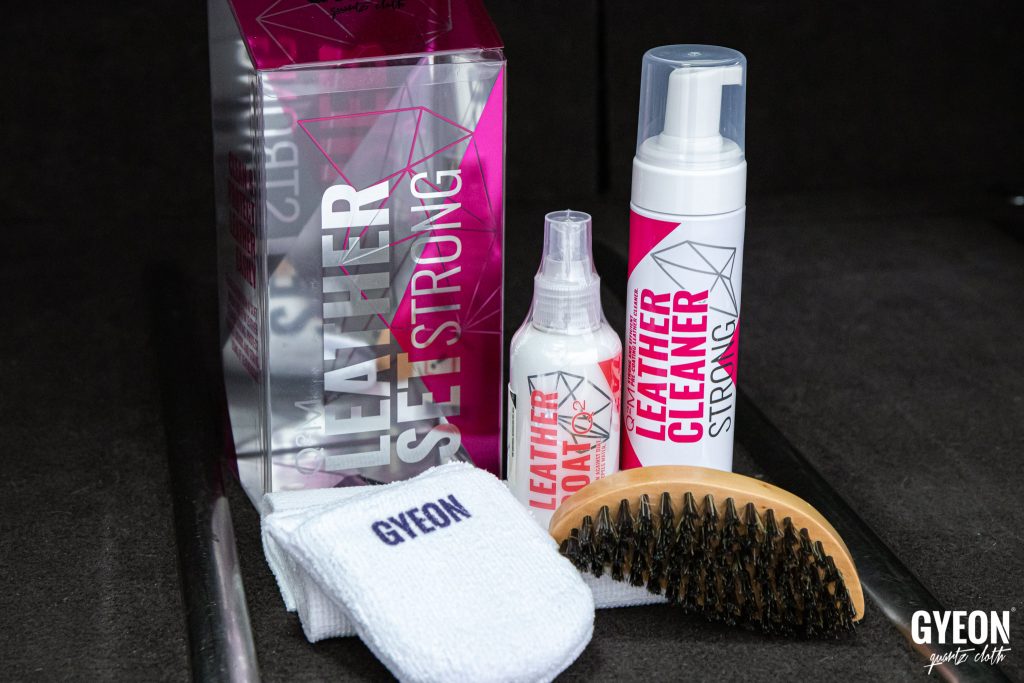
Gyeon quartz Q²M LeatherSet Strong
Q²M LeatherCleaner Strong 200 ml / Q² LeatherCoat 120 ml / Q²M LeatherBrush / Q²M MF Applicator / Microfiber
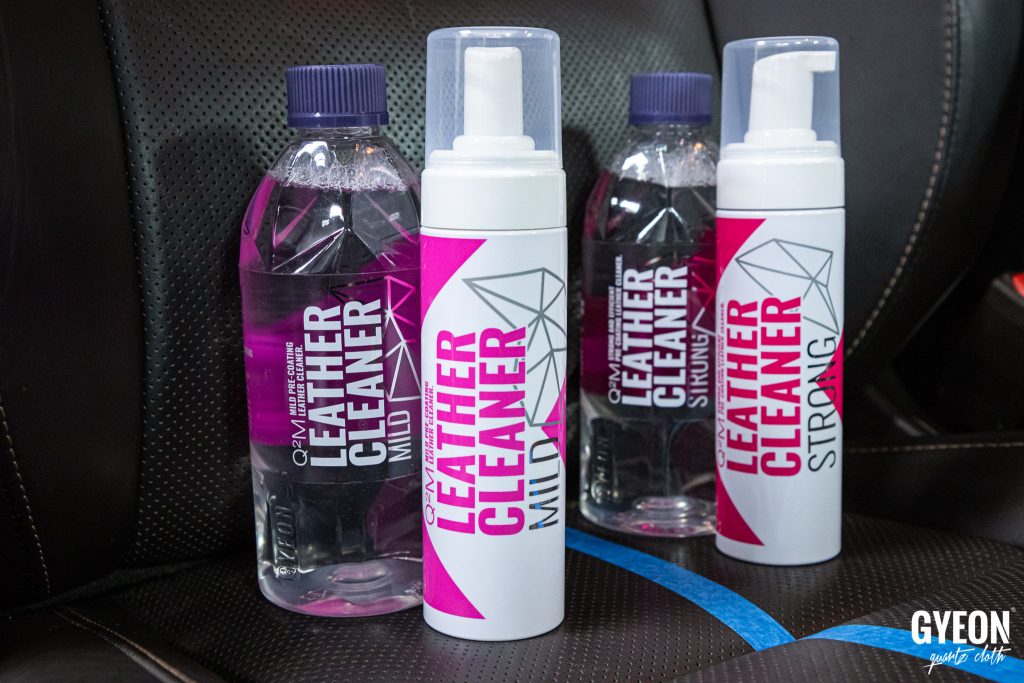
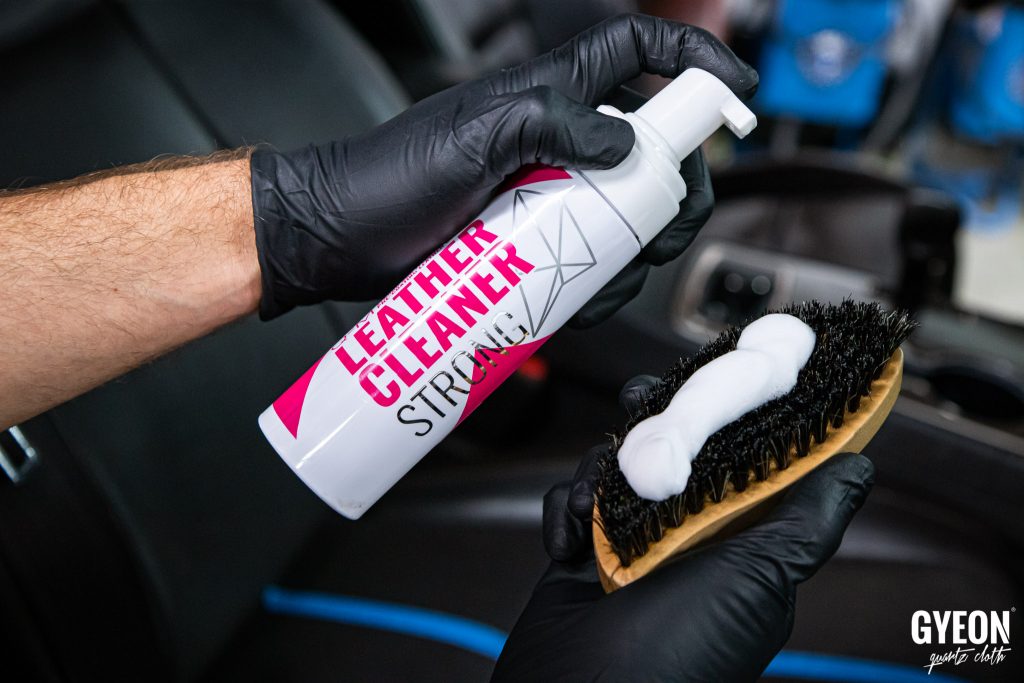
The first step in leather care is to properly clean the leather. For this, Gyeon has Q²M LeatherCleaner Strong and Q²M LeatherCleaner Mild. As the names suggest, they are simply a strong and mild version of the cleaner. For new or lightly used cars I’d be going with the Mild cleaner before applying protection. For older or heavily soiled cars I’d be going with the Strong version of the cleaner with possible multiple rounds of decontamination.
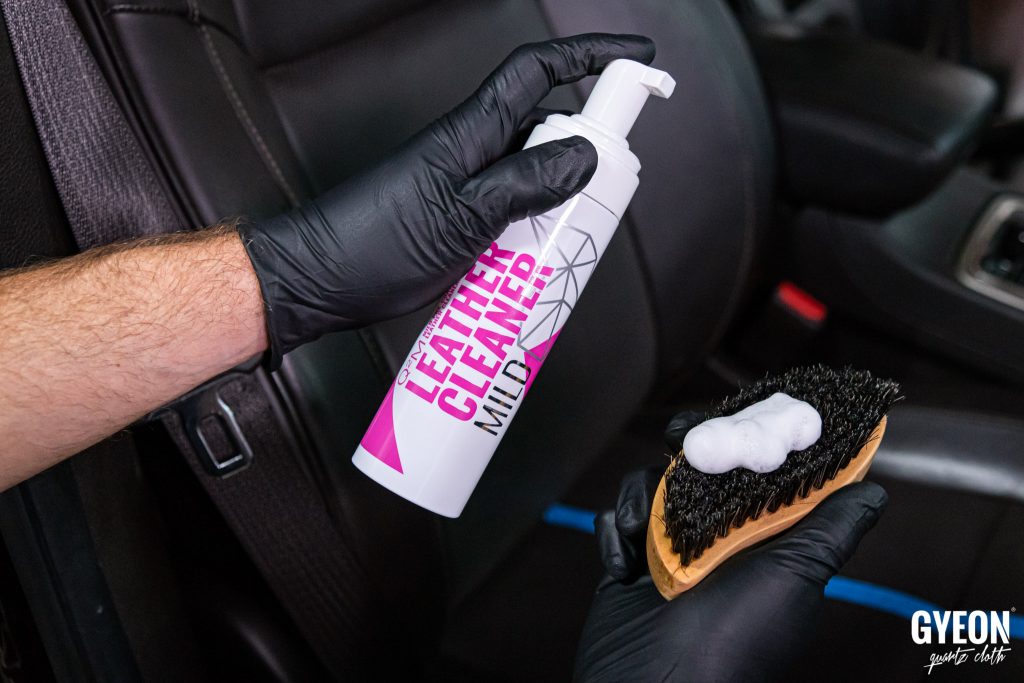
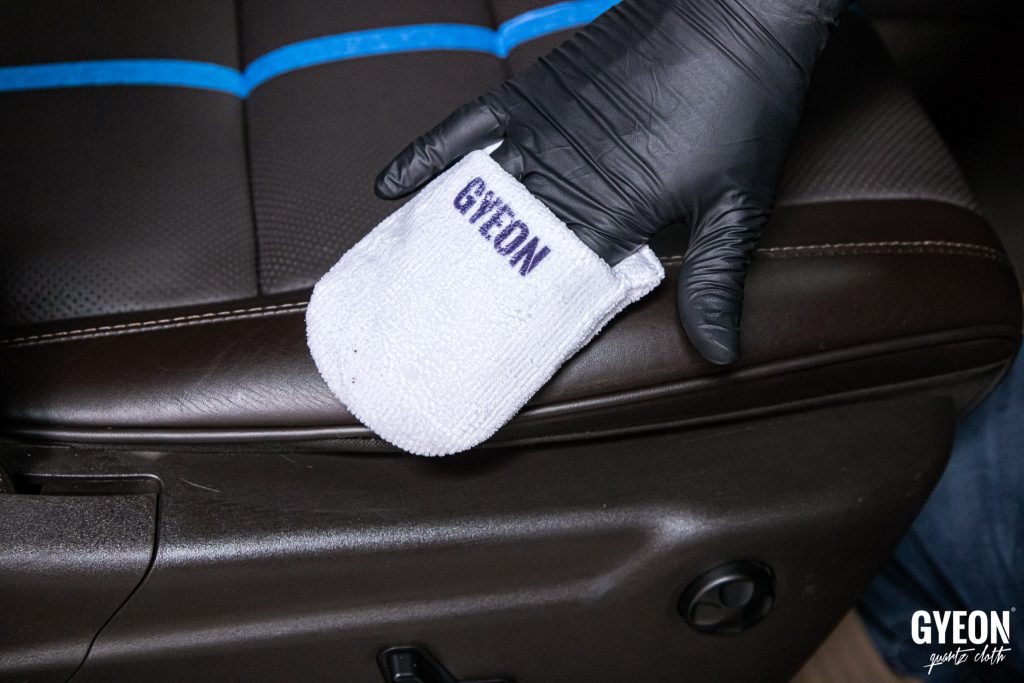
Both leather sets come with the foam pump included. When cleaning leather, the goal is to exfoliate the pores of the leather and lift the dirt and debris out. By using the foam, the cleaner can list and encapsulate the contaminant a bit better than a pure liquid. The foam pump in the sets is refillable with either cleaner. The sets also include the Q²M LeatherBrush, which is a very ergonomic and effective leather brush.
So let’s get into some step by step on cleaning before we get into protection. We used an exceptionally dirty Jeep Grand Cherokee for this write-up, and I don’t think the leather has EVER been cleaned. Here’s a pick of the shiny seats we started with.

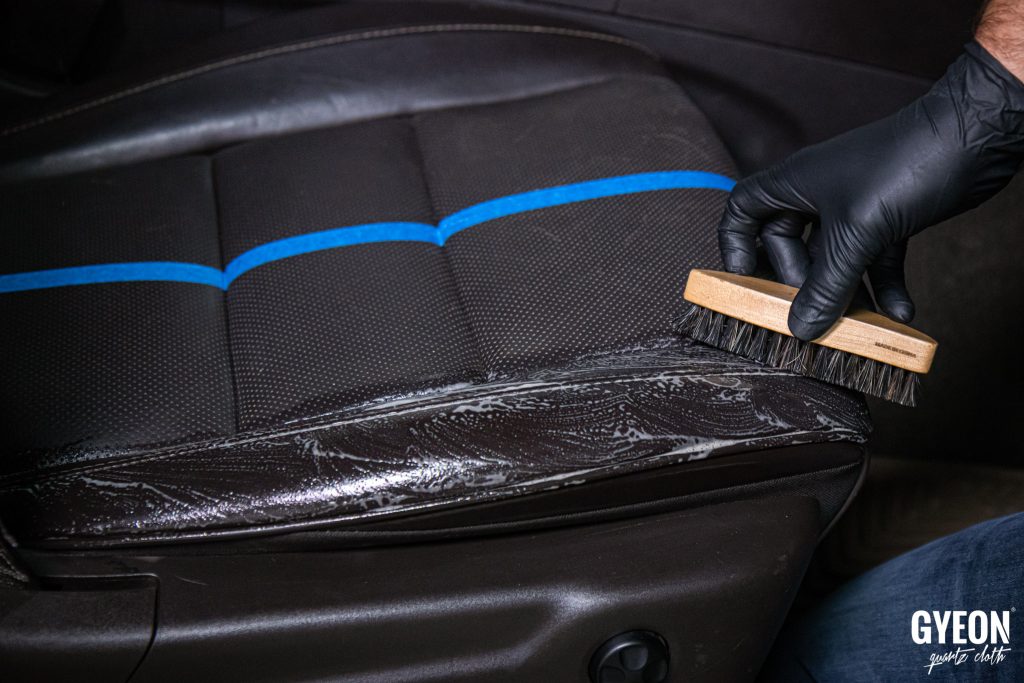
First, apply a fair amount of product directly to the leather brush with the foam pump. This will eliminate any overspray of product from a trigger sprayer and help you control the area being worked on.
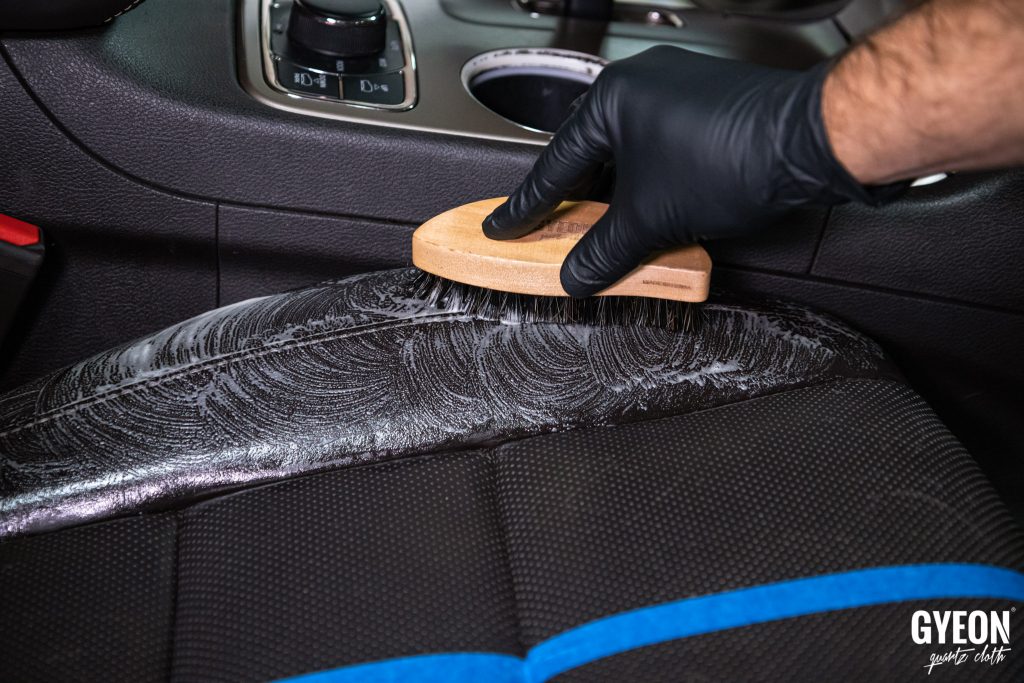
Next, spread the foam cleaner out over a small area of the leather. I like to pick a bolster or section of the seat at a time so I can control my area. Then gently massage the leather in circular motions to allow the cleaner to break down the contaminant and lift it from the surface.
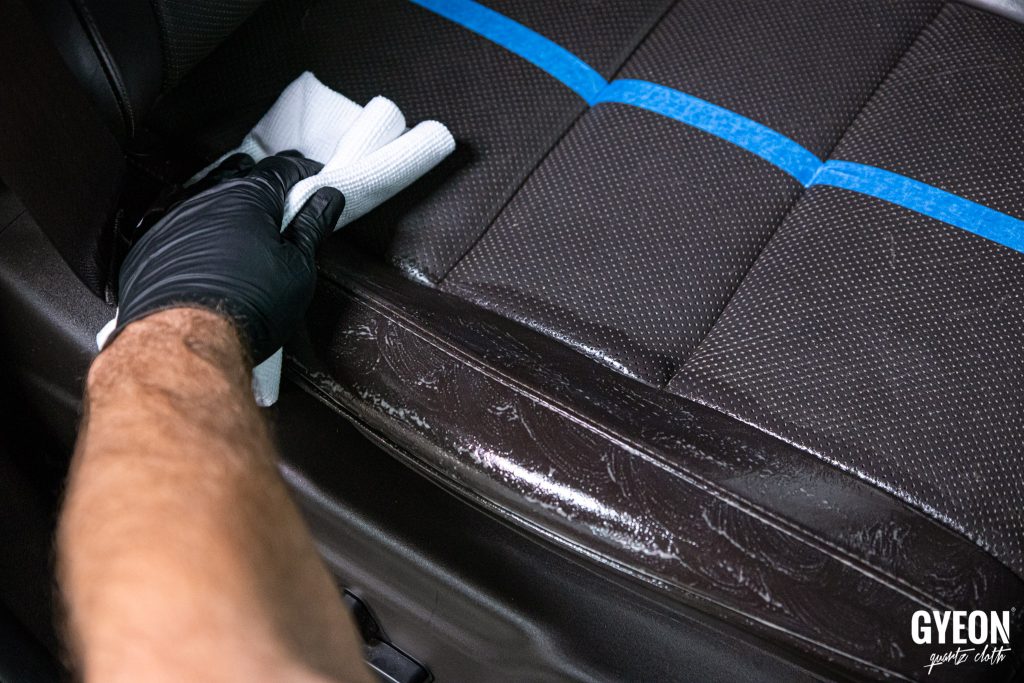
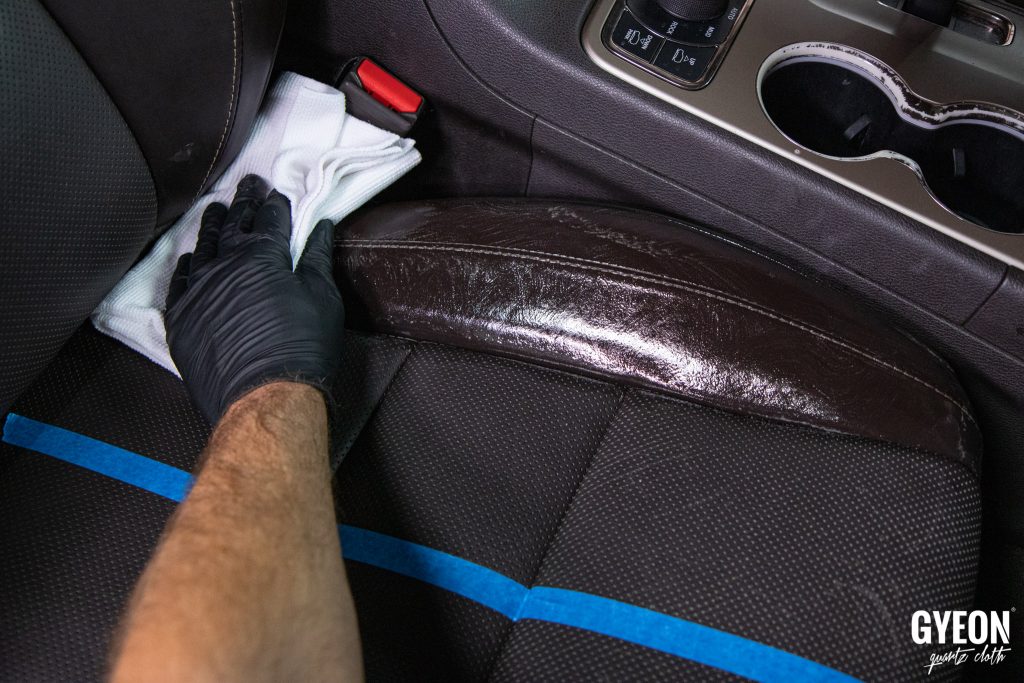
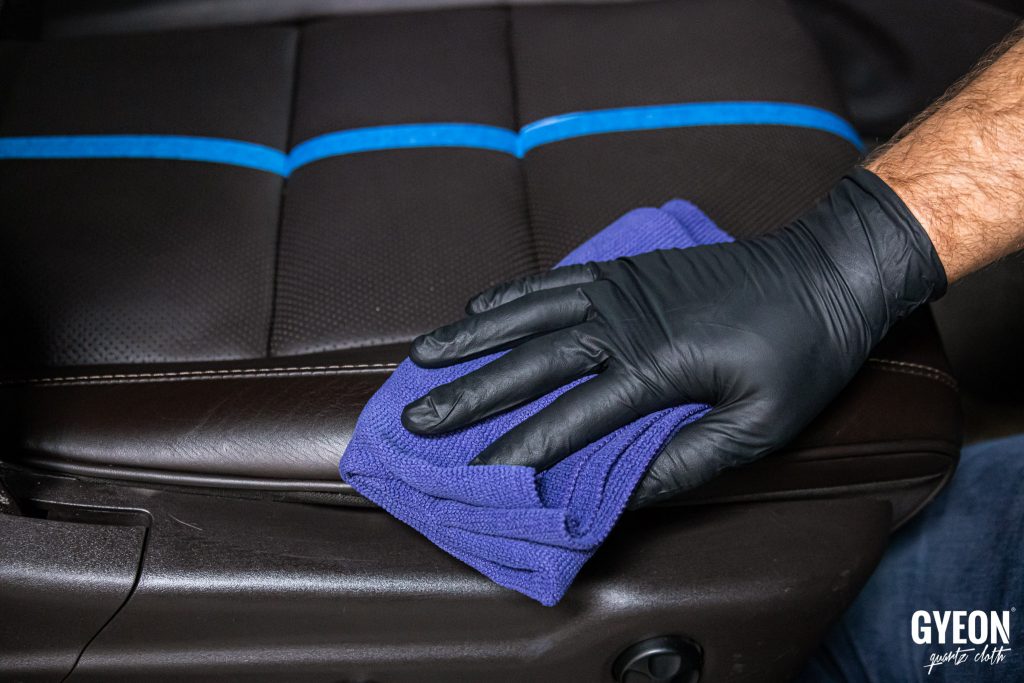
Once you have the area well cleaned, we want to get as much of the sudsy cleaner that is suspending the dirt and grim up and off of the seat with one straight line wipe of a microfiber towel as we can. We do not want to wipe and smear the dirt right back into the leather.
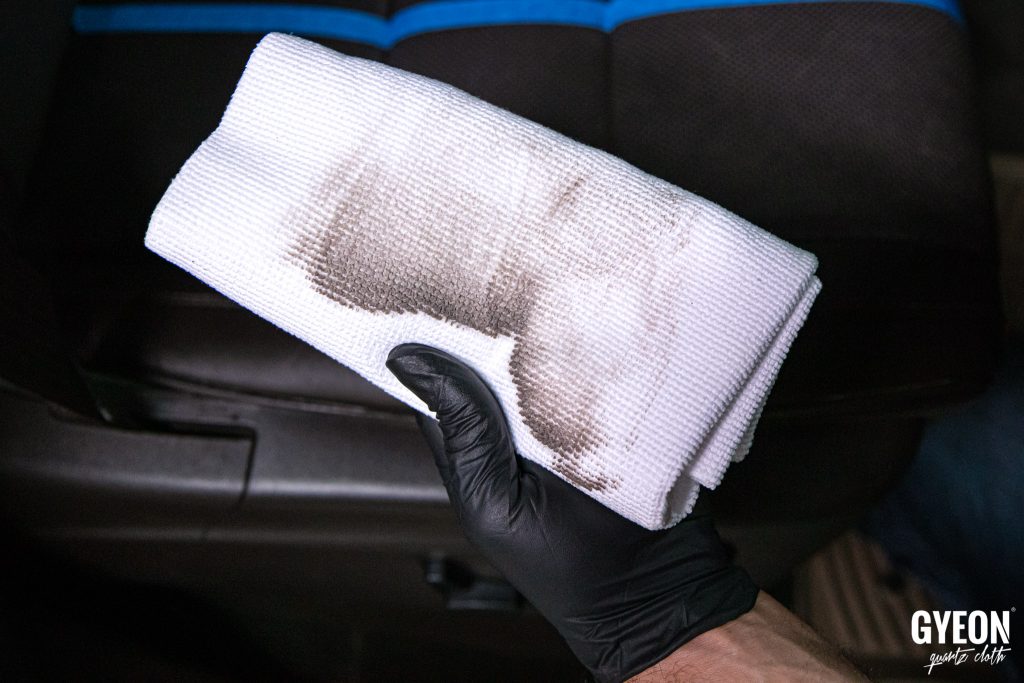
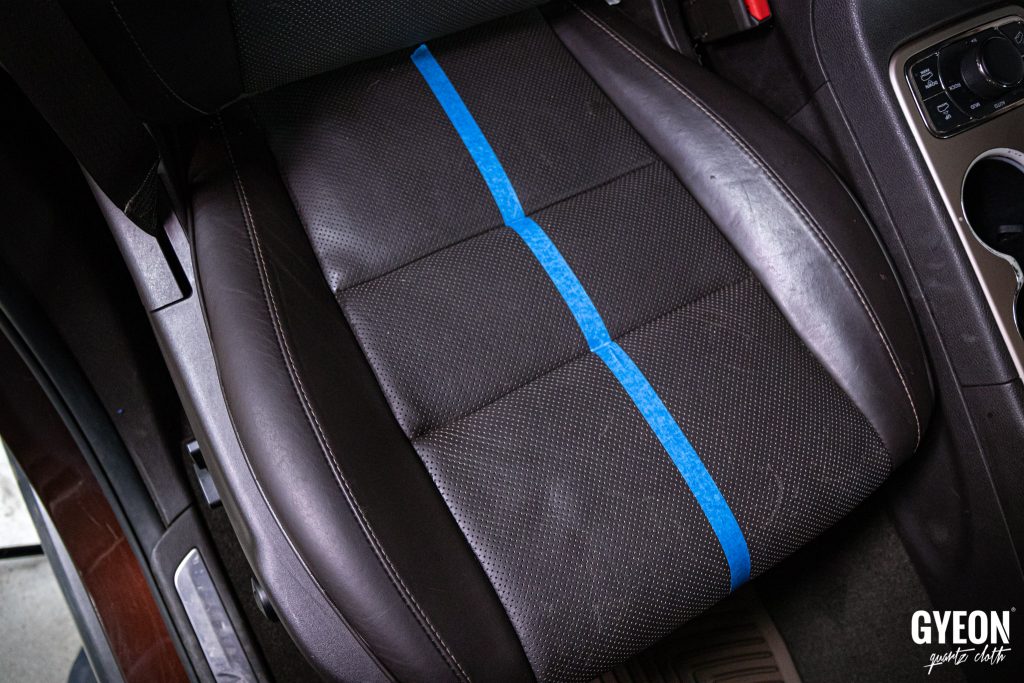
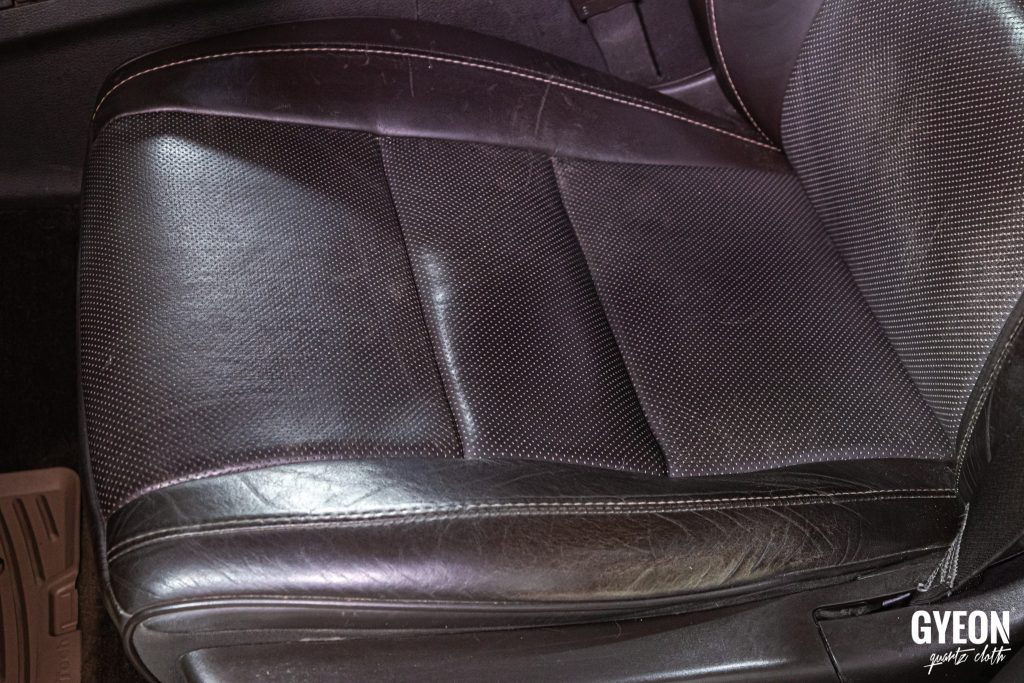
With the left side of the seat cleaned and the right side untouched, you can see a major difference in the finish of the leather. Shiny leather is dirty leather and this leather was very dirty. As you can see, the Mild cleaner is very potent. We cleaned the other side of the seat with the Strong cleaner to compare. Both sides cleaned up very well.

Now on to protection. The goal of protecting modern leather is twofold. First, to create a surface that will repel dirt, grime, body oils, lotions etc to keep the finish of the leather healthy. Healthy and clean leather should have a nice satin sheen. Second, we want to add a bit of slickness to reduce the friction of clothes and jeans as we exit and enter the vehicle which wears down and eventually tears the bolsters.

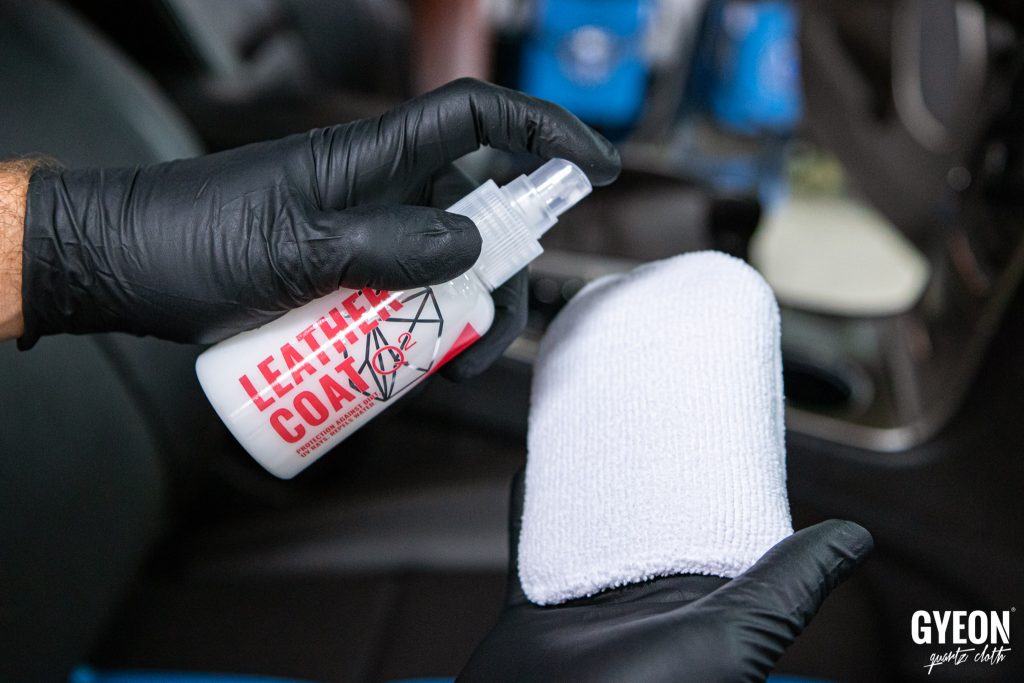
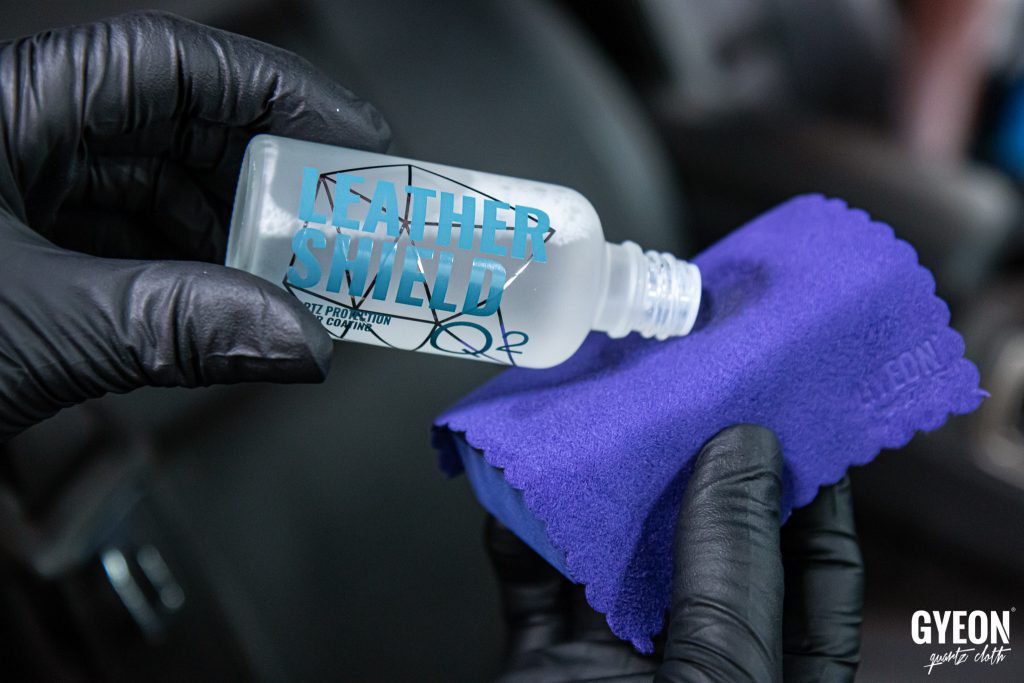
Gyeon produces two products for leather protection: Q² LeatherCoat and Q² LeatherShield. Both products perform very well and accomplish the above-listed goals of leather protection. Q² LeatherCoat is a water and resin-based product that is very quick and easy to wipe in to clean leather. It leaves a very healthy satin finish and tangible slickness. It will last about 3 months give or take. Q² LeatherCoat is great for the DIY enthusiast who is happy to reapply the leather protection a few times a year. Q² LeatherShield is a true SiO2 based coating with a solvent carrier. The application is very simple, but more in-depth. We should see at least a years durability out of the coating and this product is great to offer as a full leather coating service for professionals, but can certainly be done in a DIY setting.
So how do we apply each.
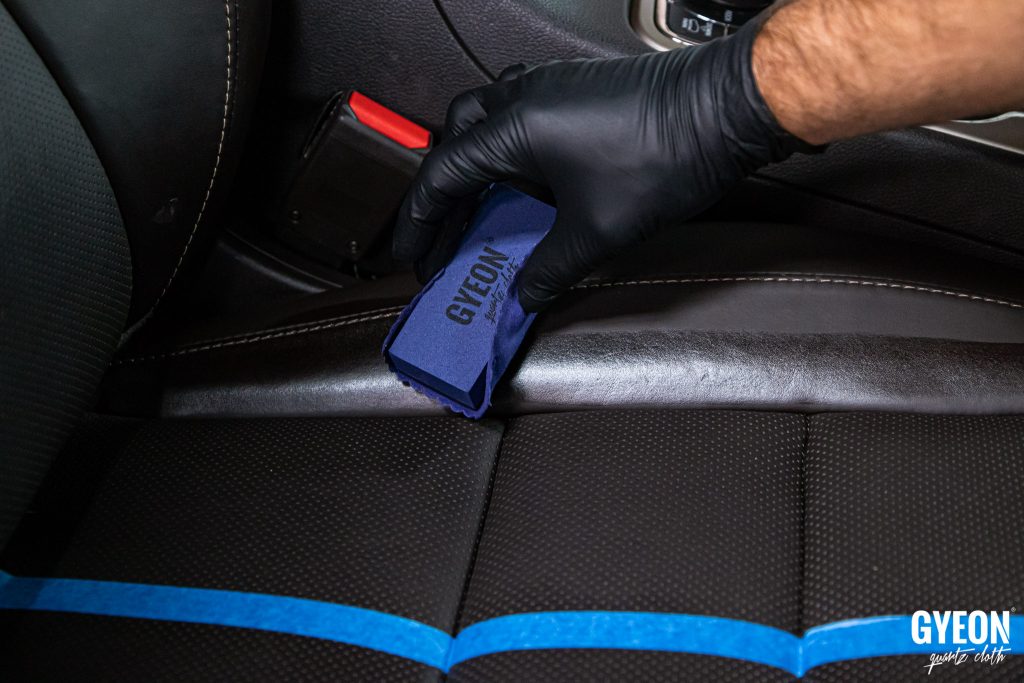
Q² LeatherCoat is very fast and simple. Just spray one or two sprays of the product into your applicator of choice (here I’m using the Gyeon Microfiber Applicator that comes in the sets) and work it into the clean leather. Do a quick wipe with a quality microfiber towel to pick up any excess product and that is it. Give the leather at least 20 mins before you sit on it to allow the product to set up.
Q² LeatherShield is simple to install as well, but not quite as fast. Thoroughly cleaning the leather is very important for this product. Apply a fair amount to the suede applicator. Work in evenly to a small section at a time.
Q² LeatherShield goes on very “wet”. Do not be alarmed. This is where the trust fall comes in and I would not steer you wrong.
Q² LeatherShield should not be “wiped up”. Just let the product dry and bond with the leather. The picture below is immediately after application.
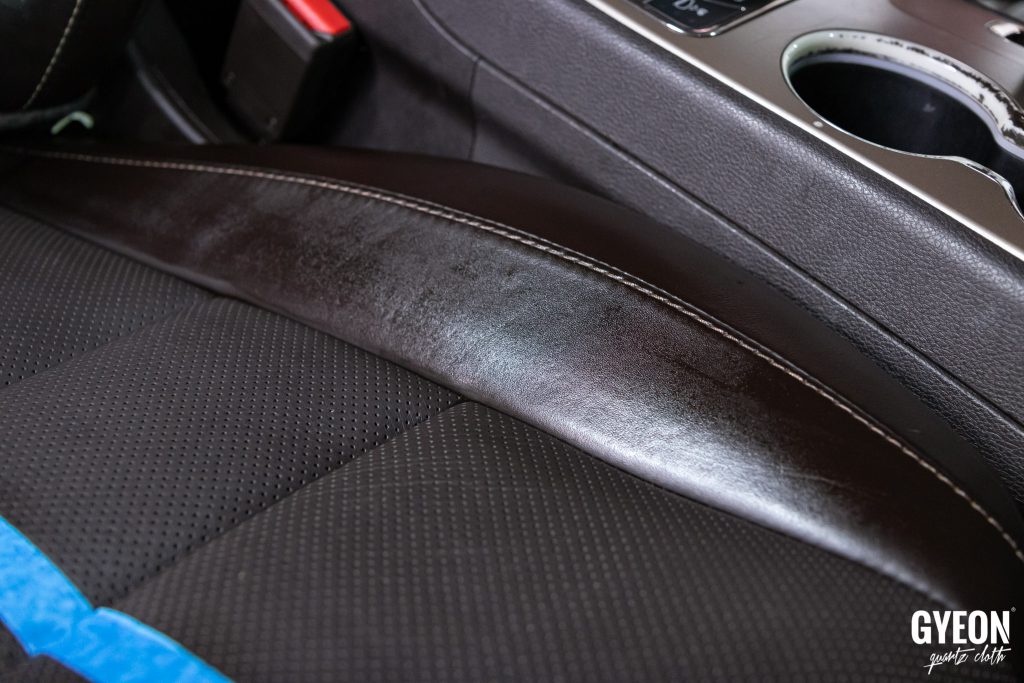
This picture is about 10 mins after application, untouched.
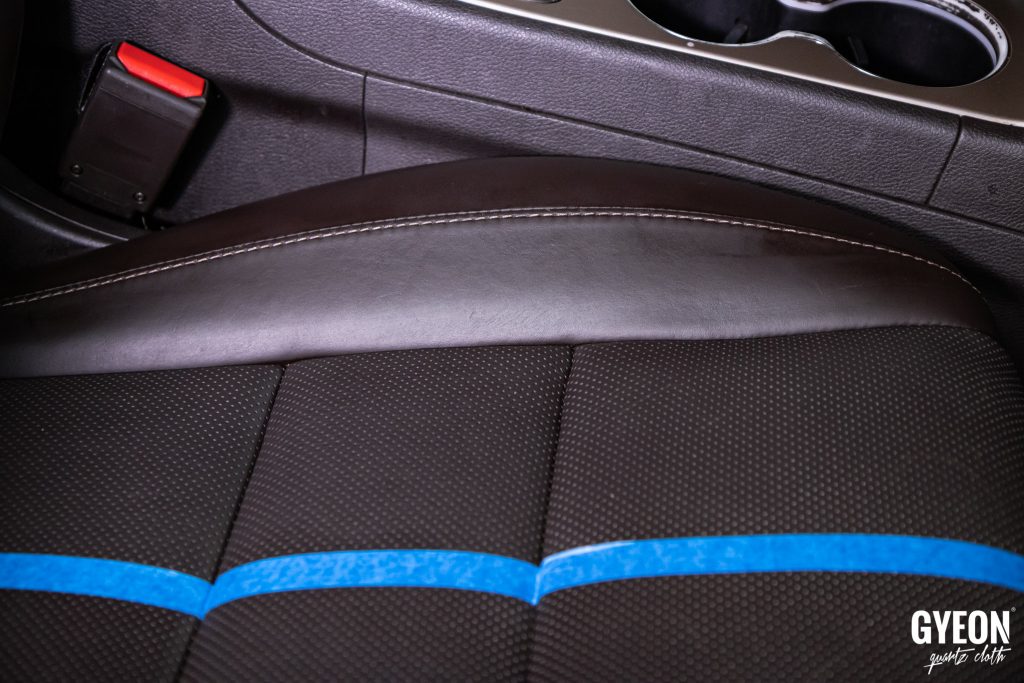
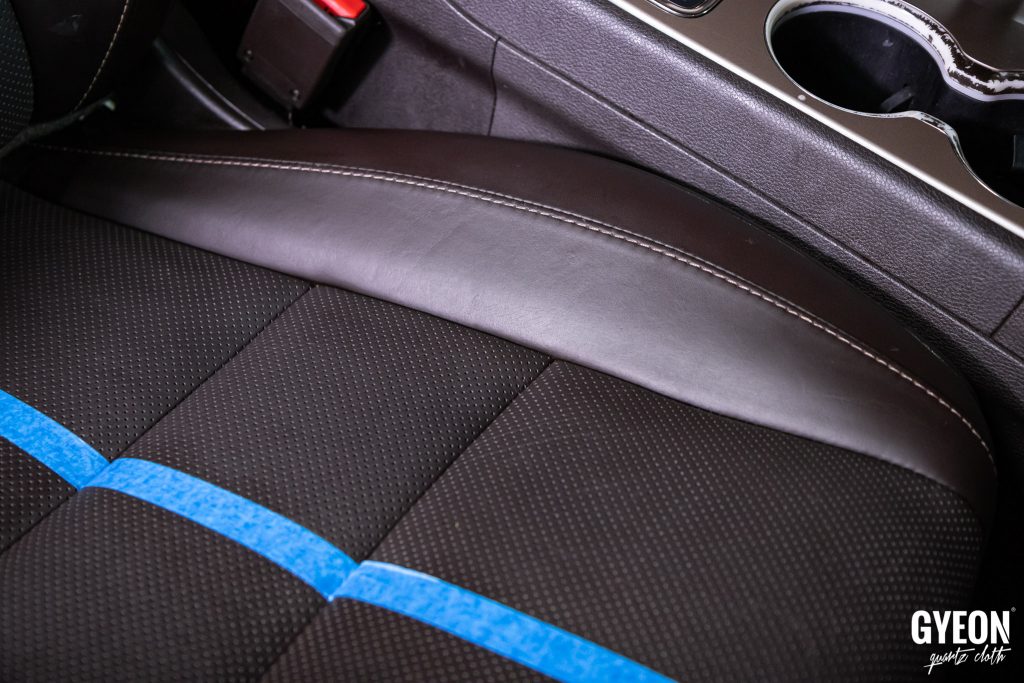
This picture is about 20 mins after application. Q² LeatherShield was absorbed into the leather and has dried without any streaks or smears. The only time I have seen this go wrong is if the leather was not adequately cleaned and the product could not evenly absorb or if someone tried to wipe it off.
And that’s it folks. That is the full rundown of the Gyeon leather products and how to use them. We started with a supremely nasty seat and ended up with a well cleaned and protected but of automotive comfort that I’d be proud to sit in!


Thanks for the howto, I have some LeatherShield at home that I haven’t used yet. My car has alcantara inserts, are there any tricks to cleaning and coating the bolsters without getting it all over the alcantara?
What about the center section of the leather with the perforated holes? Can you also do the same process with those products as well? Will the cleaner get soaked into the holes?