
It’s All About the Visuals 1 – Intro to Photography
by Nicholas ChoppIntroduction
If you want to grab interest, effective documenting of your process – and especially before and after photos – are as good as it gets. I’ve been a photographer since 2002, for my other part-time business (Four Twigs Photography) and for the US Army. In this post, I’ll be providing links to some valuable resources to help you learn about photography, as well as some of my lessons learned.
Intro to Photography
This series of articles at ItsJustLight does a great job of teaching the basics of photography.
Equipment
One of the main questions photographers get is “What kind of camera should I get?” You have three main options (I’m not addressing point and shoot cameras as modern smartphones have comparable image quality):

Cell phone – modern smartphones often have quite high-quality cameras. DXOMark has a comprehensive database of image quality of smartphones.
Advantages
- Availability – you probably already have one
- Convenience of posting/messaging – very easy to just upload directly to Facebook/Instagram/Snapchat/Myspace, or texting to clients
Disadvantages
- Small sensor – performance in low light is usually marginal, depth of field (appearance of areas that are out of focus) is usually low
- No optical zoom (typically)
- Limited manual settings in many phones/camera apps
- No real options for additional flash lighting

Mirrorless – mirrorless cameras come in several different sensor sizes – full-frame, APS, and Micro Four Thirds (M43). Sony, Nikon, and Canon all have full-frame and/or APS offerings.
Advantages
- Image quality – mirrorless cameras have superior image quality to cell phones, with better low light performance
- Size – M43 cameras and lenses are significantly smaller than DSLRs (the full-frame and APS cameras and lenses are larger)
- Lighting – many options for additional lighting (on-camera, off-camera, etc)
- Full manual controls (shutter speed, aperture, ISO)
Disadvantages
- Cost
- Typically need to transfer images to a computer (or smartphone, depending on the camera) to actually use
Digital Single-Lens Reflex – also known as DSLRs, these are the cameras you typically associate with professional photography. Nikon and Canon are the primary manufacturers of DSLRs. DSLRs are largely being supplanted by the full-frame and APS mirrorless cameras.
Advantages
- Image quality – DSLRs (particularly the prosumer such as Nikon D850 and Canon 5D MarkIV) have absolutely stunning image quality and outstanding low-light performance
- Lighting – many options for additional lighting (on-camera, off-camera, etc)
- Full manual controls (shutter speed, aperture, ISO)
Disadvantages
- Size – the body and lenses are typically not small
- Cost
- Typically need to transfer images to a computer (or smartphone, depending on the camera) to actually use
- Being phased out – there will not be much in the way of new bodies and lenses for DSLRs in the future
Photographers suffer from GAS (Gear Acquisition Syndrome) as much (or more) than detailers. It’s easy to fall down the rabbit hole of online reviews at DPReview and other sites, forever searching for better image quality (IQ). I have quite a few options to choose from – ranging from a Nikon D800 with a 24-70mm 2.8 to a Panasonic G7 with a 12-35mm 2.8 – and I typically reach for the smaller, less “professional” G7. I don’t need the 36 megapixels the D800 gets me, since all I’m using the images for is online work. It’s small, easy to use, and has good enough image quality for the intended purpose.
Technique
I think about two major things – documenting progress, and before and after images.
Documenting Progress
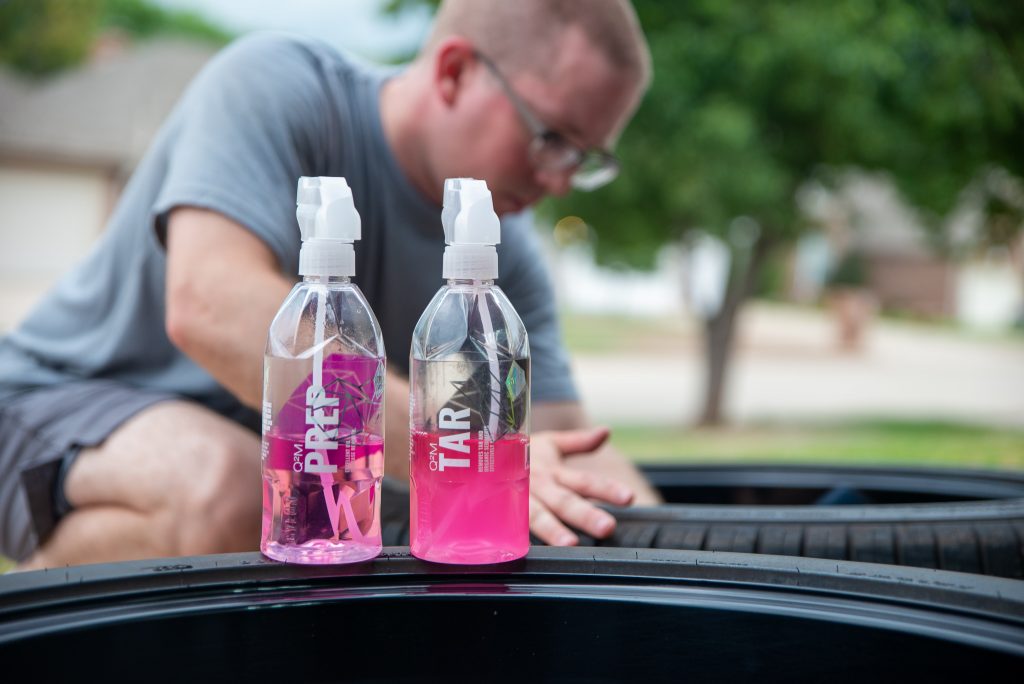
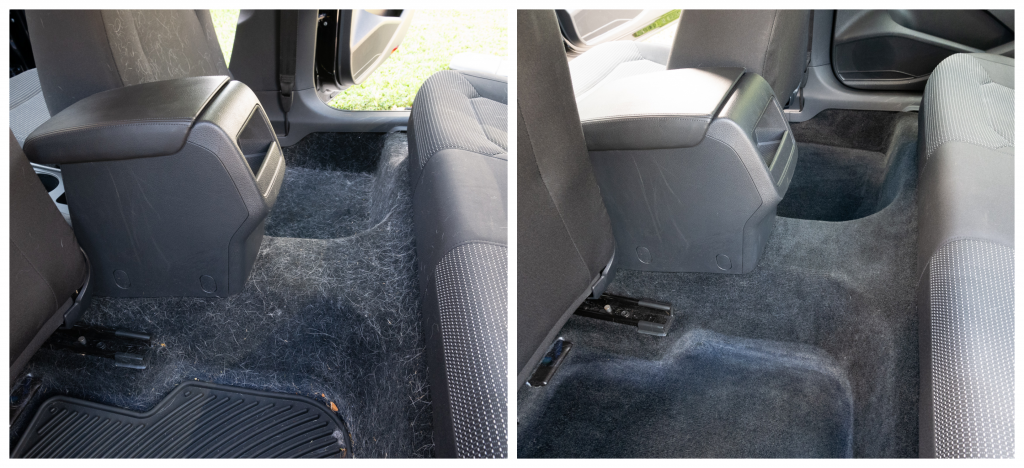
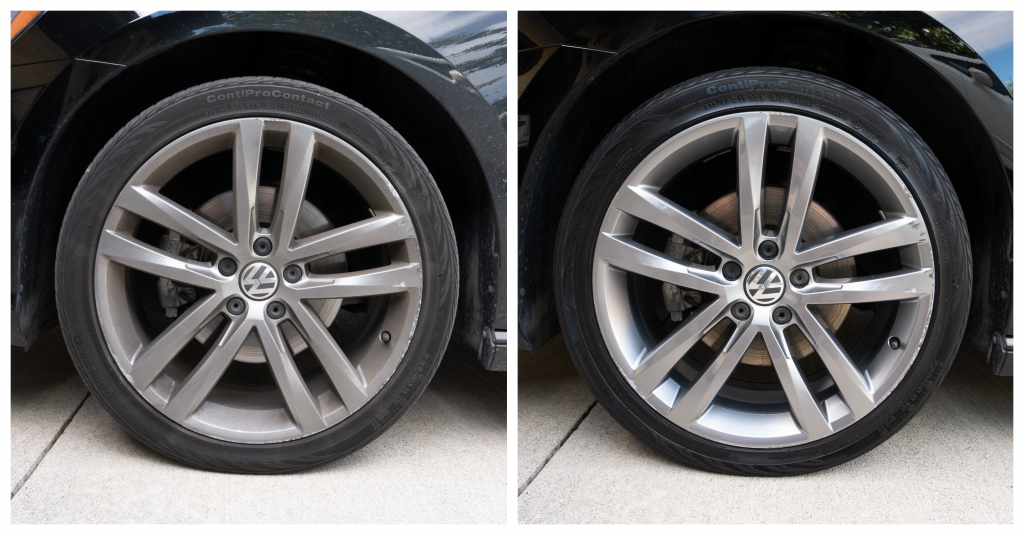
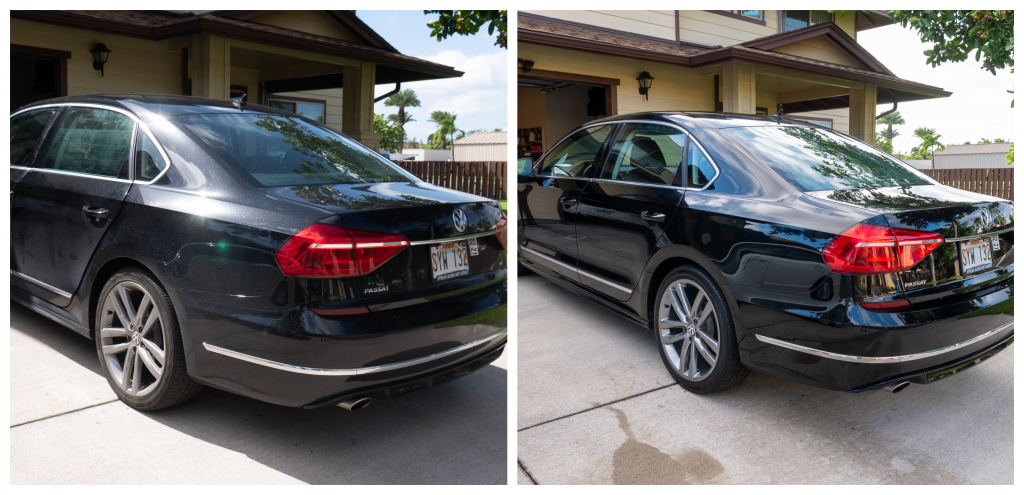
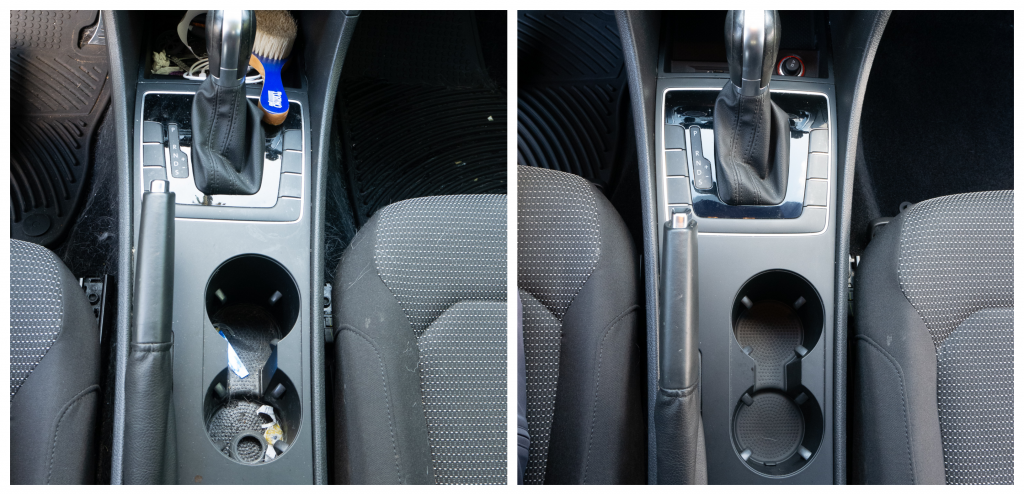
The first thing I do after a client drops off a vehicle is to document its condition at drop off. I take images from the front, rear, and all four corners.
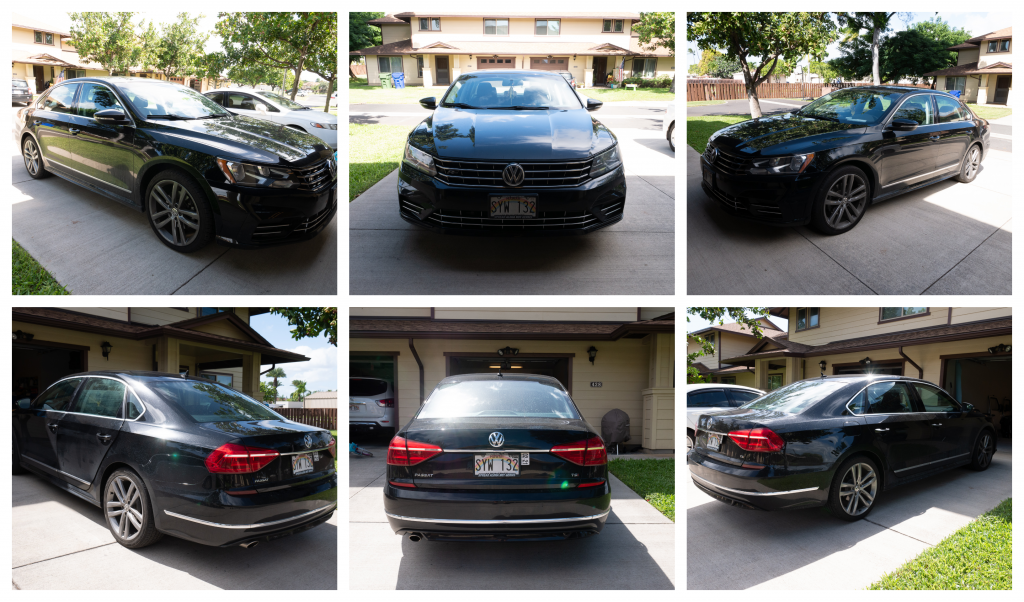
I’ll also grab an image of at least one wheel/tire, and highlights of the interior. I’m a big fan of dramatic before and after images, so if the vehicle is particularly dirty, I’ll spend more time on this stage than if it’s a pretty clean vehicle.

After the intake photos, I get started on the actual detailing. I typically wait until I’m complete to take the after photos. I try and send regular photo updates to the client throughout the day – I’ve found it helps reassure them about the process, and also gets them excited to see the end result.
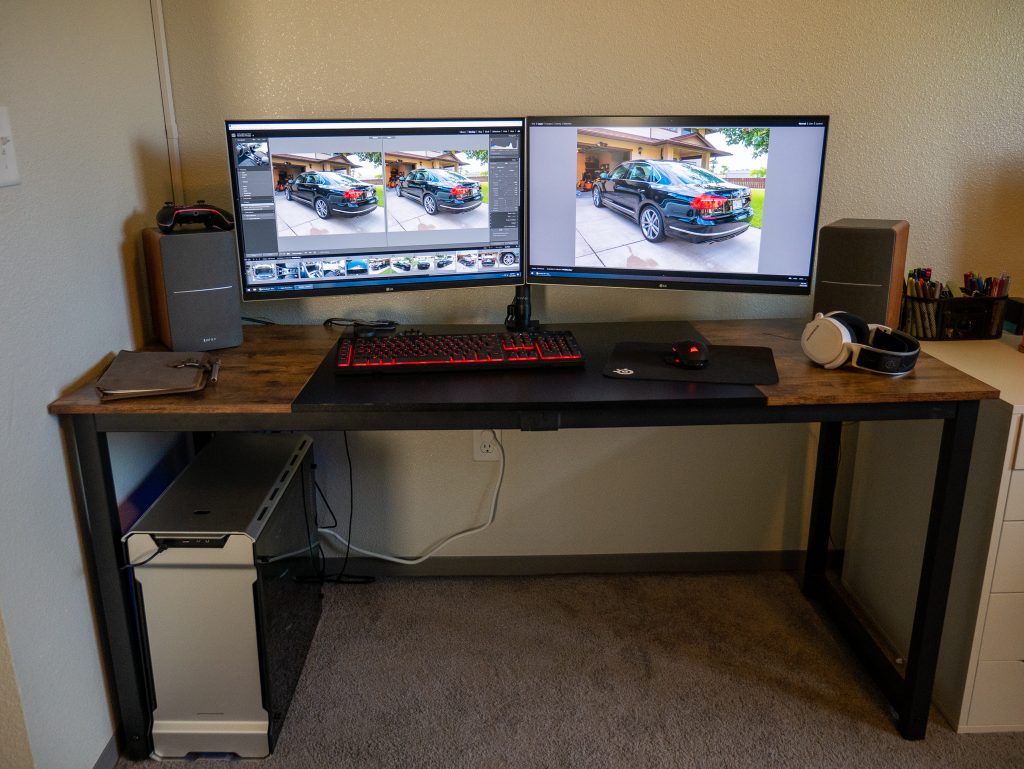
Once I’m done with the job I import all the photos to my PC and do basic edits in Adobe Lightroom (mostly just exposure/contrast).
Before and After
One trick I’ve found to make getting similar angles easier is to ensure I’m using the same focal range all the time. So instead of using the zoom on my lens, I leave it at 12mm (the widest angle) and just move forward and backward with my feet. That way the perspective won’t change nearly as much, and it makes matching the images up much easier. I use the collage creator at BeFunky to create the dramatic before/after images that really show what we do:
Conclusion
This is the first in a series of articles about the importance of appearance – stay tuned for our next two articles! I hope this helped get you on the path to increasing the production values of what you do – please feel free to comment below with any questions or feedback!


As someone who is just starting to scratch the surface with his cameras, working on my photography and video content, I really enjoyed this article. A lot of enthusiasts are really into car photography.
Thanks Rodney! Been enjoying your recent articles as well. If you have any questions feel free to hit me up! (Nick Chop on Facebook).
Great article. I take pics after every detail (I rarely do before, as some clients would be embarrassed by the before pics) and I am always looking to improve my photography skills.
Thanks! And I definitely understand on the before photos – it’s a double-edged sword.
Great article. I’ll just add that there’s a danger in not taking photos before you start work, and that’s running the risk of being accused of causing damage whilst a car’s in your care. Even if you don’t post or provide the photos of the car before work, having them in your possession may save some very awkward conversations with clients.
Plus…..everyone loves a before and after
Thanks Stuart – that’s a great point too. I also do a quick walk-around while the client is there and point out any damage I’ve noticed, and ask if there’s anything else.
I often find that detailing a car, is like reading a book : you often don’t know the whole story until the end! Perception of “damage” varies from one client to another… It’s a big spectrum
Very good article. Congratulations and thank you.