Tips and Tricks to Enhance Your Carpet Art
by Brian GuyI’d like to share with you guys some tricks on how to improve your carpet art.
We are all most familiar with striping the carpets, right? It helps make for a more presentable detail to the interior and customers generally love it. Well, what I’d like to show you could possibly make your customers fall in love with you!
A couple years back when I was running a volume based detail operation, I wanted to separate one car from the next. How could I make this BMW different from that BMW at the same time as making it a little more personable? It was a constant mind struggle for myself. I was always dealing with the same cars and clients. Over the years I got to know everybody on a more personal level. I did my starting years of detailing at cooperate offices. I would collect the cars in the morning as they came into work and I would have their car ready by the time the work day was done. Therefore, I was almost like a counselor to many. I would hear the stories, thoughts and gripes from my clients, good and bad. This is how relationships are developed. And this was why I wanted to really make their day through my detailing service! Plus I really love seeing their smiles.
My guys would handle most of the work with the cleaning and detailing and I would collect all the floor mats to do. First impressions are in the carpets. They have the potential to set the tone for the whole car. Wow, just thinking about all this brings back great memories!!! 🙂
Okay, so one day I was airbrushing a motorcycle helmet and had a stencil in my hand. I had just finished cleaning it and walked inside for a second. I rested my hand with the stencil in it against a suede chair in my house. Not knowing it, I turned and and saw the impression the stencil made in the chair. They were skulls and they were on my chair! Light Bulb!!!

We are all familiar with the contrast of carpet, light and dark, so it’s very simple 2D.
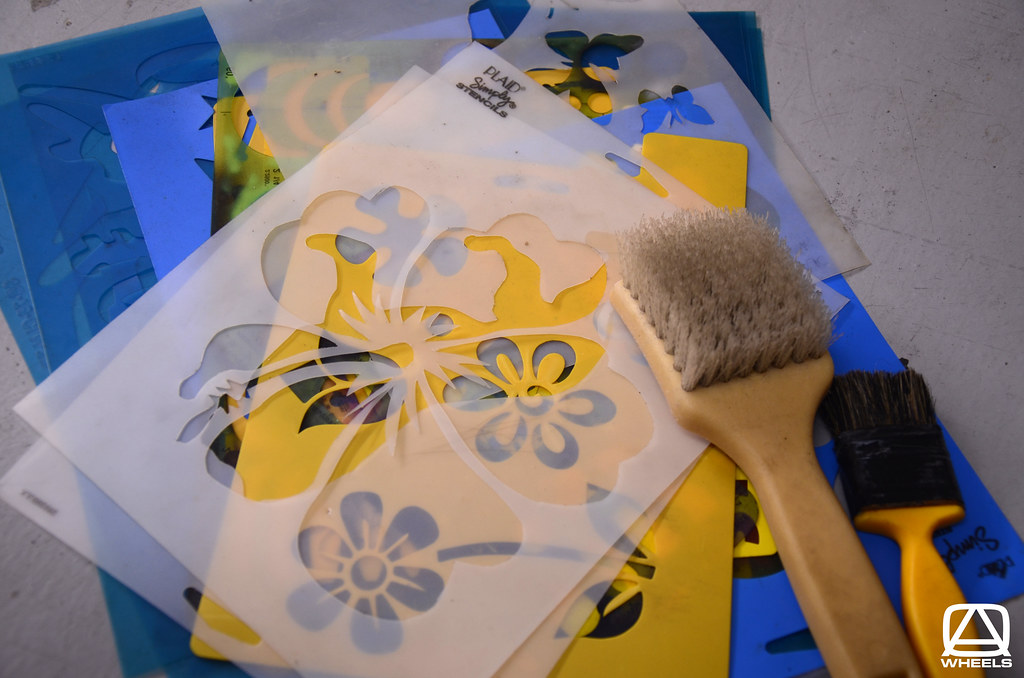
All you need is some floor mats, stencils, and 2 brushes. I recommend for any basic stripping of carpets a nice clean stiff bristle tire brush. They are about 2″ in width and the bristles don’t buckle from use. Therefore allowing us to create straighter lines. Second a short painters type brush with a softer and more condensed bristles. This short bristle painters type brush will allow us to brush the carpet back up to a fluff.
The carpets must obviously be cleaned first. After the carpets are cleaned and the mat is “slightly” damp, brush all the fibers down (this would be the light contrast). Now simply set your stencil into place and brush the fibers back up (this would be your dark contrast). When you are doing this it’s important not to have a soaked carpet. If the floor mats are already in great shape, just mist them slightly with clean water. This allows the fibers to be more flexible for moving them around. It also helps to show a “better” light and dark contrast. Some floor mats are incapable of this, but not many.
I honestly haven’t put anything down on anybody’s carpets in a few years, I’ve been sticking with the normal strips. When I had the time a few years ago, it seemed more worth it and customers really loved it! I would get people asking me to put things like “Happy Birthday xxxxx”, company logos (which I’ll talk about in a sec) and all kinds of things! My clients really got into it and it struck most of them on a personal level. Taking a single mom for example and putting something like “Super Mom” on the passenger floor mat could bring someone to tears, I’ve actually seen it before! These are the reasons I fell in love with detailing in my beginning stages. I was striking people were it matters. So having a good relationship with your clients can ultimately turn into life long friends.
Company logo’s are a great idea if dealing with fleets, limousine companies or whatever. Head over to your local art supply store and pick up some stencil sheets. Print out the companies logo on your printer and use it as something to trace (cut out with x acto knife). Remember to think 2D. I started to think into 3D while doing this over the years. I won’t indulge into my thoughts on that. However, I do believe it’s achievable. Light Bulb!
I recommend not trying this with some individuals and their cars, it is not for everybody. And I certainly wouldn’t do it to someones Ferrari, Rolls etc. But what I do recommend is knowing your client in some way. And don’t put so much force and pressure behind lining a carpet. The fibers will move with light pressure, and we don’t want to damage the carpet.
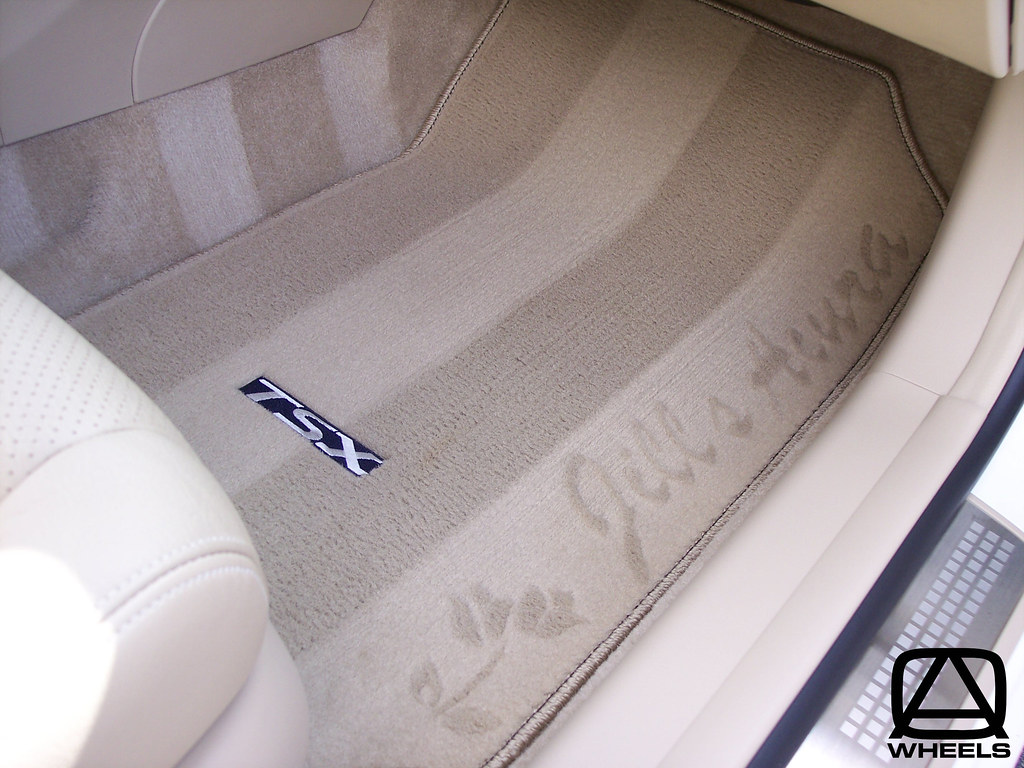
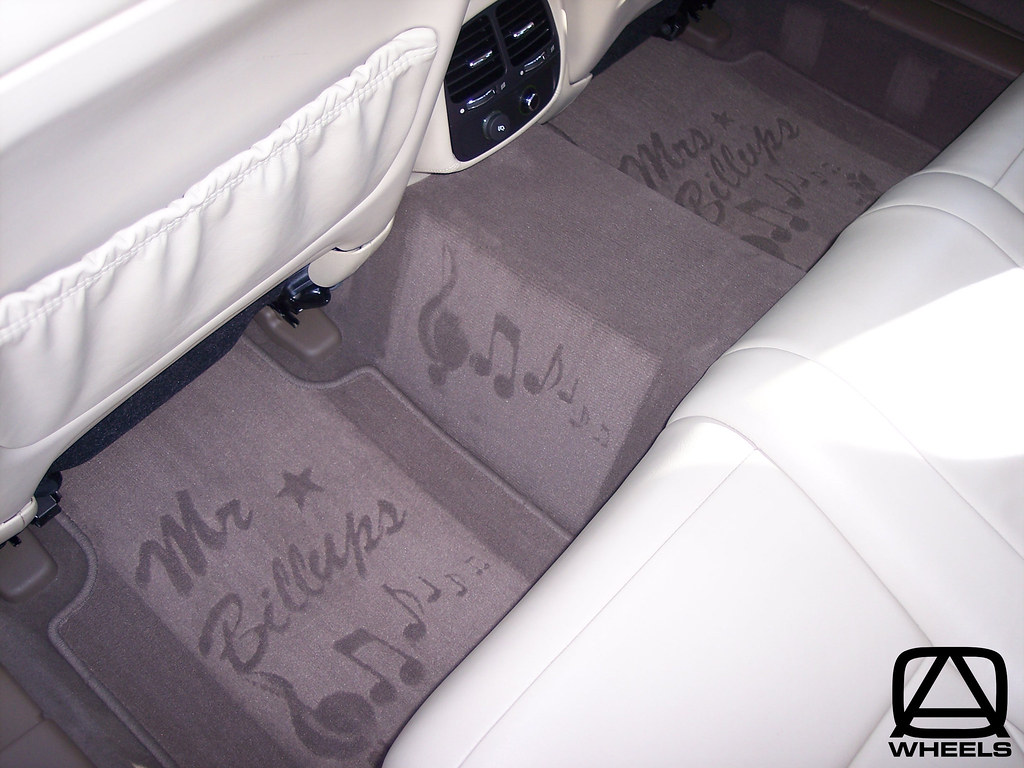
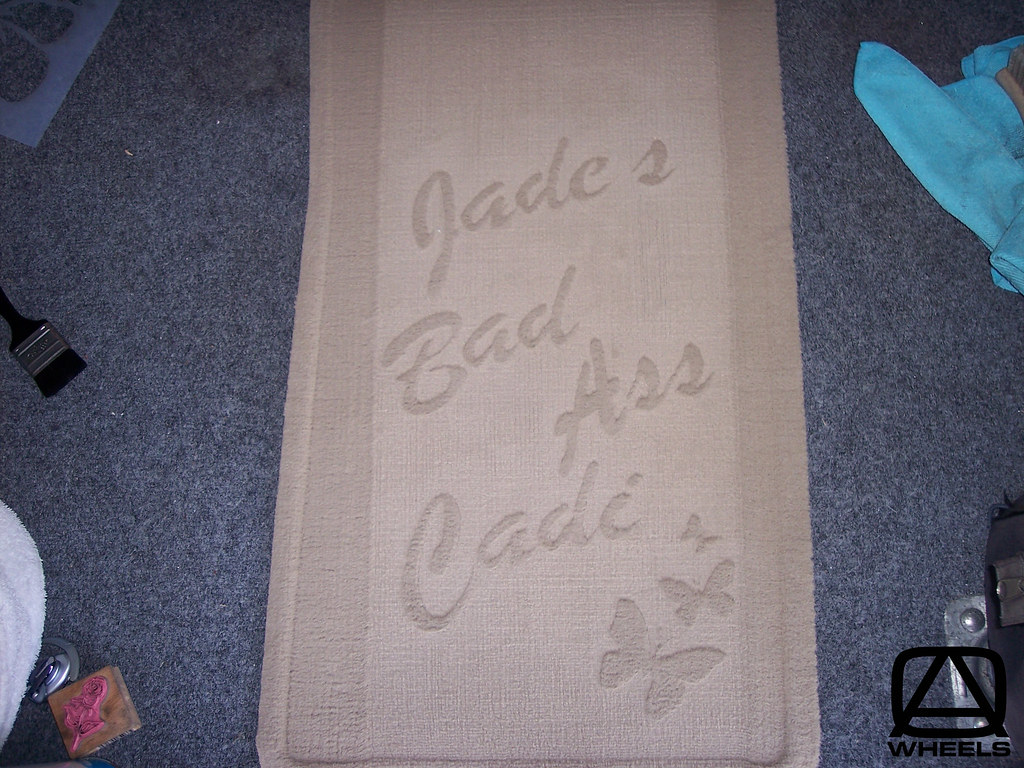
I’ve done so many different variations of designing someones floor mats over the years. If you have a special someone in mind, give it go and embrace the reaction! That’s it for now! Here is a few of my examples.


Above was a request 🙂
Hope you enjoyed and thank you for viewing!
All the best,
Brian


Wow… that is a really good idea. I bet it’s also a great conversation piece when they are showing off their freshly detailed interior. “Look what this detailer did.” Not only does it set each car apart, but it also sets you apart from other detailers. I can honestly say, I have never seen that done. Great write up. These kinds of things are the reason I follow the detailers here on DI.
Very creative, and it does set you apart.
Thats cool
I really like that. I will try that on my cars on the next detailing. I think it would add something extra special on my show cars too. Again Thanks.
Wow, I thought freehanding the Maseratti symbol on a carpet I did a month or so ago was impressive. Thanks for all the great ideas. Can’t wait to start doing this. I am also going to be sharing this on my social network.
Thanks for all the kind words guys!!! Glad You Enjoyed and I hope it makes some customers happy for you!!!
Hello Brian. I really like this article. I am new to detailing and want to know if what you did with the stencils permanent? Or can a person leave it permanent?
Rodolfo,
Thanks for checking out the article!!! This cannot be permanent unfortunately. As soon as the rugs/mats get a little traffic the stencil work will go away.
Brain you are the master in carpet art, all your interior work are great!! Do you mind sharing your process for carpet strips?
Sure Steven!
https://www.detailedimage.com/TUF-SHINE-M50/Tire-Brush-P550/
First I’ll clean and vacuum the carpets as normal. I usually use another brush to help fluff and loosen the carpet up while vacuuming.
Okay, once all clean… I’ll give the mats / carpet a quick spray or two with with nothing more than water.
This brush I put a link to will be designated specifically for lining the carpets. (it will have no other use in its life)
I look for the center line first… Then work to the outsides. I mostly stick with 2 up and 2 down. (This brush will cover about 4″ doing two strokes up and 4″ doing two strokes down) The little mist of water will help gain the contrast if its not damp from shampooing already…
If the bristles in the brush start to fold or buckle… time to get a new brush. The straighter the bristles, the straighter the lines.
Hope that helps some!?!? Thank You for checking this article out and the kind words!!! I appreciate it tons 🙂
Kindly,
Brian
Where did you find the stencils? an i assume this only works on light colored carpets grey tan etc?
Hello Brian, that,s a very wonderful trick. I will be very thankful to you if you upload the video of this trick, please.