
How To Properly Use a Clay Bar
by Todd CooperiderWhat is a clay bar
To many, claying is a magical and mysterious process that only the professional detailers use. They have heard that using a clay bar will remove contaminants and provide a very smooth finish, but they are reluctant to try it.
While there are a few important safety tips to be aware of before trying it, claying your vehicle is actually quite easy and doing it a couple of times per year will help maintain a smooth, clean finish.
Let’s take a look at a few key areas about claying.
Why Clay?
The surface of your vehicle is constantly getting exposed to airborne contaminants that will actually stick to the finish and potentially cause damage. Items like brake dust, industrial fallout, bug residue, tar, etc. Some of these items can be corrosive, and they will start to damage the clear coat and cause rust spots if not removed regularly by using a clay bar. Tiny metal particles (commonly referred to as rail dust) will embed into the finish, and will show up as very small rust colored specs that are particularly easy to spot on white cars.
Regular washing doesn’t always remove all of the contaminants from the surface either. If you run your car through the occasional touch-less car wash (do NOT use car washes with brushes or anything else that touches the surface…that’s another topic I will cover), you will notice that there is still a film of road grime left. Over time that will build up and the only way to remove it is by claying.
By rubbing the detailing clay across the surface of the vehicles, it will actually trap these particles and contaminants leaving a fresh, smooth finish.
Not only does claying prevent potential damage from some of these corrosive materials, but it also provides a smooth surface that allows your sealant or wax to adhere better.
Do brand new cars need to be clayed?
Yes, absolutely! Once cars are built, they typically sit in lots or shipping docks that have a high exposure to industrial fallout. Many of them also spend time on trains and trucks to get to their final destinations where…they sit in lots some more! It’s very common to find rail dust on brand new vehicles. I always recommend that a brand new car gets (at the very least) clayed to remove these contaminants.
How often should I clay my car?
That depends on a lot of factors, but as a rule of thumb I recommend that it be done twice per year. My personal vehicles will get clayed right after we come out of the harsh Midwest winter and then again in the fall before I apply my winter sealant. If you live or work in an area with a high level of industrial fallout, then it should be done more often.
How do I know if my car needs to be clayed?
When the car is wet, lightly run your fingers across the surface to see if you feel any rough spots. If so, you’re feeling contaminants that need to be removed. Another way is to use the “bag method”. You can either put your hand inside of a plastic baggie, or use some plastic wrap from the kitchen. Run this across the surface with your hand, and if anything grabs at the plastic, you know that you need to clay.
What’s the claying process?
First you’ll need some clay and a proper clay lubricant to protect the surface. Without lubrication, the clay cannot glide across the surface, and will actually leave marring and residue (OK, important safety tip…use plenty of clay lube!).
If you are new to clay, or you clay often and thus already have a vehicle in good condition, I would recommend using a fine grade bar of clay from Clay Magic, Chemical Guys, or Clear Kote. The finer the clay, the less chance of marring the finish. The medium grade clay is used for more heavily contaminated vehicles (cars that have gone many years without claying), and it has a greater risk of marring the finish. It’s only recommended that you use medium grade clay if you are polishing afterwards.
As for clay lubes, there are plenty of choices out there. Optimum No Rinse is a great option because it can be used for a wide variety of needs (quick detailing, clay lube, no-rinse washes, cleaning inside of door jambs, etc). Two of my favorites when I need a really slick lubricant are Dodo Juice Born Slippy clay lube or Optimum Quick Detailer and Gloss Enhancer.
Before you start, you’ll want to thoroughly wash and dry the vehicle as you normally would. This is all you need to do to prep the surface for claying.
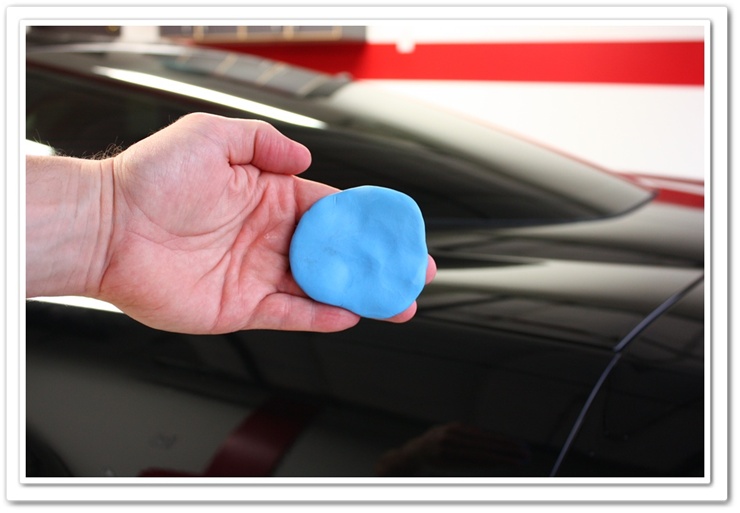
Take your clay bar and cut it up into 3 or 4 equally sized pieces. You don’t want to use one big piece because if you drop it on the ground, it needs to be thrown away! You always want a few backup pieces available to you.
Now take one of the pieces and flatten it out so it’s easily held with about 3 fingers.
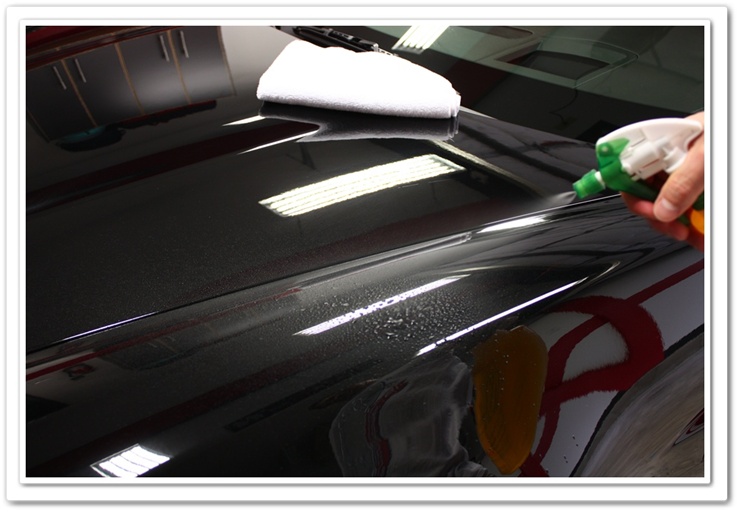
 Work in small sections (24″ x 24″) so that your lubricant doesn’t have a chance to dry out, and preferably do it in the shade. Liberally spray your clay lubricant across the surface. If you miss a spot, the clay will stick so be sure to get an even coverage.
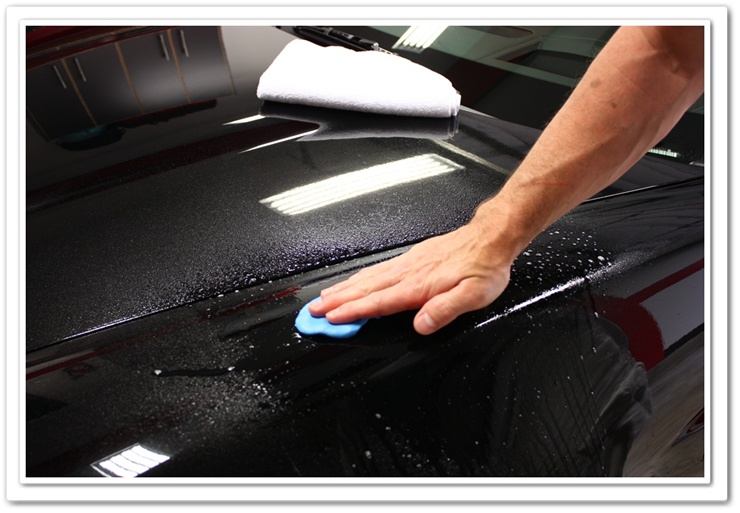
 With light pressure, glide the clay back and forth across the surface. Do this only in one direction and back as opposed to circles or switching directions. You should be able to hear and feel the clay picking up contaminants as it glides across the paint. Be sure not to use too much pressure otherwise you will risk marring or scratching the finish (another important safety tip!).
 After a few passes you should notice that the clay glides effortlessly, and you will no longer feel or hear the roughness in the finish. Once you have achieved this, it is time to move to the next section. If you have a section that still feels rough after a few passes, re-mist the area with lubricant as you’re going to make sure the clay moves freely.
You always want to keep a fresh side of the clay on the paint, so be sure to inspect it often. Do a few small sections, and then flip the clay over to exposure a fresh side. After you have done both sides, you can fold the clay a few times, knead it, and then re-flatten it out to make sure you have a clean piece of clay to work with. You should continually check the clay to make sure there are no heavy pieces of debris in it that could potentially harm the finish.
Typically the worst areas of the vehicle will be the horizontal surfaces, the back end, and the areas directly behind the wheels.
You can also use clay to thoroughly clean the exterior windows, and the wheels as well.
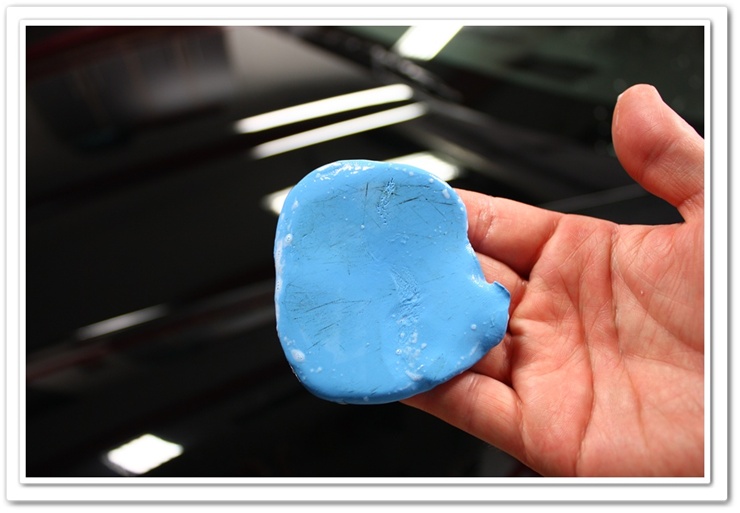
If at the end of the process the clay appears to be heavily contaminated (significantly discolored or feels rough), then throw it away. In most cases it can be used again, so for storage I recommend that you spray the piece with your lubricant, and put it in a zip-lock baggie. Don’t leave the clay out and exposed as it can dry out and/or collect dirt and debris.
Here you can see a little bit of contamination in the clay after doing just one small section…on a new, garage-kept Corvette with only 1400 miles on it!
 If it’s your first time, you should expect the process to take an hour or so. Once you’ve done it a few times (and your car is already pretty clean), you should be able to eventually bring the total amount of time down to about 30 minutes or less.
Once again, if you drop your clay…throw it away!
After you’re done claying the car and you’ve exposed a smooth new surface, you have a few options for your next step.
Some say to re-wash the car to remove any potential debris from the claying process, and some say it’s not necessary. Personally, I like to do a quick wash afterwards to make absolutely sure that any debris is removed along with the residue of the clay lubricant.
If you’re machine polishing, then you’re surface is prepped and ready. If you want to do it by hand, a product like Dodo Juice’s Lime Prime pre-wax cleanser (for light defect removal), or their Lime Prime Lite (no abrasives) to give the paint a nice shine, and a good base for waxing.
Or finally at this point you can go straight to your favorite wax or sealant.
Now you have learned how to use detailing clay like a pro, and you are on your way to keeping a much nicer finish on your vehicle! Have fun…
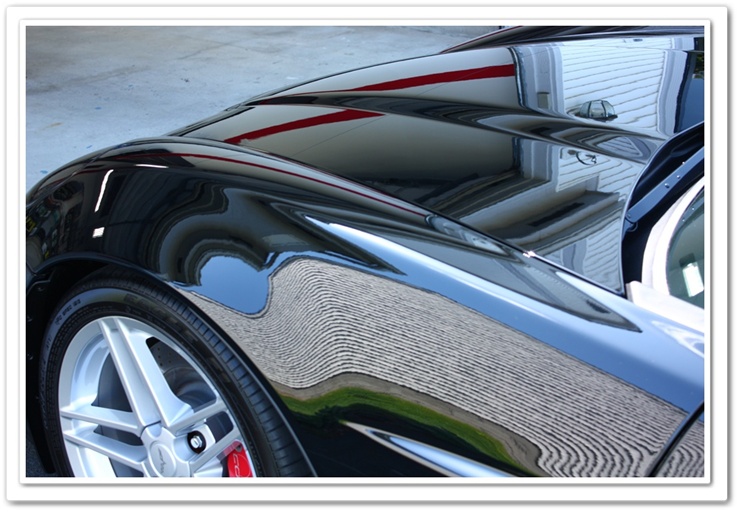
This photo represents the finish after washing, claying, polishing, sealing, and waxing:
If you have any additional comments or questions, please submit your reply in the comment box below.


Todd..i am stunned at what i have learned from this most excellent web site, and from the blogs you fine folks have..i own a 2001 Acura RL with only 40k..just bought it and the surface needs some work..it was neglected and never waxed,just car wash and at the dealer! UGH is right..
i am having a learning curve with the clay process and found that the clay left splotchy areas that i had a hard time wiping off..i used Speed Clean by Griot, and i thought i was lubricating the surface well enough, the clay bar was a a Mother’s kit found at the auto parts store..i read somewhere that they have a device that the clay bar can be stuck on to a holder to facilitate the claying..have you ever seen a holder for a clay bar? i plan on buying clay bars and a CG lube and try again..thanks for the article that i will use in the next attempt!
Rich,
I’m happy to hear that you have learned a lot from our articles! The goal here was to develop the most comprehensive collection of detailing educational material anywhere, and it’s always great to hear such positive feedback.
If you have that happen, just spray some more lube and lightly go over the area again. It’s basically clay left on the surface from lack of lubricant.
I personally prefer to use clay by hand as I can get a better “feel” for what the clay is doing. There are also plenty of tight or curvy areas on the car where a holder would interfere.
Thanks again,
Todd
Todd, what a page of information
Cause you know your stuff. One question. When I come across a paint that needs help,I usually get out the 3M products and the buffer. I know it depends on the condition of the paint.
Seems like I could maybe skip that work infused routine.
Great job.
I have a few scratches on my car. Will using a clay bar help with these at all? They are not deep. I have a ‘05 Mustang. Thank you!
Bob – A clay bar will not help remove scratches. It will only help remove contamination that is embedded in the paint. If you have scratches you will have to polish the paint to remove them. Check out this article for some polishing tips: https://www.detailedimage.com/Ask-a-Pro/polishing-how-to-with-meguiars-m105-m205/
[…] towels, etc,) let me know I can help you make some decisions since your starting out on this. How To Properly Use a Clay Bar – Detailed Image __________________ See Garage Almost Fully Bolt-On See Zats 1'st Detailing Instructional […]
Todd……. great article! I did my first clay job this evening, using the Mothers kit. It contained two bars, a microfiber towel and a bottle of quick detailer for lube. I made sure to spray liberally to keep the surface wet, and I have to say, I was very surprised how easy the process was! The one thing I had a hard time determining was whether my clay was getting to dirty. Other than a few areas near the lower part of the car, the clay seemed to me, to be relatively clean given that this was the first time this car had ever been clayed in the three years we’ve owned it (bought new). We’ve always garaged it, so perhaps the overall contaminant level wasn’t that great? The surface feels nice and smooth, and I’m sure that will be enhanced once it’s polished and waxed.
Mike,
I’m glad to hear that your first experience went well. Typically on cars that haven’t been clayed, you’ll find that the lower portions, the areas right behind the wheels, and the entire back end are some of the most heavily contaminated (especially after winter). You’ve made your first step in doing more extensive detailing on your cars…congratulations!
Todd
So do I clay first and what kind of sealer do I use? What specifically do you use and can you name brands?
Marvin,
Yes, the process would be to wash, clay, and then wax or seal. There are a lot of great products to choose from and it really comes down to what you wish to achieve (looks, durability?), and what your budget is. I typically use the DI clay, Dodo Juice Born Slippy Clay lube, and for a sealant I typically use Blackfire Wet Diamond. If I want a quick wax I will use Optimum Car Wax (spray).
what is your opinion on fw1 wax
I’ve never heard of it, let alone tried it.
Todd,
Great information.
I had a shop here in Dallas clay bar my SL 600 and it now has what appears to be burn on the clear coat. That’s the only way that I can explain it. Are you familiar with any techniques for repairing a clear coat finish and have you seen anything similar to this with clay bar?
Thanks in advance.
Brett,
Claying can and will mar the finish, especially when using more aggressive clay or on dark colored vehicles. I have a (soft) black car myself, and won’t clay it unless I’m polishing afterwards. What you need now is to have the car polished to remove the marring on the finish. This could be done by hand, but if properly done by machine, it would make a night and day difference! Let me know if you’d like recommendations for reputable professional detailers in your area.
Thanks Todd. If you have any reputable detailers that you could recommend in north Dallas, Plano TX area, I would be appreciative. I have done some work on the finish by hand as I am not comfortable enough to take power to it. Still needs work. Thanks again.
Hi Todd,
Great site..
So, I’m scared.. I have a brand new dark blue metallic camaro. Less than a week in my garage. I’ve done my first wash a and wax, but pretty sure I should clay bar. I haven’t done the baggy test, but after my first wax, my microfiber towels don’t glide over the surface like they used to with my vette. Did I wax wrong of is claybar the answer.
I have a bit of experience with clay bar. I used to clay bar my black vette. I bought the vette used and it certainly helped, but I wasn’t as concerned about mistakes with the vette as I am with my brand new car.
I’m scared because I saw your comment about claybar possibly marring black/dark finish and don’t want to do something that I’ll be upset with myself about.
Any specific recomendations for brand new dark metallic colors?
Chuck,
You’re correct in that there’s always the potential of slightly marring the finish when using a clay bar. You do have some precautions however that you can take. First of all, be sure you’re using the Ultra Fine Clay Bar as it will have the least risk of marring on your brand new vehicle. While you’re at it, pick up some good hand-polish as a backup in case you do get marring. I’d recommend the Sonax Nano Techn Paint Cleaner as it works very well at removing light haze or marring by hand. Do a small test section of claying in a relatively inconspicuous area (but one where you can still see if you caused marring…shadows can hide defects). Lightly clay with virtually no pressure, then wipe down and inspect the surface. If it looks good, then continue on and keep checking your work. If you experience any light marring, then use your Sonax Paint Cleaner with a microfiber applicator and see if you can remove it. This process should help you to get through the claying process with a bit more confidence!
Hi Todd,
i just finished reading your article and it give a whole new preservative in claying my car. I would like to enquire whether it’s possible in using car shampoo instead of the detailer with the clay bar ? Hope for your reply soon. Cheers.
Yes Suresh, it’s fine to use a dilluted car shampoo / water mix for claying. Just as long as it provides lubrication, then you’re good.
Can you use a clay bar on new paint I have some buff swirls on my car how can I remove them?
thank you Charlene
Yes you can use a clay bar on new cars, but they won’t do anything for swirl marks. The only way to remove buffer-induced swirls on paint is to have it buffed out properly.
Todd,
Thank you for this brilliant article.
I just recently bought a used car, its been repainted, black no less.
She shines pretty good, however I have a feeling I can get more out of her.
This would be my first time using a clay bar, and I know this car could use it; so should I go with Ultra Fine/Fine clay and work my way to a medium? Or should Fine be just…. well, fine.
Thank you.
Gino,
Especially with black paint, I’d try using the least aggressive clay first. And keep in mind, that even with the best products and techniques, there’s a good chance you will create slight marring of the black paint when using a clay bar. And claying alone won’t increase gloss…polishing will. If you’re going to clay, I’d also recommend polishing the car out by hand afterwards with something like Sonax Nano Tech Paint Cleaner or Dodo Juice Lime Prime
Hi Todd,
Thanks for the great site. I just took delivery on a brand new Black Cadillac CTS and already have a Black 2007 Monte Carlo SS. I have never clay barred my cars before and would like to ask if I should clay bar the CTS immediately or wait a little while. I saw your advice on using the lightest grade clay for black cars. Also I have looked at the Turtle Wax black car kit that has a precleaner, detailer, and wax. Can I use the detailer for lube and after claying should I use the precleaner, detailer, and then wax? Should I use the same grade clay on the 2007 Monte Carlo and take the same steps? I know it is a lot of questions but I want to be sure I don’t hurt the finish. Thanks for your help!!
George,
I’m unfamiliar with the kit you’re referring to, so I can’t add any advice or comments on it.
Brand new cars should be clayed as well, but usually just on the horizontal surfaces. Be careful though as you run a risk of marring the surface even with the mildest clay. You’ll probably want to follow it up with a polish that can take out any light marring and that will also leave a layer of protection as well. For this I would recommend Sonax Nano Tech Paint Cleaner. Have fun!
Hi Todd,
I’m slightly confused and I have two questions.
First I’m confused because your article said to clay new cars and there were no restrictions but in your answer to George you said yes, clay new cars, but only on the horizontal surfaces. So, can I clay the entire new car or should I just do the horizontal surfaces? My new car is white.
I was told by an “expert” to wipe off the clay with a thick micrfiber towel after claying each small section but I did not see anything about this in your article. Did I miss something?
Thank you,
Malcolm
My other question
Malcom,
I haven’t gone back and read all of the questions / replies, but I’m sure what I meant is that you can typically get away with just claying on horizontal surfaces if you didn’t wish to do the entire car.
And for the recommendation you heard about wiping off the clay with microfiber…that’s not something I’ve heard of before. I’m not saying it’s right, wrong, or indifferent…just that I’ve never heard that advice or technique. As long as you frequently fold and knead the clay, you should be fine.
Todd
Today i wiped some bird dropping off my auto. I found some slite etchings in the clear coat. Can This be repaired. It has been very hot heat in TX. This happened all in one day. Is there hope?
Ron
Ron,
Yes it can be repaired, but it will require the use of an abrasive polish. You can try something like Meguiar’s ScratchX by hand to see if it takes care of the problem. If not, then you’ll need to have that spot machine polished by a qualified person to level the finish. Yes…it’s amazing how quickly bird bombs can etch into the finish in the hot sunshine!
Todd
Thank you so much for all of your help. Your the best.
Ron
Hello Todd,
After buying a DI claybar and Born Slippy lubricant, I stored the new claybar in a baggie with a bit of the lube to keep it from drying out and kept it in a cool place per a recommendations from a guide on this website.
After returning after a few weeks, the claybar was rather soft. When using it however, the claybar seemed to dissolve a bit into the lube, leaving a powdery residue when the lube dried. It clayed my car well for the first and only time I got to use it, but when I came back to it a few weeks later to use it for a different car, the whole thing was moldy?!
What happened?
Brandon…good question as I’ve never seen this happen before. I personally keep mine in a sealed container without lubricating it prior to storage, and don’t have any problems.
Todd I have been looking hours on the internet to find out how to really detail my car and this is the best article I found, thank you for posting this, now I am new to this and still have some questions. Now I baby my car and want to do this right, and I just found out that my honda prelude had some tree sap spots on it, and very slight swirl marks, you have to look in the light just right to see it (this is actually my fault because I waxed the car with a rag and never clayed the car before never knowing I had to). But that being said I have bought all meguiars products, such as the high tech yellow wax, the ultimate polish (prewax glaze), and the 160 gram clay bar with quik detailer. Now an important question I wanted to ask was everyone on other websites say that the clay bar will take off all the existing wax and sealants, is this true? Also what if I marr the paint will this cause permanent damage? And if I wash my car right after, isnt that causing a risk of water spots to the clear coat? Also I was planning on polishing by hand, never using a buffer before (I have one just a little nervous to use it) but will this get out my slight swirl marks? Plus do I really have to tape everything up, like my window seals and all of that? And what could happen if I dont? I have waxed many times before but just washed my car and waxed right after. Never claybared or polished before. Thanks!
Hi Todd, this is an amazingly helpful article and I plan to follow it to a T. I just bought a 2012 Silver Hyundai Elantra. I want to clay it, but what do I do after claying? Polish/Wax/Seal?
Time and effort are of no concern to me. I can do all three after claying, but I don’t know which order, and I don’t know if I can do all in one night or if I should wait between steps.
My car will be parked outside in Chicago and will be getting lots of miles as well. So, I really need to properly protect this paint job!
Thanks so much!
Amber,
If you do just a light claying on your silver car, you can probably get away without having to do any polishing. After claying, you can go straight to using your sealant or wax of choice. Given the fact that you’re in Chicago, I’d recommend using a sealant instead of a wax because it will be much more durable in the winter.
Great article Todd,
Is it okay to clay both the metal and plastic (ie color matched bumpers and such) surfaces of the car?
Thanks
Yes, it is fine to use in these areas. Metal, glass, chrome, painted plastic, etc…all good.
Just got an old VW from a friend that didn’t do much cosmetic maintenance. It is beginning to oxidize on the horizontal surfaces. I plan to polish by hand to try and improve the situation and I am going to clay the car first. It is black paint, but given the decade+ of neglect, should I use a medium grade clay since I will be polishing afterward? I’m not looking for a showroom shine, but want to get the best look without having to repaint. Does polish work as wax, or do I need to get a coat of wax on after polishing?
P.S. Great article and pics! Thanks for providing us with your knowledge.
Todd,
I have not had a good experience with clay bar. I used a z y m o l clay bar and lubricant. Luckily, I did it on my old truck that I just sold. I did a trial section. I scratched my hood badly. I obviously did something wrong. Maybe I put too much pressure. how do I know that the clay is ultra fine? Unfortunately, I am now clay-shy. I have a new cadillac ext and am too fearful to clay the beautiful new finish. I have used zymol hd cleanse and vintage estate glaze carnuba on the brand new finish. Do you have experience with these products? Any words of wisdom to get me back into the ring? Thank you very much. This web site is very helpful and a wealth of terrific knowledge!!!
Bill
Hi Todd, your site is a tremendous resource. Thanks for sharing:)
I’m hoping you can help me please with a cosmetic issue on my ’08 Corvette/Black interior.
On the interior hatch panel, I have what I would describe as stains, & “glossy” smudge/grease marks.
If it helps, I’d be more than happy to send you pics?
From combing the Corvette Forum, it’s my understanding that the finish on the interior hatch panel is very delicate. My guess is that the former owner used Windex (or another product with ammonia) to clean the interior hatch glass, which created a residual spray-off, or dripped onto the panel (I only use Stoners Invisible Glass). Also, that an object (golf bag?) in the hatch area rubbed against the panel & created a smudge mark.
Can you recommend a specific product(s) that will remove the blemishes, and/or blend the finish keeping the OEM look/color?
Before applying a product, should the panel first be cleaned with soap & water, or an all purpose cleaner?
Thanks in advance for your keen insight/advise.
Best regards,
Glenn
I have a 2007 Honda with quite a few bugs/insects imbedded into the front of the hood and grille.
I don’t think it has ever been clayed. I had it detailed and waxed, but they didn’t get all the bugs off the front of the car. Will claying help remove these and should I use fine clay bar or something more aggressive? Thanks for your help!
[…] you will need the proper pads and polishes for the job. Then before any polishing is done, properly clay bar all painted surfaces to remove any bonded contamination that could interfere with polishing. Seeing […]
[…] is always that time that comes along when your clay bar just isn’t enough to remove the contamination at task. For example, say you have some road tar, […]
Hey Todd
Great article. I just bought a 2008 black Pontiac Solstice for my wife. The finish is in pretty good shape, the guy who owned it before us told me about using a clay bar. After treading your article and some of the comments I have decided not to use a clay bar on it. What I need to know is first: what’s the best and safest way to wash it and second: could I then just put a good carnauba wax on it. There are some light swirl marks that can be seen on the hood ( that’s what I don’t like about dark colors) but for the most part the car is shiny. I just don’t feel comfortable using the clay bard or polish, and I don’t know of a detailed here that I could trust. Any advice would be appreciated.
Always enjoy the articles from the best on detailEd image…this website is on my daily routine….keep up the great work!!!!
Greets Todd! It’s refreshing to find a site with an author so willing to personally answer (accurately) the greater amount of questions tossed at you. Most commendable! After reading ‘all-of-the-above’ queries regarding claying, I believe the “clayers” that have never used the stuff are trying to determine “what do they do with the remaining lubricant once they are done working an area?” Wipe it up or? (Hence those questions about what kind of microfiber towel or “whaaaat” do they use, if anything, to sop up lube that remains when they have finished an area.
My general answer would be that you don’t do anything with the lube except to keep “chasing it” until (let’s say) the rear deck is fully clayed out and grit-less. (But THEN what does one do with the lube that has trickled over edges and ran down the back-end of the vehicle)? Speaking only for myself, I keep using the same microfiber towel (I mean one towel per step) to “catch and soft-buff” the ‘over-spillage’ in such cases. Do you concur? (I am NOT nearly or even remotely an expert with such things, but rather, I copy what I see the pros doing and pray that it works for me). lol… My 2010 Caddy CTS (Performance) is ALL black, “soft as hot butter” and so far I’ve had excellent results using Turtle Wax “Black Box” (it contains black pigmented finishing spray that you also use as a lube AFTER first using the supplied cleaner/conditioner. That’s followed with one or two coats of black pigmented Carnauba Wax (hard) that will virtually hide the greater majority of “light” swirls, rock dings (but not if you can see the undercoat). THEN you once again use the finishing spray to get that awesome “wet look” …and that’s it! You might say it’s an amazingly acceptable work-a-round for those who aren’t yet “comfy” using orbitals & polishes/sealants (which I agree are “much tougher” than any wax out there). For those who are no stranger to orbitals (any type) Turtle Wax “Black Box” is 10 times “prettier” when “machined” as opposed to using just elbow grease. Lastly, prior to anything I first clay using Meguiar’s “white clay” (very non-abrasive (light-duty at best) and unlikely to leave marring, even on “soft” black finishes provided you use ample amounts of lubricant and ‘zero-hand-pressure’ (just let it glide)! (I don’t think one can stress the importance of “ample lube” when claying enough can they)? To close, thanks so much for everything which your site and personal time has contributed. You have saved my “hiney” from committing hideous errors at least 50 times, and I appreciate it immensely. Cheers!
Say Todd ….you still breathing? It’s been like 7 months and “we” are getting a wee bit concerned with your ‘disappearance’.
My posting frequency has dropped off, but I’m still getting some writing done every now and then. Business has been booming…new facility, huge growth, hiring and training employees, running my new detailing academy, etc, etc. With all of that, it’s hard to dedicate 2-5 hours to write!
[…] Or do you leave it on and then wax/ seal? Here is a good reference on how to clay a car: How To Properly Use a Clay Bar – Detailed Image Very thorough instructions. Hope this […]
Thank you for your articles. They are a fantastic resource and a great read.
Amazing
U just made my day with this article
I just got a new Hyundai sonata, silver, and I waxed it with liquid hard shell turtle wax. It looks great and then I read about claying. If I decide to clay it can I clay over the fresh coat of wax and then apply a second coat of wax? Thanks.
I have been reading and loving your articles searching for a situation like mine so I thought I would just ask. I have a black BMW x5 , she is 12 years old and needs some love. I have read all about clay bars and quite frankly it scares the hell out of me. Most of what I read seems to be care for fairly new cars or cars that have been clayed before. My car has never been clayed just washed and waxed. Thr paint is well 12 yrs old but cleaned up doesn’t look too bad. Due to having kids there are some minor scratches and from camping and going to the beach as well. Is claying still a good choice for a black car that probably has a lot of contaminates in the paint? Or do I just wash it & wax it and be done? I really would love to see it shiny and pretty again. If you have any advice I would love to hear it. Thanks
I just bought mcguyers. Clay bar kid….my son and I just got done with it today and we also waxed a
It as well……it made a. Real differance… felt smooth as glass…….loved the results……..
Great article…I hadn’t clay-bar’d a car in awhile, I took the kit out tonight and just looked for a refresher instruction, it’s funny how quickly it comes back to you…spray with one hand, clay with the other and you can do a door in a couple of minutes. then wipe. The difference is remarkable on my Merc CLK63 AMG.
Incredible….. I just bought some clay and a bottle of polish from advanced auto to use on my G37. Your article just taught me all I need to know to do this without being nervous. Thanks a million. Your vette looks GREAT!
Thanks for this article – I’m not so apprehensive about claying after reading each and every question and response.
Much obliged!
Arden
[…] pretty much makes this impossible. However, I've run across this website before and shows how to clay bar. Maybe other users here will give better/different […]
Hey there! You article finally gave me the confidence to give Claying a shot. I just got my Mother’s 2007 Mercedes (In black, no less) and it has seven years of neglect built up on the paint (in the form of tree sap). I purchased the Mother’s kit and will be Claying the car the next chance I have, but I have a few questions.
1) Should I wait until I have the resources to correct any botched areas to Clay it? All I have at my disposal are the usual washing mitts/microfiber towels and some spray-on Turtle Wax.
2) Can I Clay the windshield? The built-up tree-sap makes it splotchy when I use the wipers.
3) Will Claying do anything for swirls? Other comments seem to point at ‘no’ but I’d like to be sure, because this poor car has a lot of them.
[…] is going on lol. wash, clay bar, wax. no? i was told it exposes the clear coat… https://www.detailedimage.com/Ask-a-P…se-a-clay-bar/ __________________ 2005 LS G35 Coupe | HKS | MD | Stillen | H&R | Nismo | HD | Ztube | SPC […]
I got a Meguiar’s clay kit for Christmas and ran across your article on claying while researching the “how to” and “why” for claying. You wrote a great article. My comments concern your apparent extremely low mileage Corvette. My wife and I bought a 1989 red Corvette, a C4, as a third car and I was so proud of it that I drove it very little and washed and waxed it quite often. We babied it and drove it to special occasions like the Georgia-Florida football game in Jacksonville and only to work once in a while. I drove it so few times that I warped the components in the engine block from allowing them to become dry from gravity causing the oil to fall off the parts. I paid at least one thousand dollars to have a new half-block (?) installed, most of which was labor. After that I decided to drive it more regularly. In June 2000 I used it as a trade-in at the same Chevy dealership where I bought it. The ’89 Vette had only 51,600 miles on it in eleven years and all I got as a trade-in was basically wholesale. Trust me when I say the car looked brand new. That trade-in was for a Tahoe, but in May 2003 we bought a new red Corvette, a C-5, with a factory pick-up. We still have the ’03 Vette and I drive it quite often, even though it is still a third car for two drivers in the family. I still wash and wax it often but I drive it a lot. My point is that a Corvette is made to be driven. I regretted that I did not allow myself to enjoy my ’89 by driving it much more. Even if using the car a lot results it it not being pristine, it is a shame to forego the driving experience just to have a perfect car in the garage.
Could the clay bar be used to clean glass shower doors and panels?
Thank you Todd for the article. I was not familiar with this process, until I spotted a clear coat damage on the top of my car (most likely because of sunlight exposure) and search online for ways to restore or prevent clear coat from wearing out. I noticed you wrote this article some time ago and wonder if you can provide with an update, weather the products you are using still your preferred ones or perhaps you have tried other ones. Thanks again for the help.
I need to remove tree sap from the windshield and side mirror. the mechanic at the dealership recommended clay bar.Is it safe, and if so what brand is best?
I bought a new VW Passat this fall…my first new car. I live in a harsh northern climate, lots of snow, and am trying to keep my car clean this winter by using the “touchless” washes. After a wash this weekend, I was horrified to see my car speckled with…gasp…rust colored dots. A few phone calls & internet searches have introduced me to rail dust. It seems that I need to clay my car. When should I do this? Should I wait until spring (which means May in this region)? I do not have a heated garage.
I do a lot of highway driving for work (2000 miles/month).
Advice please…:-)
[…] your hand across the body try a process called "clay bar". Here is a badass wright up… How To Properly Use a Clay Bar | Ask a Pro Blog bryantt9 is online now […]
I have a 1996 850r red volvo wagon .oxidation is almost pink. Will clay in bring it back to volvo red?
Hay Tod, I have a 95 Grand Prix. The front driver side break caliper malfunctioned and was lightly applying the break pads on the rotter as I drove. This caused a brown dust that covers the side of the car. It looks like I drove through mud. Its very hard to get off. The only thing that seems to kind of work (with a lot of scrubbing) is lacquer thinner and it does not remove all of it. Do you know what I can use to completely clean it off?
Ed
I just bought a 2014 black camaro with a few light scratches from what it looks like, an automatic car wash. I brought it by a detailer and he said they would just wash and wax it and clay bar spots that needed it. I asked him about polishing and he said you should never buff a black car. Is this true?
You really explained in a plain professional language!
Thank you Todd.
Just bought a new 2015 pathfinder and noticed a stain on the back bumper. I’m not sure what it is but doesn’t look like it is on the surface. Do you think claying will remove the stain. Here is a picture of the stain. https://goo.gl/photos/pRUaMTpbzduncv3v5 Thanks Ron
What is the sealing then waxing business? (Referencing the photo from original post of corvette) do you deal then wax? Never heard of the sealing step?
A quick question… What is the difference between using clay and polishing compound?
Hello,
I’ve used clay bars for years and would never wax my vehicles without this important first step. However, I never flatten the bar into a “pancake” as instructed. I always use it as a full “bar” and for good reason. Allow me to explain:
When the bar surface becomes soiled, I take a common Potato Peeler and take a few seconds to shave off the soiled layer, exposing a new pristine surface. Using this method, I’ve had clay bars last for years and there is never a question about the bar being too soiled to use any longer.
I never understood the logic in folding microscopic contaminates back into the bar only to resurface sometime later ?
David
I recently had my car machine polished, this has left swirl marks, holograms. The guy who did the work is refusing to fix this. Will clay barring and polishing remove these marks?
Gary – After a good wash, using a clay bar will remove embedded contamination, leaving the surface clean and ready for polishing. Swirl marks are generally created from contamination on the surface, scratches, etc. Holograms, also known as buffer trails or buffer swirls, are formed by the improper use of a high speed rotary buffer, poor pad/product choice, or the overall lack of polishing knowledge (https://www.detailedimage.com/Ask-a-Pro/how-are-holograms-formed/). At the bottom of that article Chad recommends some products to help remove holograms and swirls to bring your paint back to life. You can do it yourself if you have a buffer on hand, but if you are looking for someone to take care of it for you check out our Find-A-Detailer Map (https://www.detailedimage.com/Find-a-Detailer/).
Question for the pros here. I’ve got an 8-month old Tesla. Bought it brand new and it’s black. I’ve never waxed it and am ready to do so. I only wash it myself with the two-bucket method preceded by a good foaming and I always blow dry it. And the car sleeps in my garage. All this to say the paint looks, to my novice eyes anyway, pretty darn good. Still shines, no swirl marks. So, here comes my question. Should I clay it before my first wax? I know that you all recommend it but because the paint looks good and I wouldn’t want to make it any worse by my limited claying skills, do you think I could skip the step and go straight to waxing? Thanks in advance for the thoughts.
I’m planing to do this to my car. Just wondering if meguiar clay bar kit is good to use. When I buy the kit it should have the lubricant and the bar after than I can rewatch the car than should I wax it or it’s okay after I used the clay bar? Or can I used the quick wax liquid ? After I do everything Juss wanted to kno if I have to wax it and Wat is a sealant.. Should I just follow this after washing, claying, polishing, sealing, and waxing. Can I used all meguiar product do to all this step. Thanks
Hi I have a 99 chrome yellow Roush Mustang convertible , I live in Palm Springs California in the desert heat I had The Claybar used on my car at a local hand carwash I don’t think they did it the way you have described they had the clay bar in the wash bay and used it with the water from the car wash after that I had severe clear-coat peeling on my car , I had owned this car for four years with no peeling shortly after the car is unbelievable it has to have a complete paint job everyone says Claybar won’t do this to your car but I think when they’re using it in the wash bay dropping it on the ground picking it up and not doing it the way you have described it has Ruined the finish to the point that my car has to be taken down to the bare metal and repainted which is going to cost me like $4000 The car wash tells me they’ve never ever had a problem with Claybar but I disagree with them what do you think about this?
[…] from Griot’s Garage or Mothers, for instance, work well with newer Chevy Cruze models—and try a clay bar kit to improve the shine after a wash. And don’t forget the microfiber drying […]
Hi. I have a black Ford truck and I noticed that I have white specs on the tail gate and also on the front of my fishing boat. The only thing I can think of is that it is white paint from new stripes on the highway. I have been able to take a few off of my boat with my thumb nail but I don’t want to try that on my trucks finish. Will claying remove this. I would guess their are about 50 or so specs on the truck and boat. Any help would be great.
Do i have to remove the wax on my car before i clay bar my car or just use the clay bar over the wax thanks i will wait until you tell me how to do it.
Hi Todd: What a great blog and your suggestions/recommendation are clear and concise . . Excellent.
I purchased a 52 Ford f1 pickup with fiberglass fenders ( Rt & Lt, front & back) painted black.
Body, cab, doors and bed are fire truck red. Presents a very nice combination and draws a fair amount of attention.
There are some scratches on the front fenders (probably from engine work) that appear reasonably deep, but not to the primer or fiberglass.What would be your recommendation(s) and step/step process to achieve a reasonably (good, not showroom) presentation. Thank you for your time and expertise. John @ Clarkeshouse garage
[…] How To Properly Use a Clay Bar […]
Hi Todd, I have a black 1938 chevy, that has like a heavy soap residue on it, is the clay bar the best way to remove it?
How much should I expect to pay some to do the clay and paint correcting polish?
I have a 2015 Ford Mustang
Brandon – It really all depends on your market and the offerings of the detailer. I would recommend asking around and finding a detailer in your area with a good reputation and he can give you a quote specific to the condition of your paint.
I have a white Toyota Camry. The top has a lot of marks on it, I think from tree sap though I’m not sure. The marks are not anywhere else on the car. If it is tree sap, will claying remove it without damaging the surface of the car? Since I don’t really know what it is, are there situations where I should *not* clay the car?
I have recently purchased a 2013 Honda Fit. I don’t think this car has ever been waxed and it certainly was never garaged. I started to clay the hood and roof and noticed that some of the red paint rubbed off onto the white clay bar. I never seen that happen before. The surface was so contaminated that I had to make two passes to get the surface smooth.
Great articles and wonderful information! I have learned a lot and plan on trying claying on my Black Mazda CX-5. It is two years old and I have not tried it yet. I will start with a very light claying and go from there! Thanks again!
Informative comments , For my two cents if people are interested in a TAR-2010 , my colleagues filled out a fillable document here
https://goo.gl/vRkoFW.HI Todd,
I am DIY detailer enthu and spend lots of time learning and applying knowledge of cleaning/detailing/maintaining my own Audi A5 black ed sepang blue. Its 6 month old from brand new. There are loads of overlapping and prone to-make-confused information available online on detailing techniques. I’ll be switching from Wax (FK temp) to GTechniq C2v3. I am planning to do the bits this weekend. Your detailed steps and description made me realize some things which I am not doing correctly (and wasting money on products) and some of things I am doing correctly. Glad, that I read your article. I was using G3 clay mitt, followed by Sonus paint cleanser (pre-wax) for new paint, and then FK temp. Do you recommend G3 Clay mitt (theres only one in Halfords) or still vote for traditional clay bar?
RajKP – Happy to hear you are enjoying this post and the AAP Blog! For the mitt vs traditional clay bar, it really all comes down to personal preference. I personally like the mitt as it saves time, but clay bars can get into tighter areas that the mitt may struggle with. All in all, just use what you like, or a combo of both and you should easily remove embedded contamination! If you have any other questions please do not hesitate to contact us: https://www.detailedimage.com/Contact/
Will a clay bar remove light over spray from my suv’s roof and hood? I parked too close to the garage when my husband was spraying clear coat
[…] Always use the supplied lubricant with a clay bar product. When used as directed there is no polishing effect on the surface while the bar is grabbing the contaminants. As the bar becomes soiled, just pull, stretch and fold it to expose a fresh surface, and never reuse a clay bar that’s been dropped on the ground. Full steps on how to use a clay bar. […]
[…] off your car, there are some more steps you should take to keep up that shine. The first one is to use a clay bar to clean off those teeny tiny particles. There are going to be some debris on your car’s surface that you won’t even be able to see at […]
Hello,
I have white paint overspray from a water tower that was painted close by my office. I would like to know what is the best way to remove all these small white specs from the paint. I was told that a clay bar would need to be used and then polished. Does this sound correct? Unfortunately, I do not know what type of paint was used. My vehicle is a 2017 RAV4, dark grey in color.
Thank you,
Nancy
We had our 2004 Honda Accord done with Clay bar for the first time. It looks like showroom quality. Simply amazing! I highly recommend this product.
Well, this might not be the most unique or most flashy item on our list; but we guarantee that any of your car enthusiast friends will surely appreciate this. They’ll love it not only because it’s from a reputable brand, but because they now have more reasons to spend time obsessing on grooming their beloved cars.
We stumbled over here different page and thought
I might check things out. I like what I see so now i’m following
you. Look forward to looking over your web page yet again.
Looking to strip off old wax before applying new wax. Should I use a body solvent (paint prep) to strip off wax before using the clay bar? Or use the clay bar first then use paint prep? Thanks!
[…] or scratches. Some forms of residue can be really sticky and tough to remove with only soap. Use a clay bar to get rid of any contaminants that the wash left behind. You’ll even be able to remove […]
[…] People who just wash their cars at home also like to make use of these convenient tools. Using a clay bar on your paint while you are washing it can help you to smooth out the surface. If your paint is […]
[…] People who just wash their cars at home also like to make use of these convenient tools. Using a clay bar on your paint while you are washing it can help you to smooth out the surface. If your paint is […]
What is better for my car with soft paint? Soft clay bar or fine grade clay mitt? Is there any cugestion in what company product to use?
Great article! Thank you!
We just bought a new vehicle and I wanted to get it off on the right foot by giving a good wash and wax. I found this site and followed your instructions for washing, then using a clay bar, then waxing. I’d never used a clay bar before, but following your instructions, I found it pretty easy. I didn’t clay bar one small area just to see the difference. I could definitely feel the difference in the clay barred surface and the area I didn’t clay bar, so I know I was picking up contaminants that I would have missed if not using the clay bar. I clayed the portion I left unclayed earlier, then waxed the entire vehicle, again following your instructions. The whole wash/clay bar/wax routine took about 2.5 hours for a compact SUV, and while it was a lot of work, I actually found it kinda fun. And the results were “wow, I did that?” spectacular. It rained the next day and after the car dried of in the garage, my wife couldn’t really tell it had been rained on. Can’t ask for more than that.
Great article. I never really knew about claying before. My question is do you have to clay a vehicle or can you get away with waxing without doing that? I hate to clay it and make a good paint job looking bad by not claying it correctly.
Thank you for any help in this.
In order to bond the wax very good to the paint and give the most durability it is necessary to prepare the paint. You can use a paint cleaner with or no abrassives, or a cleaner wax or cleaner sealant which make and the preparation to the paint and protect the paint. Cleaner wax, cleaner sealant is 2 in 1 product.
[…] clay bar is designed to remove any microscopic particles that are stuck on your […]
[…] about this process is that it is 100% non-abrasive. If you are new to clay bars, then check out this great guide on the […]
Thanks for the info. Should I completely tape the vinyl stripes before using the iron remover? Seems like, it might damage the 15-year-old stripes.
James – Most iron removers are pH neutral so it should be safe on most vinyl surfaces. However, I always recommend applying to a cool surface and thoroughly rinse away to be safe. Also, if you are concerned test on a small area before proceeding to a complete clean.
[…] 2. Wash and dry your car as usual. This will help remove any loose dirt and debris that could potentially scratch your paint during the claying process. […]