Restoring Severely Faded Headlights: Pads, Polishes, and Protection
by Reece @ DI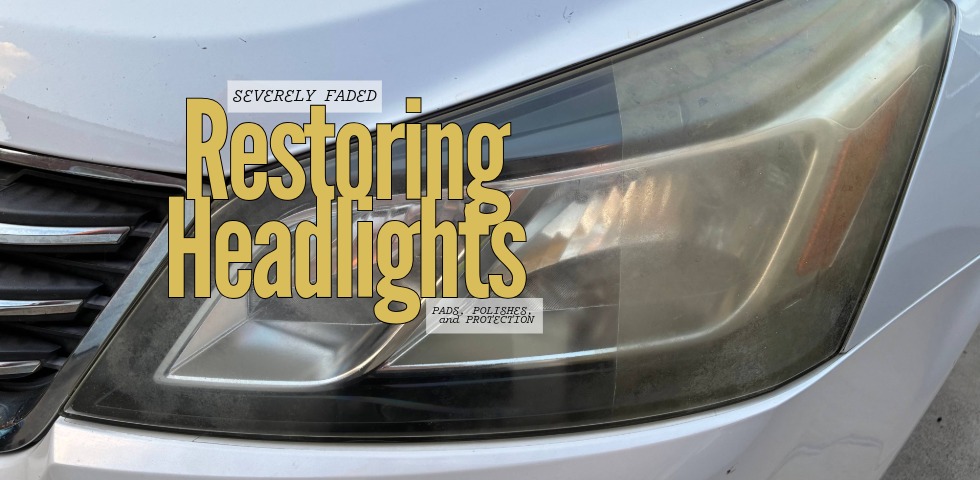
Severely oxidized and yellowed headlights do not just look bad, they also reduce visibility and safety when driving at night. On this particular set of headlights, the plastic lenses were heavily faded, pitted, and in serious need of correction. The goal was not to achieve absolute perfection (deep pitting can only be improved so much), but to restore as much clarity as possible while adding some protection to keep the oxidation and yellowing at bay.
Starting off, one of the things I stress in detailing is the importance of testing or a test spot. Every headlight, or even paint type, reacts differently, so trying out combinations of pads and polishes is key to finding what works best for your specific situation. The key here is “your specific situation” as guidelines can only take you so far. Find what works best for removing the imperfections in from of you or what works best for your setup.
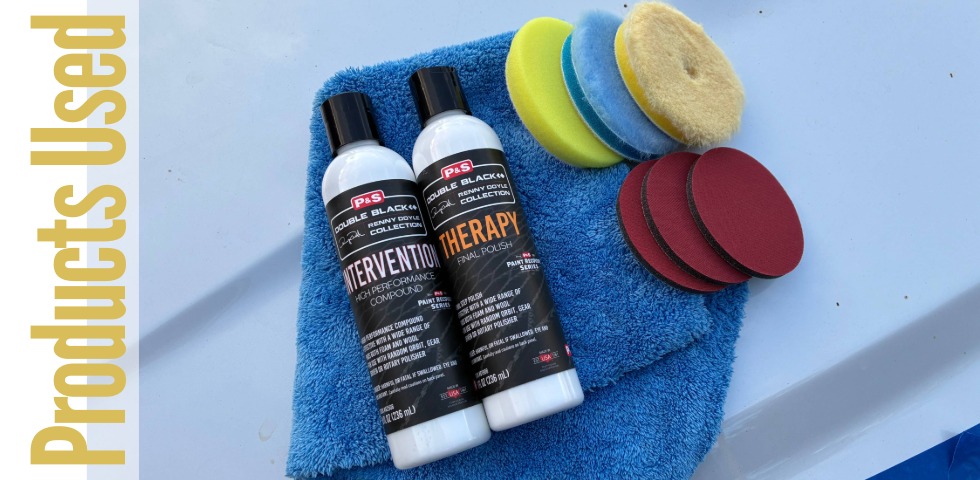
For this project, I wanted to see how a few different Rupes pads performed and I paired them with some P&S polishes that I had on hand. So I started with the lightest pad/polish combo I had, noticed that I did not like the results and bumped up the power. Once the oxidation was gone, I worked my way back down to finishing to an acceptable clarity level. After this test spot, the process is listed below.
The Process
Step 1 – Cutting the Oxidation
I started with the Rupes X-Cut Foam Abrasive Disc in 1500 grit. These headlights were badly oxidized, so beginning with a sanding disc was necessary to level the surface and clear away years of UV damage. The X-Cut did a great job in this step and started me off in a good spot to finish the headlights out.
Step 2 – Correction
From there, I moved into the Rupes DA Coarse Microfiber Pad with P&S Rehab Correction Creme. This combo had impressive cutting power, removing sanding marks and offering a middle step to bridge the larger gap (from X Cut Discs to Lighter correction).
I followed that with the Rupes DA Fine Microfiber Pad, which further refined the finish while still delivering solid correction.
Step 3 – Finishing
For the final polishing stages, I dropped to a slower machine speed and switched over to the Rupes DA Ultra Fine White Foam Pad. Using P&S Therapy Final Polish, the clarity really started to shine through. This pad and polish combination finished beautifully, leaving behind a noticeably improved and clear surface.
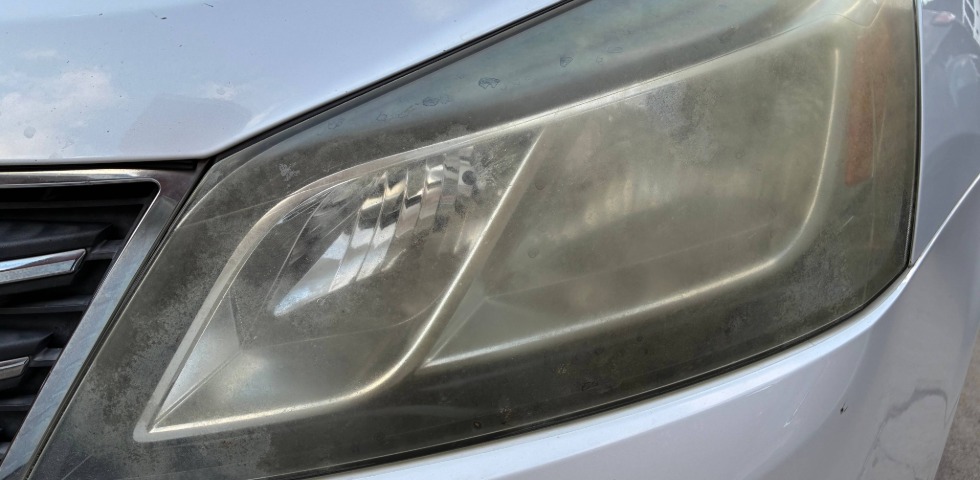
Before
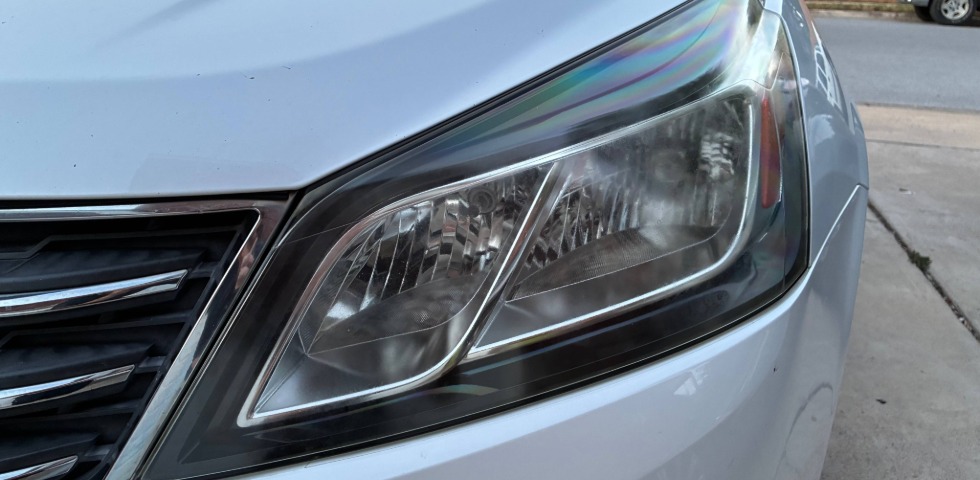
After
Key Takeaways
- Correction Power – The Rupes DA Microfiber pads really impressed me. The Coarse version had the muscle needed for heavy oxidation, while the Fine helped bridge the gap toward a clearer finish.
- Clarity – The Rupes DA Ultra Fine Foam Pad produced a smooth, refined finish that made the final polish pop.
- Polish Performance – The combination of P&S Rehab and Therapy was a highlight. Both worked well across different pads, cut efficiently, finished down cleanly, and never dusted. That is a big plus when you are working in tight areas like headlights.
- Ooo That Smell – Therapy smells fantastic, making the polishing stage more enjoyable.
- Results – These headlights had deep pitting that could not be fully erased. Even with that, the turnaround was fantastic and the headlights look great.
Protection. Locking the Results in!
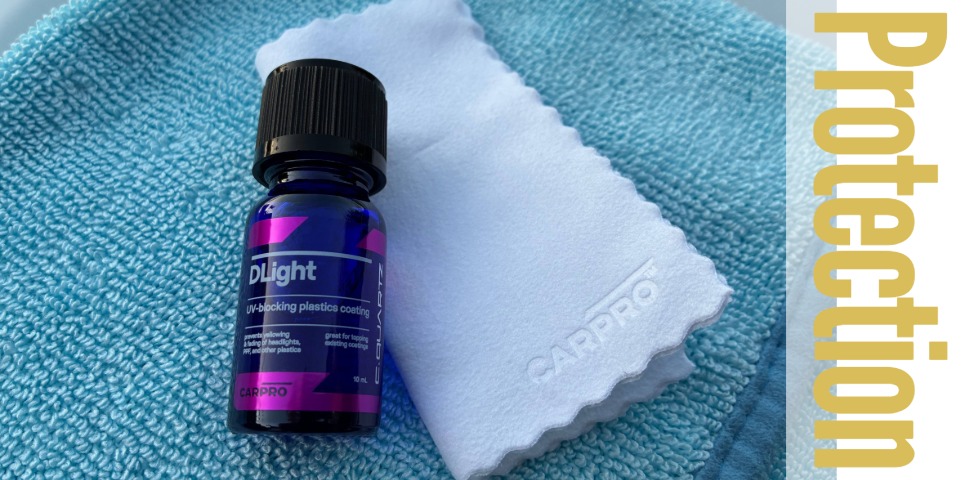
After correction, I sealed the headlights with CarPro DLite Anti-UV Coating. This step is crucial. Without protection, plastic lenses will quickly fade and yellow again. I chose DLite as CarPro states that it blocks UVA and UVB rays, helping slow oxidation and extend the clarity we just restored. It also has an estimated durability of 3 years!
Final Thoughts
As mentioned up top, product testing is important. By trying different pads, polishes, and approaches, I found a combination that worked exceptionally well on these severely faded headlights. The results may not be perfect due to pitting, but the clarity and protection are a huge improvement over where we started. Most importantly, the headlights are safer for night driving.