Optimum Poli-Seal to the Rescue!
by Todd CooperiderJust as Forrest Gump (and his Momma) found life to be like a box of chocolates (you never know what you’re gonna get), so too is detailing!
We think we’ve experienced each kind of paint in all conditions and know exactly what products and processes to use, and then one comes along that just leaves you scratching your head a bit. You go back through your detailing journal just to find out what you used the last time you worked on the same make/model/color of car, and figure that the process will go much quicker this time. Well my friends, I’m here to tell you that even for those of us with a lot of experience at this, it doesn’t always work out so smoothly.
When a product and/or process isn’t working out like it “should”, that’s when you need to know what techniques or products to try next to achieve the desired results. If you have just one pad and polish in your arsenal, then you’ll be stuck! Even if you have a lot of different resources available, you still may end up spending a lot of time testing to get the right one, or you end up with an odd combination that just happens to work in that particular situation.
I always keep Optimum Poli-Seal in my arsenal because it suits a lot of needs. Normally this is my go-to product when somebody wants a quick polish to bring out some gloss and add some protection. If you work it longer, it even has some decent correction capability on softer paints. I won’t go into a full review of the product because David Bibiloni has already done that (David’s full article HERE).
Now the other day I had a 1985 Ferrari Testarossa that needed a bit of TLC, and I wanted to clean it up a bit for a car show. The paint had a bad case of oxidation along with plenty of swirls…what it really needed was a full restorative detail. Well that wasn’t on the menu so I wanted to get the paint looking as good as I could for the customer with a quick one-step polish. I knew that if I just took care of the oxidation problem, it would make a world of difference. I tried out two different polishes…one was an abrasive polish, and the other a chemical polish. The abrasive polish was a little easier to work with in this particular instance, so I proceeded to finish the car off. As you’ll see from the 50/50 shot below, there was a significant difference in the looks of the paint after one quick pass.

I finished polishing the car, and when I pulled it outside I noticed that there was a very uneven finish on it. Hmmm…not happy! Most people wouldn’t have noticed it, but I’m obsessive-compulsive enough to realize that I would have to do the entire car all over again before I could call it finished. I thought that it may just be an uneven distribution of product…perhaps from the reaction with the oxidation, but I quickly found out that this was not the case. I started grabbing different products and pads, and using a variety of speeds and techniques…nothing! After getting a bit frustrated with it, I decided just to let the car sit overnight and come back in the morning to see what it would take. It was Friday night, I had family coming into town the next day and didn’t want to work on a Saturday, but I needed to get this car finished correctly for the show.
The next morning I got to the shop and grabbed for the Optimum Poli-Seal and a blue pad. Given the fact that it’s a combination paint cleaner / polish / sealant, I thought it might have a fighting chance with this challenging paint. I pulled the car outside and did my work in the morning light so I could see better and to save a lot of trips in and out of the shop. After I worked the hood with very light pressure on speed 5 of my PC 7424XP, I wiped it down, held my breath, and smiled when I saw the finish. Finally! I proceeded to use the same process on the entire car (which only takes about 30-45 minutes), it turned out fantastic, and the owner was very happy with how it looked at the show the next day.
I’ve had other instances (especially on very soft cars) where the finishing process wasn’t going as planned, and I broke out the Poli-Seal to give me the finish that I was looking for. It’s a very versatile product that serves a lot of purposes, but in more than one case the purpose that it served was that of a life saver!
Optimum Poli-Seal is definitely one that I would recommend having in your detailing arsenal!
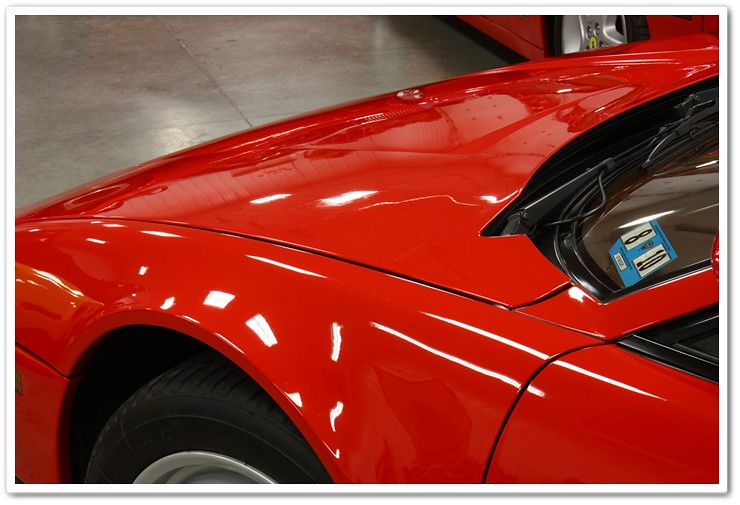
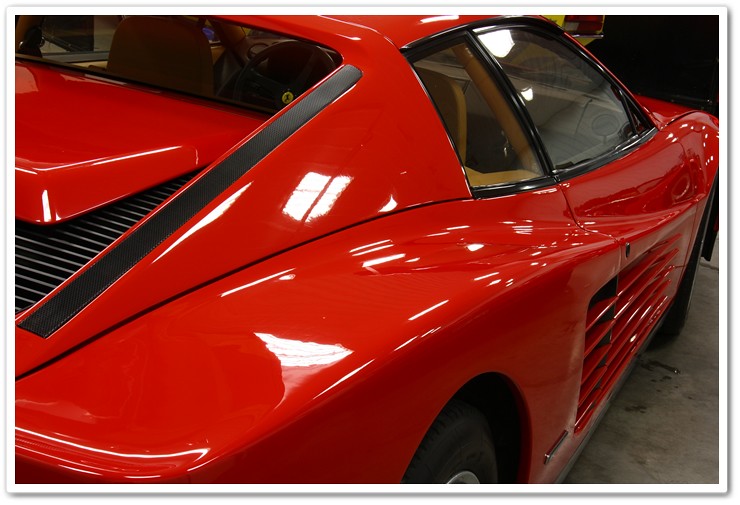
Here are a few quick shots of this 25 year old beauty after a “quick” one-step polish:


Would the paint on LS430 be soft enough for using Optimum Poli-Seal?
Ken,
Poli-Seal will work on any vehicle, but the softer the paint, the more correction capability it has. It’s not designed to provide “major” correction, but it can clean light defects up quite nicely. I have a customer with an LS460 that gets regular Poli-Seal treatment. Lexus paint is typically pretty soft, and quite easy to work with. While it won’t make your car look brand new again, it will most definitely make a noticeable difference. Pair it with a white pad and give it a try!
I Like it too. ^^
For some reason the pictures are not coming up for me.
Work was blocking the pictures…go figure. Nice work, Todd. I’m getting ready to use poli-seal on my GF’s single stage white 4Runner. This thing has never been polished or clayed. I asked and she said that she just washes it from time to time, and some times through the car wash! (Snow, ice, etc where she lives.) I’ve heard the paint is typically soft, and I read David’s writeup with the pads he used, so I am leaning towards 4-5 light green pads instead on the white pads. Any tips or recommendations?
green pads should be fine. Orange pads however, I think its a bit too much of a stretch for poliseal.
I use it with megs yellow, or LC white or black from time to time, more so when in a jam/time constraint where I need to be done in 1 hour and dont have time to polish, ezcream, bfwd. The only thing poliseal lacks, IMO, is long term durability….but thats not the point to it!
I don’t use AIO’s too often, but I agree that it is a very good idea to always have one on hand. I’m almost out of my Klasse AIO, and I plan on replacing it with Optimum’s Poli-Seal.
I just purchased a preowned Lexus RX330 in metallic midnight blue with tan leather for my wife and having been reading this site for a while now it seemed like the right time to try a real detail session for a vehicle that was really neglected by it’s former owner. Lots of road rash around the grill and it seems the previous owner used a serious compound or steel wool on a number of scratches around the car. Starting with a soak and wheel cleaning to remove the years of brake dust caked onto the wheels I followed it up with a two-bucket wash mixed at paint prep/wax striping strength. Next a light clay job using Megs fine grade clay and their California Gold Quick detail spray as lube.
Machine polishing came next using the Megs orbital polisher (until I can save up for the Porter Cable model) and a somewhat light corrective polish – I paid extra attention to each of the aforementioned scratched areas. Applied Fade to Black on all of the black plastic exterior trim to restore the color and seal it prior to waxing. Finally I applied a coat of Megs California Gold Carnuba wax by hand. The results were respectable but as I continue to learn I hope to do it again in a few months to correct some outstanding issues.
Thanks for the generosity in sharing your hard earned knowledge for the benefit of community here. Now off to order some additional products from you guys for next time…
-Greg