
Ask DI: How to Restore Your Headlights
by Reece @ DI
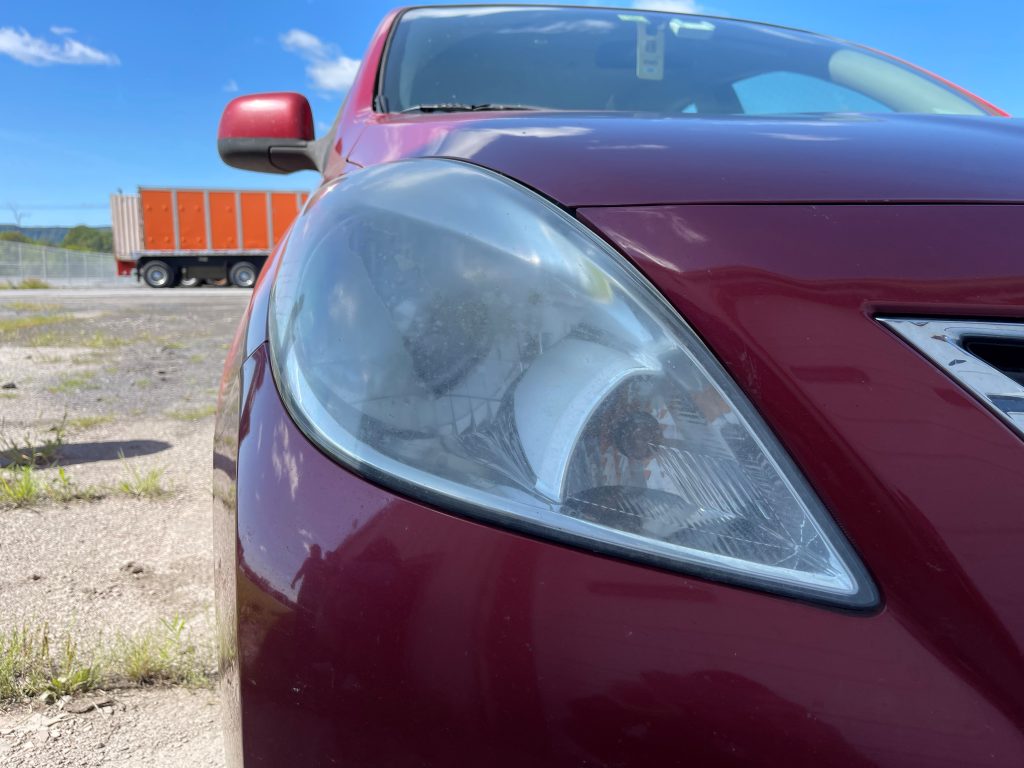
Headlights take a beating from not only dirt and grime, but harmful UV rays. After years of driving and exposure to the elements, that clear, crisp, plastic lens we all love can become faded and yellowed. When your lights begin to look like this you are losing a majority of your lighting visibility, which is a huge safety concern when driving at night.
Below is a set of headlights from one of our employees and while they are certainly not the worst looking headlights we have come across, they are due for a refresh.
How to Restore Your Headlights
Before polishing, make sure you thoroughly clean the surface. This includes washing away dirt and grime, along with claying to remove embedded contamination. Whenever we plan on polishing a surface, the rule of thumb is to always use the least aggressive pad and polish combo to start. Perform a test spot on the surface and find what combination will provide you with the results you are looking for.
Now onto the lights, we reached for our Flex PXE 80 12-EC 2.5 Cordless Polisher, a Buff and Shine Uro-Fiber Microfiber Finisher Pad and The Last Detail The Final Polish. This combination is extremely light and after only a few passes it was clear we needed a much stronger combination.
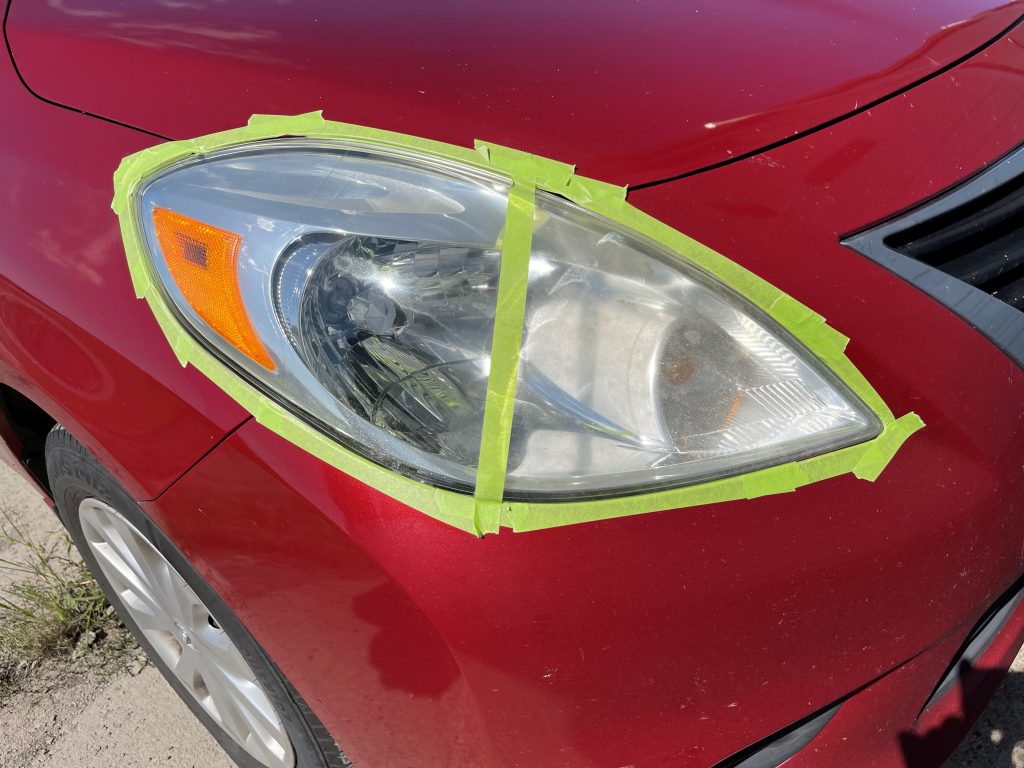
We jumped right to the Menzerna 300 and a Lake Country Purple Foamed Wool Pad. This combination was great, but a second pass with the Rupes Coarse Wool Pad added even greater results.
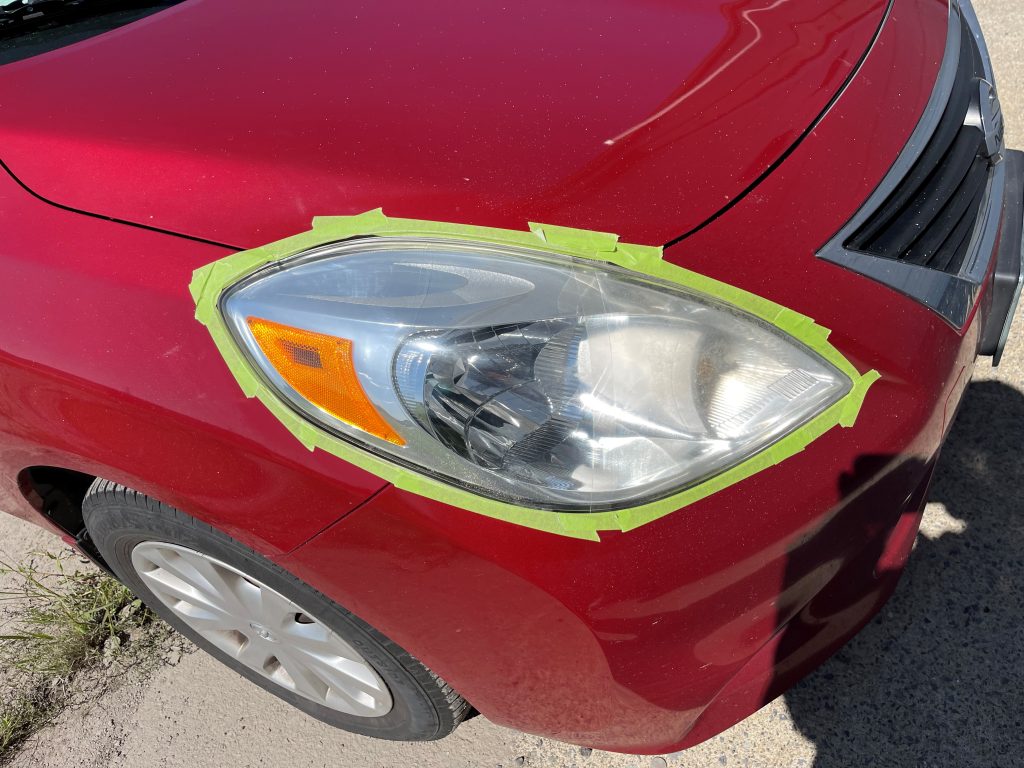
Now here is where it gets interesting. No matter what detailing step you are working on, there are products designed for that specific area. However, the beauty of detailing is that you can sometimes find products designed for one area that work great on something completely different and unplanned. During this headlight restoration we had a few spots that were severely stained and oxidized. It was clear that wet sanding would be needed to remove them, but I was lazy and was looking for another way. In comes the Lake Country Glass Polishing Disc!
This disc is designed for glass polishing as the name suggests, but it is still less aggressive than wet sanding. I would not recommend using these on painted surfaces, but for the headlights I figured it would not hurt to give them a try. We paired them with the Menzerna 300 and it added an extra level of correction to really take the correction to the next step.
We were extremely happy with the results with this step and went right into finishing the surface down. We followed up with the Rupes Coarse Wool Pad and the Uro-Fiber Finisher Pad with Rupes Uno Protect to finish the headlights off. We opted for the UNO as it is a light polish, but left behind some protection on the headlights when finished. Take a look at the final results!
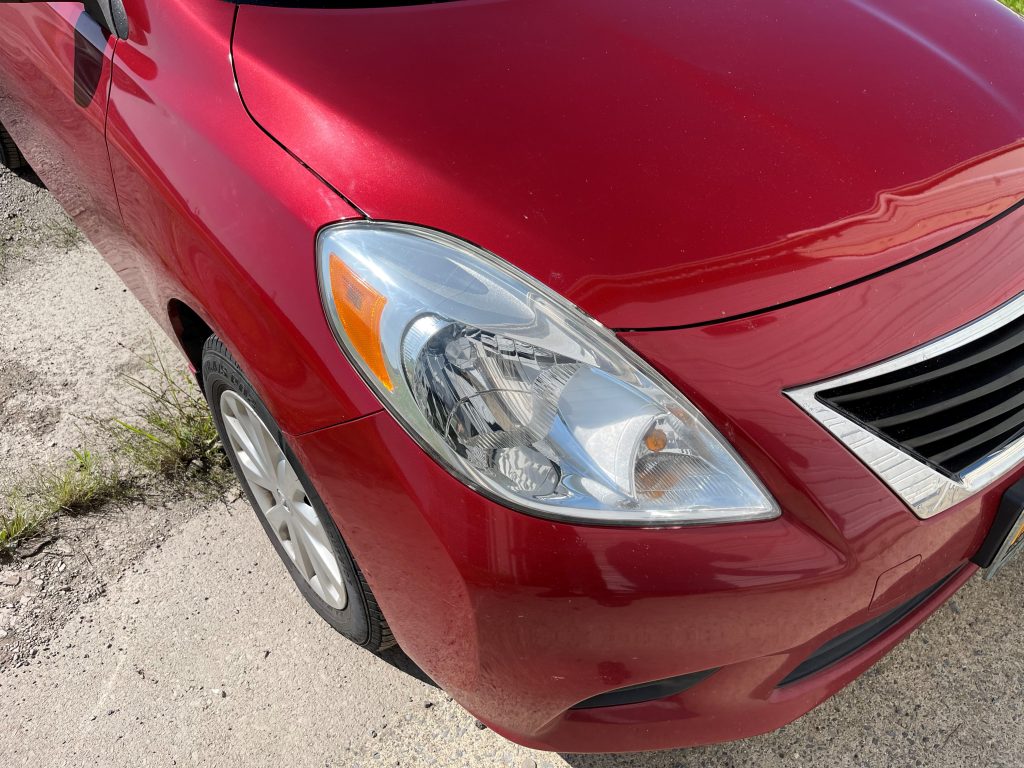
Overall it took a little testing, but we found a great three step process that improved the look and clarity in these headlights drastically. The only way to add to the results would be to wet sand and that could be an option in the future, but for now these results are exactly what we were looking for.
I hope you enjoyed this read and remember, do not be afraid of performing a test spot or trying out new products. You might really enjoy what comes of this testing!


Unless you enjoy polishing your headlight every month I would suggest you coat you lenses with P&S Lucid Coat or add 3M Film.
I have been doing the wet sanding method for headlight lens restoration… I start with 3000 grit for light oxidized lenses, the lowest I will go with is 800 for severe and build up to 5000 grit for final sanding, then I compound with The Last Cut polishing glaze, polish with CarPro Essence and finish the job bu ceramic coating with GTechniq Exov4.
How can you do this by hand when you don’t have a polisher and all of the pads etc?
To correct headlights you will need to have some polishes, pads, sandpaper, etc. If you do not have a polisher you can certainly work by hand using something like the Polishing Pal (https://www.detailedimage.com/DI-Accessories-M12/Polishing-Pal-P453/).
Thanks so much!
They make a kit. Check out https://youtu.be/HAwXVfFxAtE
That look great also! Thanks for the link,…although it did not seek like the bottom part of the headlight was as clear as the top part. But the link is much appreciated!
Really need to include a uv clearcoat step. These headlights will look terrible in a couple months. I learned the hard way
A protection layer is highly recommended after any correction to help protect your headlights. However, after heavy correction on older headlights oxidation does come back easier than before. XPel also has some great clear vinyl options for protection that will protect better and for longer than coatings, waxes, or sealants.
Can you recommend a film. I’d like to try one
3M, SunTek and XPEL are some of the best on the market.
I have a little CarPro Dlux left after coating my winter wheels. Is this something I could apply after treating the headlights? Or is that the wrong product for this application?
Mike – You can apply DLUX to plastics and rubber surfaces as well!
I’ve offered this service and clients are always amazed by the results. I see ceramic coatings specifically for headlights but does anything actually have uv protection built in? I’ve seen guys re-clear the lights before with 2k clear but that’s a completely different process.
You need to apply a ceramic coating designed for polycarbonate headlight lenses as the last step. If you skip this the headlights will become cloudy and oxidized again. A quality headlight coating will provide UV protection, which is an important part of the process.
Headlight Restoration is such a key service to get done, both for safety and looks, so I’m really glad you covered it here. My clients always love getting it done, and makes any detail so much better!
-Jackson, CB Detailing