
Different Levels of Paint Correction
by Ivan RajicWe’re used to seeing a lot of great work shown on the blog with amazing before and after photos, process, etc. All of us professionals, along with many enthusiasts here enjoy bringing a paint that’s somewhat beat up “back to life”. This is done through a polishing process, which can vary greatly from person to person. There are so many different polishers, polishing pads, polishes and techniques that one can probably write a book about all of it. One thing I’ve noticed that gets discussed quite a bit after someone corrects the paint on a vehicle is the level of correction or perfection achieved, but no one really has a scale in text or images to show exactly what this means. Many times we as professionals will tell clients they can expect “75% improvement” or “95% perfection” etc. and many enthusiasts will share similar stories online, but again, there’s no set standard as to what these numbers actually mean.
I’m not here to create a standard nor to explain what the numbers mean because it is a greatly subjective topic and to different people “90% perfect” may mean very different things. However, I wanted to share the “scale” we use at LUSTR and explain at least a bit what we mean when we give out a percentage of improvement. For this, I couldn’t have asked for a better car than my friend’s 2011 Toyota Camry with jet black and fairly beat up paint.
The trunk was the test area and I divided it into 4 sections. Starting from the left, the 1st section received one stage of polishing, 2nd section was not polished and represents the before condition, 3rd section received three stages and 4th section two stages. Stage in this case means that I went over that section with one polishing cycle, with a single pad and polish.
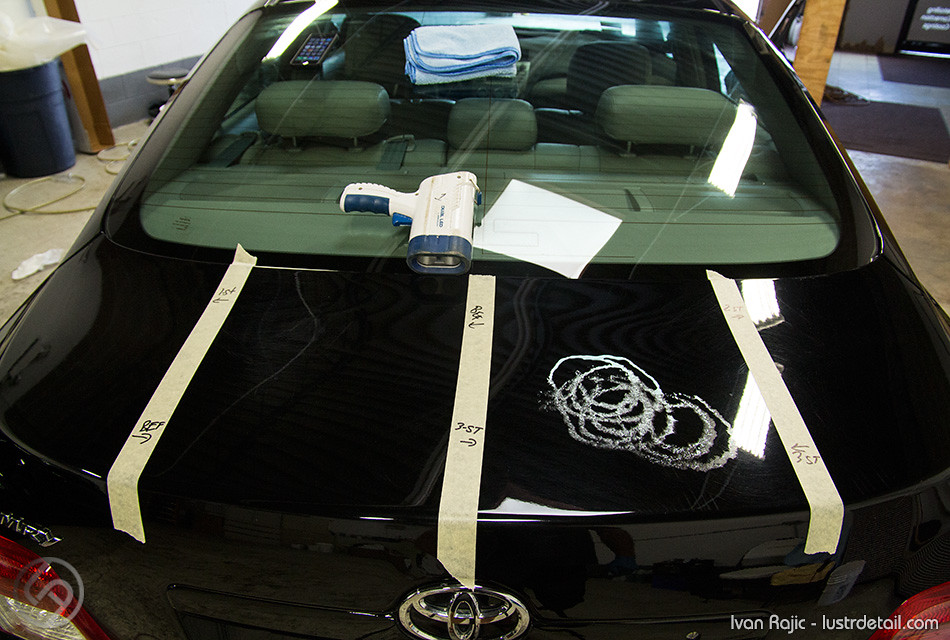
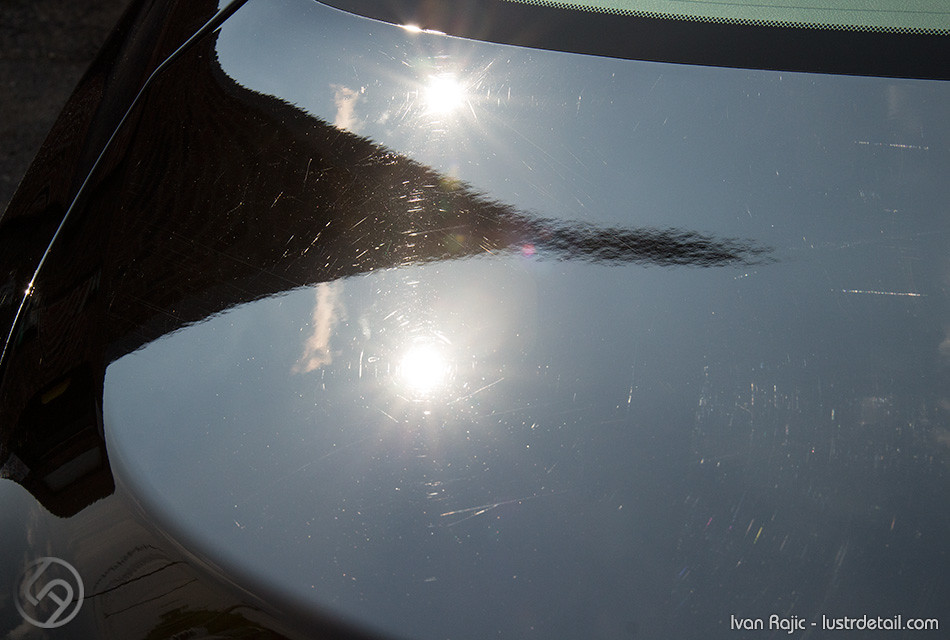
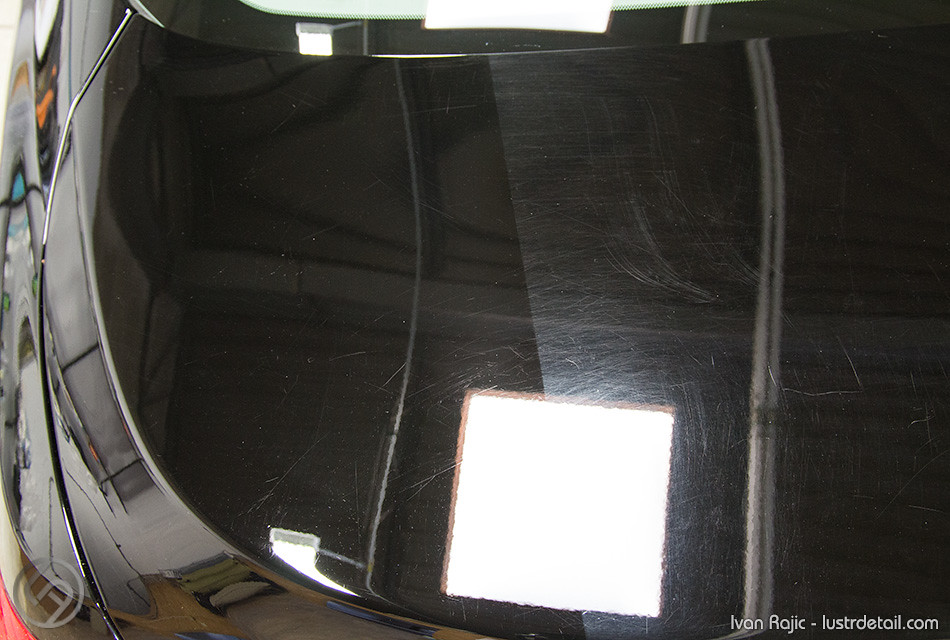
As you can see above, I took the photo after I started to use Menzerna FG400 with a LC Purple foamed wool pad on the section receiving 3 polishing stages. I used various products and polishing steps on each section and to keep it simple, below is a list of each trunk section and the work that was done on each.
- 1st Section (1 Stage Polishing Process): Menzerna SF 4000 with LC White Pad
- 2nd Section: Nothing/before condition of paint
- 3rd Section (Three Stage Polishing Process): FG400 with LC Purple foamed wool pad as 1st stage, M105 with Orange LC pad as 2nd stage and SF 4000 with LC White Pad as 3rd stage
- 4th Section (Two Stage Polishing Process): M105 with Orange LC pad as 1st stage and SF 4000 with LC White Pad as 2nd stage
- All polishing was done with a Flex 3401 polisher
The Results:
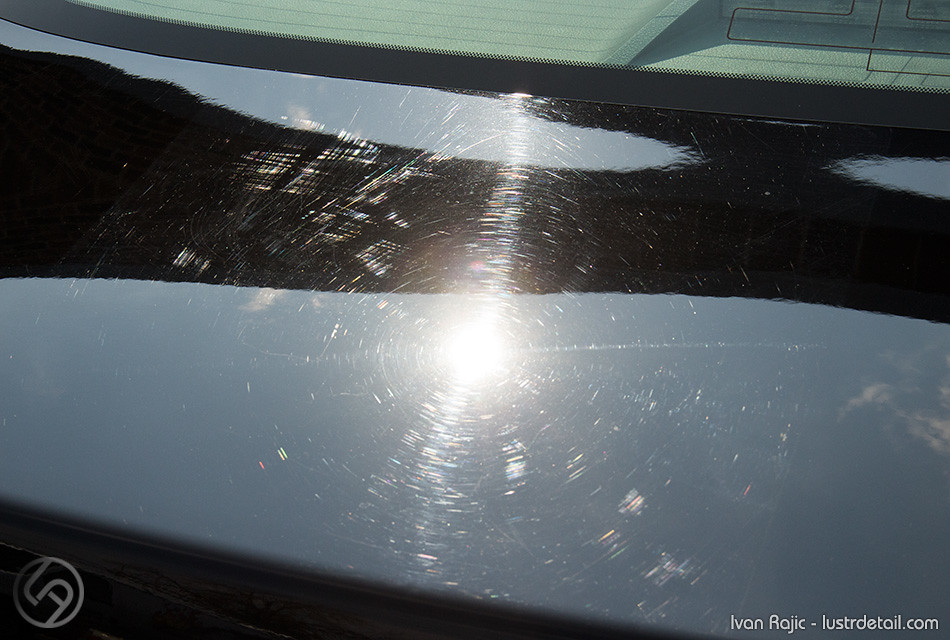
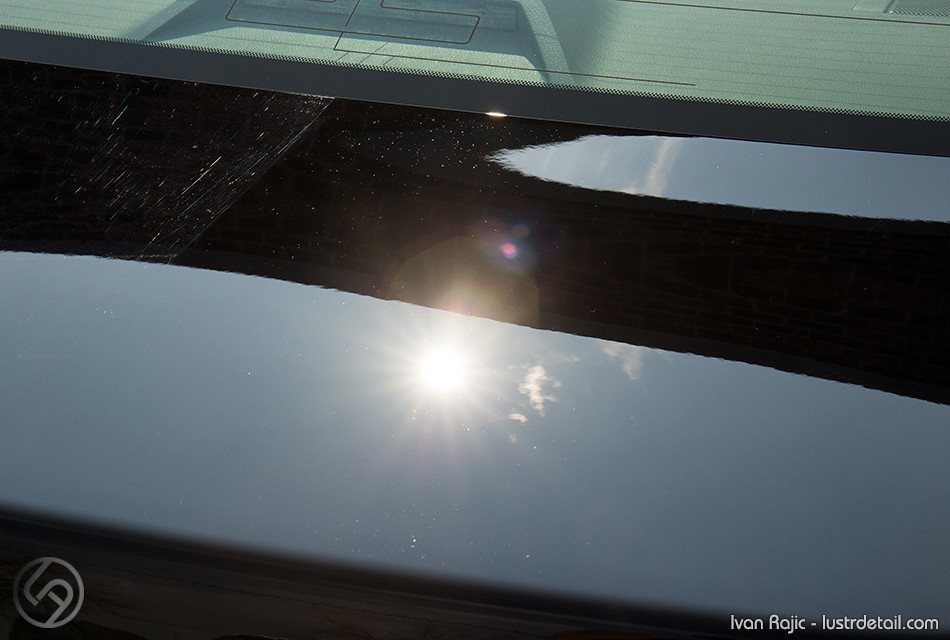
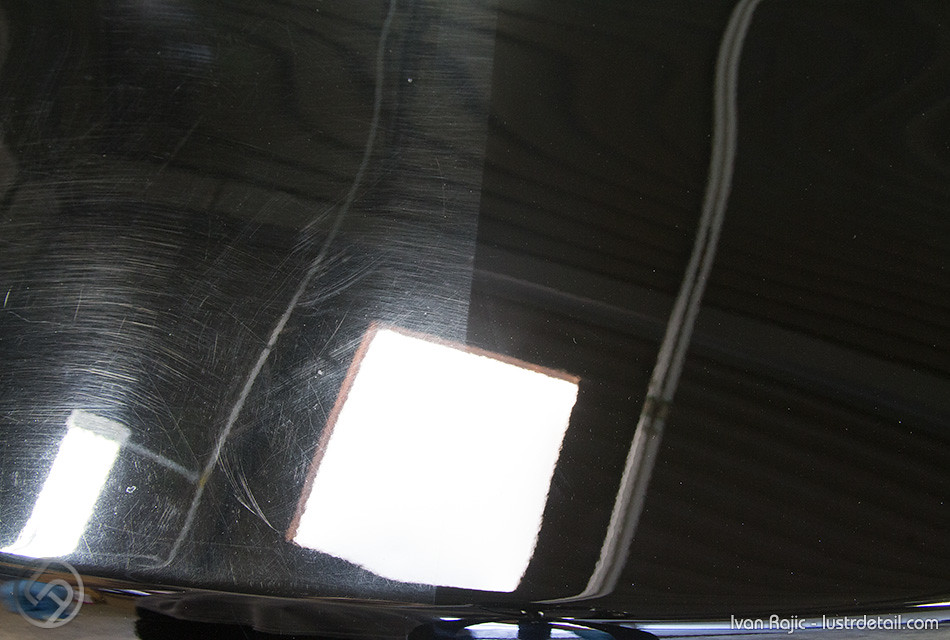
The above image shows the before condition. As you can see, it has many swirl marks with some deeper scuffs in the upper left corner of this section.
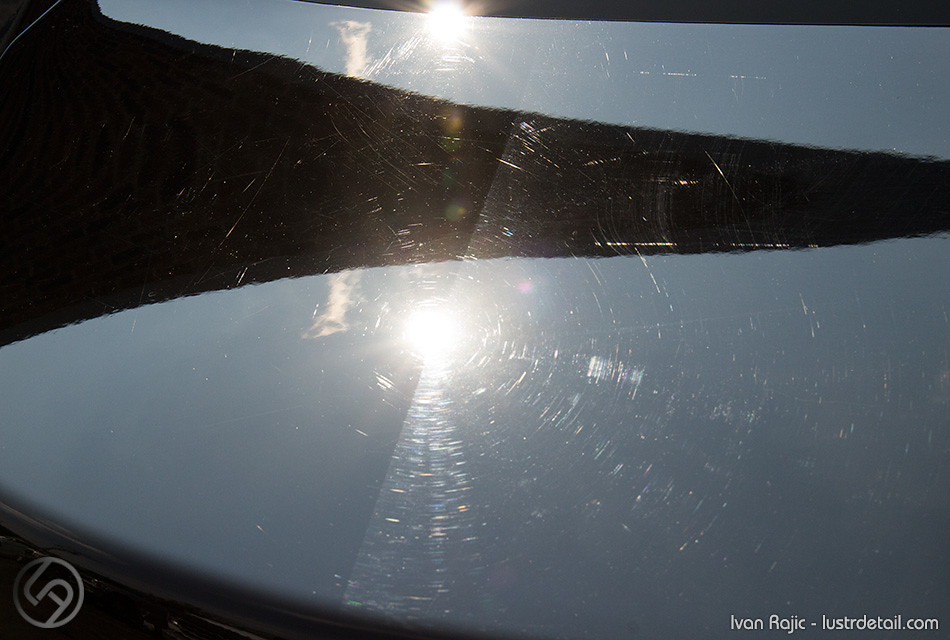
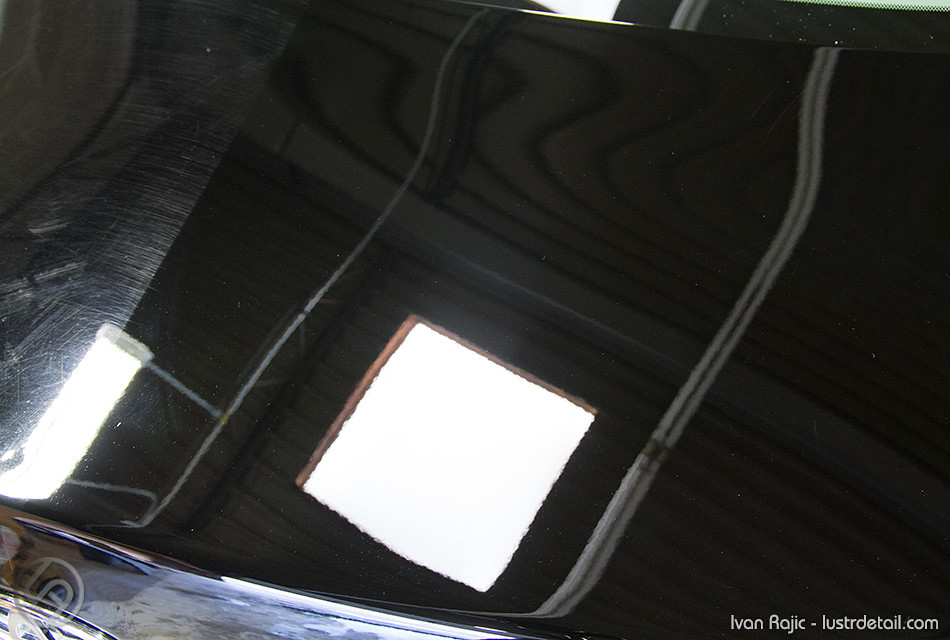
Here’s the improvement we got from the 1-stage polishing. As you can easily tell, there’s a huge improvement in color and swirl marks, but many deeper marks still remain, as shown in the next couple of photos. I would rate this at 65-70% perfect as most or all of the light swirl marks are gone and the paint has improved from a duller, grayish color to a deep black again, with only deeper marks remaining. For this type of polishing, one should always have a few different pad and polish combinations handy so as to try and get as much correction as possible while still leaving a nice and glossy finish as shown here.
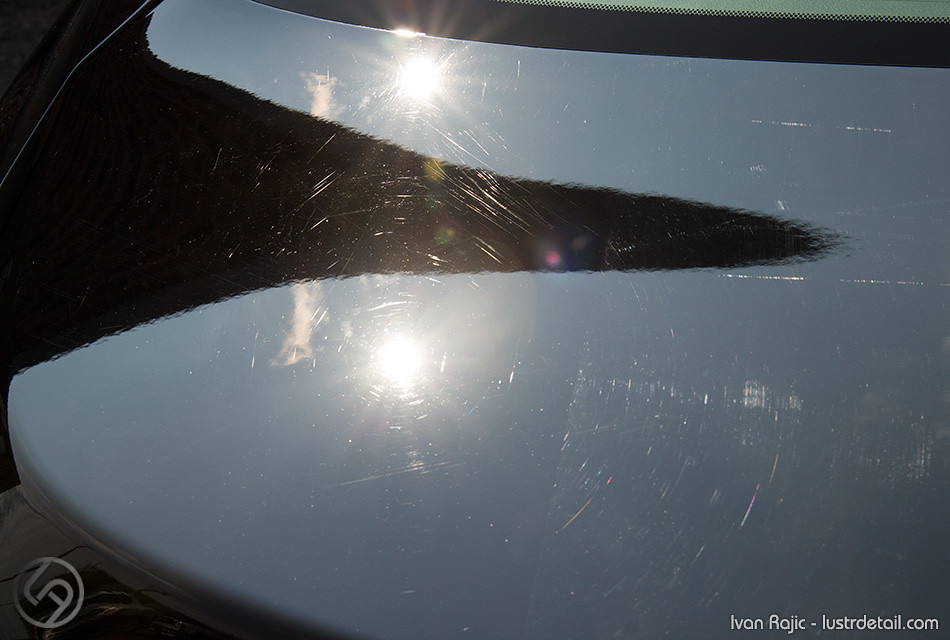
These would require a much heavier pad/polish combination to improve, which we’ll get to below…
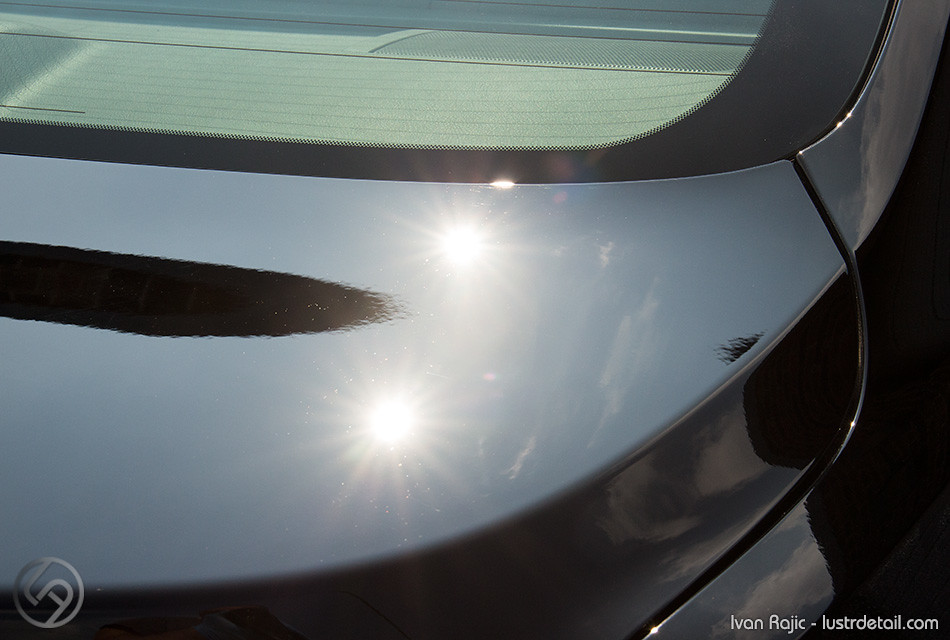
This is the 4th section, which received 2 stages of polishing. It’s obviously MUCH better than the section with only 1 stage of polishing and it’s nearly perfect. This is what I would call 90-95%+ perfect and I’ll explain why below…
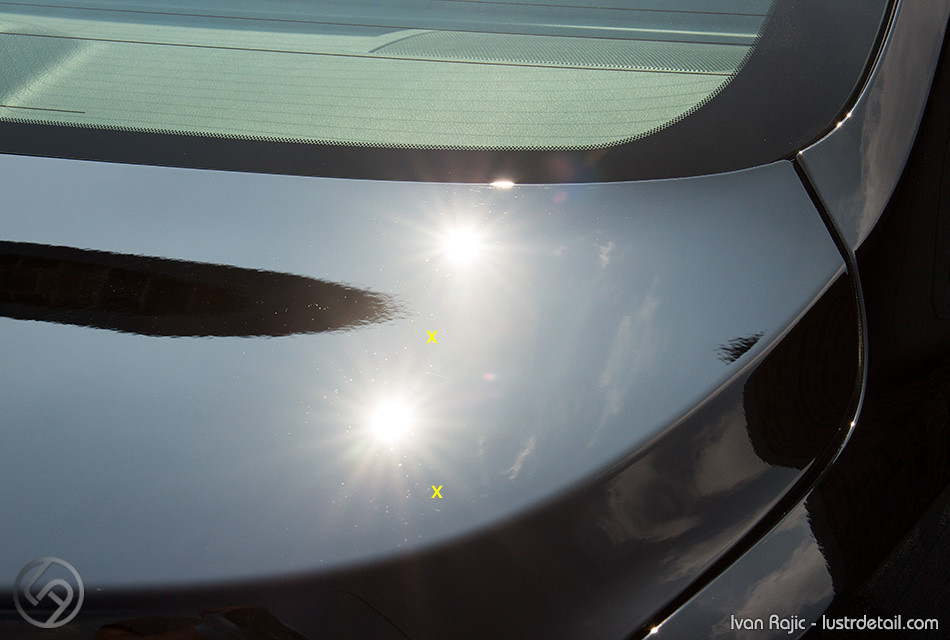
Here if you look under and around the “x” marks, you will notice some random deeper defects, which could not be removed with the 2-stage polishing.

Above is the same section just at a slightly different angle and position on the panel.

Here too I marked some deeper swirls with an X.
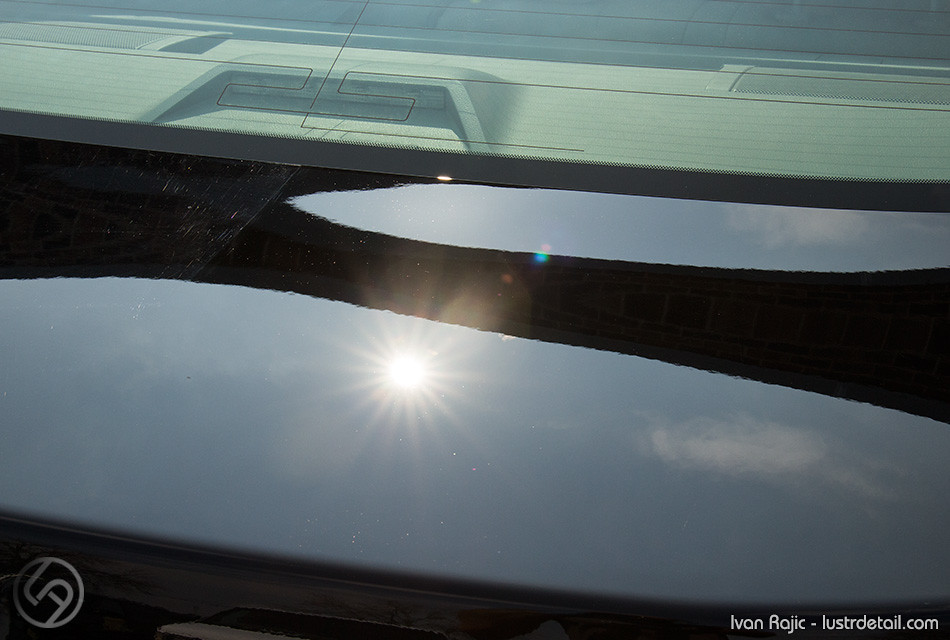
Here is the 3rd section that received 3 stages of correction. This I would consider 95%+ perfect because I truly believe that unless you’re dealing with a brand new car with really good paint, there will always be a random deep swirls such as the ones marked with an X above. This means that a car’s paint will rarely be perfect, but it is not impossible. On a sensitive jet black paint, it may be nearly impossible to make even perfection last more than a wash, as some of us know too well by now! Here’s another photo of the 3rd section…
And here’s why I’m not calling it perfect…
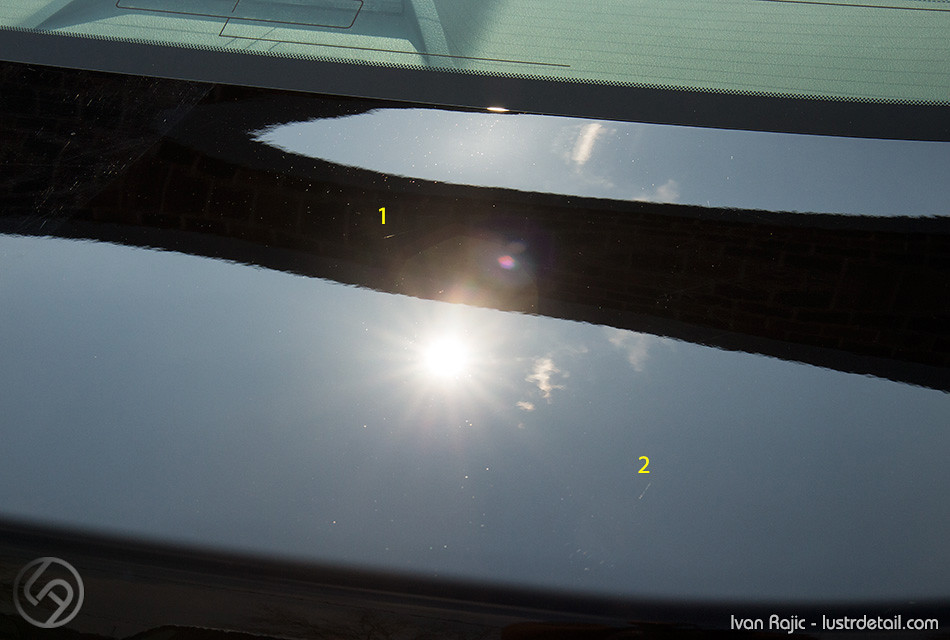
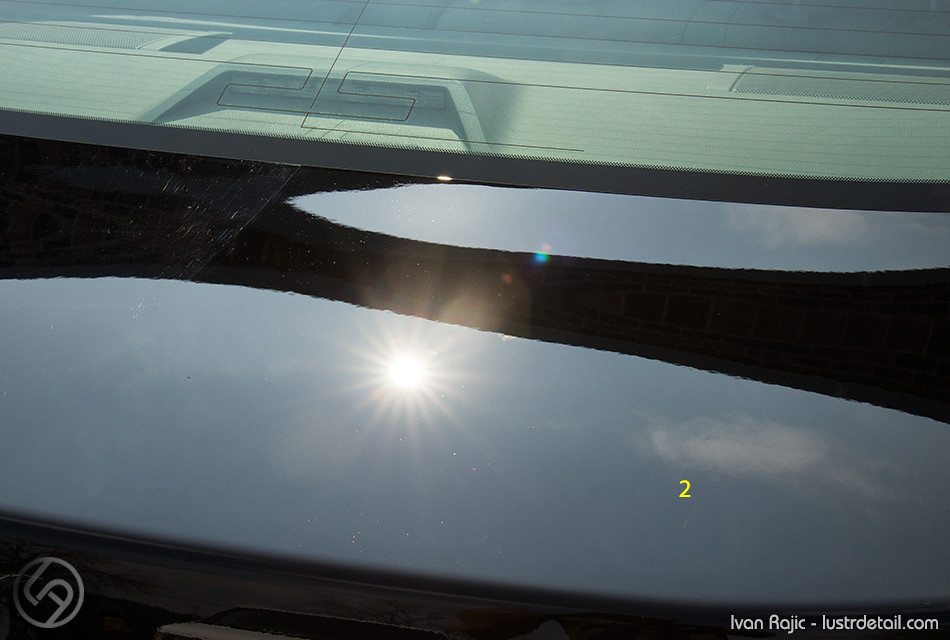
The number 1 above shows a deeper swirl mark in that 3rd section that’s nearly perfect. The reason this section is “more perfect” than that 4th section that received only 2 stages is simply because there will be more of these deeper swirl marks left over after 2 stages of polishing than with 3 stages. In the case of this trunk, I believe there were maybe 5-8 on the 4th/2-stage section and only 1-3 on the 3rd/3-stage section. For those wondering, the #2 above shows a tape line between the 3rd and 4th section, so I’m not going to hold it against either section for that deep mark :). Below is just another shot of that tape line, easily visible from a different angle of the 3rd section, which in this photo looks perfect…
Now a few photos inside the shop…
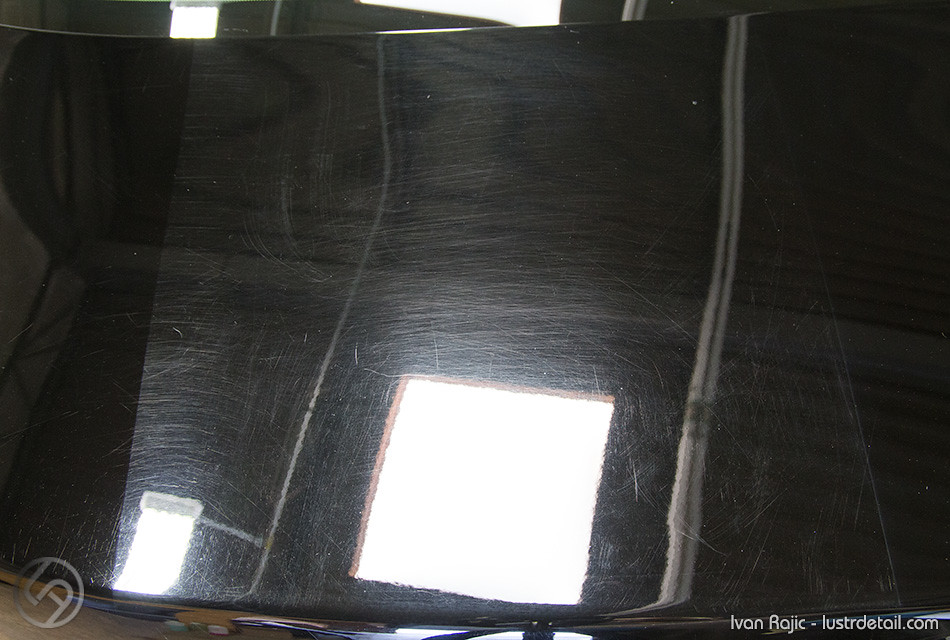
This is exactly why one should always have a few light sources available when trying to accomplish a high level of paint correction. What looks pretty good outside, in this case looks even worse inside the shop with the indirect lights. The large “light” is actually only a skylight at our shop. Above is the before section and below is the line between the before and 1-stage polishing…
You can easily tell how much darker the paint looks and when looking at this car without direct light, the difference in gloss would be much different between the two sections. The before section here actually has a coat of wax over it, so it’s as good as it can look. You can also easily see all the deeper marks left over after only 1 stage of polishing on the left side above.
Below shows the line between before and 3 stages of polishing. Here you can clearly see no deeper marks and the paint is basically black vs grey. Huge difference and as good of an improvement as we could ever expect.
Well that’s all I got for today. To summarize, I would rate the before condition as 40-50% perfect. The 1-stage polishing gave me about 70%, 2-stage roughly 90-95% and 3-stage 95%+. One thing to note is that paint sensitivity varies and the amount of correction each stage of polishing can achieve can greatly vary. For example, if the much more resistant paint on a Mercedes looked as our before section here, it may trick you into believing that you can easily correct it to near perfect in just 2 or 3 polishing stages. However, with that type of paint, you may go only from 50-55% with 1-stage and 70-80% with 2 stages. In those cases, we like to tell clients to either do a 2 or 3 stage correction (because 1-stage won’t make much of a difference) or a simple all-in-one, non-corrective polishing to amp up the gloss a bit.
Hope that helps a bit with understanding the levels of paint correction and I’ll try to do a follow up article very soon demonstrating how different paint types react to the same polishing process.
Buy Products From This Article
Purchase the products used in this article individually here!


It is nice to see someone put together a multi step diagram of the difference in level of correction and show that it can be done in different levels to a customer. This allowing for different pricing options. Well said and put together!
Great write up Ivan! Now I can expect the results from each stage of correction depending on paint softness. Instead of second guessing myself.
Thanks,
John
Hi Ivan,
Great overview. Well written and clear.
Can you estimate paint depths or amount of clear coat removed relative to amount of clear that exists total?
Thanks!
Thanks all. Eric, you will definitely need a paint gauge to even start to guess how much clear exists and how much is removed. Paint thickness is extremely thin, so measurements can vary even with really expensive gauges, but a good gauge should give you a close number and tell you when it’s safe or not safe to polish any further.
thank you for taking the time. Excellent presentation. Have you ever worked with the Griot’s Garage polishes #1- #4 ? How would they compare to the polishes used in this presentation? Any comments reguarding what # grit for each of the polishes used? Thanx, Wayne
Unfortunately I have nearly 0 experience with the Griot’s polishes and products in general Wayne. I would imagine they work just fine and I bet many users get great results with them, I have simply been used to other products.
if I have a car detailed (paint correction, polished) will the swirl marks show again if the polish wears off?
I know this might seem like a goofy question but I have never had my car detailed by a professional and it has swirls on it. I would like to have it done but have been a little afraid.
Thank you in advance
Lisa, polish is a “liquid” for lack of a better term, used to remove some paint from the surface. Some polishes, called compounds, can be very abrasive and remove a good amount of paint, whereas others are very fine and only refine the surface to add some gloss. In other words, polish isn’t applied to paint to remove swirl marks, rather “used” to abrade away a small amount of paint to level it and remove the look of swirl marks.
So to answer your question, the polish doesn’t wear off, but swirl marks come back over time after polishing/paint correction through regular wash and drying methods. Hope that makes sense.
Hi Ivan
First off just wanted to say great article and great photos . Really detailed breakdowns of the different stages yet still really easy to understand!
My question relates to the 1 stage polish and the selection of such a fine finishing polish. Would it not have given better results using something a bit more abrasive yet with potentially a tiny bit less gloss? Something like PF 2500 or even Rupes Keramik rather than SF4000?
My thinking is that most customers would want to see improvement in the scratches rather than simply the lighter swirl removal and they wouldn’t actually be able to distinguish between the minute differences between gloss levels.
Yes it would leave some minor micro-marring caused by the slightly heavier polish but would you not consider sacrificing that for the sake that you would potentially remove more of the deeper marks yet still finish down reasonably well?
Thanks
Lee
Great question Lee. In short, our business focuses on achieving the same glossy finish with as much defect removal as possible with however many polishing stages. So with the 1-stage, yes you can do what you described (more defect removal but more marring, leaving less glossy finish) but I feel that’s just introducing more defects anyway. There are many variables to this, such as sometimes using the more aggressive polish and leaving very light haze, then using a sealant as a polish with a slightly abrasive pad to both correct the haze and seal the finish at the same time. This is a great option for some paints, but definitely not for most. At the end of the day we don’t leave anything in the finish that we put there, simply remove stuff. If your clients ask for the opposite, you can surely do that, we just like to improve the paint without leaving anything in there and that’s all we offer.
hope that explains it.
Hi Ivan, yep that makes perfect sense and I appreciate the quick response!
Thanks
Lee
WOW!!!! Tremendous difference and thanks for that big write up. Excellent work
Who ever wrote or typed this is not a pro. Why? Because 1 every car ESPECIALLY black paint should be washed and then clayed (clay bar) to remove any contaminants that will end up on the pad if not clayed and end up scratching the surface more than it already is. 2 cut and polish. 3 use a filler. 4 paint sealer. Final step wax
Thank you for the comment! I can assure you that Ivan Rajic is a pro. He runs his own business, LUSTR Detail, and really does amazing work. You can check him out on his website (http://lustrdetail.com/) and I think I can speak to many of the readers on this blog in that Ivan holds a standard in our industry that many other detailers should hold themselves to. He performs top of the line work with every car that comes into LUSTR.
For the article, I can assure you that this car was thoroughly decontaminated and clayed before any polishing was done. Ivan was just trying to highlight how he uses correction percentages to break down exactly what a customer can expect from a specific detail or polishing step. This way, if he says that you can expect to see 90% correction, you will know exactly what to see when he is finished. This also helps customers decide if they want a more in depth detail, or if a one step sufficient to what they would like to achieve.
I wounder if my girl can polish my knob with all the stage options ???
Hey, this was an awesome description of paint correction levels. Can you recommend someone in southern California that is at this level.
I have a 2014 black amethyst XJR that needs it’s paint brought back.
Thanks again, incredible work!