
Hybrid Polishing Process featuring a 2004 Dodge Viper
by Todd CooperiderEarlier this year I wrote an article on different polishing processes titled: 1-Step, 2-Step…The Various Types of Polishing Processes. In that article I defined the common polishing types and terms, and also introduced you to what I call the Hybrid Polishing Process.
While this particular article is aimed more at the professional detailer, it does apply to the weekend DIYer as well.
In traditional one-step or two-step polishing methods, you’re spending the same amount of time and going for similar correction on all parts of the vehicle. So if in a one-step process you’re getting a 50% correction rate, the finish will look the same on the hood as it does on the lower part of the door.
But when you wish to achieve a higher level of correction on the top surfaces where you see it best, but don’t have the time available (or the client doesn’t have the budget) for an intensive multi-step polish job, then the Hubrid Polishing Process may be a good option for you.
Basically what the Hybrid Process does is provides a very high level of correction on all of the surfaces that are easily seen in the direct sunlight reflection…hood, trunk, roof, mirrors, tops of bumpers, tops of doors. But at the lower levels that can’t be seen in the direct sun reflection, you’re only doing a simple one-step process to remove upwards of 50% of the defects and significantly increasing gloss.
Many people see those top surfaces as the most important, and that’s what they look at most to judge the overall look of the car. And when a client isn’t in the market for a full, restorative-level detail, but wants their car to look as good as possible for their budget, then the Hybrid Process could be a perfect fit. By comparison, you could do a very intensive one-step polish or a quick multi-step polish for the same amount of money, but chances are that those key areas (hood, trunk, etc) wouldn’t turn out as good as the Hybrid.
The ONLY time that I recommend doing this level is when it is completely explained to the customer. You can give them the option of the “full” job where you are going for the same high level of correction everywhere on the car, and you can give them the option of a lighter one-step polish. If they want a higher level of correction than what your one-step will provide, but their budget doesn’t allow for the full correction job, then offer the Hybrid and FULLY EXPLAIN that the upper surfaces will have a high degree of correction and that you will taper it off on the lower sections. And for consumers hiring a professional detailer…be sure to ask specifics when you’re discussing the job at hand.
The past couple of weeks I have performed 2 Hybrid Polishing Processes on some very nice cars. One of them was a Ferrari California, and the other a 2004 Dodge Viper. In both cases, the owners spend a lot of time driving their cars and want them to look very good without being brought to the show level that a restorative detail would provide. Since I knew that the owners of these vehicles were very proud of what they drove, I thought they would be perfect candidates for the Hybrid. I explained to them that I would get a very high level of correction on the upper surfaces (where they and others would see it), but taper it down to a much lower level at the bottom surfaces. They agreed that this would be the best option for them, and we proceeded accordingly.
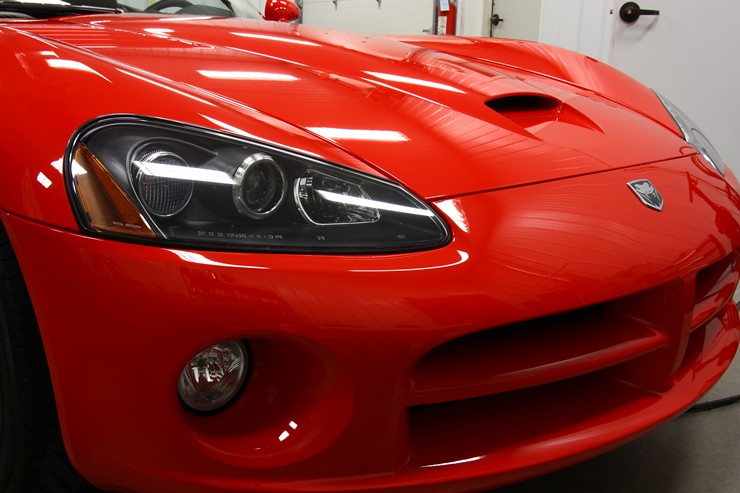
Hybrid Polishing Process. 2004 Dodge Viper
This Dodge Viper has been driven a lot, and in my opinion it had never been professionally detailed. It had a fair amount of swirls, the wheels were caked with brake dust, the interior was exceptionally dirty, and the overall looks of the car was “tired”. Knowing that the owner likes to drive the car and it wasn’t a garage queen, it was the perfect candidate for the Hybrid.
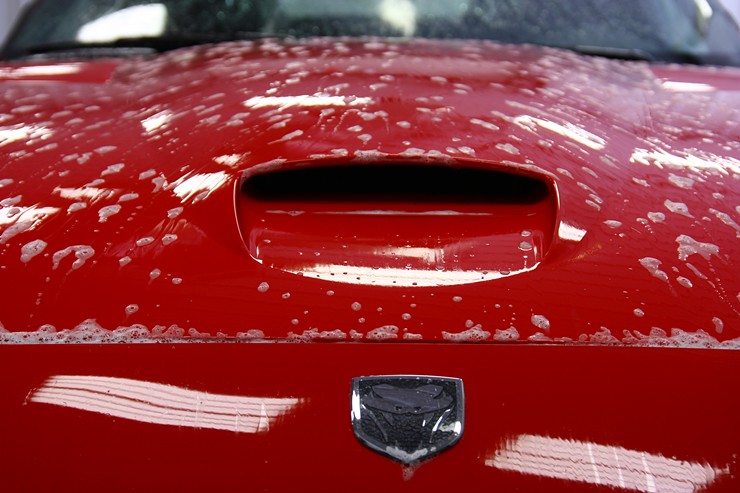
The decontamination process on this particular vehicle was quite lengthy, but would make a big difference by spending the proper time and effort in this important prep stage. I first started off with a wash using the 2×4 Grit Guard method, and incorporating the Gilmour Foam Gun and Chemical Guys Citrus Wash to clean all areas (including the low areas).

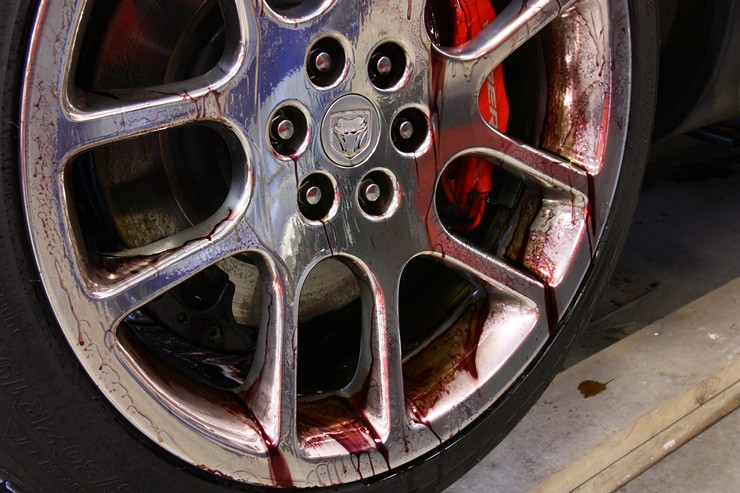
The wheels and calipers were heavily caked in old brake dust and grime
So given the heavy cleaning capability, I used Sonax Full Effect Wheel Cleaner (this stuff rocks on heavily soiled wheels!). It goes on green out of the bottle, but as it reacts with the iron deposits on the wheels it turns red to show you that it’s working. This is after about a 5 minute dwell time. Yes…this is a different wheel than in the first photo.
Now that my wash and wheel cleaning was complete, I moved on to a much needed claying session to remove all of the embedded contaminants in the paint and prep it for polishing. Here I am using the DI medium-grade clay and Dodo Juice Clay Lube. Look at that…I work so fast that my arm is just a blur! 🙂
There was a heavy buildup of tar behind all of the wheels on the lower parts of the vehicle
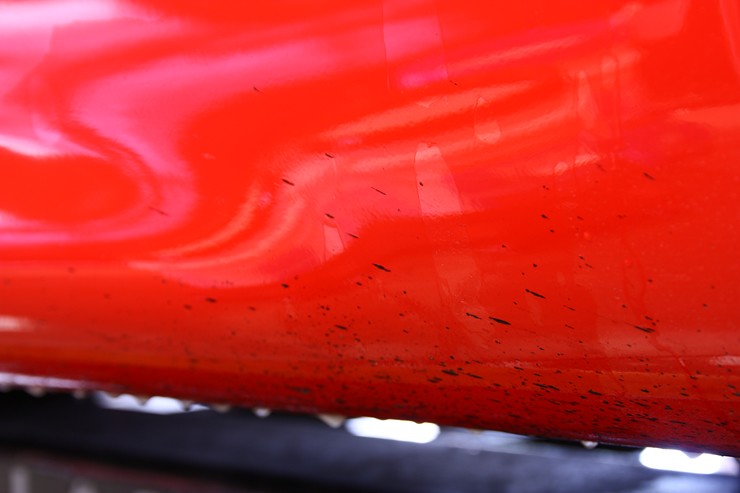
With a liberal dose of Tarminator however, the tar starts to literally melt away!
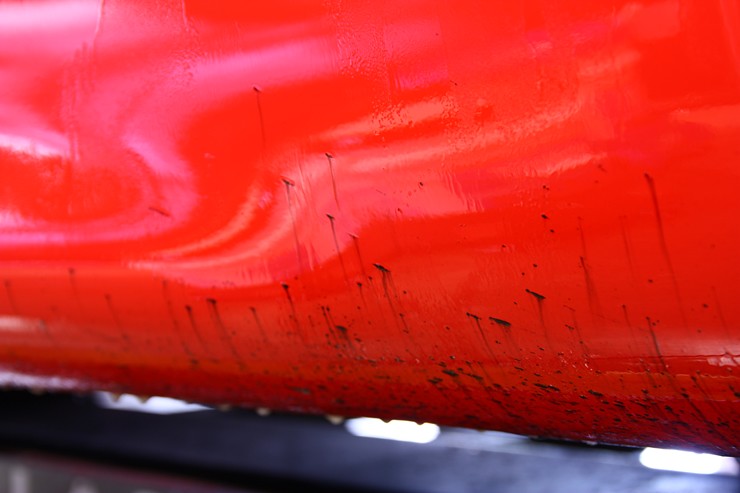
All of the tar is removed, and all you see now are rock chips remaining.
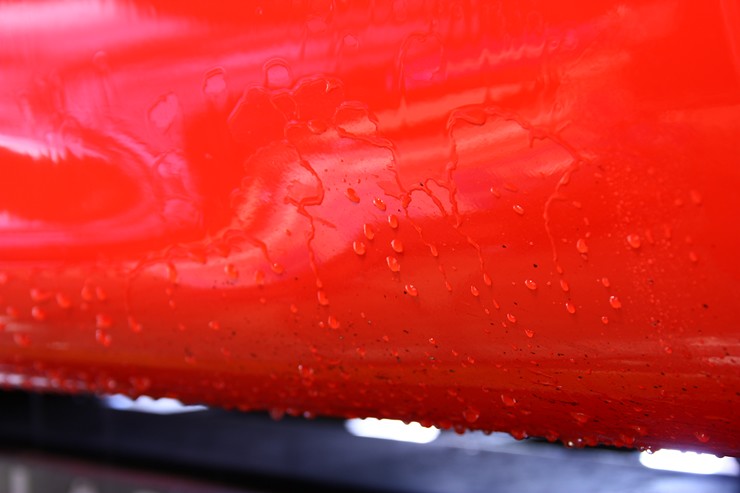
Now that I have decontaminated the painted surfaces, I gave it one last soaking in Citrus Wash via the foam gun to make sure all debris from the heavy claying session is completely removed.
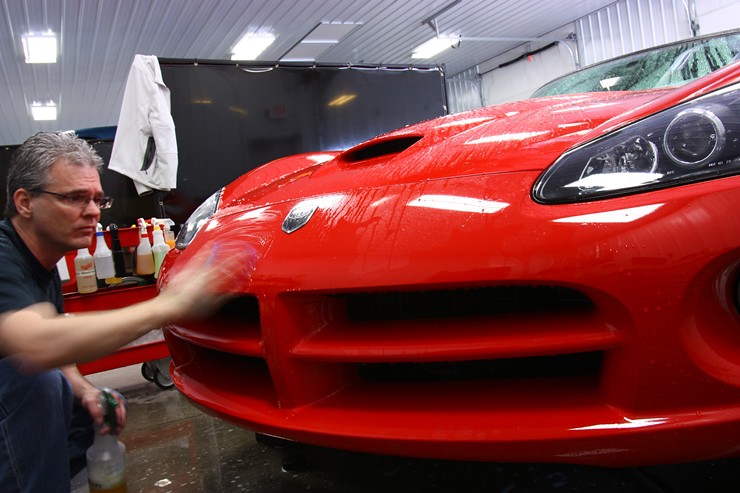
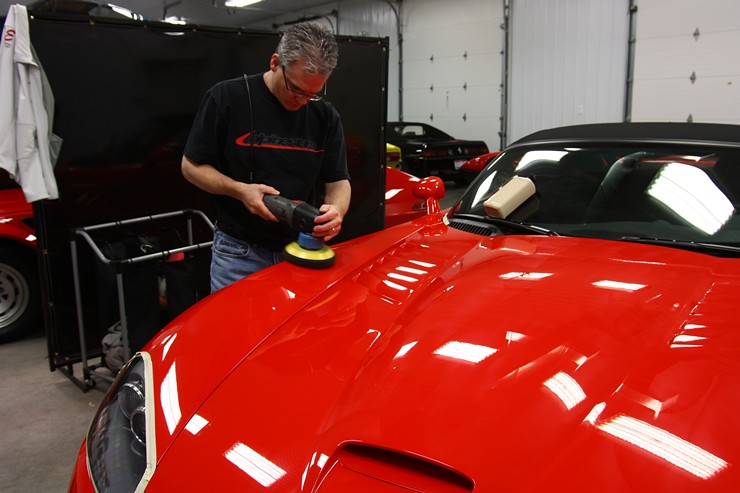
I’m two hours into the job already, but the car is already looking much better just after stripping all of the dirt and contaminants from the paint and wheels. After a quick test spot, I found that the Meguiar’s MF Cutting Disc on the Porter Cable along with Meguiar’s D300 Compound was easily giving me 95% correction, while leaving the finish almost completely mar-free. So I proceeded on with compounding on all of the upper facing surfaces (hood, trunk, tops of fenders and doors, etc).
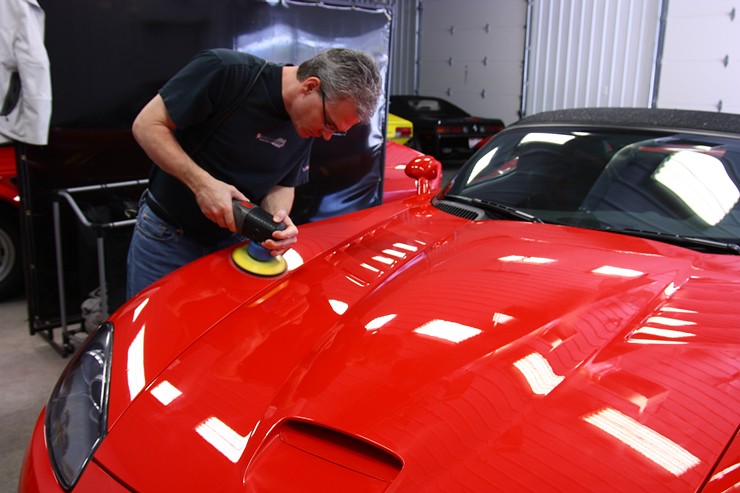
I made quick work of the compounding stage, and the car already looked stunning in comparison even before any finish polishing took place.
Now for the finish polishing stage, my goal was to increase gloss, remove any light haze that may have been left over by the compounding stage, and do it in the shortest amount of time as possible. So I decided to use Meguiar’s new Finishing Wax (final polish and durable wax all in one) with a black finishing pad on the Porter Cable. Not only did it leave a brilliant and pure finish, but by using this method I saved time since I wouldn’t need to go back with any final cleaning, sealing, or wax application steps. And for those of you paying close attention…no, I didn’t do a wardrobe change here! I started the decon/compounding stage one afternoon, and continued on with finishing the next morning.
Now for the part that makes this a Hybrid, I am doing the same finish polishing process on the lower surfaces. These areas did not get compounded. You don’t need to use the exact same process here as you do your finishing on the top surfaces, but it just worked out this way. I used a different method on the Ferrari California below and talk about it there.

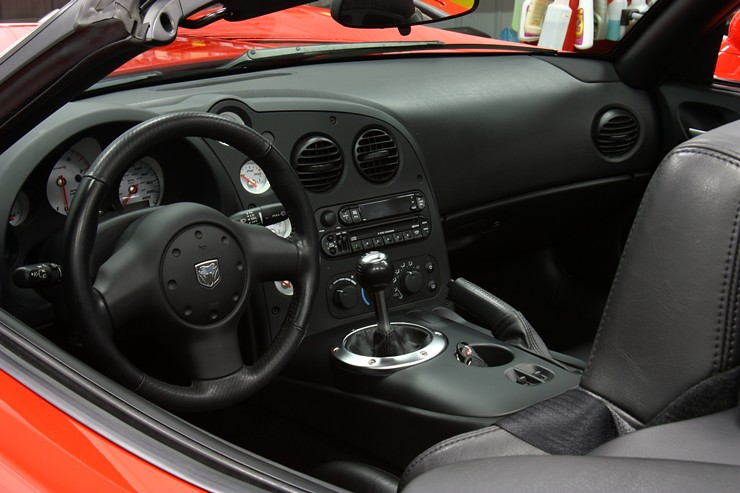
The interior was completely cleaned out using 1Z Cockpit Premium, and Meguiar’s Glass Cleaner.
The exterior was finished up, all of the jambs and engine compartment was cleaned up with ONR pre-mixed in a spray bottle, the rims were wiped down with Chemical Guys V7 (amazing stuff…review to come), the tires were dressed with 303 Aerospace Protectant, and the wheel wells were dressed with Chemical Guys Black on Black (formerly named Fade 2 Black).
So for the upper surfaces, the paint condition went from this:

To this:

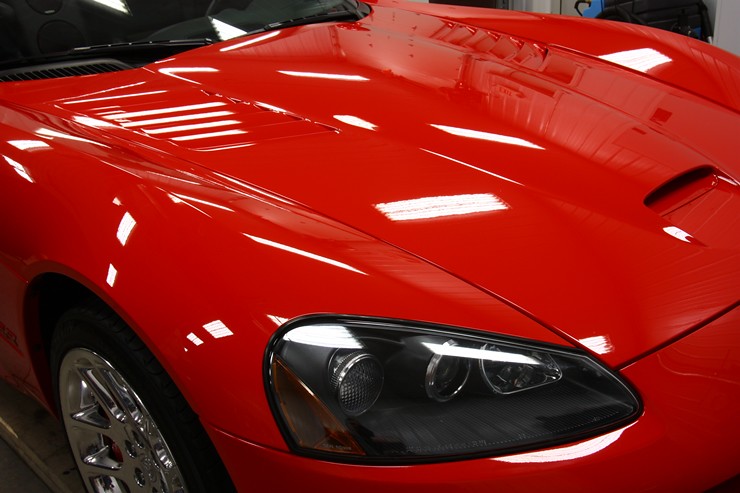
The difference in color, depth, and clarity of the car was amazing, even given the relatively short amount of time that was spent on it. And unless you looked at the lower parts of the car with a Brinkmann Light, you would never know that they were polished in a lighter manner than the top.

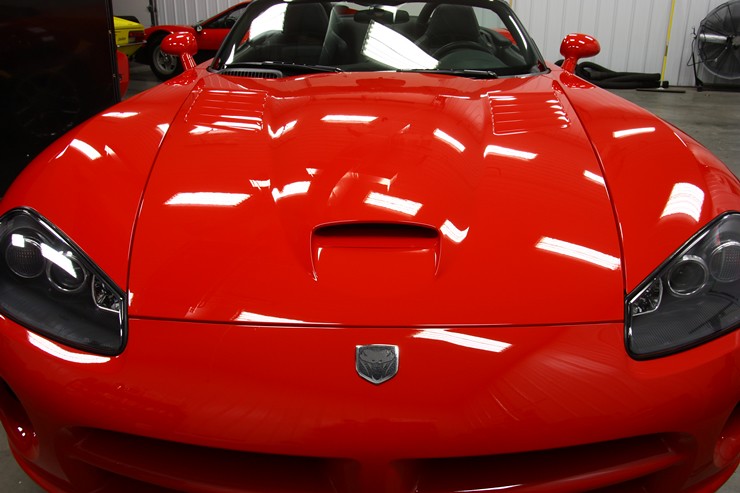
Very impressive gloss and depth of reflections!

On a side note…the seats you see on the work bench are undergoing a leather preservation process with Leatherique. They are out of a classic 1975 Ferrari 365 Boxer.
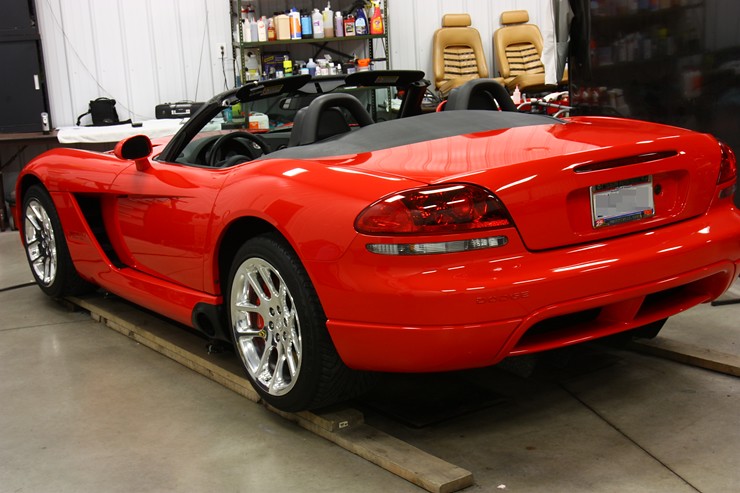
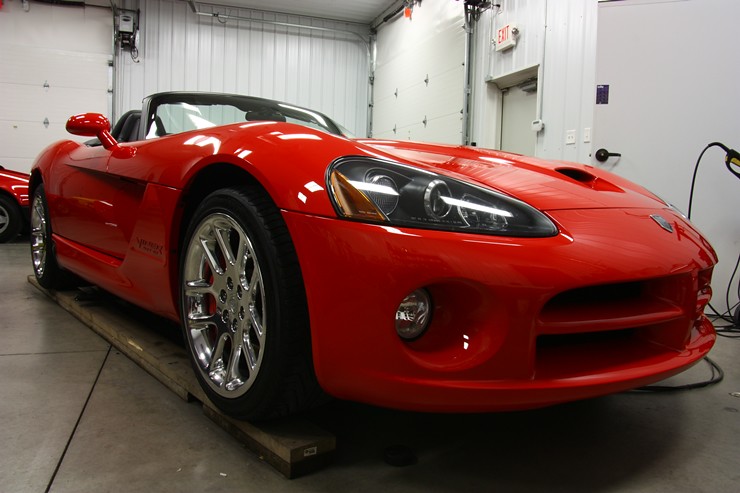
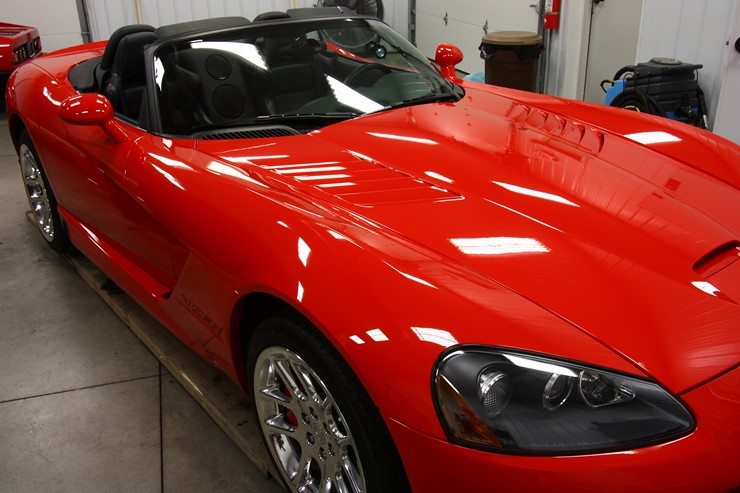
So in a mere 8 hours, I was able to do a major detail including interior and engine compartment, and get a very high level of correction on the main viewable surfaces of the car. This Viper now looked new again, and it was done without the owner having to make a huge investment. In this case, the Hybrid Polishing Process was the perfect fit!
Ferrari California
I won’t go into full detail about this car, but it has the same basic story as the Viper. The 16 month-old Ferrari is driven hard, and already has 20K miles on it. The owner wanted it to look great, but didn’t see the need for the restorative level detail given the amount of driving time it sees. The Hybrid was chosen, and in a short 12.5 hours we got this car looking better than new. As with most Ferraris, it was covered with swirls, holograms, and sanding marks from the factory so I had to take a little more aggressive approach than I did with the Viper.
The top surfaces were hit with a Porter Cable / Surbuf Pads / Meguiar’s M105 for the compounding stage, and then the finish polishing was done with my Makita rotary, Menzerna 106FA polish, and a black finishing pad. This is an incredible one-two combination, and combines heavy correction capability with an ultra fine and pure finishing process.
But for the lower areas, I chose to go with Meguiar’s M205 on the Porter Cable and a black finishing pad. While I may have given up a slight amount of cut and purity in the finish compared to what I could have gotten had I chosen to go with the same rotary/106FA/black as I did on the top surfaces, the difference was still quite minimal and I saved a ton of time in the process.
Once I was done polishing, I used Chemical Guys EZ Creme Glaze with a blue pad on the Porter Cable, and then topped it with a fresh coat of Chemical Guys Ezyme wax. The owner of the car had a brand new jar of Ezyme in his detailing cabinet, and he enjoys waxing the vehicle. Otherwise I would have went with a durable sealant since the car gets driven and washed a lot.
Before:
After:

And what it looked like in the sunshine:


And finally…

While I was out taking photos of the finished car, the owner came home from work and from his rolled down windows I could hear him laughing…he couldn’t believe how incredibly good his car looked without having to make a substantial investment. While the photos look good, it doesn’t do justice to what it actually looked like in person. And after we stood and admired the car for a while, the owner threw me the keys and said “let’s go for a drive”. Full-throttle F1 shifts in a car like this definitely adds a touch of glamour to the job. 🙂
So when you have some heavy correction to do on either your personal car or one of your clients’ vehicles, and a full-on restorative detail is not on the menu, consider the Hybrid Polishing Process to maximize the transformation while minimizing the time and / or investment.
Thanks as always for reviewing my work, and please feel free to leave your comments and questions below.
Related Posts
- Full Detail and Paint Correction: Ferrari 458 Italia by Todd Cooperider of Esoteric Auto Detail
- Lamborghini Gallardo: 24-Hour Restorative Detail by Todd Cooperider
- Ferrari F40: 60 Hour Restorative Detail by Todd Cooperider and Craig Reed
- BMW 328i Heavy Swirl Removal & Correction
- Ferrari 458 Nero Daytona Full Detail


Another good article that looks at paint renovation from a different angle.
I shall be adding this hybrid approach to my list of paint renovation programmes,
thanks for the inspiration.
Thanks Dennis, and as always…thanks for stopping by and reading the blog!
little off topic questions:
when you are using the foam gun, what is your mixing ratio? I am assuming you are using a more powerful ratio to strip anything that was previously on the car, correct?
Thanks, I get a little confused with the foam gun, you had a picture so I thought it was the proper time to ask.
On the other hand nice long colorful detailed article, very helpful like always!
Thanks again.
Adam…I’m glad you liked the article.
I’m using setting “A” on the foam gun, which is 1oz per gallon. It is stronger than the recommended ratio for Citrus Wash, but I also add a little water to the canister as well so it pretty much equals out. And yes, the goal here is to use a strong solution to help strip off any waxes or sealants that may be on the surface.
I take it that A is the most powerful setting to use, this will disperse the most foam or more water?
How many oz of citrus wash did you use in the canister, just 1oz and then fill the rest of the canister with water?
Actually, A is the lowest setting and dispenses the least amount of shampoo (1oz/gal). It doesn’t matter how much soap you put in the canister because the dial setting controls how much is pulled out.
Oh okay, then I can play with it a little bit, I just wanted to make sure I wouldn’t be wasting a lot of it, thanks again, Todd
Great topic Todd. Many people want “the works” and wont ever get to appreciate it.
A hybrid process is a smart option.
Thanks Justin!
I am new to the site and you all do amazing work. One big question I am trying to figure out is what do you guys do to correct rock chips? Do you fill with touch up paint and then polish to “blend” in the touch up or do you all leave the rock chips and just do the paint correction with them.
What are your thoughts on the plastic clear bras for front end paint protection?
Thanks Craig, and welcome to the blog. You’ll find plenty of useful information on here.
As for rock chips, it depends on what the customer wants and is paying for on the job. If time / budget allows, I’ll fill them in, sand them down, and polish over them. If not, then I’ll just polish as required.
Clear bras are a good way to protect the paint, and when installed properly, they’ll hardly be noticeable.
Is there a benefit in using the Megs Finishing Wax on a black polishing pad as you did, rather than on the MF finishing disk? I thought the Finishing Wax was designed specifically for the MF disks.
Ryan,
While it may have been developed specifically for the MF Finishing Disc, it still works on a foam pad as well. On some finishes I find the traditional foam pad with Finishing Wax yields better results.
Todd,
I looked at the photos and read the article and…um…well…wow…just WOW!!…
Great job as always. I need to build this level of clientele… 🙂
Thank you Josh!
Awesome article Todd, both cars looked amazing. Nice pics!
Thank you Paul!
Todd,
I’ve noticed in a number of your posts you use the Gilmour Foamaster as opposed to say a pressure washer with a foam cannon for your initial foamdown prior to claying. Do you think pressure washers are unnecessary when it comes to routine cleaning and paint correction prep? Or do you think they have a place in the detailing arsenal?
I think they have their place for sure, but not so much with the cars I’m working on. I have a pressure washer, but only use it when I’m dealing with a very dirty vehicle. They definitely make wheel well cleaning easier!
very nice
Terrific work as always Todd!!